
Why You’ll Love This Pumpkin Cheesecake Bars
- They’re so much easier than a whole cheesecake. No water bath, no worrying about cracks—just press the crust into a pan, whip up the filling, and bake. The bar format is forgiving and fuss-free, making it a fantastic recipe for both new and experienced bakers.
- The texture is absolutely divine. We’re talking about a seriously creamy, velvety-smooth filling that just melts in your mouth. It’s rich without being overly heavy, and the contrast with the crunchy graham cracker base is a textural dream come true.
- They pack a serious flavor punch. The combination of creamy cheesecake and spiced pumpkin is a classic for a reason. It’s warm, comforting, and perfectly balanced—not too sweet, with the spices shining through beautifully.
- They’re incredibly versatile. You can dress these bars up with a dollop of whipped cream or keep them simple. They travel well, store beautifully, and are always a hit with a crowd. You’ll notice they disappear from the plate… quickly.
Ingredients & Tools
- For the Crust:
- 200 g graham cracker crumbs (about 14-15 full sheets)
- 50 g granulated sugar
- 115 g unsalted butter, melted
- Pinch of salt
- For the Filling:
- 450 g full-fat cream cheese, softened to room temperature
- 150 g light brown sugar, packed
- 2 large eggs, at room temperature
- 225 g pure pumpkin puree (not pumpkin pie filling)
- 60 ml heavy cream or full-fat sour cream
- 1 tsp pure vanilla extract
- 1 tbsp all-purpose flour
- 1 tsp ground cinnamon
- 1/2 tsp ground ginger
- 1/4 tsp ground nutmeg
- 1/4 tsp ground cloves
- 1/4 tsp salt
Tools: 8×8 or 9×9 inch square baking pan, parchment paper, mixing bowls, electric hand mixer or stand mixer, spatula
The quality of your ingredients really matters here. Using full-fat cream cheese and real pumpkin puree (check the label—it should only have one ingredient: pumpkin) ensures the richest flavor and creamiest texture. Room temperature ingredients are non-negotiable for a smooth, lump-free filling, so plan ahead!
Serves: 9-12 | Prep Time: 20 minutes | Cook Time: 40-45 minutes | Total Time: 4+ hours (includes chilling)
Before You Start: Tips & Ingredient Notes
- Room temperature is your best friend. I can’t stress this enough. Taking the cream cheese and eggs out of the fridge at least an hour before you start prevents a lumpy filling. The cream cheese should feel soft to the touch but not greasy or melted.
- Don’t use pumpkin pie filling. This is the most common mix-up! Pumpkin pie filling has sugar and spices already added. We want 100% pure pumpkin puree so we can control the sweetness and spice level ourselves. It makes all the difference.
- Why the tablespoon of flour? It might seem odd in a cheesecake, but that little bit of flour helps stabilize the filling, giving the bars a perfect sliceable texture without making them cakey. It’s a little secret for bar-style cheesecakes.
- Line your pan properly. Leaving an overhang of parchment paper on two opposite sides creates “handles” that will let you lift the entire slab of bars out of the pan for super clean, easy cutting. It’s a game-changer, honestly.
How to Make Pumpkin Cheesecake Bars
Step 1: First, preheat your oven to 160°C (325°F). Grab your square baking pan and line it with parchment paper, making sure there’s some overhang on two sides—this will be your lifeline later. Now, for the crust. If you’re starting with whole graham crackers, pulse them in a food processor until you have fine, even crumbs. In a medium bowl, stir together the graham cracker crumbs, sugar, and a pinch of salt. Pour in the melted butter and mix until the crumbs are thoroughly coated. It should feel like wet sand.
Step 2: Dump the crumb mixture into your prepared pan and press it down firmly and evenly into the bottom. I like to use the flat bottom of a measuring cup to really compact it—this prevents a crumbly crust. You want a solid, uniform layer. Pop the pan in the preheated oven and bake the crust alone for 10 minutes. This step, called blind baking, helps the base stay crisp once the wet filling is added. When it’s done, take it out and let it cool on a rack while you make the filling. Leave the oven on.
Step 3: Now for the main event: the filling. In a large bowl, beat the softened cream cheese with an electric mixer on medium speed until it’s completely smooth and creamy. This should take about 2 minutes. Scrape down the sides and the bottom of the bowl well—this is crucial for avoiding lumps. Add the brown sugar and beat for another minute until the mixture is smooth and well-combined. You’ll notice the color lighten slightly.
Step 4: Add the room-temperature eggs, one at a time, beating on low speed just until each egg is incorporated. Don’t overmix once the eggs are in! Over-beating incorporates too much air, which can cause the bars to puff up and then crack as they cool. After the eggs, beat in the pumpkin puree, heavy cream (or sour cream), and vanilla extract. The mixture might look a little curdled at this point—don’t panic, it will come together.
Step 5: Here’s where the magic happens. In a small bowl, whisk together the tablespoon of flour, cinnamon, ginger, nutmeg, cloves, and salt. This ensures the spices are evenly distributed. Add this dry mixture to the wet ingredients and beat on low speed until everything is just combined and you see no streaks of flour or spice. Scrape the bowl one last time to make sure it’s perfectly homogeneous. The filling should be a beautiful, uniform orange-brown color and have a silky, pourable consistency.
Step 6: Carefully pour the filling over the pre-baked and slightly cooled crust. Use a spatula to spread it into an even layer, gently nudging it into the corners. Tap the pan lightly on the counter a few times to release any large air bubbles. Place the pan in the oven and bake for 40-45 minutes. The edges should look set, but the center will still have a slight jiggle—like Jell-O—when you gently shake the pan. That’s exactly what you want!
Step 7: Turn off the oven, crack the oven door open about an inch, and let the bars cool slowly inside for about an hour. This gradual cooling helps prevent the top from cracking. After an hour, remove the pan from the oven and let it cool completely on a wire rack. Then, and this is the hard part, cover the pan and transfer it to the refrigerator to chill for at least 4 hours, but preferably overnight. This patience is rewarded with the perfect firm, creamy texture.
Serving Suggestions
Complementary Dishes
- A simple green salad with a sharp vinaigrette — The acidity and freshness cut through the richness of the cheesecake beautifully, making for a wonderfully balanced dessert course after a hearty meal.
- Spiced roasted pecans or walnuts — A handful of crunchy, warmly spiced nuts sprinkled on top adds a fantastic textural contrast and deepens the autumnal flavor profile.
Drinks
- A hot mug of chai tea or coffee — The spices in the chai or the boldness of coffee are a classic pairing with pumpkin, enhancing the cozy, comforting vibe of these bars.
- A glass of cold milk or a dessert wine like a late-harvest Riesling — The creaminess of milk is a timeless match, while the honeyed sweetness of the wine complements the spices without overpowering them.
Something Sweet
- A dollop of freshly whipped cream — It’s simple, but it elevates everything. A little cloud of lightly sweetened cream on top of each bar is pure heaven.
- A drizzle of salted caramel sauce — The sweet-and-salty combination with the spiced pumpkin and creamy cheesecake is honestly a next-level experience. A little goes a long way!
Top Mistakes to Avoid
- Mistake: Using cold ingredients. This is the number one reason for a lumpy filling. Cold cream cheese doesn’t incorporate smoothly, and cold eggs can cause the fat in the cream cheese to seize up. I’ve messed this up before too, and the texture just isn’t the same.
- Mistake: Over-mixing the batter after adding the eggs. Beating too much air into the batter is a primary cause of cracking. Mix on low speed and only until each ingredient is just combined. The goal is smooth, not fluffy.
- Mistake: Over-baking the bars. Remember, the center should still jiggle when you take them out. They continue to set as they cool. If you bake them until the center is completely firm, they’ll be dry and potentially cracked.
- Mistake: Skipping the chill time. I know it’s tempting to cut into them right away, but the chilling step is what gives the bars their perfect, sliceable texture. A warm cheesecake bar will be a gooey mess.
Expert Tips
- Tip: Use a hot knife for pristine slices. For super clean cuts, run your knife under very hot water, wipe it dry, and then slice. Wipe the blade clean and reheat it between each cut. It makes the presentation look professional.
- Tip: Boost the spice flavor. If you really love spice, try toasting your spices in a dry pan for a minute before adding them to the flour. It wakes up their essential oils and gives a deeper, more aromatic flavor.
- Tip: Make a gingersnap crust. For a fun twist, swap the graham crackers for gingersnap cookies. The extra ginger flavor pairs incredibly well with the pumpkin filling and adds a lovely warmth.
- Tip: Freeze for later. These bars freeze beautifully! Individually wrap cooled and chilled bars in plastic wrap and then foil. They’ll keep for up to 3 months. Thaw overnight in the fridge for a ready-made treat.
FAQs
Can I make these bars gluten-free?
Absolutely! The only source of gluten is the tablespoon of flour in the filling and the graham cracker crust. For the flour, you can use a 1-to-1 gluten-free baking blend with no other changes. For the crust, simply use gluten-free graham-style crackers or even gluten-free ginger snaps. The recipe will work exactly the same way, and you’d never know the difference.
My filling is a little lumpy. Can I fix it?
If you notice lumps before baking, the best fix is to press the filling through a fine-mesh sieve. It’s a bit of a hassle, but it will give you that perfectly smooth texture. If you’ve already baked it and discover a few small lumps, a dollop of whipped cream on top will hide a multitude of sins! For next time, just make sure everything is truly at room temperature.
How long will these keep in the fridge?
Stored in an airtight container, these Pumpkin Cheesecake Bars will stay fresh and delicious for up to 5 days. The crust might soften a tiny bit by day 4 or 5, but they’ll still taste amazing. They’re a great make-ahead dessert for the week.
Can I double this recipe?
Yes, you can easily double all the ingredients and bake it in a 9×13 inch pan. You’ll need to increase the baking time slightly—start checking at around 50-55 minutes for the same jiggly center. The slow cool-down in the oven and long chill time are even more important for a larger pan.
Why did my bars crack on top?
Cracking usually happens from a combination of over-mixing (too much air), over-baking, or cooling too quickly. The slow cool-down in the turned-off oven is your best defense against this. But hey, if they do crack, it’s purely a cosmetic issue—the taste is still fantastic, and a topping like whipped cream will cover it right up!
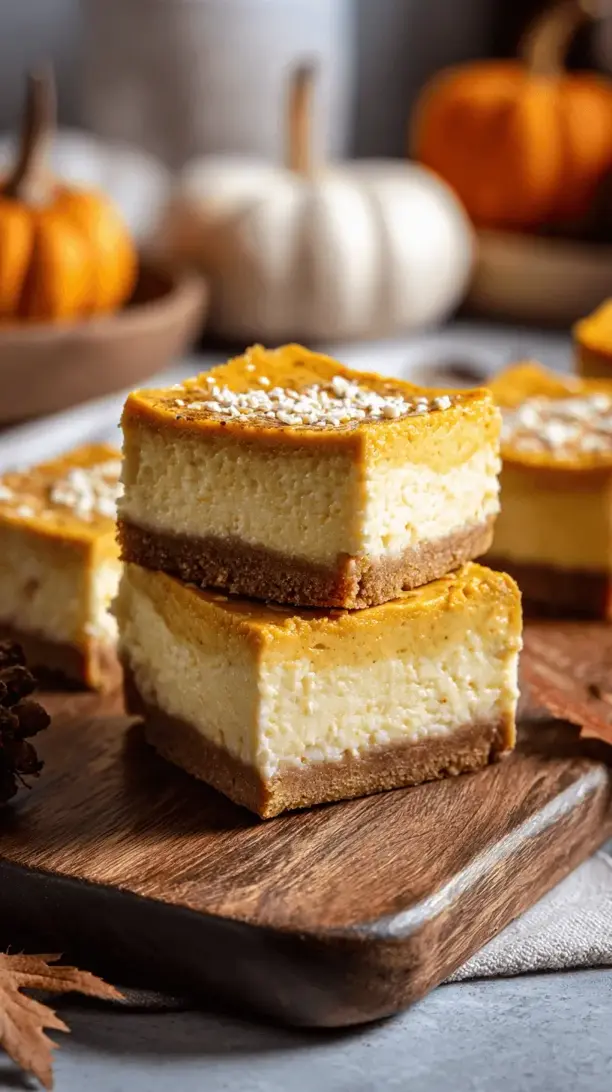
Pumpkin Cheesecake Bars
Creamy, spiced Pumpkin Cheesecake Bars are easier than a whole cheesecake! My foolproof recipe with a graham cracker crust is the ultimate fall dessert. Perfect for potlucks or a cozy treat.
Ingredients
Ingredients
-
200 g graham cracker crumbs (about 14-15 full sheets)
-
50 g granulated sugar
-
115 g unsalted butter (melted)
-
Pinch salt
-
450 g full-fat cream cheese (softened to room temperature)
-
150 g light brown sugar (packed)
-
2 large eggs (at room temperature)
-
225 g pure pumpkin puree (not pumpkin pie filling)
-
60 ml heavy cream or full-fat sour cream
-
1 tsp pure vanilla extract
-
1 tbsp all-purpose flour
-
1 tsp ground cinnamon
-
0.5 tsp ground ginger
-
0.25 tsp ground nutmeg
-
0.25 tsp ground cloves
-
0.25 tsp salt
Instructions
-
First, preheat your oven to 160°C (325°F). Grab your square baking pan and line it with parchment paper, making sure there's some overhang on two sides—this will be your lifeline later. Now, for the crust. If you're starting with whole graham crackers, pulse them in a food processor until you have fine, even crumbs. In a medium bowl, stir together the graham cracker crumbs, sugar, and a pinch of salt. Pour in the melted butter and mix until the crumbs are thoroughly coated. It should feel like wet sand.01
-
Dump the crumb mixture into your prepared pan and press it down firmly and evenly into the bottom. I like to use the flat bottom of a measuring cup to really compact it—this prevents a crumbly crust. You want a solid, uniform layer. Pop the pan in the preheated oven and bake the crust alone for 10 minutes. This step, called blind baking, helps the base stay crisp once the wet filling is added. When it's done, take it out and let it cool on a rack while you make the filling. Leave the oven on.02
-
Now for the main event: the filling. In a large bowl, beat the softened cream cheese with an electric mixer on medium speed until it's completely smooth and creamy. This should take about 2 minutes. Scrape down the sides and the bottom of the bowl well—this is crucial for avoiding lumps. Add the brown sugar and beat for another minute until the mixture is smooth and well-combined. You'll notice the color lighten slightly.03
-
Add the room-temperature eggs, one at a time, beating on low speed just until each egg is incorporated. Don't overmix once the eggs are in! Over-beating incorporates too much air, which can cause the bars to puff up and then crack as they cool. After the eggs, beat in the pumpkin puree, heavy cream (or sour cream), and vanilla extract. The mixture might look a little curdled at this point—don't panic, it will come together.04
-
Here's where the magic happens. In a small bowl, whisk together the tablespoon of flour, cinnamon, ginger, nutmeg, cloves, and salt. This ensures the spices are evenly distributed. Add this dry mixture to the wet ingredients and beat on low speed until everything is just combined and you see no streaks of flour or spice. Scrape the bowl one last time to make sure it's perfectly homogeneous. The filling should be a beautiful, uniform orange-brown color and have a silky, pourable consistency.05
-
Carefully pour the filling over the pre-baked and slightly cooled crust. Use a spatula to spread it into an even layer, gently nudging it into the corners. Tap the pan lightly on the counter a few times to release any large air bubbles. Place the pan in the oven and bake for 40-45 minutes. The edges should look set, but the center will still have a slight jiggle—like Jell-O—when you gently shake the pan. That's exactly what you want!06
-
Turn off the oven, crack the oven door open about an inch, and let the bars cool slowly inside for about an hour. This gradual cooling helps prevent the top from cracking. After an hour, remove the pan from the oven and let it cool completely on a wire rack. Then, and this is the hard part, cover the pan and transfer it to the refrigerator to chill for at least 4 hours, but preferably overnight. This patience is rewarded with the perfect firm, creamy texture.07


