
Why You’ll Love This Frozen Banana Yogurt Pops
- Incredibly Simple. Honestly, if you can operate a blender and pour liquid into a mold, you’ve basically mastered this recipe. There’s no cooking, no complicated techniques—just blend, pour, and freeze. It’s the perfect project for a lazy afternoon.
- Endlessly Customizable. This is my favorite part. Think of the base recipe as a blank canvas. You can swirl in berry puree, mix in dark chocolate chips, add a spoonful of nut butter, or even a dash of cinnamon. Every batch can be a new flavor adventure.
- Naturally Sweetened. The magic here is the ripe banana. It brings such a wonderful, caramel-like sweetness all on its own that you only need the tiniest hint of extra sweetener, if any at all. It’s a treat you can feel genuinely good about.
- The Perfect Texture. Unlike some homemade frozen treats that can turn into solid ice blocks, the combination of banana and yogurt freezes into a surprisingly soft, scoopable, and creamy consistency. It’s like a cross between a popsicle and soft-serve ice cream—truly the best of both worlds.
Ingredients & Tools
- 3 large ripe bananas (the spottier, the sweeter!)
- 1 ½ cups plain Greek yogurt (full-fat for extra creaminess)
- 2 tablespoons honey or maple syrup (optional, taste first!)
- 1 teaspoon pure vanilla extract
- A pinch of salt (to make all the flavors pop)
Tools: A good blender or food processor, a set of popsicle molds, and popsicle sticks.
The quality of your yogurt really makes a difference here—a good, thick Greek yogurt will give you that luxurious, creamy mouthfeel. And don’t skip the salt! It might seem odd for a sweet recipe, but it honestly balances the sweetness and enhances the banana flavor in a way you’ll really notice.
Serves: 6-8 pops | Prep Time: 10 minutes | Freeze Time: 4-6 hours | Total Time: 4+ hours (mostly hands-off)
Before You Start: Tips & Ingredient Notes
- Banana Ripeness is Key. You want those bananas to be very ripe, with plenty of brown spots on the peel. This isn’t just for sweetness; super-ripe bananas blend into a smoother, less starchy puree, which is essential for a creamy final texture.
- To Sweeten or Not to Sweeten? The trick is to blend your bananas and yogurt first, then taste. Depending on how ripe your bananas are, you might find the mixture is perfectly sweet already. The honey or maple syrup is there as a backup—a little goes a long way.
- Yogurt Choices Matter. Full-fat Greek yogurt will yield the creamiest, most decadent result. You can use low-fat, but the pops might be a bit icier. For a dairy-free version, a thick coconut yogurt works beautifully and adds a lovely tropical note.
- Don’t Overfill the Molds. Leave about ¼ to ½ inch of space at the top of each mold cavity. The mixture will expand slightly as it freezes, and this prevents messy overflow and makes it easier to insert the sticks later.
How to Make Frozen Banana Yogurt Pops
Step 1: Prep Your Bananas. Peel your very ripe bananas and break them into chunks. Toss them right into the blender. Using ripe bananas is non-negotiable for sweetness and creaminess—you’ll notice the difference immediately.
Step 2: Combine the Base. Add the Greek yogurt, vanilla extract, and that tiny pinch of salt to the blender with the bananas. If you’re using honey or maple syrup, add it now. Hold off on blending for just a second—we have a pro-tip coming up.
Step 3: The Perfect Blend. Here’s a little secret: blend on low speed first to break up the bananas, then gradually increase to high. Let it run for a good 45-60 seconds, until the mixture is completely smooth, with no banana lumps remaining. You’re aiming for a thick, pourable consistency, almost like a milkshake.
Step 4: Taste and Adjust. This is your moment! Dip a spoon in and taste the mixture. Is it sweet enough? If not, add a bit more sweetener and blend for another 10 seconds. You could also stir in any add-ins like mini chocolate chips or a swirl of berry puree at this stage.
Step 5: Fill the Molds. Carefully pour or spoon the blended mixture into your popsicle molds. Remember not to fill them all the way to the top. A small spouted measuring cup can make this process much cleaner and easier.
Step 6: Insert the Sticks. Tap the mold gently on the counter to release any air bubbles. Then, insert the popsicle sticks, making sure they go in straight and deep enough to hold the pop securely. If your mold has a lid to hold the sticks in place, snap it on.
Step 7: The Long Wait. Place the mold on a level surface in your freezer. Now, the hardest part: patience. Let them freeze completely, which will take at least 4-6 hours, but ideally overnight. They need to be solid all the way through.
Step 8: The Grand Unmolding. When you’re ready to enjoy, don’t just yank! Run the outside of the mold under warm water for just 10-15 seconds. This will slightly loosen the edges, and the pops should slide out effortlessly. And there you have it—perfect homemade Frozen Banana Yogurt Pops!
Serving Suggestions
Complementary Dishes
- A Fresh Berry Salad — The bright, acidic pop of fresh summer berries like strawberries and blueberries creates a lovely contrast to the creamy, cold sweetness of the pops.
- A Handful of Toasted Nuts — Sprinkle some chopped, toasted almonds or pecans over the pop for a fantastic crunch and a rich, nutty flavor that complements the banana beautifully.
Drinks
- Iced Coffee or Cold Brew — The slight bitterness of coffee is a classic pairing with sweet, creamy frozen desserts, making for a sophisticated afternoon treat.
- A Sparkling Glass of Water with Lemon — Sometimes, simplicity is best. The crisp, clean bubbles and citrus notes help cleanse the palate between creamy, sweet bites.
Something Sweet
- A Dark Chocolate Square — Let a square of high-quality dark chocolate (70% or higher) melt slowly on your tongue alongside a bite of the pop. It’s a decadent, grown-up dessert experience.
- A Warm Oatmeal Cookie — The contrast between the warm, spiced cookie and the frozen pop is pure magic. It feels like a special occasion, even on a Tuesday.
Top Mistakes to Avoid
- Mistake: Using under-ripe bananas. This is the number one reason for a lackluster pop. Green or just-yellow bananas are starchy, not sweet, and they won’t blend into a smooth puree. Wait for those spots!
- Mistake: Skipping the salt. I’ve messed this up before too, thinking it was unnecessary. But salt is a flavor enhancer—without it, the pops can taste a bit flat and one-dimensional. That tiny pinch makes a world of difference.
- Mistake: Not running the mold under warm water to unmold. If you try to pull them out by force, you’ll likely end up with a stick in your hand and the pop still stuck in the mold. A quick warm water bath is the secret to a clean release every time.
- Mistake: Freezing for too short a time. If the center isn’t fully frozen, the pop will be too soft to hold its shape when you unmold it. Patience is a virtue here—give it a solid 6 hours, if not overnight.
Expert Tips
- Tip: For an ultra-silky texture, strain the yogurt. If you have the time, place your Greek yogurt in a fine-mesh strainer lined with cheesecloth over a bowl for an hour or two in the fridge. This removes even more whey, resulting in an incredibly thick, creamy base that freezes like a dream.
- Tip: Create fun swirls. Pour the plain banana-yogurt base into the molds halfway, then add a teaspoon of raspberry puree or melted chocolate, then top with the remaining base. Use a chopstick to gently swirl for a marbled effect.
- Tip: Make them mini! If you have mini popsicle molds, use them! These are perfect for little hands or for when you just want a small, satisfying sweet bite without committing to a full-sized pop.
- Tip: Add a protein punch. For a more substantial post-workout snack, blend in a scoop of your favorite vanilla or unflavored protein powder. Just be aware it might thicken the mixture, so you may need to add a splash of milk to get it to a pourable consistency.
FAQs
Can I make these without a popsicle mold?
Absolutely! You can get creative if you don’t have a dedicated mold. Small paper cups work wonderfully—just pour the mixture in, cover the top with a small piece of foil, and then poke a popsicle stick through the foil to hold it upright. You can also freeze the mixture in a shallow loaf pan for about 3-4 hours, then scoop it out like ice cream. It won’t be a pop, but it’ll be just as delicious.
How long do these Frozen Banana Yogurt Pops keep in the freezer?
They’ll keep perfectly for about 2-3 months if stored in an airtight container or well-wrapped to prevent freezer burn. Honestly, they’ve never lasted that long in my house! The texture might become a little harder over time, but that quick warm water bath before eating will still do the trick.
My pops are too hard to bite into. What happened?
This usually points to the yogurt used. If you used a regular, thinner yogurt (not Greek-style) or a low-fat version, it can contain more water, which forms larger ice crystals. Next time, opt for full-fat Greek yogurt for that creamier, softer freeze. You can also try adding a tablespoon of milk or a teaspoon of coconut oil to the blend to help soften the texture.
Can I use frozen bananas?
You can, but it changes the process a bit. If using frozen banana chunks, you’ll likely need to add a splash of milk to get the blender moving. The mixture will also be much thicker, almost like soft-serve, so it might be harder to pour into the molds. It’s doable, but fresh, ripe bananas are definitely the easier route.
Are these suitable for babies or toddlers?
They can be a great option! For babies under one, simply omit the honey and rely on the natural sweetness of the bananas. You could use maple syrup if desired. Always ensure the texture is appropriate for your child’s eating ability, and supervise them while they enjoy their pop.
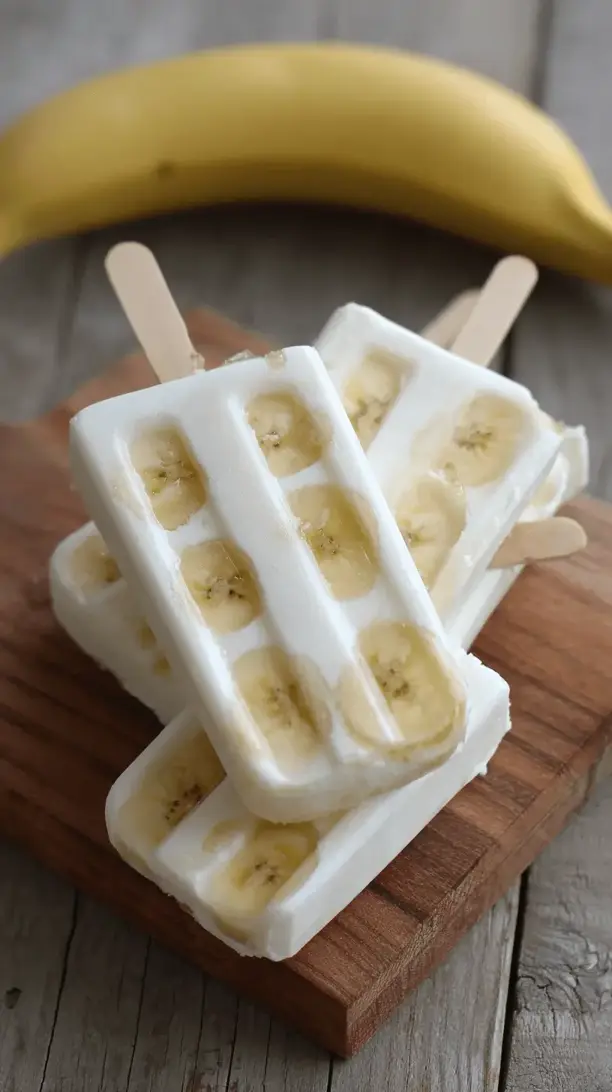
Frozen Banana Yogurt Pops
Whip up creamy Frozen Banana Yogurt Pops! This easy, healthy recipe uses ripe bananas & Greek yogurt for a guilt-free frozen treat. Perfect for kids & adults alike.
Ingredients
Ingredients
-
3 large ripe bananas (the spottier, the sweeter!)
-
1 ½ cups plain Greek yogurt (full-fat for extra creaminess)
-
2 tablespoons honey or maple syrup (optional, taste first!)
-
1 teaspoon pure vanilla extract
-
A pinch salt (to make all the flavors pop)
Instructions
-
Prep Your Bananas. Peel your very ripe bananas and break them into chunks. Toss them right into the blender. Using ripe bananas is non-negotiable for sweetness and creaminess—you'll notice the difference immediately.01
-
Combine the Base. Add the Greek yogurt, vanilla extract, and that tiny pinch of salt to the blender with the bananas. If you're using honey or maple syrup, add it now. Hold off on blending for just a second—we have a pro-tip coming up.02
-
The Perfect Blend. Here's a little secret: blend on low speed first to break up the bananas, then gradually increase to high. Let it run for a good 45-60 seconds, until the mixture is completely smooth, with no banana lumps remaining. You're aiming for a thick, pourable consistency, almost like a milkshake.03
-
Taste and Adjust. This is your moment! Dip a spoon in and taste the mixture. Is it sweet enough? If not, add a bit more sweetener and blend for another 10 seconds. You could also stir in any add-ins like mini chocolate chips or a swirl of berry puree at this stage.04
-
Fill the Molds. Carefully pour or spoon the blended mixture into your popsicle molds. Remember not to fill them all the way to the top. A small spouted measuring cup can make this process much cleaner and easier.05
-
Insert the Sticks. Tap the mold gently on the counter to release any air bubbles. Then, insert the popsicle sticks, making sure they go in straight and deep enough to hold the pop securely. If your mold has a lid to hold the sticks in place, snap it on.06
-
The Long Wait. Place the mold on a level surface in your freezer. Now, the hardest part: patience. Let them freeze completely, which will take at least 4-6 hours, but ideally overnight. They need to be solid all the way through.07
-
The Grand Unmolding. When you're ready to enjoy, don't just yank! Run the outside of the mold under warm water for just 10-15 seconds. This will slightly loosen the edges, and the pops should slide out effortlessly. And there you have it—perfect homemade Frozen Banana Yogurt Pops!08


