
Why You’ll Love This Chocolate Covered Rice Cakes
- Effortlessly Customizable. This is where the real fun begins. You can keep it classic with a drizzle of white chocolate or go wild with a sprinkle of sea salt, crushed nuts, or even a dusting of matcha powder. It’s a fantastic activity to do with kids, letting everyone create their own masterpiece.
- The Perfect Texture Contrast. There’s something truly magical about the combination of the rich, smooth, melt-in-your-mouth chocolate shell and the light, crisp, almost ethereal crunch of the rice cake. It’s a textural experience that’s far more exciting than a standard chocolate bar.
- Deceptively Simple. You don’t need to be a pastry chef to pull these off. With just a few ingredients and about 15 minutes of active time, you can create a treat that looks and tastes like it came from a fancy chocolatier. It’s the kind of recipe that builds kitchen confidence.
- A Lighter Indulgence. Compared to many rich desserts, these rice cakes offer a feeling of satisfaction without the heaviness. The base is light and airy, so you can enjoy that chocolatey goodness without feeling like you need a nap afterwards.
Ingredients & Tools
- 4-6 plain rice cakes (the large, round ones)
- 200 g good quality dark, milk, or semi-sweet chocolate (chopped bars or high-quality chips)
- 1 tsp coconut oil or neutral vegetable oil (optional, but highly recommended)
- A pinch of flaky sea salt (like Maldon)
- Your choice of toppings: crushed pistachios, freeze-dried raspberries, shredded coconut, sprinkles, etc.
Tools: A heatproof bowl, a saucepan for a double boiler (or a microwave-safe bowl), a baking sheet, parchment paper or a silicone baking mat, a spatula or spoon for spreading.
The quality of your chocolate really is the star here, so choose one you enjoy eating on its own. The tiny bit of coconut oil is a pro-tip—it makes the melted chocolate wonderfully fluid for dipping and gives the finished product a beautiful, glossy snap.
Serves: 4-6 | Prep Time: 15 minutes | Cook Time: 5 minutes (melting) | Total Time: 20 minutes (plus setting time)
Before You Start: Tips & Ingredient Notes
- Why add oil to the chocolate? This little trick prevents the chocolate from becoming too thick and clumpy when melted. It creates a smoother, more dippable consistency and helps it set with a lovely sheen. Just a teaspoon does the trick!
- Can I use chocolate chips? Absolutely. However, many chocolate chips contain stabilizers to help them keep their shape in cookies, which can sometimes make them harder to melt smoothly. If you use chips, the teaspoon of oil becomes even more important for a silky finish.
- The Rice Cake Itself. Opt for plain, unsalted rice cakes. You want a neutral base that lets the chocolate and toppings shine. Avoid flavored varieties like caramel or apple cinnamon, as they’ll clash with the chocolate.
- Setting is Key. Patience is your friend here. Make sure you have space in your refrigerator for the baking sheet. Rushing the setting process will lead to smudged chocolate and a less satisfying final texture.
How to Make Chocolate Covered Rice Cakes
Step 1: Prep Your Station. This is all about mise en place—having everything ready to go. Line a baking sheet with parchment paper or a silicone mat. Place your rice cakes on the sheet. Measure out your toppings into small bowls. Chocolate sets quickly once you start working, so having your toppings within arm’s reach is a game-changer.
Step 2: Melt the Chocolate Gently. You can use a double boiler or the microwave. For the double boiler method, bring a small amount of water to a simmer in a saucepan, then place a heatproof bowl on top, ensuring the bottom of the bowl doesn’t touch the water. Add the chopped chocolate and oil. Stir continuously until it’s just melted and smooth. If using a microwave, heat the chocolate and oil in a microwave-safe bowl in 20-second bursts, stirring well after each burst until smooth. Be careful not to overheat it!
Step 3: The Dipping (or Spreading) Ceremony. Now for the fun part. You can either dip the rice cakes directly into the bowl of melted chocolate or, my preferred method for less mess, spoon the chocolate onto the center of a rice cake and use the back of the spoon to spread it evenly to the edges. This gives you more control and ensures a nice, even layer. Don’t worry about it being perfect—a little rustic charm is welcome!
Step 4: Top Immediately. This is crucial. While the chocolate is still wet and glossy, sprinkle on your chosen toppings. If you’re using flaky sea salt, now is the time to add a delicate pinch. The chocolate begins to set quickly, so you have a small window to get creative. Go for a single topping or a artistic mix—it’s entirely up to you.
Step 5: The Patient Wait. Carefully transfer the entire baking sheet to the refrigerator. Let the chocolate covered rice cakes set completely, which will take about 30-45 minutes. You’ll know they’re ready when you gently tap the chocolate and it feels firm and makes a light tapping sound. Rushing this step is the most common mistake!
Step 6: Serve and Enjoy. Once set, your treats are ready! They are best enjoyed slightly cool from the fridge, where the chocolate has a satisfying snap. You can store any leftovers in an airtight container in the refrigerator for up to a week… if they last that long.
Serving Suggestions
Complementary Dishes
- A Fresh Fruit Platter — The bright, juicy acidity of berries, orange segments, or sliced mango provides a beautiful counterpoint to the rich chocolate, cleansing the palate between bites.
- A Cheese Board — For a more sophisticated snack spread, pair these with mild cheeses like brie or goat cheese. The creamy, savory cheese creates an unexpectedly delightful contrast with the sweet, crunchy rice cakes.
Drinks
- A Cold Glass of Milk — It’s a classic for a reason. The creaminess of milk is the perfect partner for chocolate, making this combination feel nostalgic and comforting.
- A Bold Cup of Coffee — A strong espresso or black coffee cuts through the sweetness beautifully, especially if you’ve used dark chocolate. It turns your snack into a proper coffee break moment.
Something Sweet
- Simple Vanilla Ice Cream — Crumble a chocolate covered rice cake over a bowl of high-quality vanilla ice cream. You get the warm-cold contrast and an incredible crunch that elevates the simplest dessert.
Top Mistakes to Avoid
- Mistake: Using Low-Quality Chocolate. Since there are so few ingredients, the flavor of the chocolate is paramount. A waxy, low-cocoa chocolate will result in a disappointing treat. Splurge a little on a bar you love.
- Mistake: Adding Toppings Too Late. I’ve done this myself—you get distracted for a minute, and suddenly the chocolate has a dull film on top and nothing will stick. Toppings must be applied the second you finish coating each rice cake.
- Mistake: Skipping the Oil. It might seem like an unnecessary step, but that teaspoon of oil is what gives you a smooth, professional-looking finish instead of a thick, gloppy coating that’s difficult to spread.
- Mistake: Not Letting Them Set Completely. Impatience leads to fingerprints in the chocolate and a messy eating experience. Set a timer if you have to, but give them the full time in the fridge to firm up properly.
Expert Tips
- Tip: Tempering for a Professional Shine. If you want your chocolate to have an extra crisp snap and a glossy, professional finish, look up a simple “seeding” method for tempering chocolate. It’s an extra step, but the result is stunning.
- Tip: Create a Drizzle Effect. For a beautiful presentation, melt a small amount of white chocolate separately. Once the dark chocolate base is set, use a fork or a piping bag to drizzle zig-zags of white chocolate over the top for a marbled effect.
- Tip: Break Them Up. For a party snack, try breaking the large rice cakes into uneven chunks before dipping. This creates bite-sized pieces that are perfect for grazing and look fantastic piled high on a platter.
- Tip: Storage Smarts. Always store these in the refrigerator in a single layer, separated by parchment paper, to prevent them from sticking together. The rice cake can absorb moisture and lose its crunch if left at room temperature for too long.
FAQs
Can I use white chocolate instead?
Absolutely! White chocolate works beautifully. Just be extra careful when melting it, as it’s more sensitive to heat and can seize up (become grainy) more easily than dark chocolate. Ensure all your tools are completely dry, and melt it very gently using the same methods. You can pair white chocolate with more delicate toppings like dried lavender, crushed freeze-dried strawberries, or lemon zest.
Are these gluten-free or vegan?
They can be, very easily! Most plain rice cakes are naturally gluten-free, but always check the packaging to be sure. To make them vegan, simply use a high-quality dark chocolate that is certified vegan (many are, as they don’t contain milk solids) and ensure your toppings are plant-based. It’s a wonderfully inclusive treat for almost any dietary need.
My chocolate became thick and grainy when I melted it. What happened?
This is called “seizing,” and it usually happens if a tiny bit of steam or water gets into the chocolate during melting. Unfortunately, it’s hard to reverse. Your best bet is to start over. Next time, make sure your bowl and tools are completely dry, and if using a double boiler, ensure no steam escapes around the bowl. Adding the oil can also help prevent this.
Can I make these ahead of time for a party?
Yes, they are a fantastic make-ahead option! They will keep perfectly in an airtight container in the refrigerator for up to 5 days. In fact, making them a day in advance allows the flavors to settle and the texture to become perfectly crisp. Just take them out about 10 minutes before serving to take the extreme chill off.
What other creative toppings can I use?
Oh, the possibilities are endless! Think outside the box: a sprinkle of chili powder for a sweet-heat kick, crushed pretzels for salty-sweet crunch, a dusting of espresso powder for a mocha vibe, or even edible glitter for a festive touch. Let your pantry be your guide!
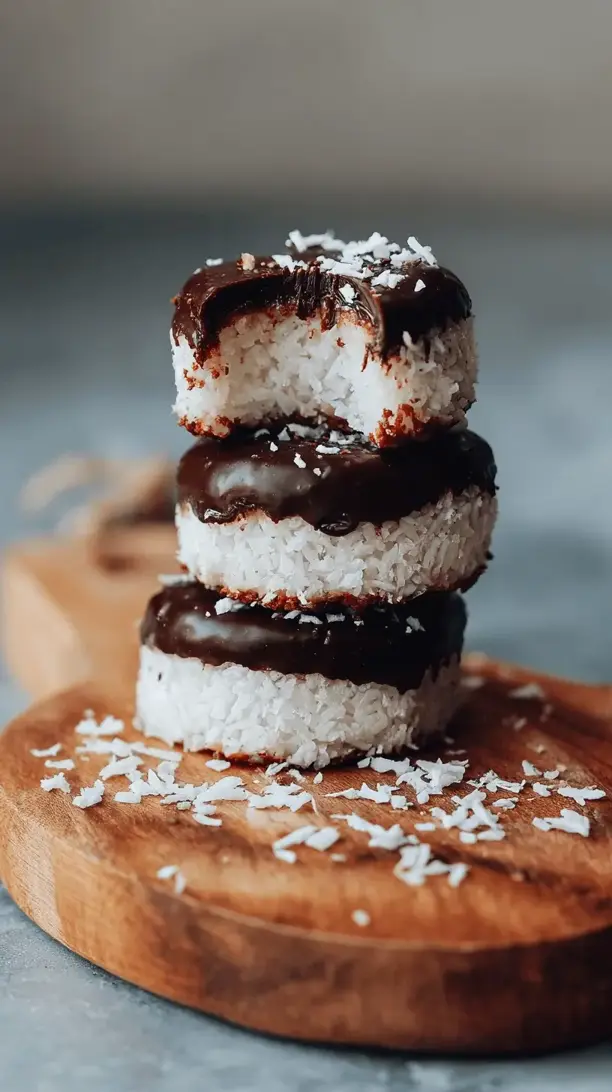
Chocolate Covered Rice Cakes
Craving something sweet but simple? My Chocolate Covered Rice Cakes are your new go-to! Easy, customizable & ready in 20 mins. A light, crunchy treat that feels indulgent.
Ingredients
Ingredients
-
4-6 plain rice cakes (the large, round ones)
-
200 g good quality dark, milk, or semi-sweet chocolate (chopped bars or high-quality chips)
-
1 tsp coconut oil or neutral vegetable oil (optional, but highly recommended)
-
A pinch flaky sea salt (like Maldon)
-
toppings (Your choice of toppings: crushed pistachios, freeze-dried raspberries, shredded coconut, sprinkles, etc.)
Instructions
-
Prep Your Station. This is all about mise en place—having everything ready to go. Line a baking sheet with parchment paper or a silicone mat. Place your rice cakes on the sheet. Measure out your toppings into small bowls. Chocolate sets quickly once you start working, so having your toppings within arm's reach is a game-changer.01
-
Melt the Chocolate Gently. You can use a double boiler or the microwave. For the double boiler method, bring a small amount of water to a simmer in a saucepan, then place a heatproof bowl on top, ensuring the bottom of the bowl doesn't touch the water. Add the chopped chocolate and oil. Stir continuously until it's just melted and smooth. If using a microwave, heat the chocolate and oil in a microwave-safe bowl in 20-second bursts, stirring well after each burst until smooth. Be careful not to overheat it!02
-
The Dipping (or Spreading) Ceremony. Now for the fun part. You can either dip the rice cakes directly into the bowl of melted chocolate or, my preferred method for less mess, spoon the chocolate onto the center of a rice cake and use the back of the spoon to spread it evenly to the edges. This gives you more control and ensures a nice, even layer. Don't worry about it being perfect—a little rustic charm is welcome!03
-
Top Immediately. This is crucial. While the chocolate is still wet and glossy, sprinkle on your chosen toppings. If you're using flaky sea salt, now is the time to add a delicate pinch. The chocolate begins to set quickly, so you have a small window to get creative. Go for a single topping or a artistic mix—it's entirely up to you.04
-
The Patient Wait. Carefully transfer the entire baking sheet to the refrigerator. Let the chocolate covered rice cakes set completely, which will take about 30-45 minutes. You'll know they're ready when you gently tap the chocolate and it feels firm and makes a light tapping sound. Rushing this step is the most common mistake!05
-
Serve and Enjoy. Once set, your treats are ready! They are best enjoyed slightly cool from the fridge, where the chocolate has a satisfying snap. You can store any leftovers in an airtight container in the refrigerator for up to a week... if they last that long.06


