Why You’ll Love This Vegan Pumpkin Pie Bars
- Incredibly Easy & Forgiving. Forget about wrestling with pie dough. The crust for these bars is a simple press-in situation—no rolling pin required. The filling is a straightforward mix-and-pour affair, making this recipe practically foolproof, even for beginner bakers.
- Perfect Make-Ahead Dessert. These bars actually get better after they’ve had time to chill and set completely in the fridge. You can make them a day or two before you need them, which is a total lifesaver during the busy holiday season.
- Rich, Creamy Texture Without Dairy. The combination of coconut milk and pumpkin puree creates a luxuriously smooth and creamy filling that’s completely plant-based. You won’t miss the traditional evaporated milk one bit—it’s that good.
- Deep, Warm Spice in Every Bite. We’re using a generous blend of cinnamon, ginger, nutmeg, and a hint of cloves. This isn’t a shy, lightly-spiced dessert; it’s a full-on flavor celebration that truly tastes like the holidays.
Ingredients & Tools
- For the Crust:
- 200 g almond flour
- 60 g rolled oats (gluten-free if needed)
- 3 tbsp maple syrup
- 3 tbsp melted coconut oil
- 1/2 tsp fine sea salt
- For the Filling:
- 425 g canned pumpkin puree (not pumpkin pie filling)
- 160 ml full-fat coconut milk
- 100 g maple syrup
- 40 g cornstarch or arrowroot powder
- 1 tsp vanilla extract
- 1 1/2 tsp ground cinnamon
- 1/2 tsp ground ginger
- 1/4 tsp ground nutmeg
- 1/8 tsp ground cloves
- 1/4 tsp fine sea salt
Tools: 8×8 inch baking pan, parchment paper, two mixing bowls, whisk, spatula
A quick note on the pumpkin puree—make sure you grab the plain, unsweetened kind. Pumpkin pie filling is pre-spiced and sweetened, and it will throw off the beautiful balance we’re creating here. The coconut oil in the crust is key for that lovely, shortbread-like texture.
Nutrition (per serving)
- Calories: 245 kcal
- Protein: 5 g
- Fat: 15 g
- Carbohydrates: 24 g
- Fiber: 4 g
Serves: 9 | Prep Time: 20 minutes | Cook Time: 45 minutes | Total Time: 4+ hours (includes chilling)
Before You Start: Tips & Ingredient Notes
- Pumpkin Puree vs. Pumpkin Pie Filling. This is the most common mix-up! You want 100% pure pumpkin puree for this recipe. The pie filling has sugar and spices already added, which will make our bars far too sweet and throw the spice balance completely off.
- Don’t Skip the Chilling Time. I know it’s tempting to dig in right away, but patience is a virtue here. The bars need that full 4-hour chill (or overnight is even better) to set up properly. This ensures you get clean, neat slices instead of a delicious, but messy, pumpkin pudding.
- Measuring Your Almond Flour. For the best crust texture, spoon your almond flour into the measuring cup and level it off. Scooping it directly can pack it down, leading to a denser, oilier crust than we’re aiming for. A little care here goes a long way.
- Full-Fat Coconut Milk is Non-Negotiable. The richness and fat content in full-fat coconut milk are essential for achieving that classic, creamy pumpkin pie texture. Light coconut milk will result in a filling that’s a bit watery and lacks that luxurious mouthfeel.
How to Make Vegan Pumpkin Pie Bars
Step 1: First, preheat your oven to 350°F (175°C). Grab your 8×8 inch baking pan and line it with parchment paper, leaving some overhang on two opposite sides. This creates little “handles” that will make lifting the entire slab of bars out of the pan later an absolute breeze. Trust me, you’ll thank yourself for this simple step.
Step 2: Now, let’s make that simple, no-roll crust. In a medium bowl, combine the almond flour, rolled oats, and salt. Give it a good whisk to break up any clumps and ensure everything is evenly distributed. You’ll notice the mixture feels light and a little coarse—that’s perfect.
Step 3: Pour in the melted coconut oil and maple syrup. Now, get in there with your hands or a spatula and mix until the dough starts to clump together. It should feel a bit like wet sand and hold together when you pinch it between your fingers. If it seems too dry, you can add another teaspoon of maple syrup.
Step 4: Transfer the crust mixture into your prepared pan. Using your fingers or the flat bottom of a measuring cup, press the dough firmly and evenly into the bottom of the pan. You want to create a solid, compact layer. I like to press it up the sides just a tiny bit to form a slight lip, which helps contain the filling.
Step 5: Pop the crust into the preheated oven and bake for about 10-12 minutes. You’re just looking for it to become lightly golden around the edges and smell a bit toasty. This pre-baking, or “blind baking,” helps prevent a soggy bottom and gives the crust a head start. Once done, set it aside to cool slightly while you make the filling.
Step 6: Time for the star of the show! In a large bowl, whisk together the pumpkin puree and coconut milk until they’re completely smooth and no streaks remain. This is your base, and getting it well-combined is key for a silky texture.
Step 7: Add the maple syrup, cornstarch, vanilla extract, and all the spices—cinnamon, ginger, nutmeg, cloves, and salt. Now, whisk vigorously! You want to ensure the cornstarch is fully dissolved and incorporated, with no little white specks left. The mixture will be thick and beautifully aromatic.
Step 8: Pour the vibrant orange filling over the pre-baked crust. Use a spatula to spread it into an even layer, making sure it reaches all the corners. Give the pan a gentle tap on the counter to release any air bubbles that might be trapped underneath.
Step 9: Carefully place the pan back in the oven and bake for 40-50 minutes. The edges of the filling will look set and might have pulled away from the sides just a touch, but the center should still have a very slight jiggle when you gently shake the pan—it will firm up as it chills.
Step 10: Remove the pan from the oven and place it on a wire rack to cool completely to room temperature. Once it’s no longer warm, transfer the entire pan to the refrigerator. This is the hard part: you must let it chill for at least 4 hours, but honestly, overnight is ideal for the perfect, sliceable texture.
Serving Suggestions
Complementary Dishes
- A simple arugula salad with a lemon vinaigrette — The peppery, bright greens provide a fantastic contrast to the sweet, spiced richness of the bars, cleansing the palate beautifully between bites.
- Savory lentil loaf or mushroom wellington — These bars make the perfect festive, plant-based finale to a hearty main course, continuing the cozy, comforting theme of the meal.
- Whipped coconut cream — A classic for a reason. A dollop of lightly sweetened coconut cream adds a cloud-like, creamy element that takes these bars to the next level of indulgence.
Drinks
- Hot spiced apple cider — The warm, autumnal spices in the cider mirror the flavors in the pie bar, creating a wonderfully harmonious and cozy sipping experience.
- Oat milk latte with a dash of cinnamon — The creamy, slightly bitter coffee is a fantastic partner for the sweet dessert, making it feel like a sophisticated café treat.
- Chai tea — The cardamom, cloves, and ginger in a warm cup of chai are a natural flavor bridge to the spices in the pumpkin filling, making every sip and bite feel intentional.
Something Sweet
- Dark chocolate-dipped orange segments — The bright, citrusy burst of orange and the bitter dark chocolate provide a lovely, simple counterpoint that doesn’t compete with the pie’s dominant flavors.
- Vanilla bean cashew ice cream — Serving a bar slightly warm with a scoop of cool, creamy vegan ice cream creates an incredible contrast in temperatures and textures that is just divine.
- Maple candied pecans — Sprinkling a few of these on top adds a delightful crunch and an extra layer of maple sweetness that complements the bars perfectly.
Top Mistakes to Avoid
- Using pumpkin pie filling instead of puree. I’ve mentioned it before, but it’s the number one mistake. It will make your bars far too sweet and spiced, and the texture will be off. Always double-check the can label.
- Overbaking the filling. You want the center to still have a slight jiggle when you take it out of the oven. If you bake it until it’s completely firm in the center, it can become rubbery and lose its creamy quality as it chills.
- Skipping the crust pre-bake. It might seem like an extra step you can skip, but that 10 minutes in the oven is what gives the crust its structural integrity and prevents it from turning into a soggy layer underneath the wet filling.
- Cutting the bars before they’re fully chilled. Impatience is the enemy of a clean slice here. If you try to cut them while they’re still warm or only partially set, you’ll end up with a gooey, delicious mess. Wait for the full chill time.
Expert Tips
- Tip: For an ultra-smooth filling, blend it. If you’re a texture perfectionist, after you’ve whisked the filling ingredients together, pour it all into a blender and give it a quick blitz. This will ensure it’s perfectly silky and eliminate any potential fibrous bits from the pumpkin.
- Tip: Toast your own spices. If you have whole cinnamon sticks, ginger, and nutmeg, lightly toasting them in a dry pan and then grinding them fresh will unlock incredibly deep, aromatic flavors that pre-ground spices just can’t match.
- Tip: Create a decorative top. Before baking, you can use the tines of a fork to create a simple cross-hatch pattern on the surface of the filling. Or, for a more rustic look, drag a spoon in gentle swirls. It bakes in beautifully.
- Tip: Make them nut-free. If you need to avoid almonds, you can replace the almond flour in the crust with an equal weight of oat flour. The texture will be slightly different but still wonderfully delicious and tender.
FAQs
Can I make these gluten-free?
Absolutely! This recipe is naturally gluten-free as written. Just double-check that your rolled oats are certified gluten-free, as oats are sometimes processed in facilities that also handle wheat. All the other ingredients, from the almond flour to the cornstarch, are naturally free of gluten.
How long will these bars keep in the fridge?
Stored in an airtight container in the refrigerator, these vegan pumpkin pie bars will stay fresh and delicious for about 4-5 days. The crust may soften slightly over time, but the flavor will still be fantastic. I don’t recommend leaving them at room temperature for more than a couple of hours due to the coconut milk in the filling.
Can I freeze them?
You sure can! They freeze remarkably well. Once completely cooled and set, cut them into bars and place them in a single layer on a parchment-lined baking sheet to freeze solid. Then, transfer the frozen bars to an airtight container or freezer bag. They’ll keep for up to 2 months. Thaw overnight in the fridge before serving.
My filling didn’t set firmly. What happened?
This usually points to one of two things: either the bars needed more chilling time (the center can sometimes take longer than the edges), or the cornstarch wasn’t fully incorporated. Make sure you whisk the filling until it’s completely smooth with no white streaks. If it’s still soft after a full overnight chill, it might need a few more minutes in the oven next time.
What can I use instead of cornstarch?
Arrowroot powder is a perfect 1:1 substitute and works just as well. Tapioca flour (also called tapioca starch) can also be used, but you may need a slightly heaped tablespoon as it’s a bit less potent than cornstarch. I wouldn’t recommend flax or chia for this particular recipe, as they can create a gel-like texture that isn’t quite right for pie.
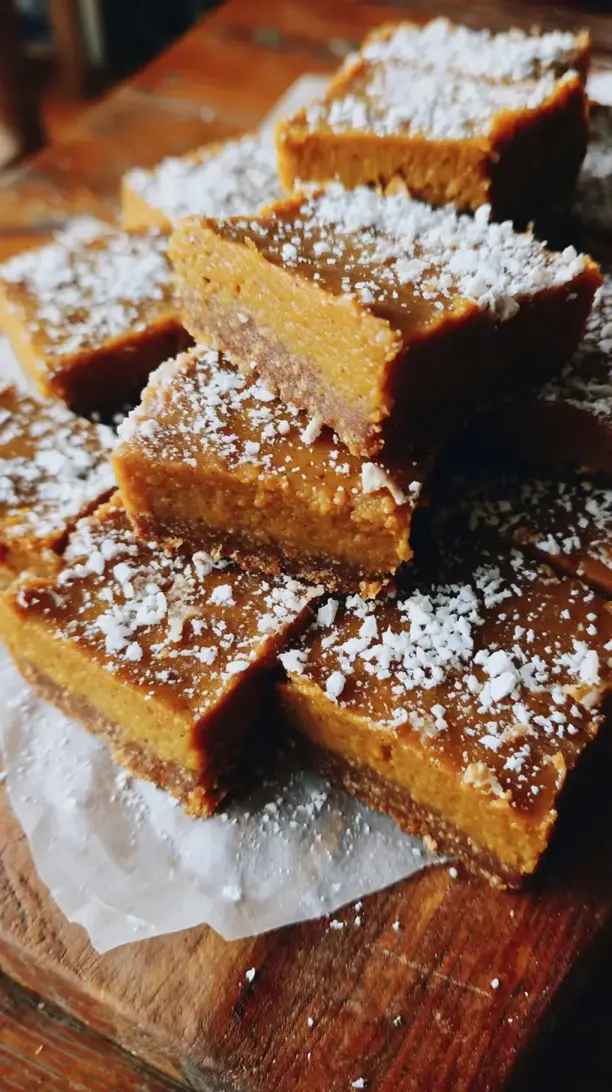
Vegan Pumpkin Pie Bars
Make the best Vegan Pumpkin Pie Bars with this easy recipe! A creamy, dairy-free filling on a no-roll crust. Perfect for holidays. Get the recipe now!
Ingredients
For the Crust:
-
200 g almond flour
-
60 g rolled oats (gluten-free if needed)
-
3 tbsp maple syrup
-
3 tbsp melted coconut oil
-
1/2 tsp fine sea salt
For the Filling:
-
425 g canned pumpkin puree (not pumpkin pie filling)
-
160 ml full-fat coconut milk
-
100 g maple syrup
-
40 g cornstarch or arrowroot powder
-
1 tsp vanilla extract
-
1 1/2 tsp ground cinnamon
-
1/2 tsp ground ginger
-
1/4 tsp ground nutmeg
-
1/8 tsp ground cloves
-
1/4 tsp fine sea salt