Why You’ll Love This Vegan Chocolate Crinkle Cookies
- They’re incredibly fudgy and rich. Thanks to a combination of melted dark chocolate and cocoa powder, these cookies deliver a deep, intense chocolate flavor that feels incredibly indulgent.
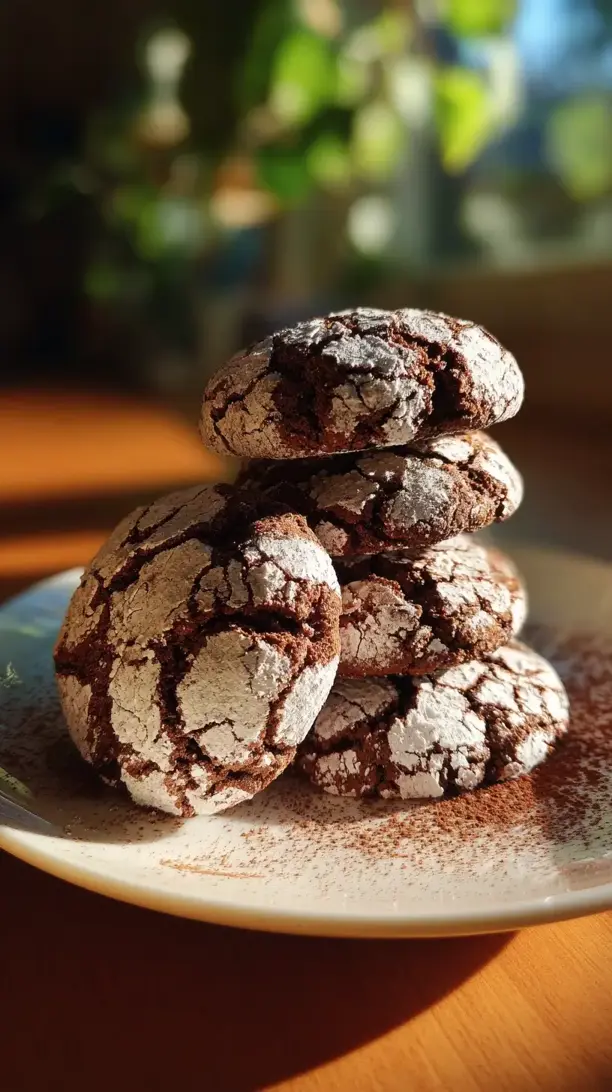
- The texture is pure perfection. You get that signature crisp, crackly shell giving way to a soft, chewy, and moist center that’s just divine.
- They’re surprisingly easy to make. No fancy equipment or complicated techniques are needed. The dough comes together in one bowl, and the chilling time is the hardest part—waiting!
- They look absolutely stunning. The dramatic contrast between the dark chocolate cookie and the white powdered sugar is a real showstopper on any holiday plate or cookie tray.
Ingredients & Tools
- 150 g all-purpose flour
- 50 g unsweetened cocoa powder (Dutch-processed works best for a deep color)
- 1 tsp baking powder
- 1/4 tsp salt
- 200 g granulated sugar
- 80 ml neutral oil (like canola or vegetable)
- 60 ml unsweetened plant-based milk (almond or oat work wonderfully)
- 1 tsp vanilla extract
- 100 g vegan dark chocolate, finely chopped
- 120 g powdered sugar, for rolling
Tools: A medium mixing bowl, a whisk, a spatula, a baking sheet, and parchment paper.
The quality of your cocoa powder really makes a difference here—it’s the star of the show. And using a good, finely chopped vegan dark chocolate instead of chocolate chips ensures it melts smoothly into the batter for that ultimate fudgy factor.
Nutrition (per serving)
- Calories: 180 kcal
- Protein: 2 g
- Fat: 7 g
- Carbohydrates: 30 g
- Fiber: 2 g
Serves: 18 cookies | Prep Time: 15 minutes (+ 2 hours chilling) | Cook Time: 10-12 minutes | Total Time: 2 hours 30 minutes
Before You Start: Tips & Ingredient Notes
- Don’t skip the chill time. This is non-negotiable for the perfect crinkle. Chilling the dough firms it up so the cookies don’t spread into puddles, and it allows the flavors to deepen beautifully.
- Why Dutch-processed cocoa? It’s treated with an alkali, which neutralizes its natural acidity. This results in a richer, darker color and a smoother, more mellow chocolate flavor that works perfectly here.
- Be generous with the powdered sugar. When you roll the dough balls, you want a thick, snowy coating. This creates that beautiful contrast as the cookie expands and cracks in the oven.
- Measure your flour correctly. For the best results, spoon your flour into the measuring cup and level it off. Scooping directly can pack in too much flour, leading to a drier cookie.
How to Make Vegan Chocolate Crinkle Cookies
Step 1: Start by melting your chocolate. You can do this in a double boiler or in short bursts in the microwave, stirring frequently until it’s completely smooth. Set it aside to cool slightly—you don’t want it so hot that it cooks the other ingredients when you mix it in.
Step 2: In your medium mixing bowl, whisk together the flour, cocoa powder, baking powder, and salt. You really want to aerate these dry ingredients and ensure the leavening is evenly distributed—this helps create those lovely cracks.
Step 3: In a separate bowl, combine the granulated sugar, neutral oil, plant-based milk, and vanilla extract. Whisk it vigorously for a good minute until it looks well-emulsified and slightly thickened. Now, pour in your slightly cooled, melted chocolate and whisk again until the mixture is glossy and uniform.
Step 4: Add the dry ingredients to the wet ingredients. Switch to a spatula now and fold everything together gently. You’ll notice the dough is quite soft and sticky—that’s exactly what you want! Just mix until no dry streaks of flour remain. Overmixing can make the cookies tough.
Step 5: This is the crucial part. Cover the bowl with plastic wrap and chill the dough in the refrigerator for at least 2 hours, or even overnight. The dough needs to be firm enough to handle. If you’re in a rush, you can pop it in the freezer for about 45 minutes, but the longer chill really does improve the flavor.
Step 6: When you’re ready to bake, preheat your oven to 175°C (350°F) and line a baking sheet with parchment paper. Place your powdered sugar in a small, shallow bowl. You’ll want a generous amount.
Step 7: Scoop out portions of the chilled dough—about a tablespoon each—and roll them between your palms into smooth balls. The dough might be a little firm straight from the fridge, but the warmth of your hands will soften it just enough. Roll each ball heavily in the powdered sugar until it’s completely covered in a thick, white coat.
Step 8: Place the sugar-coated dough balls on your prepared baking sheet, leaving about 5 cm (2 inches) between them as they will spread. Bake for 10-12 minutes. The cookies will look soft and puffy with beautiful cracks. They should still be a bit gooey in the center—that’s the secret to the fudgy texture.
Step 9: Let the cookies cool on the baking sheet for at least 10 minutes before transferring them to a wire rack to cool completely. They will firm up as they cool. This patience is rewarded with the perfect chewy texture.
Serving Suggestions
Complementary Dishes
- A scoop of vegan vanilla ice cream — The warm, fudgy cookie paired with cold, creamy ice cream is a classic dessert combination that’s simply unbeatable.
- A warm mug of chai tea — The spices in the chai beautifully complement the deep chocolate notes, creating a cozy and aromatic experience.
- A fresh fruit platter with oranges and berries — The bright, acidic fruit cuts through the richness of the chocolate, offering a refreshing palate cleanser.
Drinks
- Oat milk latte — The creamy, slightly sweet coffee is a perfect partner for the intense chocolate, making it an ideal afternoon treat.
- Peppermint tea — It’s like a liquid version of a chocolate mint pairing; the cool, refreshing tea highlights the cookie’s richness.
- A glass of chilled almond milk — Sometimes, the simplest pairing is the best. It’s a comforting, classic combo that never fails.
Something Sweet
- Vegan gingerbread cookies — The warm spice of gingerbread creates a wonderful flavor contrast with the deep chocolate, perfect for a holiday cookie box.
- Coconut macaroons — The chewy, tropical flavor of coconut offers a lovely textural and taste contrast to the fudgy crinkle cookies.
- A simple fruit sorbet — A tangy raspberry or lemon sorbet provides a light, refreshing finish that balances the decadent chocolate.
Top Mistakes to Avoid
- Using hot melted chocolate. If your chocolate is too hot when you add it to the wet ingredients, it can cause the oil to separate and give you a greasy, grainy dough. Let it cool for 5-10 minutes first.
- Not chilling the dough long enough. I’ve messed this up before too, in a moment of impatience. Warm dough will spread too much, resulting in flat, thin cookies instead of thick, puffy ones with defined cracks.
- Overbaking the cookies. They will continue to cook on the hot baking sheet after you take them out. Pull them out when the edges look set but the centers still appear soft and underdone for that perfect fudgy center.
- Skimping on the powdered sugar. A thin layer will just melt into the cookie. You need a thick, generous coating to get that classic, snowy crinkle appearance.
Expert Tips
- Tip: For an extra flavor boost, add a pinch of instant espresso powder to the dry ingredients. It won’t make the cookies taste like coffee; it just deepens and enhances the chocolate flavor in a magical way.
- Tip: If your dough is too hard to scoop after chilling, let it sit on the counter for 5-10 minutes to soften slightly. You want it firm, but not rock-solid.
- Tip: Use a cookie scoop for uniformly sized cookies. This isn’t just for looks—it ensures they all bake at the same rate, so you don’t end up with some overbaked and some underbaked.
- Tip: For a gooier, even more brownie-like center, slightly underbake by a minute. The cookies will be very soft when you take them out but will set up perfectly as they cool.
- Tip: Re-roll any leftover powdered sugar from the bowl with your next batch of dough balls. It might have some cookie dough specks, but it adds to the rustic, homemade charm.
FAQs
Can I make the dough ahead of time?
Absolutely, and I often do! The dough can be kept, covered, in the refrigerator for up to 3 days. You can also freeze the shaped, unbaked dough balls on a tray before transferring them to a freezer bag. Bake straight from frozen, adding just a minute or two to the baking time. This is a fantastic trick for having fresh, warm cookies anytime a craving strikes.
My cookies didn’t crack much. What went wrong?
This usually comes down to one of two things: the dough wasn’t chilled enough, or the baking powder might be old. The chilled dough hitting the hot oven creates a thermal shock that forces the surface to crack. If your baking powder has lost its potency, it won’t provide the necessary lift. Always test your baking powder if it’s been in the cupboard for a while!
Can I use a different type of oil?
You can, but stick to neutral-flavored oils. Coconut oil will work, but it will impart a slight coconut flavor, which can be nice! Just make sure it’s in a solid state and you melt it with the chocolate. Avoid strongly flavored oils like olive oil, as they will compete with the chocolate.
Why are my cookies cakey and not fudgy?
This typically happens if you over-measured the flour. Remember to spoon and level! Overmixing the dough after adding the flour can also develop too much gluten, leading to a more cake-like, less tender texture. Mix just until combined for the best results.
How should I store these cookies?
Once completely cooled, store them in an airtight container at room temperature. They’ll stay fresh and delicious for about 4-5 days. You can place a piece of bread in the container with them—it sounds strange, but the bread will get hard and the cookies will stay soft! They also freeze beautifully for up to 3 months.
Vegan Chocolate Crinkle Cookies
Make perfect Vegan Chocolate Crinkle Cookies with this easy recipe! Fudgy, crackly, and intensely chocolatey. Get the simple, one-bowl method now.
Ingredients
For the dry ingredients:
-
150 g all-purpose flour
-
50 g unsweetened cocoa powder
-
1 tsp baking powder
-
0.25 tsp salt
For the wet ingredients:
-
200 g granulated sugar
-
80 ml neutral oil
-
60 ml unsweetened plant-based milk
-
1 tsp vanilla extract
-
100 g vegan dark chocolate (finely chopped)
For rolling:
-
120 g powdered sugar
Instructions
-
Start by melting your chocolate. You can do this in a double boiler or in short bursts in the microwave, stirring frequently until it's completely smooth. Set it aside to cool slightly—you don't want it so hot that it cooks the other ingredients when you mix it in.01
-
In your medium mixing bowl, whisk together the flour, cocoa powder, baking powder, and salt. You really want to aerate these dry ingredients and ensure the leavening is evenly distributed—this helps create those lovely cracks.02
-
In a separate bowl, combine the granulated sugar, neutral oil, plant-based milk, and vanilla extract. Whisk it vigorously for a good minute until it looks well-emulsified and slightly thickened. Now, pour in your slightly cooled, melted chocolate and whisk again until the mixture is glossy and uniform.03
-
Add the dry ingredients to the wet ingredients. Switch to a spatula now and fold everything together gently. You'll notice the dough is quite soft and sticky—that's exactly what you want! Just mix until no dry streaks of flour remain. Overmixing can make the cookies tough.04
-
This is the crucial part. Cover the bowl with plastic wrap and chill the dough in the refrigerator for at least 2 hours, or even overnight. The dough needs to be firm enough to handle. If you're in a rush, you can pop it in the freezer for about 45 minutes, but the longer chill really does improve the flavor.05
-
When you're ready to bake, preheat your oven to 175°C (350°F) and line a baking sheet with parchment paper. Place your powdered sugar in a small, shallow bowl. You'll want a generous amount.06
-
Scoop out portions of the chilled dough—about a tablespoon each—and roll them between your palms into smooth balls. The dough might be a little firm straight from the fridge, but the warmth of your hands will soften it just enough. Roll each ball heavily in the powdered sugar until it's completely covered in a thick, white coat.07
-
Place the sugar-coated dough balls on your prepared baking sheet, leaving about 5 cm (2 inches) between them as they will spread. Bake for 10-12 minutes. The cookies will look soft and puffy with beautiful cracks. They should still be a bit gooey in the center—that's the secret to the fudgy texture.08
-
Let the cookies cool on the baking sheet for at least 10 minutes before transferring them to a wire rack to cool completely. They will firm up as they cool. This patience is rewarded with the perfect chewy texture.09