Why You’ll Love This Sweet Potato and Chickpea Croquettes
- They’re a textural dream. You get that incredible, satisfying crunch on the outside that gives way to a soft, fluffy, and warmly spiced interior. It’s a contrast that never gets old.
- They’re incredibly versatile. Serve them as a main with a big salad, pop them on a platter as a party appetizer with dipping sauces, or even stuff them into a pita pocket with some tahini sauce for a fantastic lunch.
- They’re freezer-friendly champions. You can make a big batch, freeze them before frying, and then have a quick, delicious meal ready to go on even the busiest of days. It’s like a gift from your past self.
- The flavor profile is deeply comforting. The natural sweetness of the potato plays so nicely with the earthy chickpeas and the warm, smoky spices. It’s a flavor combination that feels both familiar and exciting.
Ingredients & Tools
- 500 g sweet potatoes (about 2 medium), peeled and cubed
- 1 can (400 g) chickpeas, rinsed and drained well
- 1 small red onion, finely diced
- 2 cloves garlic, minced
- 1 tsp ground cumin
- 1 tsp smoked paprika
- 1/2 tsp ground coriander
- 1/4 tsp cayenne pepper (optional, for a little heat)
- 3 tbsp fresh parsley or coriander, finely chopped
- 2 tbsp plain flour or chickpea flour, plus extra for dusting
- 1 large egg, lightly beaten (or a flax egg for vegan option)
- Salt and black pepper to taste
- 100 g panko breadcrumbs
- Vegetable or avocado oil for frying
Tools: A large pot for boiling, a potato masher or fork, a large mixing bowl, a baking sheet, a large skillet or frying pan.
The quality of your spices really makes a difference here—toasting whole spices and grinding them yourself is a game-changer, but good-quality pre-ground ones work perfectly too. The key is to drain the chickpeas extremely well; any extra moisture can make the mixture too soft to shape.
Serves: 4 (makes about 12-14 croquettes) | Prep Time: 30 minutes | Cook Time: 20 minutes | Total Time: 50 minutes
Before You Start: Tips & Ingredient Notes
- Get the sweet potato texture right. You want to boil them until they are very tender for mashing, but be careful not to overcook them into being waterlogged. Drain them well and let them steam dry in the colander for a minute or two.
- Don’t skip the mashing step. For the best texture, you want a fairly smooth sweet potato base but with the chickpeas only partially mashed. This gives you a creamy background with little pops of texture from the chickpeas.
- Seasoning is everything. Taste the mixture before you add the egg and breadcrumbs. It should taste a little *too* seasoned, as the bland breadcrumbs will balance it out. Be generous with the salt and pepper.
- Chilling is non-negotiable. I know it’s tempting to skip this, but please don’t! Chilling the mixture firms it up dramatically, making it infinitely easier to shape the croquettes without them falling apart.
How to Make Sweet Potato and Chickpea Croquettes
Step 1: Cook and Mash the Base. Place the cubed sweet potatoes in a pot of salted water and bring to a boil. Cook for about 10-15 minutes, or until they are fork-tender. Drain them thoroughly and let them sit in the colander for a minute to release steam. While they’re still warm, transfer them to a large mixing bowl and mash them well with a potato masher or a fork. You’re aiming for a relatively smooth puree.
Step 2: Combine the Ingredients. To the mashed sweet potato, add the well-drained chickpeas. Use the potato masher again to mash the chickpeas—but not completely. You want to break most of them down but leave some texture. Now, add the diced red onion, minced garlic, all the spices (cumin, smoked paprika, coriander, and cayenne if using), the chopped herbs, the 2 tablespoons of flour, and the beaten egg. Season generously with salt and black pepper. Mix everything together until it’s fully combined. The mixture will be quite soft.
Step 3: Chill the Mixture. This is the most important step for success! Cover the bowl with cling film and pop it into the refrigerator for at least 30 minutes, or ideally up to an hour. You’ll notice the mixture firms up significantly as it chills, which will make shaping the croquettes a breeze.
Step 4: Shape the Croquettes. Place the panko breadcrumbs in a shallow dish and have a separate plate dusted with a little extra flour ready. Using your hands, scoop out about 2 tablespoons of the chilled mixture. Roll it into a ball, then gently press and shape it into a small log or oval shape. Lightly roll it in the flour to coat, then dip it into the beaten egg (if you need a second egg, beat another one), and finally, roll it thoroughly in the panko breadcrumbs, pressing gently to make sure they adhere. Place the shaped croquette on a clean plate or baking sheet. Repeat with the remaining mixture.
Step 5: Fry to Golden Perfection. Pour oil into a large skillet to a depth of about 1 cm. Heat the oil over medium heat. To test if it’s ready, drop a small breadcrumb in; it should sizzle gently. Carefully place the croquettes in the hot oil, but don’t overcrowd the pan—work in batches. Fry for about 2-3 minutes per side, turning carefully, until they are a deep, golden brown and crispy all over. The trick is to maintain a steady heat so they cook through without burning.
Step 6: Drain and Serve. Once cooked, use a slotted spoon to transfer the croquettes to a plate lined with kitchen paper to drain any excess oil. Let them rest for just a minute before serving—they’ll be piping hot inside! Serve immediately while the crust is at its crispiest.
Serving Suggestions
Complementary Dishes
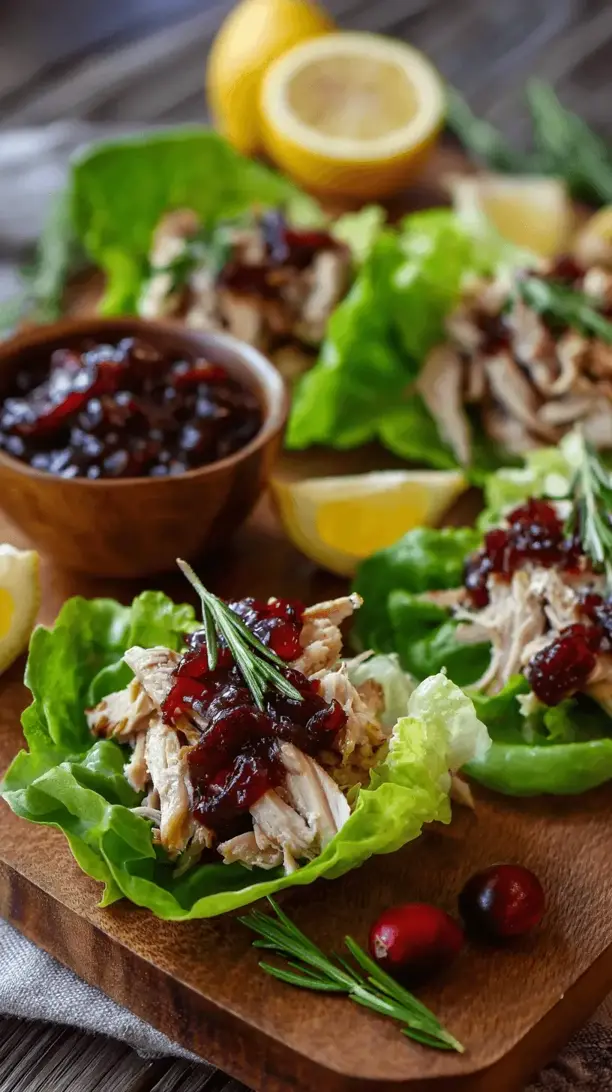
- A simple lemony green salad — The sharp, fresh acidity cuts through the richness of the fried croquettes perfectly, balancing the meal.
- Garlicky yogurt or tzatziki — A cool, creamy dip is almost essential here, adding a tangy contrast that complements the spices beautifully.
- Quinoa tabbouleh — The herby, grain-based salad adds substance and makes the croquettes feel like a complete, well-rounded feast.
Drinks
- A crisp, dry rosé — The berry notes and acidity work wonderfully with the sweet and smoky flavors of the croquettes.
- A cold, hoppy IPA — The bitterness of the beer contrasts the sweetness of the potato and stands up to the spices really well.
- Sparkling water with lemon and mint — A non-alcoholic option that’s incredibly refreshing and cleanses the palate between bites.
Something Sweet
- Orange and almond cake — The citrus notes feel light and bright after the savory, spiced main course.
- Dark chocolate pots de crème — A rich, indulgent, and make-ahead dessert that provides a decadent finish without being overly heavy.
- Lemon sorbet — The ultimate palate-cleanser; it’s zingy, refreshing, and the perfect way to end the meal on a light note.
Top Mistakes to Avoid
- Mistake: Using a watery sweet potato mixture. If you don’t drain the potatoes well enough, or if you use canned sweet potato puree that’s too wet, the mixture will be too soft to hold its shape. Always drain and steam-dry your boiled potatoes.
- Mistake: Skipping the chill time. I’ve messed this up before too, thinking I could hurry the process. A warm mixture is a sticky, frustrating mess to shape. The chill time is what gives the croquettes structural integrity.
- Mistake: Overcrowding the pan while frying. Adding too many croquettes at once will cause the oil temperature to drop drastically. This leads to oily, soggy croquettes instead of crisp ones. Patience is key—fry in small batches.
- Mistake: Not getting the oil hot enough. If the oil isn’t hot enough, the croquettes will absorb too much oil and become greasy. Use the breadcrumb test to ensure it’s sizzling nicely before you begin.
Expert Tips
- Tip: Bake for a lighter option. If you prefer not to fry, you can bake these! Arrange the breaded croquettes on a parchment-lined baking sheet, spray or brush generously with oil, and bake at 200°C (400°F) for 20-25 minutes, flipping halfway, until golden and crisp.
- Tip: Master the freeze-ahead. These are perfect for freezing. After shaping and breading, place the uncooked croquettes on a baking sheet and freeze solid. Then transfer to a freezer bag. You can fry them directly from frozen, just add a couple of extra minutes to the cooking time.
- Tip: Customize your spices. Feel free to play with the spice blend. A teaspoon of curry powder or za’atar would be fantastic here instead of the cumin and paprika. Make it your own!
- Tip: Use a cookie scoop for uniformity. For evenly sized croquettes that cook at the same rate, use a medium cookie scoop to portion out the mixture before rolling. It makes the process faster and neater.
FAQs
Can I make these croquettes vegan?
Absolutely! The one ingredient that needs substituting is the egg. For a binder, you can use a “flax egg” (1 tbsp ground flaxseed mixed with 3 tbsp water, left to thicken for 5 minutes). Alternatively, an extra tablespoon of flour or even a couple of tablespoons of mashed avocado can help bind the mixture. The breadcrumbs are usually vegan, but just double-check the packaging to be sure.
Can I use canned sweet potato?
You can, but you need to be cautious. Canned sweet potato puree is often much wetter than homemade. If you use it, you’ll definitely need to increase the amount of flour significantly, a tablespoon at a time, until the mixture is firm enough to shape. I’d also recommend spreading it on a kitchen towel to blot up excess moisture first. Honestly, boiling your own is more reliable for the right texture.
Why did my croquettes fall apart in the oil?
This usually happens for one of two reasons. First, the mixture wasn’t chilled long enough, so it was too soft. Second, the oil wasn’t hot enough when they went in. A hot oil will sear the outside instantly, creating a seal that holds the croquette together. If the oil is too cool, it will seep in and cause disintegration. Always chill thoroughly and heat the oil properly.
What’s the best way to reheat leftovers?
To regain their crispiness, the oven or an air fryer is your best friend. Avoid the microwave, as it will make them soft and soggy. Reheat in a 180°C (350°F) oven or air fryer for about 8-10 minutes, until heated through and crisp again. They won’t be *quite* as perfect as fresh, but they’ll be pretty close!
Can I use a different bean?
Yes, definitely! While chickpeas are ideal for their firm texture and mild flavor, you could experiment with cannellini beans or black beans. Just keep in mind that black beans will change the color dramatically. The method remains the same—just make sure whatever bean you use is well-drained and rinsed.

Sweet Potato And Chickpea Croquettes
Crispy, golden Sweet Potato & Chickpea Croquettes! My easy, step-by-step recipe makes these vegetarian delights perfect for dinner or parties. Get that satisfying crunch!
Ingredients
Ingredients
-
500 g sweet potatoes (about 2 medium, peeled and cubed)
-
1 can chickpeas (400 g, rinsed and drained well)
-
1 red onion (small, finely diced)
-
2 cloves garlic (minced)
-
1 tsp ground cumin
-
1 tsp smoked paprika
-
1/2 tsp ground coriander
-
1/4 tsp cayenne pepper (optional, for a little heat)
-
3 tbsp fresh parsley or coriander (finely chopped)
-
2 tbsp plain flour or chickpea flour (plus extra for dusting)
-
1 large egg (lightly beaten (or a flax egg for vegan option))
-
salt and black pepper (to taste)
-
100 g panko breadcrumbs
-
vegetable or avocado oil (for frying)
Instructions
-
Cook and Mash the Base. Place the cubed sweet potatoes in a pot of salted water and bring to a boil. Cook for about 10-15 minutes, or until they are fork-tender. Drain them thoroughly and let them sit in the colander for a minute to release steam. While they're still warm, transfer them to a large mixing bowl and mash them well with a potato masher or a fork. You're aiming for a relatively smooth puree.01
-
Combine the Ingredients. To the mashed sweet potato, add the well-drained chickpeas. Use the potato masher again to mash the chickpeas—but not completely. You want to break most of them down but leave some texture. Now, add the diced red onion, minced garlic, all the spices (cumin, smoked paprika, coriander, and cayenne if using), the chopped herbs, the 2 tablespoons of flour, and the beaten egg. Season generously with salt and black pepper. Mix everything together until it's fully combined. The mixture will be quite soft.02
-
Chill the Mixture. This is the most important step for success! Cover the bowl with cling film and pop it into the refrigerator for at least 30 minutes, or ideally up to an hour. You'll notice the mixture firms up significantly as it chills, which will make shaping the croquettes a breeze.03
-
Shape the Croquettes. Place the panko breadcrumbs in a shallow dish and have a separate plate dusted with a little extra flour ready. Using your hands, scoop out about 2 tablespoons of the chilled mixture. Roll it into a ball, then gently press and shape it into a small log or oval shape. Lightly roll it in the flour to coat, then dip it into the beaten egg (if you need a second egg, beat another one), and finally, roll it thoroughly in the panko breadcrumbs, pressing gently to make sure they adhere. Place the shaped croquette on a clean plate or baking sheet. Repeat with the remaining mixture.04
-
Fry to Golden Perfection. Pour oil into a large skillet to a depth of about 1 cm. Heat the oil over medium heat. To test if it's ready, drop a small breadcrumb in; it should sizzle gently. Carefully place the croquettes in the hot oil, but don't overcrowd the pan—work in batches. Fry for about 2-3 minutes per side, turning carefully, until they are a deep, golden brown and crispy all over. The trick is to maintain a steady heat so they cook through without burning.05
-
Drain and Serve. Once cooked, use a slotted spoon to transfer the croquettes to a plate lined with kitchen paper to drain any excess oil. Let them rest for just a minute before serving—they'll be piping hot inside! Serve immediately while the crust is at its crispiest.06