Why You’ll Love This Stuffed Mini Bell Peppers with Goat Cheese
- Effortless Elegance. These little peppers look like you spent hours in the kitchen, but the truth is, they come together with minimal fuss. They’re the ultimate “more than the sum of their parts” appetizer.
- The Perfect Flavor Balance. The tangy creaminess of the goat cheese plays so nicely against the natural sweetness of the roasted peppers. It’s a classic combination for a reason—it just works, every single time.
- Incredibly Versatile. This recipe is a fantastic template. Once you master the basic filling, you can get creative. Add cooked sausage, sun-dried tomatoes, or different herbs to make it your own.
- A Textural Dream. You get the soft, warm filling, the tender-yet-still-snappy pepper, and a little toasty top. It’s a party in your mouth, honestly.
Ingredients & Tools
- 1 lb mini bell peppers (about 18-20 peppers)
- 8 oz goat cheese, at room temperature
- 1/4 cup grated Parmesan cheese
- 1/4 cup plain breadcrumbs
- 1 large egg yolk
- 2 tbsp fresh chives, finely chopped
- 1 tbsp fresh thyme leaves
- 1 small garlic clove, minced or grated
- 1/4 tsp black pepper
- 1/4 tsp salt (adjust to taste)
- 2 tbsp olive oil, for drizzling
Tools: A sharp knife, a mixing bowl, a small spoon or piping bag (optional but helpful!), and a baking sheet.
Using room-temperature goat cheese is non-negotiable here—it makes the filling so much easier to mix and pipe. And don’t skip the fresh herbs; they really brighten up the rich cheese and make the whole thing taste incredibly fresh.
Serves: 4-6 as an appetizer | Prep Time: 20 minutes | Cook Time: 18-22 minutes | Total Time: about 40 minutes
Before You Start: Tips & Ingredient Notes
- Goat Cheese Temperature. If your goat cheese is cold, it will be crumbly and difficult to mix into a smooth filling. Let it sit on the counter for at least 30 minutes before you begin. You want it soft and spreadable.
- Choosing Your Peppers. Look for a bag of multi-colored mini peppers for a vibrant presentation. Try to select peppers that can sit flat on your baking sheet—it makes stuffing and serving so much easier.
- The Egg Yolk’s Role. The egg yolk isn’t just a binder; it adds a lovely richness and helps the filling brown beautifully in the oven. If you’re concerned about consuming raw egg, the internal temperature of the filling will get high enough to be considered safe.
- Herb Flexibility. No chives? Use the green parts of a scallion. Out of thyme? A teaspoon of dried Italian seasoning works in a pinch, though fresh is always best for flavor.
How to Make Stuffed Mini Bell Peppers with Goat Cheese
Step 1: First, preheat your oven to 375°F (190°C). This gives it plenty of time to come to the right temperature while you prep the peppers. Line a baking sheet with parchment paper for easy cleanup—trust me, you’ll thank yourself later.
Step 2: Now, let’s prep the peppers. Wash them and pat them dry. Carefully slice each pepper in half lengthwise. You’ll want to use a small, sharp knife for control. Then, using the tip of the knife or a small spoon, scoop out the seeds and the white membranes. This creates a perfect little boat for our filling. Arrange all the pepper halves on your prepared baking sheet, cut-side up.
Step 3: Time for the filling! In your mixing bowl, combine the softened goat cheese, Parmesan, breadcrumbs, egg yolk, chives, thyme, minced garlic, salt, and pepper. Use a fork or a small spatula to mash and mix everything together until it’s well-combined and smooth. You’ll notice the mixture comes together into a thick, spreadable paste. Give it a taste—this is your chance to adjust the seasoning. Maybe a pinch more salt? Go for it.
Step 4: This is the fun part—stuffing! You can use a small spoon to dollop the filling into each pepper half, but if you want to be a little fancy and get really neat results, spoon the filling into a piping bag fitted with a large tip (or even just a zip-top bag with a corner snipped off). Pipe the filling evenly into each pepper, mounding it slightly. A little goes a long way, and you want to use up all that delicious filling.
Step 5: Almost ready for the oven. Drizzle the stuffed peppers lightly with the olive oil. This will help the peppers roast nicely and encourage a gorgeous golden color on the cheesy tops. Don’t skip this step—it adds flavor and helps with browning.
Step 6: Pop the baking sheet into your preheated oven. Bake for 18 to 22 minutes. You’re looking for the peppers to be tender (you can pierce them easily with a knife tip) and the filling to be puffed up and have some golden-brown spots. The aroma in your kitchen will be absolutely incredible.
Step 7: Carefully remove the baking sheet from the oven. Let the peppers cool for about 5 minutes before serving. They are molten lava hot straight out of the oven! This brief resting time allows the filling to set just a little, making them easier to pick up and eat.
Serving Suggestions
Complementary Dishes
- A Simple Green Salad with Lemon Vinaigrette — The sharp, citrusy dressing cuts through the richness of the cheese perfectly, making the whole meal feel balanced and light.
- Grilled Lemon Herb Chicken — Serve these peppers alongside for a complete, satisfying dinner. The flavors complement each other without competing.
- A Charcuterie Board — These peppers are a star appetizer. Place them right on the board with cured meats, olives, and crackers for an impressive spread.
Drinks
- A Crisp Sauvignon Blanc — The wine’s acidity and citrus notes are a fantastic partner for the tangy goat cheese, cleansing the palate between bites.
- A Light Italian Red like Chianti — The bright cherry flavors and good acidity in a young Chianti can stand up to the dish without overwhelming the peppers.
- Sparkling Water with Lemon — A non-alcoholic option that provides the same palate-cleansing fizz and acidity, making each bite taste fresh and new.
Something Sweet
- Lemon Sorbet — After the savory, herby notes, a scoop of intensely tart and sweet sorbet is the most refreshing way to end the meal.
- Dark Chocolate Almond Bark — A few pieces of rich, slightly bitter dark chocolate with nuts provide a simple, elegant, and not-too-sweet finish.
- Berry Crostata — The sweet, jammy berries and flaky pastry are a classic, comforting end that feels special without being overly complicated.
Top Mistakes to Avoid
- Mistake: Using cold goat cheese. This is the number one issue. Cold cheese won’t mix smoothly, leading to a crumbly, difficult-to-handle filling that might not hold together well.
- Mistake: Over-stuffing the peppers. You want a nice mound, but if you pile the filling too high, the outside might brown too much before the peppers have a chance to soften properly. Moderation is key.
- Mistake: Skipping the olive oil drizzle. That little bit of oil isn’t just for show. It promotes browning on the filling and helps the peppers roast instead of just steam, giving you a better texture.
- Mistake: Not tasting the filling. Seasoning is personal! Always taste your filling before you stuff the peppers. You might find it needs another pinch of salt or pepper to really sing.
Expert Tips
- Tip: Use a piping bag for neatness. Honestly, it’s a game-changer. It’s so much faster than spooning, and you get a beautiful, professional-looking swirl on every pepper. A zip-top bag with the corner snipped off works just as well.
- Tip: Make them ahead. You can assemble these peppers completely up to a day in advance. Cover the baking sheet tightly with plastic wrap and refrigerate. Just add a couple of extra minutes to the baking time since they’ll be going into the oven cold.
- Tip: Add a textural crunch. For a little extra something, sprinkle the top of the stuffed peppers with some extra breadcrumbs or even some chopped walnuts before baking. The contrast is wonderful.
- Tip: Broil for a minute at the end. If your filling isn’t as golden as you’d like after 22 minutes, switch your oven to broil for just 60-90 seconds. Watch them like a hawk—they can burn in a flash!
FAQs
Can I make these stuffed peppers dairy-free?
You can certainly try! For the goat cheese, substitute with an equal amount of a firm, creamy dairy-free alternative like a almond- or cashew-based “cheese”. For the Parmesan, use a nutritional yeast or a vegan Parmesan substitute. The flavor profile will be different, but you’ll still get a delicious stuffed pepper. Just be sure your dairy-free cheeses are soft enough to mix into a filling.
Can I use regular-sized bell peppers instead?
Absolutely. Just slice one large bell pepper into 6-8 wedges. The baking time will likely need to increase by 5-10 minutes because the pepper pieces are thicker. Keep an eye on them, and bake until the peppers are tender at the edges and the filling is golden.
How should I store leftovers, and how long do they last?
Store any leftover stuffed peppers in an airtight container in the refrigerator for up to 3 days. They are best reheated in a toaster oven or conventional oven at 350°F until warm. The microwave will work in a pinch but will make the pepper a bit soggy.
Can I freeze these after baking?
I don’t recommend it, honestly. The texture of the peppers becomes very watery and mushy upon thawing. The creamy filling can also separate and become grainy. This is a recipe best enjoyed fresh or made-ahead and refrigerated for a day, not frozen.
The filling is a bit too thick. What can I do?
If your filling feels too stiff to pipe or spoon easily, you can loosen it up with a tiny splash of milk, cream, or even a teaspoon of olive oil. Add just a little at a time until it reaches your desired consistency. Be careful not to add too much, or it could make the filling runny when baked.
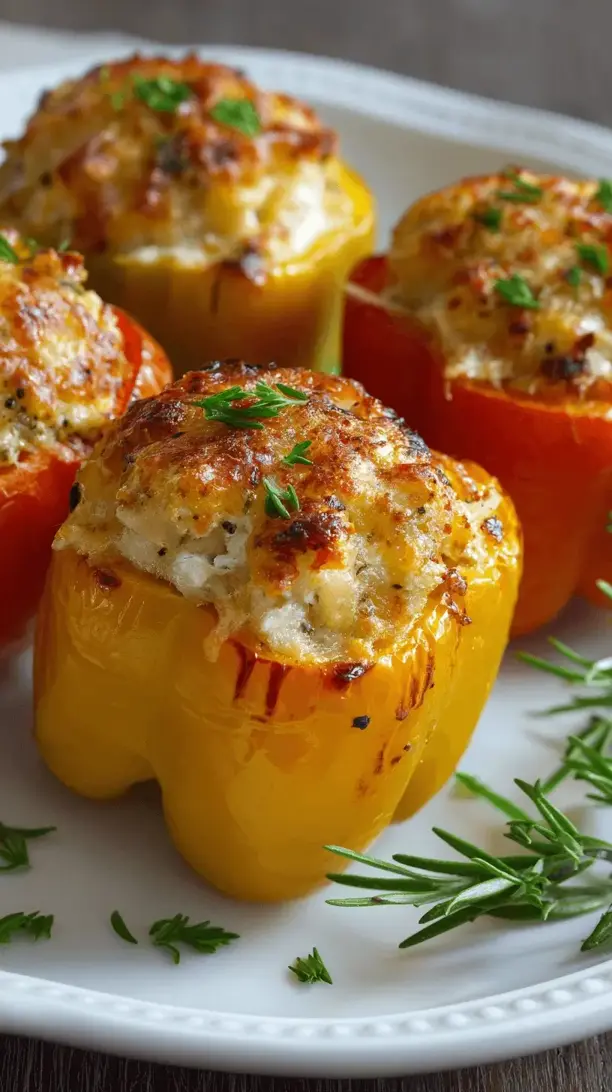
Stuffed Mini Bell Peppers With Goat Cheese
Easy stuffed mini bell peppers with goat cheese! A 40-minute appetizer with creamy, tangy filling. Perfect for parties or a tasty snack. Simple, elegant, and always a hit.
Ingredients
Ingredients
-
1 lb mini bell peppers (about 18-20 peppers)
-
8 oz goat cheese (at room temperature)
-
1/4 cup Parmesan cheese (grated)
-
1/4 cup plain breadcrumbs
-
1 egg yolk (large)
-
2 tbsp fresh chives (finely chopped)
-
1 tbsp fresh thyme leaves
-
1 garlic clove (small, minced or grated)
-
1/4 tsp black pepper
-
1/4 tsp salt (adjust to taste)
-
2 tbsp olive oil (for drizzling)
Instructions
-
First, preheat your oven to 375°F (190°C). This gives it plenty of time to come to the right temperature while you prep the peppers. Line a baking sheet with parchment paper for easy cleanup—trust me, you'll thank yourself later.01
-
Now, let's prep the peppers. Wash them and pat them dry. Carefully slice each pepper in half lengthwise. You'll want to use a small, sharp knife for control. Then, using the tip of the knife or a small spoon, scoop out the seeds and the white membranes. This creates a perfect little boat for our filling. Arrange all the pepper halves on your prepared baking sheet, cut-side up.02
-
Time for the filling! In your mixing bowl, combine the softened goat cheese, Parmesan, breadcrumbs, egg yolk, chives, thyme, minced garlic, salt, and pepper. Use a fork or a small spatula to mash and mix everything together until it's well-combined and smooth. You'll notice the mixture comes together into a thick, spreadable paste. Give it a taste—this is your chance to adjust the seasoning. Maybe a pinch more salt? Go for it.03
-
This is the fun part—stuffing! You can use a small spoon to dollop the filling into each pepper half, but if you want to be a little fancy and get really neat results, spoon the filling into a piping bag fitted with a large tip (or even just a zip-top bag with a corner snipped off). Pipe the filling evenly into each pepper, mounding it slightly. A little goes a long way, and you want to use up all that delicious filling.04
-
Almost ready for the oven. Drizzle the stuffed peppers lightly with the olive oil. This will help the peppers roast nicely and encourage a gorgeous golden color on the cheesy tops. Don't skip this step—it adds flavor and helps with browning.05
-
Pop the baking sheet into your preheated oven. Bake for 18 to 22 minutes. You're looking for the peppers to be tender (you can pierce them easily with a knife tip) and the filling to be puffed up and have some golden-brown spots. The aroma in your kitchen will be absolutely incredible.06
-
Carefully remove the baking sheet from the oven. Let the peppers cool for about 5 minutes before serving. They are molten lava hot straight out of the oven! This brief resting time allows the filling to set just a little, making them easier to pick up and eat.07