Why You’ll Love This Smoothie with Peanut Butter and Banana
- It’s the ultimate texture. We’re not making a watery juice here. This smoothie is luxuriously thick and creamy, almost like a milkshake but without any of the guilt. The frozen banana is the real hero, creating that dreamy, ice-cream-like consistency that’s just so satisfying to sip.
- It’s a powerhouse of staying power. Thanks to the healthy fats from the peanut butter and the natural sugars and fiber from the banana, this smoothie really sticks with you. It’s the perfect breakfast or post-workout refuel that will keep hunger pangs at bay for hours.
- It’s endlessly customizable. Once you’ve got the base down, you can play around endlessly. Throw in a handful of spinach (you won’t even taste it, promise!), a scoop of protein powder, or some cacao powder for a chocolate-peanut butter cup vibe. It’s your canvas.
- It comes together in under 5 minutes. Seriously, from grabbing the ingredients to pouring it into a glass, it’s one of the fastest, most satisfying meals you can make. It’s a lifesaver on those mornings when you’re running out the door but still want something wholesome.
Ingredients & Tools
- 1 large ripe banana, preferably frozen
- 2 tablespoons creamy peanut butter (see notes below!)
- 1 cup milk of choice (dairy, almond, oat)
- 1/2 cup plain Greek yogurt
- 1 tablespoon honey or maple syrup (optional, depending on sweetness preference)
- 1/4 teaspoon vanilla extract
- A large handful of ice cubes (about 1 cup)
Tools: A high-speed blender is ideal, but any decent blender will work.
You’ll notice I specify a *frozen* banana—this is non-negotiable for that perfect, thick texture. And about that peanut butter… honestly, the kind you use matters. Look for a brand with just peanuts and maybe a little salt. Avoid the ones with added oils or sugars for the cleanest, most peanut-y flavor.
Serves: 1 (generously) | Prep Time: 5 minutes | Cook Time: 0 minutes | Total Time: 5 minutes
Before You Start: Tips & Ingredient Notes
- Freeze your bananas ahead of time. This is the single best tip I can give you. Peel ripe bananas, break them into chunks, and freeze them in a zip-top bag. Not only does this prevent waste, but it gives you that thick, creamy base whenever the smoothie craving hits.
- Why Greek yogurt? It adds a huge protein boost and an incredible creaminess that makes the smoothie even more substantial. If you’re dairy-free, a scoop of your favorite protein powder or a splash of extra milk works great too.
- To sweeten or not to sweeten? Taste your smoothie before adding any extra sweetener! A ripe banana and peanut butter often provide enough natural sweetness. I usually add the honey only if my banana isn’t super spotty and ripe.
- Think about your milk temperature. Using milk straight from the fridge is fine, but if you want an extra-thick, almost soft-serve consistency, try using a slightly lesser amount of milk and a tablespoon or two of cold water instead. It sounds weird, but it works!
How to Make Smoothie with Peanut Butter and Banana
Step 1: The Liquid Base First. Always, always start by pouring your milk into the blender pitcher. This might seem like a small detail, but it makes a world of difference. Adding the liquid first helps the blender blades move freely from the get-go, preventing those frustrating pockets of unmixed powder or frozen fruit at the bottom. It just creates a smoother blend from the very first pulse.
Step 2: Add the Soft Ingredients. Next, plop in your Greek yogurt, peanut butter, vanilla extract, and sweetener (if using). The goal here is to get these softer, creamier ingredients sitting near the blades, where they can easily get incorporated into the liquid. You’ll notice this creates a creamy base that the frozen elements can blend into seamlessly.
Step 3: The Frozen Power. Now for the stars of the show: the frozen banana chunks and the ice cubes. Pile them on top. It might seem counterintuitive, but by placing the frozen items last, the blender can gradually pull them down into the already-moving liquid base. This method puts less strain on your blender’s motor and helps achieve that perfectly smooth, chunk-free texture we’re after.
Step 4: Blend to Perfection. Start your blender on a low speed and gradually increase it to high. Let it run for a good 45-60 seconds. You might need to stop and scrape down the sides once with a spatula, especially if you’re not using a high-speed blender. You’re looking for a completely homogenous, thick, and creamy mixture. It should pour slowly, like a thick milkshake. If it’s too thick, add another splash of milk and blend for another 10 seconds.
Step 5: Taste and Adjust. This is the most important chef’s step! Give your smoothie a quick taste. Does it need a bit more sweetness? A tiny pinch of salt can actually make the peanut butter flavor pop even more. Adjust to your liking, give it one last quick blend, and then…
Step 6: Pour and Enjoy Immediately. Pour your beautiful, creamy creation into a tall glass. I love using a reusable straw, but a spoon is just as acceptable—it’s that thick! Smoothies are best enjoyed right away, as they can separate and become watery if left to sit for too long.
Serving Suggestions
Complementary Dishes
- A slice of whole-wheat toast with avocado — The creamy, savory fat from the avocado provides a lovely contrast to the sweet, nutty smoothie, making it a truly balanced and filling meal.
- A soft-boiled egg on the side — For those mornings when you need serious protein power, a simple soft-boiled egg with a sprinkle of salt and pepper is a perfect, easy companion.
Drinks
- A strong cup of black coffee — The bitter notes of a good coffee cut through the richness of the smoothie beautifully, creating a classic breakfast duo that’s hard to beat.
- A glass of cold water with lemon — It might sound simple, but starting with a glass of lemon water before your smoothie is a refreshing way to hydrate and awaken your palate.
Something Sweet
- A small, chewy oatmeal raisin cookie — Honestly, this is a little indulgence, but the warm spices in the cookie complement the peanut butter and banana flavors so well. It feels like a decadent treat.
- A few dark chocolate chips sprinkled on top — For a quick and easy upgrade, sprinkle a few dark chocolate chips on top of your smoothie. They’ll add a delightful little crunch and a burst of bittersweet flavor.
Top Mistakes to Avoid
- Mistake: Using a fresh, room-temperature banana. This is the number one reason for a watery smoothie. The frozen banana is absolutely crucial for that thick, creamy, milkshake-like texture. Without it, you’ll just have a thin banana drink.
- Mistake: Adding ingredients in the wrong order. I know it seems fussy, but putting the liquid in first really does prevent the blender from getting stuck and ensures a smoother blend. I’ve messed this up before too, and it’s a frustrating cleanup!
- Mistake: Not blending long enough. Impatience is the enemy of a smooth smoothie. Give it a full minute on high speed. You want to hear the sound change from a loud, chunky grinding to a smoother, lower whir—that’s how you know it’s done.
- Mistake: Using the wrong peanut butter. Avoid peanut butter spreads with added hydrogenated oils or lots of sugar. They can make the smoothie overly sweet and sometimes leave a weird, waxy mouthfeel. Natural peanut butter blends in much better.
Expert Tips
- Tip: Make smoothie packs for the freezer. This is a huge time-saver. Portion out the frozen banana, and even the peanut butter and yogurt, into individual zip-top bags or containers. In the morning, just dump the contents into the blender, add milk, and blend. Breakfast in 60 seconds flat.
- Tip: Add a secret ingredient for creaminess. For an unbelievably rich and creamy texture, try adding a quarter of a ripe avocado. You won’t taste it, but it adds a incredible silkiness and healthy fats.
- Tip: Boost the nutrition effortlessly. Want to sneak in more greens? A large handful of fresh spinach blends in perfectly without altering the flavor. For an omega-3 boost, a tablespoon of chia seeds or ground flaxseed works wonderfully.
- Tip: Turn it into a smoothie bowl. If you reduce the milk by about a quarter, you’ll get an even thicker consistency that’s perfect for eating with a spoon out of a bowl. Then you can go crazy with toppings like granola, coconut flakes, and fresh berries.
FAQs
Can I make this smoothie ahead of time?
You can, but it’s really best enjoyed immediately. If you must prep ahead, make the smoothie and store it in a tightly sealed jar in the fridge for up to 12 hours. It will separate, so just give it a really good shake or a quick re-blend before drinking. For longer storage, you’re better off making the freezer packs mentioned above and blending fresh each morning.
My smoothie is too thick! How can I thin it out?
No problem at all—this happens! Simply add more liquid, one tablespoon at a time, blending after each addition until it reaches your desired consistency. Extra milk, water, or even a splash of cold brew coffee are all great options. The key is to add slowly so you don’t overdo it.
Can I use a different nut butter?
Absolutely! Almond butter, cashew butter, or even sunflower seed butter (for a nut-free version) would all be delicious. Each will bring its own unique flavor profile, so feel free to experiment and find your favorite combination.
Is this smoothie good for a post-workout drink?
It’s excellent! The banana provides quick-digesting carbohydrates to replenish glycogen stores, and the peanut butter and yogurt offer protein to help with muscle repair. For an even bigger protein punch, you can easily stir in a scoop of your favorite vanilla or unflavored protein powder.
Why did my smoothie turn out bland?
This usually comes down to two things: the ripeness of your banana or a need for seasoning. An under-ripe banana won’t be very sweet. And a tiny pinch of salt is a game-changer—it enhances all the other flavors, especially the peanut butter. Always taste and adjust at the end!
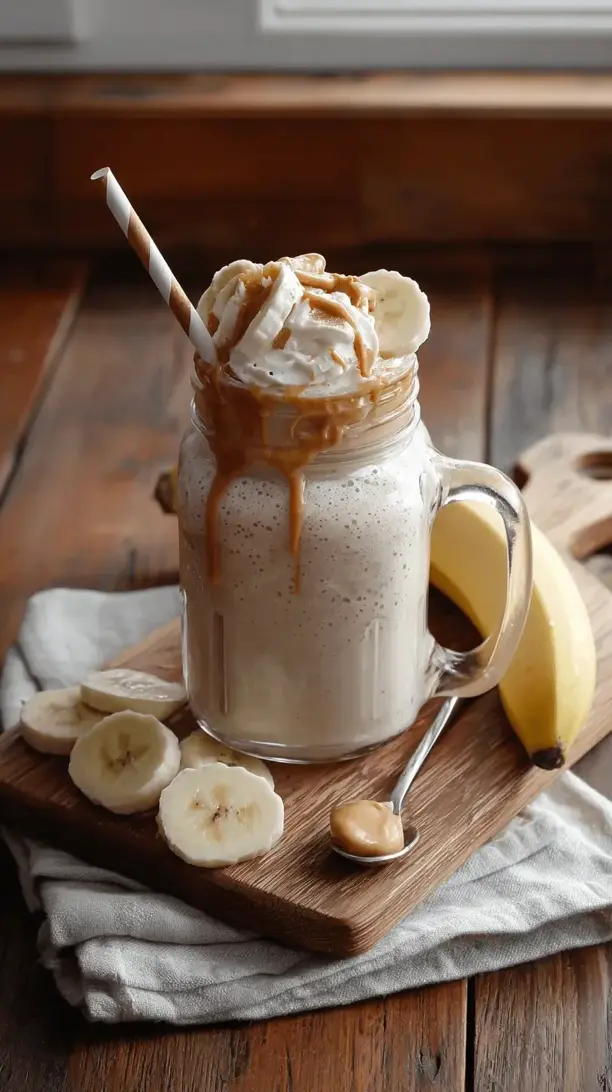
Smoothie With Peanut Butter And Banana
My ultimate peanut butter banana smoothie recipe! Creamy, thick & satisfying—just like a milkshake but healthy. Ready in 5 minutes for the perfect breakfast or snack.
Ingredients
Ingredients
-
1 large ripe banana (preferably frozen)
-
2 tablespoons creamy peanut butter
-
1 cup milk of choice (dairy, almond, oat)
-
1/2 cup plain Greek yogurt
-
1 tablespoon honey or maple syrup (optional, depending on sweetness preference)
-
1/4 teaspoon vanilla extract
-
1 cup ice cubes (a large handful)
Instructions
-
The Liquid Base First. Always, always start by pouring your milk into the blender pitcher. This might seem like a small detail, but it makes a world of difference. Adding the liquid first helps the blender blades move freely from the get-go, preventing those frustrating pockets of unmixed powder or frozen fruit at the bottom. It just creates a smoother blend from the very first pulse.01
-
Add the Soft Ingredients. Next, plop in your Greek yogurt, peanut butter, vanilla extract, and sweetener (if using). The goal here is to get these softer, creamier ingredients sitting near the blades, where they can easily get incorporated into the liquid. You'll notice this creates a creamy base that the frozen elements can blend into seamlessly.02
-
The Frozen Power. Now for the stars of the show: the frozen banana chunks and the ice cubes. Pile them on top. It might seem counterintuitive, but by placing the frozen items last, the blender can gradually pull them down into the already-moving liquid base. This method puts less strain on your blender's motor and helps achieve that perfectly smooth, chunk-free texture we're after.03
-
Blend to Perfection. Start your blender on a low speed and gradually increase it to high. Let it run for a good 45-60 seconds. You might need to stop and scrape down the sides once with a spatula, especially if you're not using a high-speed blender. You're looking for a completely homogenous, thick, and creamy mixture. It should pour slowly, like a thick milkshake. If it's too thick, add another splash of milk and blend for another 10 seconds.04
-
Taste and Adjust. This is the most important chef's step! Give your smoothie a quick taste. Does it need a bit more sweetness? A tiny pinch of salt can actually make the peanut butter flavor pop even more. Adjust to your liking, give it one last quick blend, and then...05
-
Pour and Enjoy Immediately. Pour your beautiful, creamy creation into a tall glass. I love using a reusable straw, but a spoon is just as acceptable—it's that thick! Smoothies are best enjoyed right away, as they can separate and become watery if left to sit for too long.06