
Why You’ll Love This Seasoned Roasted Pumpkin Seeds
- Incredibly Simple & Satisfying. There’s a real joy in turning something you’d normally compost into a delicious, crave-worthy snack. The process is straightforward and the result is deeply rewarding.
- Endlessly Customizable. Your spice cabinet is the limit here. Start with this classic savory blend, then get creative with sweet, spicy, or smoky flavors on your next batch. It’s your personal snack laboratory.
- The Perfect Healthy Crunch. These seeds deliver a seriously satisfying crunch that’s hard to beat. They’re packed with nutrients and fiber, making them a far superior alternative to greasy chips or pretzels.
- A Snack for Any Occasion. Keep a jar on your desk for a midday pick-me-up, serve them at your next party, or pack them for a hike. Their versatility is honestly unmatched.
Ingredients & Tools
- 2 cups fresh pumpkin seeds, cleaned and patted dry
- 1 ½ tablespoons olive oil or melted coconut oil
- 1 teaspoon fine sea salt
- ½ teaspoon garlic powder
- ½ teaspoon smoked paprika
- ¼ teaspoon black pepper, freshly ground
- Optional pinch of cayenne pepper for heat
Tools: A large bowl, a baking sheet, parchment paper (highly recommended!), and a spatula for stirring.
The ingredients are simple, but each one plays a crucial role. Using a good-quality oil helps the seasoning stick and promotes even browning. And don’t skip the step of patting the seeds dry—this is the secret to achieving that perfect crispiness instead of steaming them.
Serves: 4 (as a snack) | Prep Time: 10 minutes | Cook Time: 20-25 minutes | Total Time: 35 minutes
Before You Start: Tips & Ingredient Notes
- Don’t Skip the Drying Step. This is, hands down, the most important tip. Wet seeds will steam in the oven, resulting in a chewy texture. Taking a few extra minutes to pat them thoroughly dry with a clean kitchen towel is non-negotiable for crunch.
- Get Creative with Seasonings. The recipe below is a classic, but feel free to experiment! For a sweet version, try cinnamon and a pinch of sugar. For a spicy kick, add chili powder or cayenne. Everything bagel seasoning is also a fantastic shortcut.
- Size Matters (A Little). Pumpkin seeds can vary in size depending on the pumpkin. Larger seeds might need a couple more minutes in the oven, while smaller ones can cook faster. Keep an eye on them, especially in the last five minutes.
- Why Parchment Paper? It’s not just for easy cleanup—it prevents the seeds from sticking and ensures they roast evenly instead of potentially burning on direct hot metal. A silicone baking mat works wonderfully too.
How to Make Seasoned Roasted Pumpkin Seeds
Step 1: The Great Seed Cleanse. First, you’ll need to separate the seeds from the stringy pumpkin guts. The easiest way is to place the seeds and pulp in a large bowl of water. The seeds will float to the top, making them much easier to scoop out. Give them a good swish around in the water to remove any stubborn orange bits.
Step 2: The Pat-Dry Ritual. This is where the magic begins. Spread the cleaned seeds out on a layer of paper towels or a clean kitchen towel. Pat them dry thoroughly. Honestly, be a bit obsessive here—the drier they are, the crispier they’ll become. You can even leave them out on the counter for an hour or two to air-dry further.
Step 3: The Flavor Coating. Preheat your oven to 325°F (165°C). In a medium bowl, toss the completely dry seeds with the olive oil. You want every seed to have a light, glossy coating. Then, sprinkle the salt, garlic powder, smoked paprika, and black pepper over the top. Toss, toss, toss again until the seasoning is evenly distributed. Taste a seed (raw is fine!) and adjust the salt if needed.
Step 4: The Even Spread. Line your baking sheet with parchment paper. Pour the seasoned seeds onto the sheet and spread them out into a single, even layer. This is key—if the seeds are piled on top of each other, they’ll steam instead of roast. You want each little seed to have its own personal space to get crispy.
Step 5: The Slow Roast. Place the baking sheet in the preheated oven. Now, the trick is to roast them low and slow. Bake for 20-25 minutes, but here’s the important part: take the sheet out every 10 minutes and give the seeds a good stir with a spatula. This prevents the edges from burning and ensures even cooking. You’ll know they’re done when they are golden brown and you hear a faint popping sound.
Step 6: The Patient Cool-Down. Once they’re beautifully golden, remove the baking sheet from the oven. Now, you must resist the urge to eat them immediately! Let the seeds cool completely right on the baking sheet. They will continue to crisp up as they cool. This final step is what delivers that signature crunch.
Serving Suggestions
Complementary Dishes
- A Creamy Soup Topper — Sprinkle these over a bowl of butternut squash or tomato soup. The crunchy, salty seeds provide a wonderful textural contrast to the smooth, velvety soup.
- Salad Superstar — Instead of croutons, use these seeds to add a protein-packed crunch to your favorite autumn salad, especially one with bitter greens like arugula and a sharp vinaigrette.
- Yogurt or Oatmeal Booster — Add a savory twist to your breakfast by stirring a tablespoon of seeds into Greek yogurt or sprinkling them over a bowl of savory oatmeal with a soft-boiled egg.
Drinks
- A Crisp Lager or Pale Ale — The nutty, toasty flavor of the seeds pairs beautifully with the clean, crisp finish of a cold beer. It’s the ultimate snack for a casual gathering.
- Sparkling Apple Cider — For a non-alcoholic option, the sweet effervescence of cider is a delightful contrast to the salty, savory seeds, making it a perfect family-friendly pairing.
- A Rich Amber Ale — The caramel notes in an amber ale mirror the toasted flavor of the seeds, creating a really harmonious and cozy combination.
Something Sweet
- Dark Chocolate Bark — Chop the seeds roughly and press them into melted dark chocolate before it sets. The saltiness cuts through the sweetness of the chocolate for a truly addictive treat.
- Spiced Pumpkin Cookies — Serve these seeds alongside soft, cake-like pumpkin cookies. The contrasting textures make for a delightful dessert plate.
- Simple Apple Slices — Sometimes the simplest pairings are the best. The sweet, juicy crunch of a fresh apple slice followed by a handful of salty seeds is a perfect snack-time combo.
Top Mistakes to Avoid
- Mistake: Not Drying the Seeds Enough. I’ve messed this up before too, and it leads to chewy, unsatisfying seeds. Moisture is the enemy of crunch, so take your time with the towel.
- Mistake: Roasting at Too High a Temperature. It’s tempting to crank the heat to speed things up, but this will burn the delicate spices and leave the insides of the seeds undercooked. Low and slow is the only way.
- Mistake: Crowding the Baking Sheet. If the seeds are piled up, they’ll steam each other. Give them space! If you have a lot of seeds, use two baking sheets.
- Mistake: Skipping the Stirring. The seeds on the edges of the pan cook faster. Stirring them every 10 minutes is crucial for an even, golden roast without any bitter, burnt bits.
Expert Tips
- Tip: Add a Splash of Soy Sauce. For a deeper, umami-rich flavor, replace ½ tablespoon of the olive oil with an equal amount of soy sauce or tamari when tossing. It adds an incredible savory depth.
- Tip: Test for Doneness by Sound. Besides looking golden, listen for a faint popping or crackling sound near the end of the roasting time. That’s a sure sign the moisture inside is gone and they’re perfectly crisp.
- Tip: Season After Roasting for Intense Flavor. For an extra punch, toss the seeds with the oil and roast them plain. While they’re still hot from the oven, immediately toss them with your seasonings. The heat helps the spices adhere brilliantly.
- Tip: Make a Big Batch and Freeze. Pumpkin seeds freeze beautifully! Let them cool completely, then store them in an airtight freezer bag for up to 3 months. They’ll stay crisp, and you’ll have a healthy snack on demand.
FAQs
Can I use seeds from other squash, like butternut or acorn?
Absolutely! The method is exactly the same. Seeds from any winter squash will work wonderfully. Butternut squash seeds tend to be a bit flatter, while acorn squash seeds are smaller. Just adjust the roasting time slightly if needed—smaller seeds may cook a minute or two faster.
Why are my roasted pumpkin seeds chewy?
This almost always comes down to moisture. Either the seeds weren’t dried thoroughly enough before roasting, the oven temperature was too low, or they were crowded on the pan. If you find they’re chewy after cooling, you can pop them back into a 325°F oven for another 5-10 minutes to drive off the remaining moisture.
Do I need to boil the seeds before roasting?
It’s a common tip, but honestly, it’s not necessary for this dry-roasting method. Boiling can make the shells a bit easier to eat if you’re using large, tough seeds, but for most pumpkins, simply drying and roasting yields a perfectly crisp result without the extra step.
How long do homemade roasted pumpkin seeds last?
Stored in an airtight container at room temperature, they’ll stay deliciously crisp for about 2-3 weeks. The oil can eventually go rancid, so if you don’t think you’ll eat them that quickly, the freezer is your best friend for long-term storage.
Can you eat the shell, or should you shell them first?
You can absolutely eat the whole seed! The shell becomes tender and crispy when roasted. It’s where a lot of the fiber is. However, if you prefer just the inner pepita, you can shell them after roasting—it’s a bit tedious, but the tender green pepitas inside are a lovely, more delicate snack.
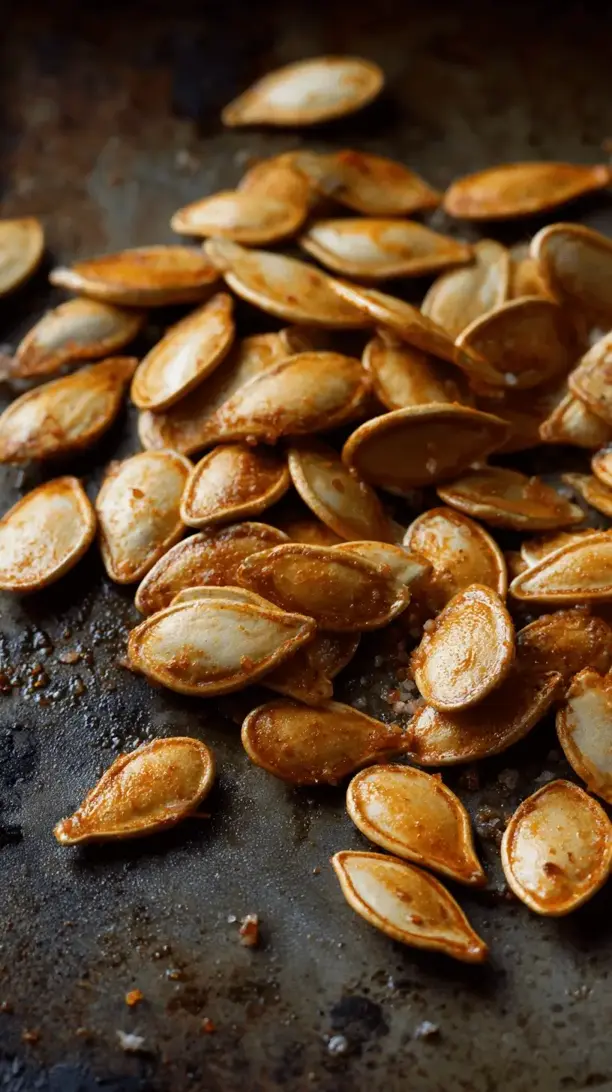
Seasoned Roasted Pumpkin Seeds
Don't toss those pumpkin seeds! Turn them into a crunchy, savory snack with this easy recipe. Perfectly seasoned & roasted for a healthy, addictive treat. Zero-waste deliciousness!
Ingredients
Ingredients
-
2 cups fresh pumpkin seeds (cleaned and patted dry)
-
1 ½ tablespoons olive oil or melted coconut oil
-
1 teaspoon fine sea salt
-
½ teaspoon garlic powder
-
½ teaspoon smoked paprika
-
¼ teaspoon black pepper (freshly ground)
-
pinch cayenne pepper (optional, for heat)
Instructions
-
The Great Seed Cleanse. First, you'll need to separate the seeds from the stringy pumpkin guts. The easiest way is to place the seeds and pulp in a large bowl of water. The seeds will float to the top, making them much easier to scoop out. Give them a good swish around in the water to remove any stubborn orange bits.01
-
The Pat-Dry Ritual. This is where the magic begins. Spread the cleaned seeds out on a layer of paper towels or a clean kitchen towel. Pat them dry thoroughly. Honestly, be a bit obsessive here—the drier they are, the crispier they'll become. You can even leave them out on the counter for an hour or two to air-dry further.02
-
The Flavor Coating. Preheat your oven to 325°F (165°C). In a medium bowl, toss the completely dry seeds with the olive oil. You want every seed to have a light, glossy coating. Then, sprinkle the salt, garlic powder, smoked paprika, and black pepper over the top. Toss, toss, toss again until the seasoning is evenly distributed. Taste a seed (raw is fine!) and adjust the salt if needed.03
-
The Even Spread. Line your baking sheet with parchment paper. Pour the seasoned seeds onto the sheet and spread them out into a single, even layer. This is key—if the seeds are piled on top of each other, they'll steam instead of roast. You want each little seed to have its own personal space to get crispy.04
-
The Slow Roast. Place the baking sheet in the preheated oven. Now, the trick is to roast them low and slow. Bake for 20-25 minutes, but here's the important part: take the sheet out every 10 minutes and give the seeds a good stir with a spatula. This prevents the edges from burning and ensures even cooking. You'll know they're done when they are golden brown and you hear a faint popping sound.05
-
The Patient Cool-Down. Once they're beautifully golden, remove the baking sheet from the oven. Now, you must resist the urge to eat them immediately! Let the seeds cool completely right on the baking sheet. They will continue to crisp up as they cool. This final step is what delivers that signature crunch.06


