
Why You’ll Love This Sea Salt Dark Chocolate Bark
- It’s unbelievably simple. Seriously, if you can melt chocolate, you can make this bark. There’s no tempering required, no fancy equipment, and the whole process is wonderfully forgiving.
- The sweet-salty contrast is pure magic. That flaky sea salt on top isn’t just for looks. It creates this incredible flavor explosion that makes cheap chocolate taste expensive and good chocolate taste absolutely divine.
- It’s your perfect blank canvas. Once you master the base, you can go wild. Think toasted almonds and dried cherries, pistachios and apricots, or even a spicy kick with a pinch of cayenne pepper. It’s a fantastic way to use up little bits of nuts and seeds lurking in your pantry.
- It makes a gorgeous, thoughtful gift. Packaged in a cute cellophane bag or a simple mason jar, this homemade bark feels incredibly personal and special. It’s a treat that says you care, without requiring days of baking effort.
Ingredients & Tools
- 400 g high-quality dark chocolate (around 70% cocoa solids), chopped
- 1 ½ tsp flaky sea salt (like Maldon), plus more for finishing
- 100 g mixed toppings (e.g., roasted almonds, pistachios, dried cranberries, pumpkin seeds)
- Optional: a tiny pinch of cayenne pepper or a drizzle of high-quality olive oil for an extra layer of flavor.
Tools: A medium heatproof bowl, a saucepan for a double boiler (or a microwave-safe bowl), a baking sheet, parchment paper or a silicone baking mat, and a spatula.
The quality of your chocolate is the star of the show here, so it’s worth using a bar you genuinely enjoy eating on its own. As for the salt, flaky sea salt is non-negotiable for that perfect crunchy texture—table salt will just dissolve and make it taste unpleasantly salty. The toppings are where your personality can shine through!
Serves: 8-10 (as a generous snack) | Prep Time: 10 minutes | Cook Time: 5 minutes (melting) | Total Time: 1 hour 15 minutes (includes setting)
Before You Start: Tips & Ingredient Notes
- Chocolate Choice is Key. Go for a couverture or baking chocolate bar, not chocolate chips. Chips contain stabilizers that prevent them from melting smoothly, which can result in a bark that’s thick and difficult to spread. A good 70% dark chocolate offers the ideal balance of bitterness and sweetness.
- Why Chop the Chocolate? Evenly chopped pieces melt at the same rate, preventing some bits from burning while others are still solid. This is the secret to a perfectly smooth, glossy melt. Take the extra two minutes to chop it finely—it makes all the difference.
- Don’t Skip Toasting Your Nuts. If you’re using raw nuts like almonds or pecans, toasting them first in a dry pan for a few minutes until fragrant is a game-changer. It deepens their flavor and adds a crucial crunch that stands up to the chocolate.
- Patience is a Virtue. Rushing the melting process or trying to speed up the setting in the freezer can cause the chocolate to “seize” (become grainy) or develop a dull, whitish coating called bloom. Low, gentle heat and letting it set at room temperature are the tricks to a professional finish.
How to Make Sea Salt Dark Chocolate Bark
Step 1: Prepare Your Pan. First things first, line your baking sheet with a piece of parchment paper or a silicone baking mat. Smooth it out so there are no major wrinkles, as these will transfer to the back of your bark. You don’t need to grease it—the chocolate will release easily once set. Having this ready before you melt the chocolate is crucial because melted chocolate waits for no one!
Step 2: Melt the Chocolate Gently. This is the most important step. Create a double boiler by bringing a couple of inches of water to a simmer in a saucepan, then placing your heatproof bowl on top, ensuring the bottom of the bowl doesn’t touch the water. Add your chopped chocolate to the dry bowl. Stir continuously and gently with a spatula as it melts. You’ll notice it goes from solid, to shardy, to a beautiful, glossy liquid. The moment it’s almost fully melted, take the bowl off the heat—the residual heat will melt the last few lumps. This prevents overheating.
Step 3: Season and Spread. Stir about a teaspoon of the flaky sea salt right into the melted chocolate. This layers the salt flavor throughout, not just on top. Now, pour the chocolate onto your prepared baking sheet. Use your spatula to spread it into an even layer, about ¼ to ½ inch thick. It doesn’t have to be a perfect rectangle—rustic edges are part of its charm! Work relatively quickly here before the chocolate starts to set.
Step 4: Add Your Toppings. Immediately after spreading, sprinkle your chosen toppings evenly over the surface. Press them in gently so they adhere. Now, for the final flourish, take the remaining half teaspoon of flaky sea salt and sprinkle it over everything. This gives you those delightful bursts of salty crunch with every bite.
Step 5: Let it Set Completely. This is the test of your patience! Carefully transfer the baking sheet to a cool, dry spot away from any heat. Let it sit undisturbed for at least an hour, or until the chocolate is completely firm to the touch. You can speed this up by placing it in the refrigerator for 20-25 minutes, but room temperature setting gives the best texture and shine.
Step 6: Break and Enjoy. Once the bark is fully set, lift the parchment paper off the baking sheet. You can break it into large, dramatic shards with your hands for a rustic look, or use a knife to cut it into neater pieces. It’s ready to eat, gift, or store!
Serving Suggestions
Complementary Dishes
- A Cheese Board — A shard of this bark nestled among sharp cheddar, creamy brie, and some fresh fruit like pears or grapes creates an incredible sweet and savory experience that’s perfect for entertaining.
- Strong Black Coffee or Espresso — The bitterness of a good brew is a classic and perfect partner for dark chocolate. A small piece of bark alongside your afternoon cup is a little moment of pure bliss.
Drinks
- A Robust Red Wine — Think Cabernet Sauvignon or Zinfandel. The tannins in the wine interact beautifully with the cocoa, creating a rich and sophisticated pairing for a cozy evening.
- A Creamy Stout or Porter — The roasted, coffee-like notes in dark beer are a match made in heaven for the deep flavors of the chocolate, making for a decadent after-dinner treat.
Something Sweet
- Orange Slices — The bright, citrusy zing of a fresh orange segment provides a refreshing contrast that cleanses the palate and highlights the fruitiness of the dark chocolate.
- Vanilla Bean Ice Cream — Crumble a piece of this bark over a scoop of high-quality vanilla ice cream. The combination of cold, creamy, and crunchy is simply irresistible.
Top Mistakes to Avoid
- Mistake: Getting water in the melting chocolate. Even a single drop of water or steam can cause the chocolate to “seize,” turning it from smooth and liquid to a thick, grainy paste. Always ensure your bowl and tools are completely dry. I’ve learned this the hard way!
- Mistake: Using the microwave on high power. Microwaving in short bursts is possible, but high heat scorches chocolate incredibly easily. If you use a microwave, do it at 50% power in 20-second intervals, stirring well each time.
- Mistake: Adding cold toppings. If your nuts or other toppings are cold from the pantry or fridge, they can cause the chocolate to set unevenly and might not stick as well. Let them come to room temperature first.
- Mistake: Skipping the salt mix-in. Just sprinkling salt on top is good, but stirring some into the melted chocolate first is what creates a truly complex flavor profile. It’s the difference between a good bark and a great one.
Expert Tips
- Tip: Add a fat for extra shine. For an even glossier, more professional-looking bark, stir in a tiny teaspoon of a neutral oil (like coconut or avocado) or even a dab of refined coconut oil into the melted chocolate. This can also make it a bit easier to spread.
- Tip: Create layers for a showstopper. Melt dark and white chocolate separately. Spread a layer of dark chocolate, let it set for just 5 minutes until tacky, then drizzle the white chocolate over it and use a toothpick to swirl them together before adding toppings.
- Tip: Infuse your salt. For a next-level touch, you can lightly crush your flaky sea salt with a citrus zest (orange or lemon work beautifully) or a fresh herb like rosemary before sprinkling. It adds a subtle, aromatic complexity.
- Tip: Use a offset spatula. If you have one, an offset spatula is the perfect tool for spreading the chocolate into a beautifully even layer without getting your fingers messy.
FAQs
How should I store the chocolate bark, and how long does it last?
Store it in an airtight container at a cool room temperature (away from direct sunlight or heat) for up to two weeks. You can refrigerate it, but this can sometimes cause condensation and sugar bloom (those white spots) when it comes back to room temp. The bloom is harmless and doesn’t affect taste, but it does affect the appearance. For the best texture and shine, room temperature storage is ideal.
Can I use milk or white chocolate instead?
Absolutely! The method is exactly the same. Just keep in mind that milk and white chocolate are sweeter and more sensitive to heat, so be extra gentle when melting them. The salt contrast works wonderfully with them too, though you might want to use a slightly lighter hand with the amount you sprinkle on top.
My bark has white streaks on it. Is it safe to eat?
Yes, completely safe! Those white streaks are called sugar bloom or fat bloom. It happens when the chocolate is exposed to temperature changes or moisture. It’s purely a cosmetic issue and the flavor is unaffected. To prevent it, just focus on gentle melting and steady, cool setting.
Can I make this recipe vegan?
Easily! Just ensure the dark chocolate you choose is certified vegan (some brands use milk fat). Most high-quality dark chocolates above 70% are naturally vegan, but always check the label. All the other ingredients are typically plant-based.
What are some of your favorite topping combinations?
Oh, I love to experiment! A classic for me is roasted almonds and dried cherries. For a more adventurous take, try toasted pumpkin seeds, chopped crystallized ginger, and a hint of black pepper. For a truly decadent version, crushed pretzels and mini marshmallows are a crowd-pleaser. Honestly, just raid your cupboard and see what inspires you!
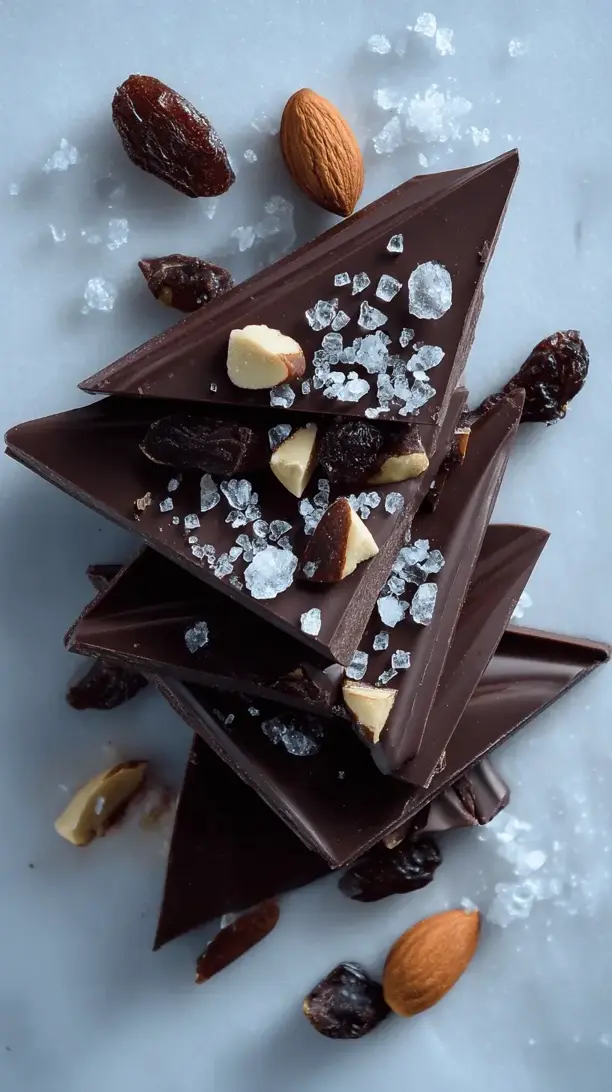
Sea Salt Dark Chocolate Bark
Create gourmet Sea Salt Dark Chocolate Bark at home! My easy recipe uses simple ingredients for a sweet & salty treat. Perfect for gifting or a quick dessert. No fancy skills needed!
Ingredients
Ingredients
-
400 g high-quality dark chocolate (around 70% cocoa solids) (chopped)
-
1.5 tsp flaky sea salt (like Maldon) (plus more for finishing)
-
100 g mixed toppings (e.g., roasted almonds, pistachios, dried cranberries, pumpkin seeds)
-
cayenne pepper or high-quality olive oil (Optional: a tiny pinch of cayenne pepper or a drizzle of high-quality olive oil for an extra layer of flavor)
Instructions
-
Prepare Your Pan. First things first, line your baking sheet with a piece of parchment paper or a silicone baking mat. Smooth it out so there are no major wrinkles, as these will transfer to the back of your bark. You don't need to grease it—the chocolate will release easily once set. Having this ready before you melt the chocolate is crucial because melted chocolate waits for no one!01
-
Melt the Chocolate Gently. This is the most important step. Create a double boiler by bringing a couple of inches of water to a simmer in a saucepan, then placing your heatproof bowl on top, ensuring the bottom of the bowl doesn't touch the water. Add your chopped chocolate to the dry bowl. Stir continuously and gently with a spatula as it melts. You'll notice it goes from solid, to shardy, to a beautiful, glossy liquid. The moment it's almost fully melted, take the bowl off the heat—the residual heat will melt the last few lumps. This prevents overheating.02
-
Season and Spread. Stir about a teaspoon of the flaky sea salt right into the melted chocolate. This layers the salt flavor throughout, not just on top. Now, pour the chocolate onto your prepared baking sheet. Use your spatula to spread it into an even layer, about ¼ to ½ inch thick. It doesn't have to be a perfect rectangle—rustic edges are part of its charm! Work relatively quickly here before the chocolate starts to set.03
-
Add Your Toppings. Immediately after spreading, sprinkle your chosen toppings evenly over the surface. Press them in gently so they adhere. Now, for the final flourish, take the remaining half teaspoon of flaky sea salt and sprinkle it over everything. This gives you those delightful bursts of salty crunch with every bite.04
-
Let it Set Completely. This is the test of your patience! Carefully transfer the baking sheet to a cool, dry spot away from any heat. Let it sit undisturbed for at least an hour, or until the chocolate is completely firm to the touch. You can speed this up by placing it in the refrigerator for 20-25 minutes, but room temperature setting gives the best texture and shine.05
-
Break and Enjoy. Once the bark is fully set, lift the parchment paper off the baking sheet. You can break it into large, dramatic shards with your hands for a rustic look, or use a knife to cut it into neater pieces. It's ready to eat, gift, or store!06


