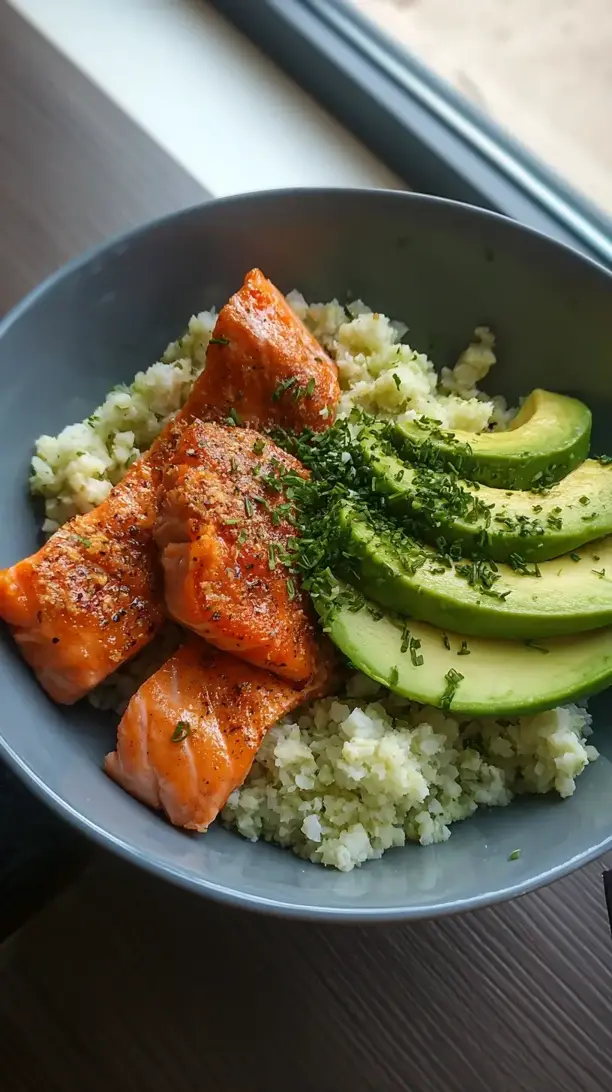
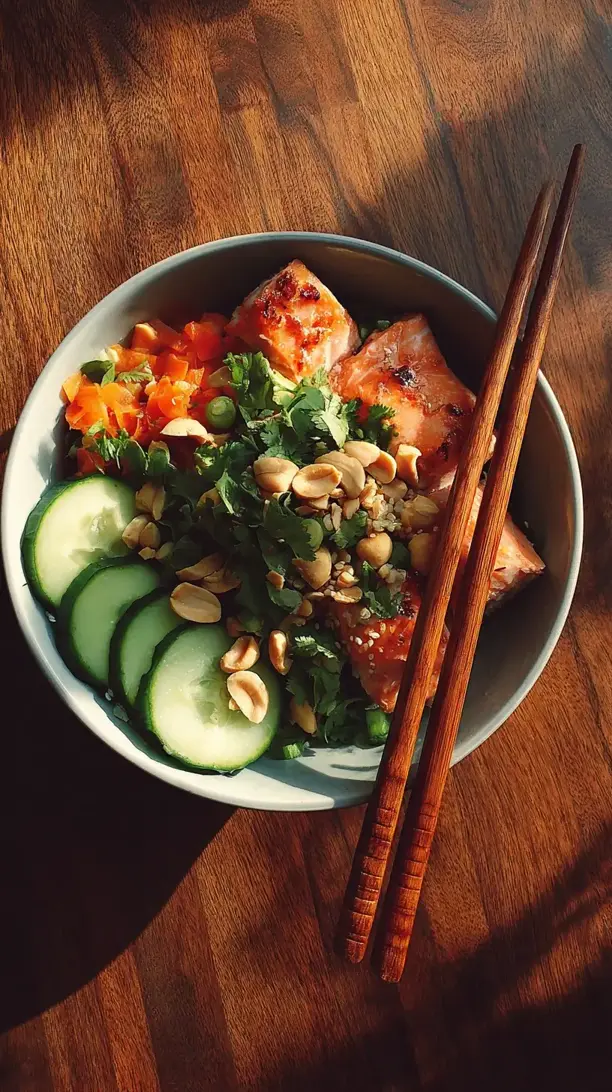
This Salmon Ramen Bowl offers a lighter, elegant take on classic ramen. Flaky salmon, springy noodles, and a rich umami broth come together for a nourishing weeknight meal. It’s surprisingly simple to make and endlessly customizable.
Why You’ll Love This Salmon Ramen Bowl
- Complete & Balanced: Lean protein, carbs, and veggies in one beautiful bowl.
- Quick Flavorful Broth: Miso, soy, and ginger create depth without long simmering.
- Endlessly Customizable: Swap veggies or adjust heat to your preference.
- Dreamy Textures: Silky salmon, chewy noodles, creamy egg, and crisp toppings.
Ingredients & Tools
- 2 salmon fillets (about 150g each), skin on or off
- 4 tbsp white or yellow miso paste
- 3 tbsp soy sauce (or tamari for gluten-free)
- 1.5 L good-quality chicken or vegetable broth
- 4 cloves garlic, minced
- 2-inch piece of fresh ginger, grated
- 2 tbsp mirin
- 1 tbsp sesame oil, plus more for drizzling
- 200 g dried ramen noodles (or 2 servings of fresh noodles)
- 100 g shiitake mushrooms, sliced
- 2 large eggs
- 2 spring onions, thinly sliced
- 1 carrot, julienned or spiralized
- Handful of baby spinach or kale
- To serve: nori sheets, toasted sesame seeds, chili oil
Tools: A large pot for broth, a medium saucepan for eggs, a skillet or frying pan for salmon and mushrooms, and a fine-mesh strainer.
Notes: Don’t stress if you’re missing an ingredient—this dish is flexible. Miso is essential for flavor. Choose bright, fresh-smelling salmon fillets.
Nutrition (per serving)
| Calories: | 620 kcal |
| Protein: | 38 g |
| Fat: | 22 g |
| Carbs: | 65 g |
| Fiber: | 6 g |
Serves: 2 | Prep Time: 20 minutes | Cook Time: 25 minutes | Total Time: 45 minutes
Before You Start: Tips & Ingredient Notes
- Get your misa right. White miso (shiro miso) is milder and slightly sweeter, making it a great all-purpose choice. Yellow miso is a bit stronger, and red miso is the most robust. For this recipe, white or yellow works beautifully.
- Don’t boil the miso! This is a classic mistake. Miso is a fermented product, and boiling it will kill its beneficial enzymes and dull its complex flavor. Always stir it in at the very end, off the heat.
- Prep your toppings first. Ramen comes together quickly at the end, so having all your components—sliced veggies, cooked salmon, soft-boiled eggs—ready to go is the key to a smooth, stress-free assembly.
- What if I can’t find fresh ramen noodles? No worries! Dried ramen noodles (discard the flavor packets!) work perfectly well. You could also use udon or even soba noodles for a different, but equally delicious, twist.
How to Make Salmon Ramen Bowl
Step 1: The Perfect Soft-Boiled Egg. Bring a small saucepan of water to a rolling boil. Gently lower the eggs into the water using a spoon and set a timer for 6.5 minutes. While they cook, prepare an ice bath—a bowl filled with cold water and ice cubes. As soon as the timer goes off, transfer the eggs immediately to the ice bath to stop the cooking process. Let them cool for at least 5 minutes before carefully peeling. You’re aiming for a firm white and a gorgeously jammy, runny yolk.
Step 2: Cook the Salmon. Pat the salmon fillets completely dry with a paper towel and season both sides generously with a pinch of salt and pepper. Heat a tablespoon of neutral oil (like avocado or vegetable) in a non-stick skillet over medium-high heat. Place the salmon skin-side up (if it has skin) and cook for 3-4 minutes, until a golden-brown crust forms. Flip carefully and cook for another 2-3 minutes, or until the salmon is cooked to your liking and flakes easily with a fork. Remove from the pan and set aside on a plate.
Step 3: Build the Broth Base. In your large pot, heat the sesame oil over medium heat. Add the minced garlic and grated ginger and sauté for just 60-90 seconds until incredibly fragrant—be careful not to burn it! Pour in the chicken or vegetable broth and the mirin. Bring this to a gentle simmer, then let it bubble away for about 10 minutes to allow the flavors to meld beautifully.
Step 4: Sauté the Mushrooms. While the broth simmers, use the same skillet you cooked the salmon in (hello, extra flavor!) to sauté the sliced shiitake mushrooms. They might have soaked up the oil, so add a tiny bit more if the pan is dry. Cook over medium heat for 5-7 minutes, until they’ve softened and taken on a lovely golden-brown color. Season with a tiny splash of soy sauce.
Step 5: Cook the Noodles. Bring a separate pot of water to a boil and cook your ramen noodles according to the package directions. Fresh noodles often take just 2-3 minutes, while dried ones might need 4-5. The key is to cook them until they’re just al dente, as they’ll continue to soften a little in the hot broth. Once cooked, drain immediately and rinse briefly under cold water to stop the cooking and remove excess starch.
Step 6: Finish the Broth. This is the most important step! Turn the heat under your broth pot off. Take a ladleful of the hot broth and add it to your miso paste in a small bowl. Whisk it vigorously until the miso is completely dissolved and smooth. Now, pour this miso slurry back into the big pot of broth and stir to combine. Add the soy sauce. Taste and adjust seasoning—you might want a little more soy for saltiness. The broth should be deeply savory and aromatic.
Step 7: Assemble Your Masterpiece. Divide the rinsed noodles between two large, deep bowls. Ladle the hot miso broth over the noodles. Now, artfully arrange your toppings: flake the cooked salmon into large pieces, halve your soft-boiled eggs, and add the sautéed mushrooms, a handful of fresh spinach, the julienned carrot, and sliced spring onions. Finish with a drizzle of chili oil, a sprinkle of sesame seeds, and a sheet of nori tucked into the side.
Storage & Freshness Guide
- Fridge: Store components separately for up to 2 days; assemble just before serving.
- Freezer: Broth (without miso) freezes well for up to 3 months.
- Reviving: Reheat broth gently; add miso off heat. Cook noodles fresh.
Serving Suggestions
Complementary Dishes
- Simple Cucumber Sunomono — A light, vinegary cucumber salad provides a crisp, refreshing counterpoint to the rich, savory broth and cuts through the richness beautifully.
- Quick-Pickled Radishes — Their bright pink color and sharp, tangy bite add a fantastic pop of acidity and crunch that elevates the entire bowl.
- Steamed Edamame with Sea Salt — An easy, interactive starter that everyone loves. The simple, salty pods are a classic pairing and keep everyone happy while you put the finishing touches on the ramen.
Drinks
- Iced Green Tea — Its clean, slightly bitter notes are the perfect palate cleanser between slurps of the rich, umami-packed broth, making each mouthful taste fresh

Salmon Ramen Bowl
Make this delicious Salmon Ramen Bowl with flaky salmon, a rich miso broth, and chewy noodles. A complete, customizable meal ready in 45 minutes. Get the recipe!
Ingredients
For the Broth and Aromatics:
-
4 tbsp white or yellow miso paste
-
3 tbsp soy sauce (or tamari for gluten-free)
-
1.5 L good-quality chicken or vegetable broth
-
4 cloves garlic (minced)
-
1 piece fresh ginger (2-inch, grated)
-
2 tbsp mirin
-
1 tbsp sesame oil (plus more for drizzling)
For the Salmon and Vegetables:
-
2 fillets salmon (about 150g each, skin on or off)
-
100 g shiitake mushrooms (sliced)
-
2 large eggs
-
2 spring onions (thinly sliced)
-
1 carrot (julienned or spiralized)
-
1 handful baby spinach or kale
For the Noodles and Toppings:
-
200 g dried ramen noodles (or 2 servings of fresh noodles)
-
nori sheets (toasted sesame seeds, chili oil, to serve)
Instructions
-
Bring a small saucepan of water to a rolling boil. Gently lower the eggs into the water using a spoon and set a timer for 6.5 minutes. While they cook, prepare an ice bath—a bowl filled with cold water and ice cubes. As soon as the timer goes off, transfer the eggs immediately to the ice bath to stop the cooking process. Let them cool for at least 5 minutes before carefully peeling. You’re aiming for a firm white and a gorgeously jammy, runny yolk.01
-
Pat the salmon fillets completely dry with a paper towel and season both sides generously with a pinch of salt and pepper. Heat a tablespoon of neutral oil (like avocado or vegetable) in a non-stick skillet over medium-high heat. Place the salmon skin-side up (if it has skin) and cook for 3-4 minutes, until a golden-brown crust forms. Flip carefully and cook for another 2-3 minutes, or until the salmon is cooked to your liking and flakes easily with a fork. Remove from the pan and set aside on a plate.02
-
In your large pot, heat the sesame oil over medium heat. Add the minced garlic and grated ginger and sauté for just 60-90 seconds until incredibly fragrant—be careful not to burn it! Pour in the chicken or vegetable broth and the mirin. Bring this to a gentle simmer, then let it bubble away for about 10 minutes to allow the flavors to meld beautifully.03
-
While the broth simmers, use the same skillet you cooked the salmon in to sauté the sliced shiitake mushrooms. They might have soaked up the oil, so add a tiny bit more if the pan is dry. Cook over medium heat for 5-7 minutes, until they’ve softened and taken on a lovely golden-brown color. Season with a tiny splash of soy sauce.04
-
Bring a separate pot of water to a boil and cook your ramen noodles according to the package directions. Fresh noodles often take just 2-3 minutes, while dried ones might need 4-5. The key is to cook them until they’re just al dente, as they’ll continue to soften a little in the hot broth. Once cooked, drain immediately and rinse briefly under cold water to stop the cooking and remove excess starch.05
-
Turn the heat under your broth pot off. Take a ladleful of the hot broth and add it to your miso paste in a small bowl. Whisk it vigorously until the miso is completely dissolved and smooth. Now, pour this miso slurry back into the big pot of broth and stir to combine. Add the soy sauce. Taste and adjust seasoning—you might want a little more soy for saltiness. The broth should be deeply savory and aromatic.06
-
Divide the rinsed noodles between two large, deep bowls. Ladle the hot miso broth over the noodles. Now, artfully arrange your toppings: flake the cooked salmon into large pieces, halve your soft-boiled eggs, and add the sautéed mushrooms, a handful of fresh spinach, the julienned carrot, and sliced spring onions. Finish with a drizzle of chili oil, a sprinkle of sesame seeds, and a sheet of nori tucked into the side.07