Why You’ll Love This Roasted Maple Cinnamon Chickpeas
- Perfectly sweet and crunchy. The magic happens in the oven, where the chickpeas transform from soft and beany into little crispy nuggets with a caramelized maple coating that’s just sweet enough.
- Incredibly versatile. Honestly, you can enjoy these in so many ways — as a standalone snack, a yogurt topping, or even crumbled over ice cream for a surprising texture twist.
- Wholesome and satisfying. They provide a good hit of plant-based protein and fiber, which means they actually keep you full and energized, unlike a sugar crash from conventional sweets.
- Seriously simple to make. You only need one bowl and one baking sheet. The process is almost entirely hands-off, leaving you free to do other things while your kitchen fills with that wonderful cinnamon-maple scent.
Ingredients & Tools
- 2 cans (15 oz / 425 g each) chickpeas, rinsed, drained, and patted very dry
- 2 tablespoons olive oil or melted coconut oil
- 3 tablespoons pure maple syrup
- 1 teaspoon vanilla extract
- 1 ½ teaspoons ground cinnamon
- ¼ teaspoon ground nutmeg
- ¼ teaspoon sea salt
- A tiny pinch of black pepper (trust me, it enhances the sweetness!)
Tools: A large rimmed baking sheet, parchment paper or a silicone baking mat, a large mixing bowl, and a clean kitchen towel or paper towels.
The quality of your maple syrup really matters here — go for the real, pure stuff for the best flavor. And don’t skip the step of drying the chickpeas thoroughly; it’s the secret to getting them truly crisp instead of steaming in the oven.
Nutrition (per serving)
- Calories: 180 kcal
- Protein: 6 g
- Fat: 5 g
- Carbohydrates: 28 g
- Fiber: 6 g
Serves: 4 | Prep Time: 10 minutes | Cook Time: 40-50 minutes | Total Time: about 1 hour
Before You Start: Tips & Ingredient Notes
- Dry those chickpeas like your crunch depends on it. Because it honestly does. After rinsing, spread them on a clean kitchen towel and gently rub them dry. Removing the loose skins is a bonus for extra crispiness, but don’t stress about getting every single one.
- Why the pinch of black pepper? I know it sounds odd in a sweet recipe, but a tiny amount of black pepper adds a subtle, warm complexity that makes the cinnamon and maple flavors pop without being spicy. You won’t taste “pepper,” just a deeper, richer sweetness.
- The oil choice is yours. Olive oil gives a neutral base, while melted coconut oil will add a very subtle, lovely tropical note that pairs beautifully with the cinnamon. Both work wonderfully, so use what you have or prefer.
- Don’t crowd the pan. Make sure your chickpeas are in a single, even layer with a little space between them. If they’re piled on top of each other, they’ll steam and become chewy instead of roasting to a perfect crunch.
How to Make Roasted Maple Cinnamon Chickpeas
Step 1: First, get your oven nice and hot. Preheat it to 400°F (200°C). Line your large rimmed baking sheet with parchment paper or a silicone mat—this is crucial to prevent the maple syrup from creating a sticky, nightmare-to-clean mess. Trust me on this one, it’s a non-negotiable step.
Step 2: Now, for the most important prep: drying the chickpeas. Drain and rinse your two cans of chickpeas in a colander. Then, spread them out on a clean kitchen towel and use another towel or paper towels to pat them vigorously until they are completely dry to the touch. You’ll notice some of the thin, translucent skins will come off; just discard those. The drier they are, the crispier your final snack will be.
Step 3: In your large mixing bowl, whisk together the olive oil, maple syrup, and vanilla extract. You want this liquid base to be well-emulsified. Then, add the ground cinnamon, nutmeg, sea salt, and that tiny, daring pinch of black pepper. Whisk it all together until you have a smooth, fragrant, dark syrup.
Step 4: Add your bone-dry chickpeas to the bowl with the maple cinnamon mixture. Using a spatula or a large spoon, gently fold and toss until every single chickpea is evenly and beautifully coated. You’ll see the mixture cling to them, turning them a warm, inviting brown color. Take your time here to ensure no chickpea is left behind.
Step 5: Pour the coated chickpeas onto your prepared baking sheet and spread them out into a single, even layer. Make sure they aren’t touching or piled up. This allows the hot air to circulate around each one, which is what gives you that all-important crunch instead of a soft, steamed texture.
Step 6: Place the baking sheet in the preheated oven and roast for 40 to 50 minutes. The trick is to stir them every 15 minutes or so. This prevents burning and ensures even browning. You’ll notice they will sizzle and the syrup will bubble and caramelize. They’re done when they are deep golden brown, firm to the touch, and have a shrunken, slightly wrinkled appearance.
Step 7: This is a critical step: let them cool completely on the baking sheet. As they cool, they continue to crisp up. I know it’s tempting to taste one right away, but if you try them hot, they might still seem a bit soft or chewy in the center. Patience is key for the perfect snap!
Serving Suggestions
Complementary Dishes
- A bowl of creamy Greek yogurt or oatmeal — The cool, creamy base is a perfect textural contrast to the crunchy, spiced chickpeas, making for a fantastic breakfast or snack.
- A simple green salad with a tangy vinaigrette — Scatter a handful over your greens for a sweet, crunchy element that breaks up the acidity and adds a surprising protein boost.
- Roasted squash or sweet potato — They add a wonderful sweet and savory crunch to the soft, caramelized flesh of the vegetables, elevating a simple side dish into something special.
Drinks
- A hot chai latte — The warm spices in the drink mirror the cinnamon and nutmeg in the chickpeas, creating a beautifully harmonious and cozy flavor experience.
- Cold oat milk or almond milk — The simple, slightly sweet, and neutral flavor of plant-based milk is a refreshing and clean palate cleanser between handfuls of the sweet, spiced snack.
- Black coffee — The bitterness of a good, strong coffee cuts through the sweetness of the maple beautifully, making for a sophisticated and balanced snack time.
Something Sweet
- A scoop of vanilla bean ice cream — Crumbling these over ice cream introduces an incredible texture and a warm, spiced flavor that turns a simple dessert into a gourmet treat.
- Apple slices with a dab of almond butter — Use the chickpeas as a topping on this classic snack for an extra layer of crunch and a cinnamon-maple kick that feels like a deconstructed pie.
- Warm rice pudding — Stirring them into rice pudding adds little pockets of crunch and spice that transform this comforting classic into a textural adventure.
Top Mistakes to Avoid
- Mistake: Not drying the chickpeas enough. Any residual moisture will steam the chickpeas in the oven, resulting in a soft, chewy, and sometimes rubbery texture instead of the light crunch you’re after. I’ve messed this up before too, and it’s a disappointing outcome from such a simple step.
- Mistake: Using a sticky sweetener like honey without caution. While you can substitute honey, it tends to burn at a lower temperature than maple syrup. If you do use it, consider lowering your oven temperature by 25°F and watching them like a hawk to prevent a bitter, burnt taste.
- Mistake: Skipping the stirring during roasting. The maple syrup can caramelize unevenly and burn in spots if left undisturbed. Giving them a good stir every 15 minutes ensures they roast evenly and develop a consistent, deep flavor and color.
- Mistake: Storing them before they are completely cool. If you put them in a jar while they are even slightly warm, the residual heat will create steam and make your beautifully crispy chickpeas lose their crunch and become soft. Let them cool on the pan for at least 30 minutes.
Expert Tips
- Tip: Add a protein powder boost. For an extra protein kick, try tossing the dried chickpeas with a tablespoon of vanilla or unflavored protein powder along with the spice mix. It creates a slightly thicker, even more flavorful coating that adheres beautifully.
- Tip: Play with your spices. Don’t be afraid to experiment! A pinch of cardamom or ginger can be wonderful here. For a “chai-spiced” version, add a pinch each of ground cloves and allspice along with the cinnamon.
- Tip: Revive lost crunch. If your chickpeas lose their crispness after a day or two in storage (which can happen in humid climates), simply pop them back into a 350°F (175°C) oven for 5-10 minutes to re-crisp. They’ll be as good as new.
- Tip: Make a savory version. The technique is the same! Just swap the maple syrup and cinnamon for spices like smoked paprika, garlic powder, and a touch of cumin for a completely different, savory snack.
FAQs
How long do these roasted chickpeas stay crispy?
Honestly, it depends on your climate and how well you seal them. In an airtight container at room temperature, they are at their absolute best for about 2-3 days. After that, they can start to soften a little, especially if it’s humid. That’s why I often make a smaller batch to enjoy at its peak. If they do soften, see the expert tip above for how to easily re-crisp them in the oven.
Can I use dried chickpeas instead of canned?
Absolutely, you can! You’ll need to start with about 1 cup of dried chickpeas. Soak them overnight in plenty of water, then drain and cook them until they are tender but not mushy—usually about 60-90 minutes. Let them cool and dry them thoroughly before proceeding with the recipe. This method gives you more control over the texture and can be more economical.
Why are my chickpeas still soft and chewy after baking?
This almost always comes down to one of two things: either they weren’t dry enough before you added the coating, or they needed more time in the oven. All ovens are different, so don’t be afraid to give them an extra 5-10 minutes if they don’t look dark golden and feel firm. Also, remember they crisp up significantly as they cool, so that final cooling period is part of the cooking process.
Can I make these without any oil?
You can try, but the results will be different. The oil helps the spices and syrup coat the chickpeas evenly and promotes browning and crisping. Without it, the maple syrup is more likely to burn before the chickpeas crisp through, and the coating might be patchy. If you must avoid oil, use a very light spritz of cooking spray on the parchment paper to help prevent sticking.
Are these chickpeas good for meal prep?
They are a fantastic meal prep component! I love making a batch on a Sunday to have on hand for the first half of the week. Portion them out into small containers for easy grab-and-go snacks, or keep a larger jar to sprinkle over my weekday breakfasts. Just remember the storage tip—let them cool completely and keep them sealed tight to maintain that perfect crunch for as long as possible.
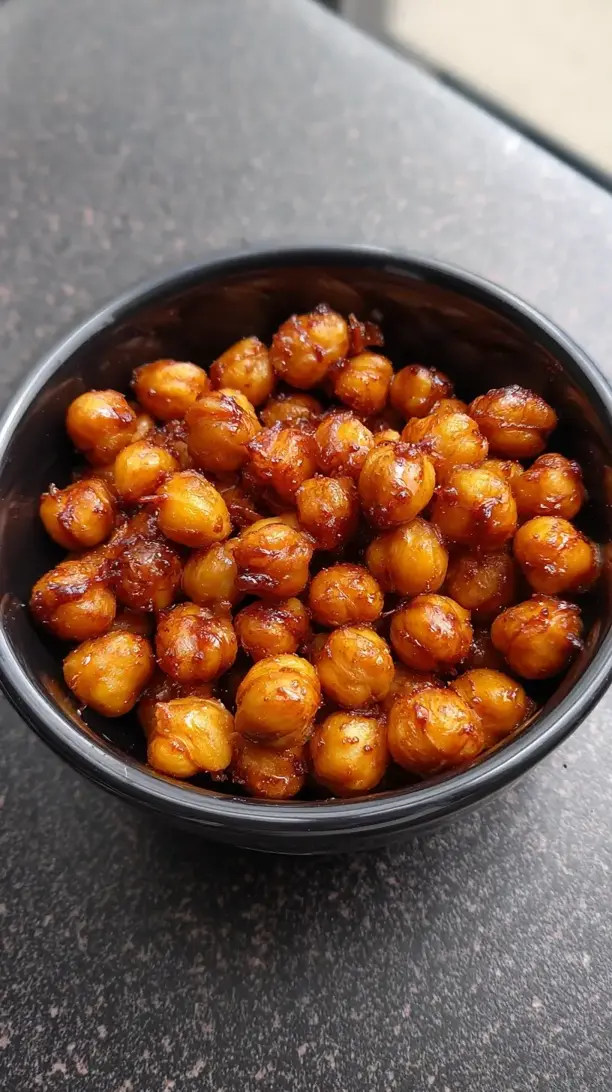
Roasted Maple Cinnamon Chickpeas
Make addictive Roasted Maple Cinnamon Chickpeas for a healthy, crunchy snack. Perfect for yogurt toppings or hiking fuel. Get the easy recipe now!
Ingredients
For the Ingredients
-
2 cans chickpeas (15 oz / 425 g each, rinsed, drained, and patted very dry)
-
2 tablespoons olive oil or melted coconut oil
-
3 tablespoons pure maple syrup
-
1 teaspoon vanilla extract
-
1 ½ teaspoons ground cinnamon
-
¼ teaspoon ground nutmeg
-
¼ teaspoon sea salt
-
A tiny pinch black pepper
Instructions
-
First, get your oven nice and hot. Preheat it to 400°F (200°C). Line your large rimmed baking sheet with parchment paper or a silicone mat—this is crucial to prevent the maple syrup from creating a sticky, nightmare-to-clean mess.01
-
Now, for the most important prep: drying the chickpeas. Drain and rinse your two cans of chickpeas in a colander. Then, spread them out on a clean kitchen towel and use another towel or paper towels to pat them vigorously until they are completely dry to the touch. You’ll notice some of the thin, translucent skins will come off; just discard those.02
-
In your large mixing bowl, whisk together the olive oil, maple syrup, and vanilla extract. You want this liquid base to be well-emulsified. Then, add the ground cinnamon, nutmeg, sea salt, and that tiny, daring pinch of black pepper. Whisk it all together until you have a smooth, fragrant, dark syrup.03
-
Add your bone-dry chickpeas to the bowl with the maple cinnamon mixture. Using a spatula or a large spoon, gently fold and toss until every single chickpea is evenly and beautifully coated.04
-
Pour the coated chickpeas onto your prepared baking sheet and spread them out into a single, even layer. Make sure they aren't touching or piled up.05
-
Place the baking sheet in the preheated oven and roast for 40 to 50 minutes. The trick is to stir them every 15 minutes or so. This prevents burning and ensures even browning. They’re done when they are deep golden brown, firm to the touch, and have a shrunken, slightly wrinkled appearance.06
-
This is a critical step: let them cool completely on the baking sheet. As they cool, they continue to crisp up.07