
Why You’ll Love These Raspberry Oatmeal Bars
- They’re the perfect texture. We’re talking about a firm, slightly chewy base that holds its shape, a gooey, fruity center, and a crisp, crumbly oat topping. Every single bite is a delightful textural adventure.
- They’re incredibly versatile. While I adore the raspberry version, this recipe is a fantastic blueprint. You can easily swap the raspberry jam for apricot, blackberry, or even a seeded strawberry jam. It’s your canvas!
- They’re a make-ahead dream. These bars actually taste even better the next day, once the flavors have had a chance to really meld together. They freeze beautifully, too, so you can always have a sweet treat on hand.
- They feel wholesome without sacrificing taste. With a hearty dose of oats and a fruit-forward filling, these bars feel like a satisfying snack you can feel good about. But let’s be real—the buttery, crisp topping is what makes them truly irresistible.
Ingredients & Tools
- 1 ½ cups all-purpose flour
- 1 ½ cups old-fashioned rolled oats
- 1 cup packed light brown sugar
- ½ teaspoon baking soda
- ¼ teaspoon fine sea salt
- ¾ cup unsalted butter, melted and slightly cooled
- 1 teaspoon vanilla extract
- 1 ¼ cups raspberry jam (see notes below!)
- 1 tablespoon cornstarch
- 1 tablespoon lemon juice
Tools: 8×8 inch baking pan, parchment paper, mixing bowl, whisk, spatula
A quick note on the jam—this is where the magic happens! Using a good-quality jam with real fruit makes a noticeable difference. The cornstarch and lemon juice mixed into it are our little secret weapons; they help thicken the filling just enough so it doesn’t run everywhere when you take a bite.
Serves: 9 | Prep Time: 15 mins | Cook Time: 35 mins | Total Time: 50 mins
Before You Start: Tips & Ingredient Notes
- Why can’t I use quick oats? You really want the sturdy texture of old-fashioned rolled oats here. Quick oats are cut smaller and will absorb the butter differently, resulting in a denser, less crumbly bar. The rolled oats give you that perfect, classic texture.
- Does the butter temperature matter? Honestly, yes. You want the butter melted but not piping hot. If it’s too hot, it can start to “cook” the other ingredients when you mix it in. Let it cool for about 5 minutes after melting—it should be warm to the touch, not scalding.
- What kind of jam is best? Look for a jam that’s thick and has a high fruit content. A runny jam will make the filling too wet. If your jam is on the thinner side, you can simmer it in a small saucepan for a few minutes to reduce and thicken it before using.
- Why line the pan with parchment? This is a non-negotiable step for easy removal and clean slicing! Let the parchment paper overhang on two opposite sides—this creates “handles” that let you lift the entire block of bars out of the pan once cooled, so you can cut them perfectly on a cutting board.
How to Make Raspberry Oatmeal Bars
Step 1: First, preheat your oven to 350°F (175°C). Grab your 8×8 inch baking pan and line it with parchment paper, making sure there’s an overhang on two sides. This little trick is a game-changer for clean, easy removal later. Give the parchment a light spray with cooking spray or a quick brush with butter to ensure nothing sticks.
Step 2: In a large mixing bowl, whisk together the flour, rolled oats, brown sugar, baking soda, and salt. You want everything to be evenly distributed. You’ll notice the brown sugar might have some lumps—just break them up with your fingers or the back of a spoon as you mix. This dry mixture is the foundation for both our crust and our topping.
Step 3: Pour the slightly cooled, melted butter and the vanilla extract over the dry ingredients. Now, use a spatula or your hands to mix everything together. The goal is to get a crumbly mixture where the butter is fully incorporated and no dry spots remain. It should hold together when you pinch a bit of it—this is your sign that it’s ready.
Step 4: In a small separate bowl, stir together the raspberry jam, cornstarch, and lemon juice. The cornstarch will help the filling set, and the lemon juice adds a lovely brightness that cuts through the sweetness. Mix it until the cornstarch has completely dissolved and you have a smooth, uniform filling.
Step 5: Time to assemble! Press about two-thirds of the oat mixture firmly and evenly into the bottom of your prepared pan. Really press it down—this compact layer is what becomes your firm base. Then, carefully spread the raspberry jam mixture over the crust, leaving a small border around the edges.
Step 6: Sprinkle the remaining one-third of the oat mixture evenly over the raspberry layer. Don’t press it down—you want this top layer to be loose and crumbly so it bakes up nice and crisp. It’s okay if some of the jam peeks through; that’s part of the charm.
Step 7: Bake for 30-35 minutes, or until the top is a beautiful golden brown and the edges are bubbling slightly. Your kitchen will smell amazing. Place the pan on a wire rack and let the bars cool completely in the pan. I know it’s tempting, but this is crucial—if you try to cut them while warm, they’ll fall apart.
Step 8: Once completely cool (I sometimes pop them in the fridge for 30 minutes to speed this up), use the parchment paper handles to lift the entire block out of the pan. Transfer it to a cutting board and use a sharp knife to slice into 9 even squares. Wiping the knife clean between cuts helps get those perfect, clean edges.
Serving Suggestions
Complementary Dishes
- A simple green salad with a lemon vinaigrette — The sharp, fresh acidity of the salad provides a lovely contrast to the sweet, rich bars, making them part of a perfect light lunch.
- A scoop of vanilla bean Greek yogurt — For a breakfast or brunch twist, serving a bar alongside some creamy, tangy yogurt creates a fantastic balance of flavours and textures.
Drinks
- A hot cup of Earl Grey tea — The bergamot in the tea complements the raspberry flavour beautifully, creating a really sophisticated pairing that feels like a treat.
- A glass of cold whole milk — Sometimes, the classic is best. The creaminess of cold milk is the ultimate partner for any oat-based bake, and it’s just so comforting.
Something Sweet
- A small dish of lemon sorbet — If you’re serving these as a dessert, a palate-cleansing scoop of tart lemon sorbet alongside a warm bar is a match made in heaven.
- A dark chocolate espresso bean — For an after-dinner bite, enjoy a square with a single piece of intense dark chocolate. The bitter notes highlight the sweetness of the jam in a really interesting way.
Top Mistakes to Avoid
- Mistake: Pressing the topping down. When you sprinkle the remaining oat mixture over the jam, resist the urge to press it in. A loose, crumbly topping is what gives you that delightful crisp texture. Pressing it down will make it dense and cake-like.
- Mistake: Cutting the bars while warm. I’ve messed this up before too, and it leads to a gooey, messy situation. The filling needs time to set as it cools. Patience is key here for those perfect, clean slices.
- Mistake: Using a glass or dark-colored pan without adjusting the temperature. These pans retain heat differently and can cause the edges to over-brown or burn. If you must use one, consider reducing the oven temperature by 25°F and keeping a close eye on the baking time.
- Mistake: Not measuring the flour correctly. Spoon the flour into your measuring cup and level it off with a knife. Scooping the cup directly into the flour bag packs it down, leading to an extra ¼ cup or more of flour, which can make the crust dry and tough.
Expert Tips
- Tip: Add a nutty crunch. For an extra layer of flavour and texture, stir ½ cup of chopped pecans or walnuts into the oat mixture before adding the butter. The toasty nuts add a wonderful complexity.
- Tip: Grate in some citrus zest. Adding the zest of one lemon or orange to the dry ingredients will make the flavour of the crust pop and add a beautiful, fragrant note that complements the raspberry perfectly.
- Tip: Make them gluten-free. This recipe adapts wonderfully! Simply use a 1:1 gluten-free all-purpose flour blend and ensure your oats are certified gluten-free. The texture will be just as good.
- Tip: Create a layered fruit filling. For a more complex fruit flavour, spread half the jam, then sprinkle a handful of fresh or frozen raspberries over it, then dot with the remaining jam. This gives you little pockets of whole fruit.
FAQs
Can I use frozen raspberries instead of jam?
You can, but it requires a few adjustments. Toss about 2 cups of frozen raspberries with ¼ cup of sugar and 2 tablespoons of cornstarch. Let them sit for 10 minutes to macerate and create their own juicy syrup. You might need to bake the bars for an additional 5-10 minutes, as the frozen berries will release more liquid. The result will be a less uniform but wonderfully fresh-tasting filling.
How should I store these bars, and how long will they keep?
Once completely cooled, store the bars in an airtight container at room temperature for up to 3 days. For longer storage, they keep beautifully in the fridge for up to a week. The chilled texture is actually lovely—a bit firmer. You can also freeze them for up to 3 months. Just layer them between parchment paper in a freezer-safe container and thaw at room temperature when you’re ready.
My bottom crust seems a bit soft. What happened?
This usually happens if the crust wasn’t pressed down firmly enough before adding the jam. You really need to compact it to create a solid base. Another culprit could be under-baking. The edges should be a deep golden brown and you should see the jam bubbling actively at the edges when you take it out of the oven.
Can I double this recipe?
Absolutely! This recipe doubles perfectly for a 9×13 inch pan. Simply double all the ingredients. The baking time might need to be extended by 5-10 minutes—just keep an eye on it until the top is evenly golden brown. It’s a great option for a potluck or party.
Is there a way to make these less sweet?
Yes, a few tweaks can help. You can reduce the brown sugar in the crust/topping by ¼ cup—the texture will be slightly less crisp but still delicious. The main change is to use a reduced-sugar or no-sugar-added raspberry jam. The lemon juice in the filling becomes even more important here to balance the tartness of the fruit.
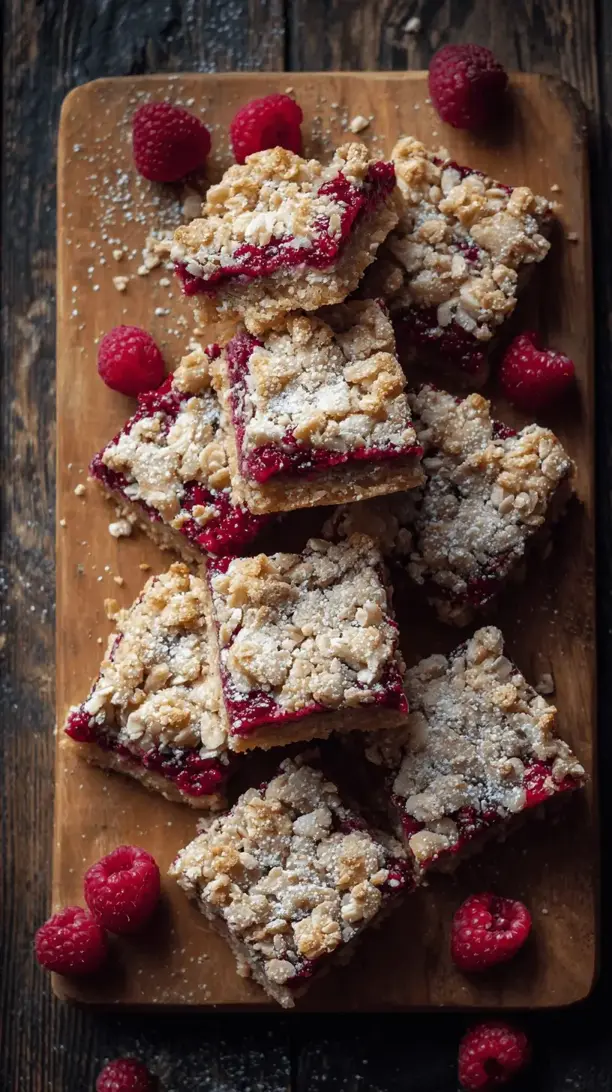
Raspberry Oatmeal Bars
Whip up these easy Raspberry Oatmeal Bars! A buttery oat crust & crumble topping with a jammy raspberry center. Perfect for snacks, lunchboxes & make-ahead baking. Simple recipe!
Ingredients
Ingredients
-
1 ½ cups all-purpose flour
-
1 ½ cups old-fashioned rolled oats
-
1 cup packed light brown sugar
-
½ teaspoon baking soda
-
¼ teaspoon fine sea salt
-
¾ cup unsalted butter (melted and slightly cooled)
-
1 teaspoon vanilla extract
-
1 ¼ cups raspberry jam
-
1 tablespoon cornstarch
-
1 tablespoon lemon juice
Instructions
-
First, preheat your oven to 350°F (175°C). Grab your 8x8 inch baking pan and line it with parchment paper, making sure there's an overhang on two sides. This little trick is a game-changer for clean, easy removal later. Give the parchment a light spray with cooking spray or a quick brush with butter to ensure nothing sticks.01
-
In a large mixing bowl, whisk together the flour, rolled oats, brown sugar, baking soda, and salt. You want everything to be evenly distributed. You'll notice the brown sugar might have some lumps—just break them up with your fingers or the back of a spoon as you mix. This dry mixture is the foundation for both our crust and our topping.02
-
Pour the slightly cooled, melted butter and the vanilla extract over the dry ingredients. Now, use a spatula or your hands to mix everything together. The goal is to get a crumbly mixture where the butter is fully incorporated and no dry spots remain. It should hold together when you pinch a bit of it—this is your sign that it's ready.03
-
In a small separate bowl, stir together the raspberry jam, cornstarch, and lemon juice. The cornstarch will help the filling set, and the lemon juice adds a lovely brightness that cuts through the sweetness. Mix it until the cornstarch has completely dissolved and you have a smooth, uniform filling.04
-
Time to assemble! Press about two-thirds of the oat mixture firmly and evenly into the bottom of your prepared pan. Really press it down—this compact layer is what becomes your firm base. Then, carefully spread the raspberry jam mixture over the crust, leaving a small border around the edges.05
-
Sprinkle the remaining one-third of the oat mixture evenly over the raspberry layer. Don't press it down—you want this top layer to be loose and crumbly so it bakes up nice and crisp. It's okay if some of the jam peeks through; that's part of the charm.06
-
Bake for 30-35 minutes, or until the top is a beautiful golden brown and the edges are bubbling slightly. Your kitchen will smell amazing. Place the pan on a wire rack and let the bars cool completely in the pan. I know it's tempting, but this is crucial—if you try to cut them while warm, they'll fall apart.07
-
Once completely cool (I sometimes pop them in the fridge for 30 minutes to speed this up), use the parchment paper handles to lift the entire block out of the pan. Transfer it to a cutting board and use a sharp knife to slice into 9 even squares. Wiping the knife clean between cuts helps get those perfect, clean edges.08


