
Why You’ll Love This Raspberry Lemon Pancakes
- A Burst of Fresh Flavor in Every Bite. The combination of sweet raspberries and tangy lemon is just unbeatable. It’s like summer on a plate, even if you’re making these in the dead of winter. The flavors are so bright and cheerful, they’re guaranteed to put a smile on your face.
- Incredibly Light and Fluffy Texture. The secret here is a light hand when mixing and letting the batter rest for a few minutes. This gives the gluten a chance to relax, resulting in pancakes that are tender, airy, and melt-in-your-mouth good. You’ll notice the difference immediately.
- They Come Together in a Flash. Seriously, from bowl to plate in under 20 minutes. It’s one of those recipes that looks and tastes impressive but requires minimal effort. Perfect for those mornings when you want something special without a lot of fuss.
- Endlessly Customizable. While the raspberry-lemon combo is classic, this batter is a fantastic base. You can swap the raspberries for blueberries, blackberries, or even chopped strawberries. Not a lemon fan? A dash of vanilla or a sprinkle of cinnamon works beautifully too.
Ingredients & Tools
- 1 ½ cups all-purpose flour
- 2 tablespoons granulated sugar
- 2 teaspoons baking powder
- ½ teaspoon baking soda
- ½ teaspoon fine sea salt
- Zest of 1 large lemon
- 1 ¼ cups buttermilk, well-shaken
- 1 large egg
- 3 tablespoons unsalted butter, melted and slightly cooled
- 2 tablespoons fresh lemon juice
- 1 teaspoon vanilla extract
- 1 heaping cup fresh raspberries (plus extra for serving)
- Maple syrup and extra butter, for serving
Tools: A large mixing bowl, a medium bowl, a whisk, a spatula, a griddle or large non-stick skillet, and a ¼-cup measuring cup or ice cream scoop for portioning.
Using real buttermilk is key here — its acidity reacts with the baking soda to create those lovely air bubbles for maximum fluffiness. And don’t skip the fresh lemon zest; that’s where the real, potent lemon oil lives, giving the pancakes an incredible fragrance.
Serves: 3-4 (makes about 10-12 pancakes) | Prep Time: 10 minutes | Cook Time: 10 minutes | Total Time: 20 minutes
Before You Start: Tips & Ingredient Notes
- Why buttermilk? Buttermilk is the secret weapon for tender, tangy pancakes. If you’re in a pinch, you can make a quick substitute by adding 1 tablespoon of lemon juice or white vinegar to 1 ¼ cups of regular milk. Let it sit for 5 minutes until it curdles slightly.
- Don’t overmix the batter! A few lumps are totally fine — in fact, they’re desirable. Overmixing develops the gluten in the flour, which leads to tough, chewy pancakes. We’re going for light and fluffy, so mix just until the dry ingredients are incorporated.
- How to handle the raspberries. Fresh raspberries are delicate. If you’re using frozen, do not thaw them! Toss them in a tablespoon of flour from your measured amount before folding them in. This helps prevent them from bleeding too much color into the batter and sinking to the bottom.
- Get your pan to the right temperature. This is crucial. A pan that’s too hot will burn the outside before the inside is cooked. Too low, and you’ll get pale, greasy pancakes. A flick of water should sizzle and evaporate immediately on the surface.
How to Make Raspberry Lemon Pancakes
Step 1: Combine the Dry Ingredients. In your large mixing bowl, whisk together the flour, sugar, baking powder, baking soda, and salt. Now, add the lemon zest. Use your fingertips to rub the zest into the dry ingredients for a moment—this helps release even more of those wonderful citrus oils. You’ll smell it immediately! This little trick makes a huge difference in distributing the flavor evenly throughout the batter.
Step 2: Whisk the Wet Ingredients. In the medium bowl, whisk the buttermilk, egg, melted butter, fresh lemon juice, and vanilla extract until they are just combined. The mixture might look a little curdled because of the lemon juice and buttermilk—that’s perfectly normal and nothing to worry about. You’re building the base of your tangy, flavorful liquid component here.
Step 3: Bring It All Together. Pour the wet ingredients into the dry ingredients. Now, with your spatula, gently fold everything together. Use a broad, sweeping motion and stop as soon as you no longer see large streaks of flour. I’ll say it again: a lumpy batter is a good batter! It means you haven’t overworked it. Overmixing is the enemy of fluffy pancakes.
Step 4: Fold in the Raspberries. Gently scatter the raspberries over the top of the batter. Carefully fold them in once or twice—you just want to distribute them, not crush them. Some will break, and that’s okay; it adds to the marbled, jammy effect. Let the batter rest for 5-7 minutes on the counter. You’ll notice it thicken slightly and become bubbly. This resting period is like a mini spa treatment for the batter, resulting in a better texture.
Step 5: Cook to Golden Perfection. Heat your griddle or skillet over medium heat. Lightly grease it with butter or a neutral oil. Test the heat with a few drops of water—they should sizzle and dance. Using your ¼-cup measure, scoop the batter onto the hot surface, leaving space for spreading. Cook until the edges look set and bubbles form on the surface and begin to pop, about 2-3 minutes.
Step 6: The Flip and Final Cook. This is the moment of truth! Slide your spatula underneath and confidently flip each pancake. They should be a beautiful golden brown. Cook for another 1-2 minutes on the second side, until equally golden and cooked through. You can peek by pressing gently in the center—it should spring back. Transfer to a plate. I like to keep them warm in a single layer on a baking sheet in a 200°F (95°C) oven while I finish the rest.
Serving Suggestions
Complementary Dishes
- Crispy Turkey Bacon or Breakfast Sausage — The salty, savory contrast plays wonderfully against the sweet and tart pancakes, creating a perfectly balanced plate.
- Softly Scrambled Eggs with Chives — A classic pairing that turns your pancake stack into a full, satisfying brunch. The creamy eggs are a lovely textural counterpoint.
- A Simple Arugula Salad with Lemon Vinaigrette — A light, peppery salad cuts through the richness and adds a fresh, elegant touch to your meal.
Drinks
- A Hot Cup of Earl Grey Tea — The bergamot in the tea harmonizes beautifully with the citrus notes in the pancakes for a truly sophisticated brunch vibe.
- Freshly Squeezed Orange Juice — It’s a classic for a reason! The sweet, sunny flavor is a no-fail match that everyone will love.
- A Sparkling Mimosa — For a real celebration, the bubbles and acidity of a mimosa cleanse the palate between each delicious, syrupy bite.
Something Sweet
- Lemon Curd or Raspberry Jam — Double down on the core flavors! Swirling a spoonful on top of the pancakes before adding syrup adds an intense, fruity burst.
- Whipped Cream or Greek Yogurt — A dollop of something cool and creamy on the warm stack is just heavenly. Greek yogurt adds a nice tang, too.
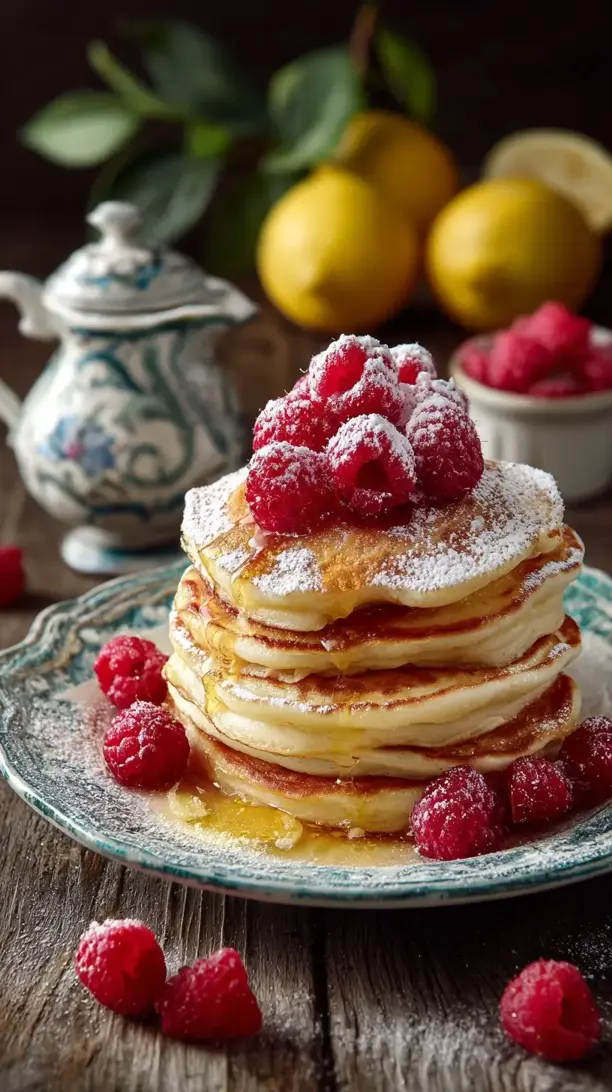
- A Dusting of Powdered Sugar — Sometimes simple is best. It looks beautiful and adds a subtle, snowy sweetness without being overpowering.
Top Mistakes to Avoid
- Mistake: Overmixing the batter. This is the number one pancake pitfall. It makes them tough. Remember, lumps are your friend. Mix until just combined and then walk away.
- Mistake: Incorrect pan temperature. I’ve messed this up before too… if your pan is too hot, the outside burns; too low, and they steam instead of fry. Do the water test every time.
- Mistake: Pressing down on the pancakes with the spatula. Don’t do it! You’re squeezing out all the precious air bubbles you worked so hard to create. Just let them cook in peace.
- Mistake: Flipping too early. Wait for those bubbles to form and pop on the surface. If you try to flip too soon, you’ll end up with a messy, undercooked pancake. Patience is key.
Expert Tips
- Tip: Keep your pancakes warm. Place cooked pancakes in a single layer on a baking sheet in a 200°F (95°C) oven. This keeps them warm and crisp for everyone to eat together, without them getting soggy.
- Tip: Use an ice cream scoop for perfect portions. It’s a game-changer for evenly sized pancakes that cook at the same rate. It’s also just less messy than using a ladle or pouring from a bowl.
- Tip: Add a pat of butter to the pan between batches. A little fresh fat for each new batch ensures a beautifully golden, non-stick surface and adds fantastic flavor.
- Tip: Make a “test” pancake first. Cook one small pancake first to check your pan’s temperature and seasoning. It’s your sacrificial pancake that guarantees the rest of the batch will be perfect.
FAQs
Can I use frozen raspberries?
Absolutely! In fact, they often work even better for folding into batter because they’re a bit sturdier. The key is to use them straight from the freezer—do not thaw them. Toss the frozen berries in a tablespoon of the measured flour before folding them in. This light coating helps prevent them from bleeding too much color into the batter and from sinking straight to the bottom. You might need to add a minute or so to the cooking time since the berries will be cold in the center.
Can I make the batter the night before?
I don’t recommend making the complete batter ahead of time. The baking powder will lose its leavening power, and the pancakes will be dense. However, you can do some prep! Whisk all the dry ingredients (including the lemon zest) together in a bowl and cover it. In a separate container or jar, mix the wet ingredients (buttermilk, egg, etc.) and keep it refrigerated. In the morning, just combine the two and cook. It cuts the morning prep time down to almost nothing.
My pancakes are turning out flat. What did I do wrong?
Flat pancakes are usually a sign that your leavening agents (baking powder/soda) are old and have lost their potency. Check the expiration dates! Another common culprit is overmixing, which deflates the air bubbles. Also, make sure your pan is hot enough—if it’s too cool, the pancakes will spread out too much before they have a chance to rise.
Can I make these gluten-free or dairy-free?
Yes, with a few simple swaps. For gluten-free, use a 1:1 gluten-free flour blend (I’ve had great results with brands like Bob’s Red Mill). For dairy-free, use a plant-based milk (like almond or oat) mixed with 1 tbsp lemon juice to make a “buttermilk,” and use vegan butter or coconut oil for melting. The texture might be slightly different, but they’ll still be delicious.
What’s the best way to reheat leftover pancakes?
The toaster is your best friend here! It re-crisps the outside beautifully. You can also warm them in a 350°F (175°C) oven for about 5-10 minutes, or for a quick fix, microwave them for 20-30 seconds. They won’t be quite as perfect as fresh, but they’re still a great quick breakfast.
Raspberry Lemon Pancakes
Whip up Mike's incredibly fluffy Raspberry Lemon Pancakes! This easy 20-minute recipe delivers a burst of sweet & tangy flavor, perfect for a special weekend brunch.
Ingredients
Ingredients
-
1 ½ cups all-purpose flour
-
2 tablespoons granulated sugar
-
2 teaspoons baking powder
-
½ teaspoon baking soda
-
½ teaspoon fine sea salt
-
1 large lemon (zest only)
-
1 ¼ cups buttermilk (well-shaken)
-
1 large egg
-
3 tablespoons unsalted butter (melted and slightly cooled)
-
2 tablespoons fresh lemon juice
-
1 teaspoon vanilla extract
-
1 heaping cup fresh raspberries (plus extra for serving)
-
Maple syrup and extra butter (for serving)
Instructions
-
Combine the Dry Ingredients. In your large mixing bowl, whisk together the flour, sugar, baking powder, baking soda, and salt. Now, add the lemon zest. Use your fingertips to rub the zest into the dry ingredients for a moment—this helps release even more of those wonderful citrus oils. You'll smell it immediately! This little trick makes a huge difference in distributing the flavor evenly throughout the batter.01
-
Whisk the Wet Ingredients. In the medium bowl, whisk the buttermilk, egg, melted butter, fresh lemon juice, and vanilla extract until they are just combined. The mixture might look a little curdled because of the lemon juice and buttermilk—that's perfectly normal and nothing to worry about. You're building the base of your tangy, flavorful liquid component here.02
-
Bring It All Together. Pour the wet ingredients into the dry ingredients. Now, with your spatula, gently fold everything together. Use a broad, sweeping motion and stop as soon as you no longer see large streaks of flour. I'll say it again: a lumpy batter is a good batter! It means you haven't overworked it. Overmixing is the enemy of fluffy pancakes.03
-
Fold in the Raspberries. Gently scatter the raspberries over the top of the batter. Carefully fold them in once or twice—you just want to distribute them, not crush them. Some will break, and that's okay; it adds to the marbled, jammy effect. Let the batter rest for 5-7 minutes on the counter. You'll notice it thicken slightly and become bubbly. This resting period is like a mini spa treatment for the batter, resulting in a better texture.04
-
Cook to Golden Perfection. Heat your griddle or skillet over medium heat. Lightly grease it with butter or a neutral oil. Test the heat with a few drops of water—they should sizzle and dance. Using your ¼-cup measure, scoop the batter onto the hot surface, leaving space for spreading. Cook until the edges look set and bubbles form on the surface and begin to pop, about 2-3 minutes.05
-
The Flip and Final Cook. This is the moment of truth! Slide your spatula underneath and confidently flip each pancake. They should be a beautiful golden brown. Cook for another 1-2 minutes on the second side, until equally golden and cooked through. You can peek by pressing gently in the center—it should spring back. Transfer to a plate. I like to keep them warm in a single layer on a baking sheet in a 200°F (95°C) oven while I finish the rest.06