Why You’ll Love This Quinoa Noodle Pad Thai
- It’s a lighter, feel-good twist. Quinoa noodles are naturally gluten-free and pack a bit more protein and fibre than traditional rice noodles. The result is a meal that’s just as satisfying but leaves you feeling energised, not weighed down.
- The texture is absolutely fantastic. You get this wonderful springy, slightly chewy bite from the noodles that holds up perfectly against the crisp bean sprouts and crunchy peanuts. It’s a real party for your palate.
- It’s incredibly fast and forgiving. This is a true 30-minute meal. The sauce whips up in a minute, and the cooking process is more about assembly than precision. It’s perfect for a busy night when you need something delicious, stat.
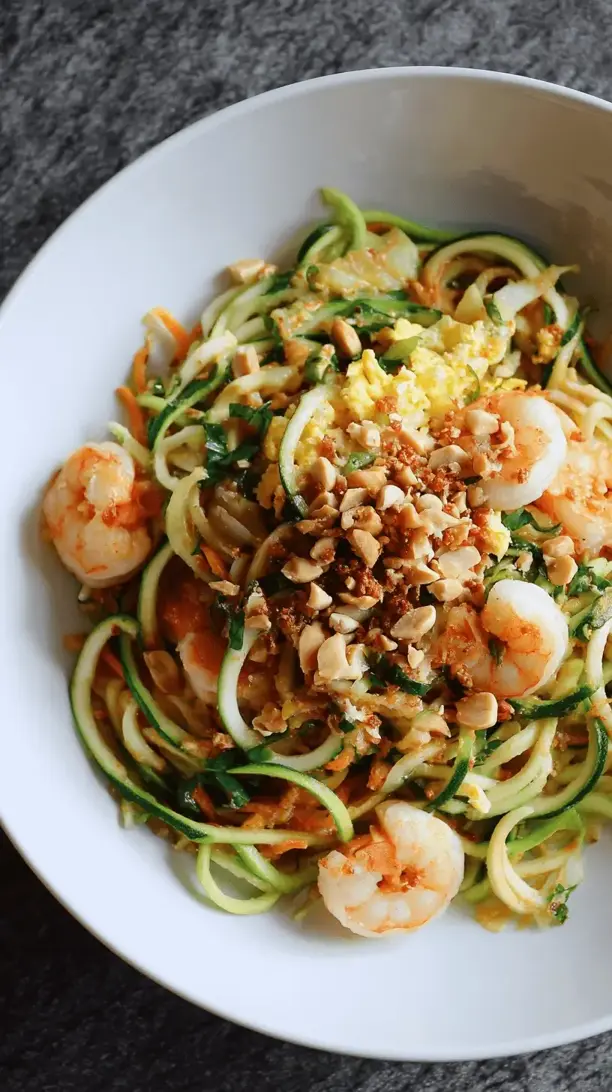
- It’s endlessly customisable. Not a fan of tofu? Use shrimp or chicken. Want more heat? Add extra chilli. The basic formula is so solid, you can make it your own every single time.
Ingredients & Tools
- 200 g quinoa noodles (or pad thai-style rice noodles)
- 2 tbsp coconut oil or avocado oil
- 200 g firm tofu, pressed and cubed (or protein of choice)
- 2 eggs, lightly beaten
- 2 cloves garlic, minced
- 1 small red onion, thinly sliced
- 1 carrot, julienned
- 1 cup bean sprouts
- 3 spring onions, sliced (whites and greens separated)
- 1/4 cup roasted peanuts, roughly chopped
- 1 lime, cut into wedges
- Fresh coriander, for serving
- For the Sauce: 3 tbsp tamari or coconut aminos, 2 tbsp tamarind paste, 1.5 tbsp maple syrup or coconut sugar, 1 tbsp fresh lime juice, 1-2 tsp sriracha or chilli garlic paste (to taste)
Tools: A large wok or non-stick skillet, a medium pot for boiling noodles, a small bowl for the sauce.
The real magic here, honestly, is in the sauce. Getting that balance right is key—the tamarind brings the essential tang, the tamari gives the salty depth, and the sweetener rounds it all out. Don’t skip the fresh lime juice at the end; it brightens everything up beautifully.
Serves: 3 | Prep Time: 15 mins | Cook Time: 15 mins | Total Time: 30 mins
Before You Start: Tips & Ingredient Notes
- Press that tofu! If you’re using tofu, taking the time to press out the excess water is non-negotiable. It allows the tofu to crisp up beautifully in the pan instead of steaming. Wrap it in a clean tea towel and place a heavy pan on top for 15 minutes.
- Get your mise en place. Pad Thai cooks fast once you start. Have all your veggies chopped, your sauce mixed, and your noodles ready to go. It makes the process seamless and stress-free.
- Tamarind paste is the secret weapon. This is what gives authentic Pad Thai its signature sour note. You can find it in jars at most well-stocked supermarkets or Asian grocers. If you’re in a real pinch, you can substitute with more lime juice, but the flavour profile will be different.
- Don’t overcook the quinoa noodles. They can go from perfectly al dente to mushy surprisingly quickly. Always err on the side of undercooking them slightly, as they’ll continue to soften when you toss them in the hot wok with the sauce.
How to Make Quinoa Noodle Pad Thai
Step 1: Noodle Prep. Bring a large pot of salted water to a boil. Cook the quinoa noodles according to package directions, but aim for just al dente—usually about 5-7 minutes. Once cooked, drain immediately and rinse with cold water to stop the cooking process. Toss them with a tiny bit of oil to prevent sticking and set them aside.
Step 2: Crisp the Tofu. While the noodles cook, heat 1 tablespoon of oil in your wok or large skillet over medium-high heat. Add the pressed and cubed tofu. Cook, stirring occasionally, until golden brown and crisp on all sides. This should take about 5-7 minutes. Season with a tiny pinch of salt. Remove the tofu from the wok and set it aside on a plate.
Step 3: The Aromatics & Egg. Reduce the heat to medium and add the remaining tablespoon of oil to the wok. Add the minced garlic and the white parts of the spring onions. Sauté for just 30-60 seconds until fragrant—be careful not to burn the garlic! Push the aromatics to one side of the wok and pour the beaten eggs into the empty space. Scramble the eggs gently, breaking them up into small curds as they cook.
Step 4: Veggie Time. Now, add the sliced red onion and julienned carrot to the wok. Stir-fry for 2-3 minutes until the vegetables have just started to soften but still retain a good crunch. You’ll notice the colours becoming more vibrant.
Step 5: Bring It All Together. Add the drained noodles and the crispy tofu back into the wok. Give the sauce a quick stir (the ingredients might have settled) and then pour it over everything. Using a pair of tongs or two spatulas, toss everything together vigorously. You want every strand of noodle to be coated in that glorious sauce. Let it cook for another minute so the noodles can soak up the flavours.
Step 6: The Final Touches. Turn off the heat. Now, stir in most of the bean sprouts and the green parts of the spring onions. This keeps them lovely and crisp. Give it one final toss. Your kitchen should smell absolutely incredible by now.
Step 7: Plate and Garnish. Divide the Pad Thai among bowls. Top with the remaining fresh bean sprouts, a generous handful of chopped peanuts, and a big squeeze of fresh lime juice. Scatter some fresh coriander leaves over the top. Serve immediately while it’s hot and wonderfully aromatic.
Serving Suggestions
Complementary Dishes
- A simple cucumber salad — The cool, refreshing crunch of thinly sliced cucumbers with a splash of rice vinegar provides a perfect, palate-cleansing contrast to the rich, savoury noodles.
- Fresh summer rolls — Serve a few veggie-packed summer rolls on the side for a lighter, interactive starter. The soft rice paper and fresh herbs complement the main event beautifully.
Drinks
- A crisp, dry Riesling — The slight sweetness and high acidity of a good Riesling cut through the richness of the dish and balance the spice and tang perfectly.
- A classic Mojito (or a virgin version) — The mint and lime in a mojito are a match made in heaven for Thai flavours. It’s zesty, refreshing, and cleanses the palate between bites.
Something Sweet
- Mango with sticky rice — You can’t go wrong with this classic Thai dessert. The sweet, creamy mango and coconut-infused sticky rice are the ideal way to end a Thai-inspired meal on a high note.
- Coconut ice cream — A simple scoop of rich, creamy coconut ice cream is a no-fuss way to satisfy that sweet tooth. The coconut flavour echoes the subtle notes in the Pad Thai sauce.
Top Mistakes to Avoid
- Mistake: Overcooking the noodles. This is the number one error. Mushy noodles will ruin the texture of the entire dish. They should be tender but still have a bit of a bite (al dente) before you add them to the wok.
- Mistake: Adding the sauce too early. If you add the sauce before the noodles are in the pan, it can reduce too much and become overly salty and sticky. The sauce’s job is to coat the noodles, not reduce into a syrup on the bottom of the wok.
- Mistake: Crowding the wok. If you add all the ingredients at once, you’ll steam them instead of stir-frying. Cooking in stages—tofu first, then aromatics/egg, then veggies—ensures everything gets the right amount of heat and develops delicious flavour.
- Mistake: Skipping the final fresh garnishes. The lime wedge, fresh herbs, and extra peanuts aren’t just for looks. They add crucial fresh, acidic, and crunchy elements that complete the dish. Don’t be shy with them!
Expert Tips
- Tip: Make it saucy. If you find your noodles are a bit dry after tossing, don’t panic. Have a little extra tamari, lime juice, and a splash of water on hand. You can always add a tablespoon or two of this mixture to loosen everything up.
- Tip: Toast your peanuts. If you have raw peanuts, toast them in a dry pan for a few minutes before chopping. This deepens their flavour immensely and adds an incredible nutty aroma that takes the dish to the next level.
- Tip: Let your protein marinate. For even more flavour, you can marinate your tofu (or chicken/shrimp) in a tablespoon of the Pad Thai sauce for 15-20 minutes before cooking. It infuses the protein with flavour from the inside out.
- Tip: The “wok hei” effect. If you’re feeling adventurous and have a gas stove, you can try to get a bit of “wok hei” – that smoky, breath-of-the-wok flavour. Briefly toss the finished dish over very high heat for a final 30-second sizzle.
FAQs
Can I make this Quinoa Noodle Pad Thai ahead of time?
You can definitely prep the components ahead to make assembly super fast. Cook the noodles, make the sauce, and chop the veggies, storing them separately in the fridge for up to a day. The dish is best served immediately after final cooking, as the noodles can soften and the veggies lose their crunch upon reheating. If you do have leftovers, reheat them gently in a wok or skillet with a tiny splash of water to revive the sauce.
I can’t find tamarind paste. What’s the best substitute?
Tamarind is quite unique, but in a pinch, you can create a substitute. Mix 1 tablespoon of rice vinegar with 1 tablespoon of lime juice and a teaspoon of brown sugar. It won’t be exactly the same, but it will provide the necessary tangy-sweet balance. Another option is to use a bit of Worcestershire sauce (Anchovy-free if vegan) for depth, though the flavour will shift.
Is this recipe gluten-free and vegan?
Yes, it can be! To keep it gluten-free, ensure you use tamari (which is typically wheat-free) or certified gluten-free soy sauce, and check your quinoa noodle packaging. It’s naturally vegan as written, just be sure your sugar source (like maple syrup) is vegan-friendly. The egg can be omitted or replaced with a vegan egg substitute or extra tofu.
My noodles are sticking together. How can I prevent this?
The key is to rinse them thoroughly with cold water after draining to remove excess starch. Then, toss them with a very small amount of neutral oil (like avocado or grapeseed) to create a protective coating. When you add them to the wok, have your sauce ready to go and toss everything quickly and efficiently to distribute the sauce evenly, which also prevents sticking.
Can I use a different protein?
Absolutely! This recipe is very adaptable. For chicken, use 200g of thinly sliced chicken breast and stir-fry until cooked through before setting aside. For shrimp, use peeled raw prawns and cook until pink and opaque. You could even use tempeh or edamame for a different plant-based twist. Just adjust the cooking time for your protein of choice.
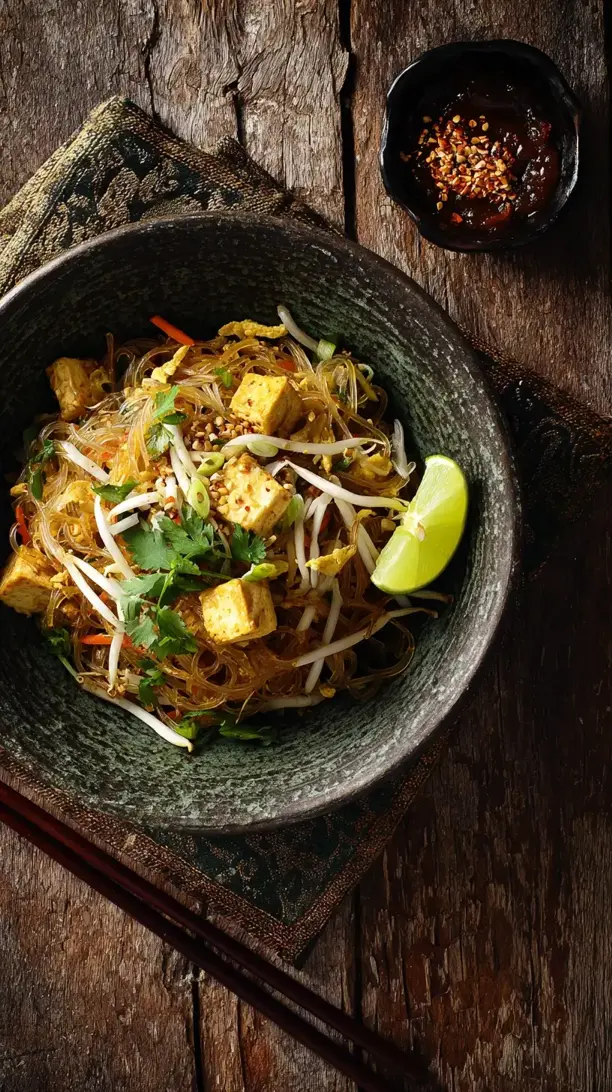
Quinoa Noodle Pad Thai
My lighter, protein-packed Quinoa Noodle Pad Thai! All the sweet, sour & salty flavors you love, ready in 30 mins. A gluten-free weeknight hero that's seriously delicious.
Ingredients
Ingredients
-
200 g quinoa noodles (or pad thai-style rice noodles)
-
2 tbsp coconut oil or avocado oil
-
200 g firm tofu (pressed and cubed (or protein of choice))
-
2 eggs (lightly beaten)
-
2 cloves garlic (minced)
-
1 small red onion (thinly sliced)
-
1 carrot (julienned)
-
1 cup bean sprouts
-
3 spring onions (sliced (whites and greens separated))
-
1/4 cup roasted peanuts (roughly chopped)
-
1 lime (cut into wedges)
-
Fresh coriander (for serving)
-
3 tbsp tamari or coconut aminos (for the sauce)
-
2 tbsp tamarind paste (for the sauce)
-
1.5 tbsp maple syrup or coconut sugar (for the sauce)
-
1 tbsp fresh lime juice (for the sauce)
-
1-2 tsp sriracha or chilli garlic paste (to taste, for the sauce)
Instructions
-
Noodle Prep. Bring a large pot of salted water to a boil. Cook the quinoa noodles according to package directions, but aim for just al dente—usually about 5-7 minutes. Once cooked, drain immediately and rinse with cold water to stop the cooking process. Toss them with a tiny bit of oil to prevent sticking and set them aside.01
-
Crisp the Tofu. While the noodles cook, heat 1 tablespoon of oil in your wok or large skillet over medium-high heat. Add the pressed and cubed tofu. Cook, stirring occasionally, until golden brown and crisp on all sides. This should take about 5-7 minutes. Season with a tiny pinch of salt. Remove the tofu from the wok and set it aside on a plate.02
-
The Aromatics & Egg. Reduce the heat to medium and add the remaining tablespoon of oil to the wok. Add the minced garlic and the white parts of the spring onions. Sauté for just 30-60 seconds until fragrant—be careful not to burn the garlic! Push the aromatics to one side of the wok and pour the beaten eggs into the empty space. Scramble the eggs gently, breaking them up into small curds as they cook.03
-
Veggie Time. Now, add the sliced red onion and julienned carrot to the wok. Stir-fry for 2-3 minutes until the vegetables have just started to soften but still retain a good crunch. You'll notice the colours becoming more vibrant.04
-
Bring It All Together. Add the drained noodles and the crispy tofu back into the wok. Give the sauce a quick stir (the ingredients might have settled) and then pour it over everything. Using a pair of tongs or two spatulas, toss everything together vigorously. You want every strand of noodle to be coated in that glorious sauce. Let it cook for another minute so the noodles can soak up the flavours.05
-
The Final Touches. Turn off the heat. Now, stir in most of the bean sprouts and the green parts of the spring onions. This keeps them lovely and crisp. Give it one final toss. Your kitchen should smell absolutely incredible by now.06
-
Plate and Garnish. Divide the Pad Thai among bowls. Top with the remaining fresh bean sprouts, a generous handful of chopped peanuts, and a big squeeze of fresh lime juice. Scatter some fresh coriander leaves over the top. Serve immediately while it's hot and wonderfully aromatic.07