
Why You’ll Love This Protein Smoothie Popsicles
- They’re a sneaky source of nutrition. Honestly, these are the ultimate healthy hack. You’re getting a solid dose of protein, vitamins from the fruit, and good fats, all disguised as a frosty treat. It’s the kind of snack that makes you feel good from the inside out.
- The texture is magically creamy, not icy. The trick is in the ingredients—using creamy elements like Greek yogurt or a ripe banana prevents that unpleasant, rock-hard ice block texture. You’ll get a smooth, almost soft-serve-like consistency that’s an absolute dream to eat.
- They’re endlessly customizable. Got a favorite protein powder flavor? A berry you love? A nut butter obsession? This recipe is your playground. You can mix and match to create your own signature popsicle, which means you’ll never get bored.
- Perfect for meal prep and busy schedules. Making a batch takes minutes, and then your freezer is stocked with ready-to-go, portion-controlled snacks for the whole week. It’s the ultimate in convenience without compromising on quality.
Ingredients & Tools
- 1 cup plain Greek yogurt (or a dairy-free alternative like coconut yogurt)
- 1 scoop (about 30g) vanilla or unflavored protein powder
- 1 large very ripe banana (frozen is even better for extra creaminess)
- 1 cup frozen mixed berries (like strawberries, blueberries, and raspberries)
- 1/2 cup milk of choice (almond, oat, or dairy milk all work beautifully)
- 1 tablespoon honey or maple syrup (optional, depending on your sweetness preference)
- 1 tablespoon chia seeds or flax seeds (for a little extra fiber and texture)
Tools: A high-speed blender, popsicle molds (this recipe makes about 6 standard-sized popsicles), and popsicle sticks.
The quality of your ingredients really shines through here. Using a ripe banana is non-negotiable for natural sweetness and that creamy texture. And don’t skip the frozen fruit—it’s the key to getting that perfect, frosty popsicle consistency right out of the blender.
Serves: 6 | Prep Time: 10 minutes | Freeze Time: 4-6 hours | Total Time: 4+ hours (mostly hands-off)
Before You Start: Tips & Ingredient Notes
- Why is my banana so important? A ripe, spotty banana is much sweeter and blends into a smoother, creamier base. If you use a green banana, you’ll miss out on that natural sweetness and might get a slightly starchy flavor.
- Can I really use any protein powder? Pretty much! Vanilla or unflavored are the most versatile. Be cautious with strongly flavored powders (like chocolate or peanut butter) unless you’re planning your entire recipe around that flavor. Also, whey protein tends to create a smoother texture than some plant-based blends, which can be grittier.
- What if my blender isn’t super powerful? No worries! Let the frozen fruit sit in the milk for 5-10 minutes to soften slightly before blending. This little trick prevents your blender motor from working too hard and ensures a silky-smooth mixture.
- How do I get the popsicles out of the mold easily? The number one tip! Run the outside of the mold under warm water for just 10-15 seconds. You’ll feel the popsicle loosen its grip, and it should slide out effortlessly. Don’t run it for too long, or you’ll melt the surface!
How to Make Protein Smoothie Popsicles
Step 1: The Great Combine. Add all of your ingredients—the Greek yogurt, protein powder, banana, frozen berries, milk, and your optional sweetener—into the pitcher of your blender. Honestly, the order doesn’t matter too much here. I like to put the liquid and yogurt in first to help everything blend more easily. The chia seeds can go in now, too; they’ll add a lovely little texture.
Step 2: Blend to Smooth Perfection. Start your blender on low speed and gradually increase it to high. You’ll notice the frozen fruit getting chopped up, and the mixture will start to look like a thick, luxurious smoothie. Blend for a good 60-90 seconds, or until you can’t see any chunks of fruit or specks of protein powder. It should be completely smooth and have a beautiful, uniform color. If it’s too thick and struggling to blend, add another tablespoon or two of milk to get things moving.
Step 3: Taste and Adjust. This is a crucial step! Give the smoothie base a quick taste. Is it sweet enough for you? If not, add a bit more honey or maple syrup and blend for another 10 seconds. Remember, the flavor will be slightly muted once frozen, so it should taste a touch sweeter than you’d want a drinkable smoothie to be.
Step 4: Fill the Molds (Neatly!). Now, carefully pour the smoothie mixture into your popsicle molds. A small measuring cup with a spout or even a funnel makes this process much cleaner. Leave about a 1/4-inch of space at the top because the mixture will expand slightly as it freezes. Tap the molds gently on the counter to release any air bubbles.
Step 5: Insert the Sticks and Freeze. Place the lids on your molds (if they have them) and insert the popsicle sticks according to the manufacturer’s instructions. If your mold doesn’t have a lid to hold the sticks upright, you can cover the top with a piece of aluminum foil and gently poke the sticks through the foil—this will keep them standing straight. Now, the hardest part: patience. Place the molds in the freezer on a flat surface and let them freeze completely. This usually takes at least 4-6 hours, but for the best results, I like to leave them overnight.
Serving Suggestions
Complementary Dishes
- A big, crunchy salad — The fresh, crisp textures of a garden salad are a fantastic contrast to the cold, creamy popsicle, making for a light yet satisfying lunch.
- Scrambled eggs with avocado — For a post-workout breakfast, the savory, fatty eggs and avocado balance the sweet, fruity popsicle perfectly.
- Grilled chicken or fish — Serve one of these popsicles as a unique and healthy “dessert” after a lean protein-focused dinner; it’s surprisingly refreshing.
Drinks
- Sparkling water with a lime wedge — The bubbles and citrus cleanse the palate and enhance the fruity notes of the popsicle without adding extra calories.
- A warm cup of green tea — The contrast between the hot tea and the frozen treat is wonderfully stimulating and feels like a real moment of self-care.
- Cold brew coffee — The bitterness of the coffee pairs brilliantly with the sweetness of the popsicle, especially if you’ve used a vanilla-based flavor.
Something Sweet
- A small square of dark chocolate — Let a piece of high-quality dark chocolate melt on your tongue after the popsicle for a rich, decadent finish.
- A few fresh raspberries — Their tart pop echoes the berry flavors in the popsicle and adds a fresh, juicy element.
- A spoonful of almond butter — The creamy, nutty flavor is a fantastic complement to the fruit and adds a hit of healthy fats.
Top Mistakes to Avoid
- Mistake: Using under-ripe fruit. This is the biggest culprit for bland popsicles. Unripe bananas and fresh (instead of frozen) berries lack the concentrated sweetness needed to stand up to the freezing process. Your pops will taste watery and dull.
- Mistake: Overfilling the molds. Remember that liquids expand when they freeze. If you fill the molds right to the top, you’ll end up with a messy overflow in your freezer. Leaving that 1/4-inch gap is a simple step that saves a lot of cleanup.
- Mistake: Skipping the taste test. I’ve messed this up before too… you blend, you pour, you freeze, and then you’re disappointed. Always taste your mixture before freezing! Adjust the sweetness or flavor then, because you can’t fix it later.
- Mistake: Trying to remove the popsicles without warming the mold. Yanking on the stick will only lead to breakage and frustration. The 10-second warm water bath is non-negotiable for a perfect, intact popsicle every single time.
Expert Tips
- Tip: Create fun flavor layers. For a visually stunning effect, blend a green layer (with spinach and mango) and a pink layer (with berries). Pour one layer into the mold, freeze for 30 minutes, then add the second layer and freeze completely. It’s a real wow-factor!
- Tip: Add a “magic shell” chocolate coating. Melt together 1/2 cup of dark chocolate chips and 1 tablespoon of coconut oil. Once your popsicles are frozen, dip them quickly into the chocolate—it will harden almost instantly into a delicious, crackly shell.
- Tip: Use leftover smoothie. Made too much morning smoothie? Instead of drinking it, pour it right into popsicle molds! It’s the easiest way to prevent waste and have a ready-made snack for later in the week.
- Tip: For ultra-creamy pops, add avocado. A quarter of a ripe avocado blended in will make the texture unbelievably rich and creamy, and you won’t taste it at all behind the fruit flavors.
FAQs
Can I make these without protein powder?
Absolutely! The recipe will still work perfectly. The protein powder mainly adds thickness and, of course, protein. Without it, you might want to reduce the milk by a tablespoon or two to keep the mixture thick enough. You could also add a tablespoon of rolled oats to the blender for a little extra body and fiber. The flavor will be purely fruity and delicious.
How long do these popsicles last in the freezer?
They keep beautifully for up to 3 months if stored in an airtight container or if your popsicle molds have lids. After that, they might start to develop a little freezer burn or lose their vibrant flavor. For the best texture and taste, I recommend enjoying them within the first month. They never last that long in my house, though!
My popsicles are too hard to eat! What went wrong?
This usually happens if the fat content is too low. Fats (from yogurt, nut butters, etc.) help create a softer, scoopable texture. Next time, try adding a tablespoon of peanut butter or using full-fat yogurt. Also, ensure you’re using a ripe banana, as the natural sugars act as anti-freezing agents. Let the popsicle sit at room temperature for 3-5 minutes before eating to soften slightly.
Can I use fresh fruit instead of frozen?
You can, but I really don’t recommend it for your first try. Frozen fruit is essential for that thick, immediately-freezable consistency. If you use fresh fruit, the mixture will be much runnier, and the resulting popsicle will be icier and less creamy. If you must use fresh, try adding a handful of ice cubes to the blender to compensate, but the texture won’t be quite as good.
Are these suitable for kids?
They are a fantastic healthy snack for kids! They’re much lower in sugar than store-bought options and packed with hidden nutrition. To make them even more kid-friendly, you can use fun-shaped molds (like rockets or animals) and involve them in the process—let them choose the fruit or add a few mini chocolate chips to the mixture before pouring. It’s a great way to get them excited about healthy eating.
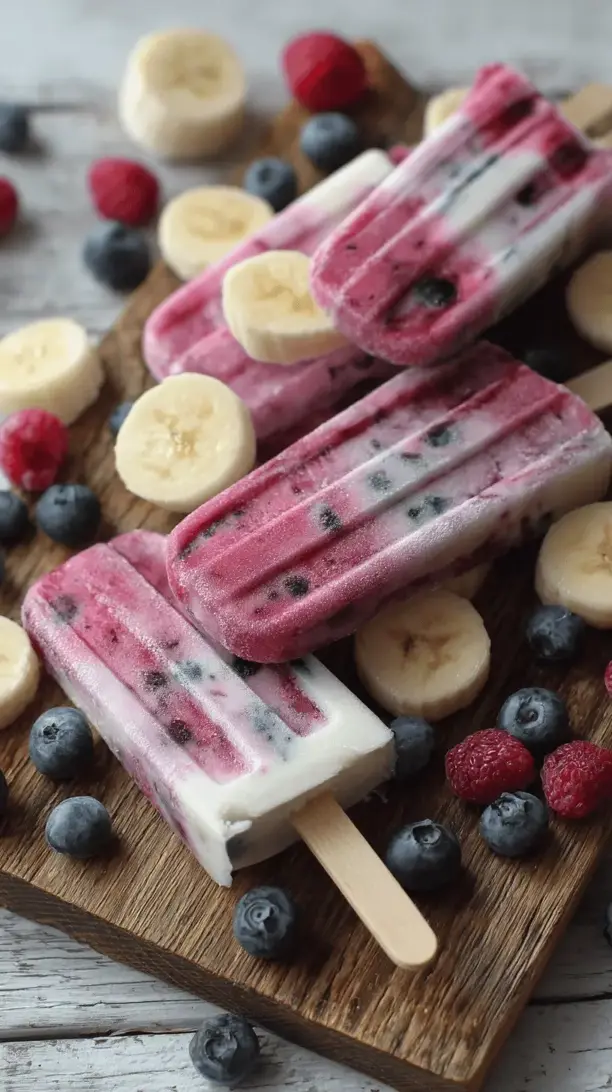
Protein Smoothie Popsicles
Whip up creamy Protein Smoothie Popsicles! A healthy, homemade frozen treat perfect for post-workout fuel or a guilt-free snack. Easy recipe with Greek yogurt & fruit.
Ingredients
Ingredients
-
1 cup plain Greek yogurt (or a dairy-free alternative like coconut yogurt)
-
1 scoop vanilla or unflavored protein powder (about 30g)
-
1 large very ripe banana (frozen is even better for extra creaminess)
-
1 cup frozen mixed berries (like strawberries, blueberries, and raspberries)
-
1/2 cup milk of choice (almond, oat, or dairy milk all work beautifully)
-
1 tablespoon honey or maple syrup (optional, depending on your sweetness preference)
-
1 tablespoon chia seeds or flax seeds (for a little extra fiber and texture)
Instructions
-
The Great Combine. Add all of your ingredients—the Greek yogurt, protein powder, banana, frozen berries, milk, and your optional sweetener—into the pitcher of your blender. Honestly, the order doesn't matter too much here. I like to put the liquid and yogurt in first to help everything blend more easily. The chia seeds can go in now, too; they'll add a lovely little texture.01
-
Blend to Smooth Perfection. Start your blender on low speed and gradually increase it to high. You'll notice the frozen fruit getting chopped up, and the mixture will start to look like a thick, luxurious smoothie. Blend for a good 60-90 seconds, or until you can't see any chunks of fruit or specks of protein powder. It should be completely smooth and have a beautiful, uniform color. If it's too thick and struggling to blend, add another tablespoon or two of milk to get things moving.02
-
Taste and Adjust. This is a crucial step! Give the smoothie base a quick taste. Is it sweet enough for you? If not, add a bit more honey or maple syrup and blend for another 10 seconds. Remember, the flavor will be slightly muted once frozen, so it should taste a touch sweeter than you'd want a drinkable smoothie to be.03
-
Fill the Molds (Neatly!). Now, carefully pour the smoothie mixture into your popsicle molds. A small measuring cup with a spout or even a funnel makes this process much cleaner. Leave about a 1/4-inch of space at the top because the mixture will expand slightly as it freezes. Tap the molds gently on the counter to release any air bubbles.04
-
Insert the Sticks and Freeze. Place the lids on your molds (if they have them) and insert the popsicle sticks according to the manufacturer's instructions. If your mold doesn't have a lid to hold the sticks upright, you can cover the top with a piece of aluminum foil and gently poke the sticks through the foil—this will keep them standing straight. Now, the hardest part: patience. Place the molds in the freezer on a flat surface and let them freeze completely. This usually takes at least 4-6 hours, but for the best results, I like to leave them overnight.05


