
Why You’ll Love This Protein PB Chocolate Cups
- They’re the perfect healthy-ish hack. Seriously, these cups satisfy that deep chocolate-peanut butter craving without the sugar crash. You get the joy of a candy bar with the bonus of staying power from the protein.
- Incredibly simple, no fancy skills required. If you can melt chocolate and stir things in a bowl, you’re already a pro. There’s no baking, no complicated techniques—just layering and freezing.
- Totally customizable to your taste. Not a fan of vanilla protein powder? Use chocolate! Want to add a crunch? Throw in some chopped almonds or a sprinkle of sea salt on top. This recipe is your playground.
- Meal-prep friendly and portable. Make a batch on Sunday, and you’ve got a week’s worth of grab-and-go snacks or desserts. They travel beautifully in a little container, so you’re never caught unprepared.
Ingredients & Tools
- 200 g high-quality dark chocolate chips or a bar (70% cacao or higher works best)
- 1/2 cup creamy, natural peanut butter (the runny kind is ideal)
- 1/4 cup vanilla or chocolate protein powder (whey or plant-based both work)
- 2-3 tbsp maple syrup or honey, to taste
- 1-2 tbsp milk of choice (almond, oat, or dairy), as needed
- 1/4 tsp fine sea salt, plus more for sprinkling
- 1/2 tsp vanilla extract (optional, but boosts flavour)
Tools: A standard 12-cup silicone or non-stick muffin tin, a small saucepan or heatproof bowl for a double boiler, a small spoon or spatula.
The quality of your chocolate really makes a difference here—it’s the star of the show. And that natural, drippy peanut butter is key for creating a smooth, mixable filling without any weird oils separating. Honestly, a little goes a long way with these ingredients.
Serves: 6 (2 cups each) | Prep Time: 15 minutes | Freeze Time: 30 minutes | Total Time: 45 minutes
Before You Start: Tips & Ingredient Notes
- Why natural peanut butter? The oils in natural peanut butter help create a wonderfully smooth and pliable filling that mixes beautifully with the protein powder. If you use a thicker, stabilised kind, you might need to add a bit more milk to get the right consistency.
- Choosing your protein powder. A protein powder you already enjoy the taste of is crucial! Vanilla is a classic, but chocolate is a no-brainer for double chocolate action. I’d avoid unflavoured ones here unless you plan to amp up the sweetness and flavour yourself.
- The chocolate melting method matters. Melting chocolate gently is the trick to a smooth, glossy shell. A double boiler (or a bowl set over a pot of simmering water) is your best friend. Microwaving in short bursts works too, but you have to be super vigilant to avoid seizing.
- Don’t skip the salt. That pinch of salt in the filling and a flaky sprinkle on top before freezing cuts through the sweetness and enhances the chocolate and peanut butter flavours exponentially. It’s a game-changer.
How to Make Protein PB Chocolate Cups
Step 1: Prepare Your Station. First things first, grab your muffin tin. If you’re not using a flexible silicone mold, I highly recommend lining the cups with parchment paper strips or using mini cupcake liners. This makes popping the finished cups out an absolute breeze. Trust me on this—it saves a lot of frustration later.
Step 2: Melt the Chocolate. This is where a little patience pays off. Break your chocolate into small, even pieces if using a bar. Place it in a heatproof bowl set over a saucepan of gently simmering water, making sure the bottom of the bowl doesn’t touch the water. Stir occasionally with a dry spoon or spatula until it’s completely smooth and glossy. You’ll notice the aroma is just incredible. Once melted, take it off the heat immediately.
Step 3: Create the Chocolate Base. Using a small spoon, add about a teaspoon of the melted chocolate to the bottom of each muffin cup. The goal is to create a solid base layer. Now, here’s a pro move: lift the tin and gently tap it on the counter a few times. This helps the chocolate settle into an even layer. Pop the entire tin into the freezer for about 5-7 minutes, just until the chocolate is set. It should look matte and feel firm to a light touch.
Step 4: Make the Protein Peanut Butter Filling. While the base sets, let’s make the heart of the cup. In a medium bowl, combine the runny peanut butter, protein powder, maple syrup, vanilla extract (if using), and that important 1/4 teaspoon of salt. Stir vigorously with a spoon or spatula. It will thicken up quickly. If it seems too dry or crumbly to stick together, add a tablespoon of milk at a time until it reaches a thick, cookie-dough-like consistency that’s easy to scoop.
Step 5: Add the Filling Layer. Take the tin out of the freezer. Scoop up small portions of the peanut butter mixture—about a heaping teaspoon each—and roll them into little balls between your palms. Flatten each ball slightly into a disc and gently press it onto the set chocolate base, leaving a small border around the edge. This border is crucial for the final chocolate layer to seal everything in.
Step 6: The Final Chocolate Seal. If the remaining melted chocolate has thickened up, you can gently re-warm it for a few seconds. Spoon the chocolate over each peanut butter disc, covering it completely and sealing the edges. Use the back of your spoon to smooth the top. This is the time for that fancy flaky sea salt sprinkle—it looks beautiful and tastes even better.
Step 7: Freeze Until Solid. Carefully transfer the filled tin back to the freezer. Now, the hard part: waiting! Let them freeze for at least 25-30 minutes, or until completely firm. You’ll know they’re ready when the top chocolate shell is hard and doesn’t give when you press it.
Step 8: Pop Them Out & Enjoy! Once fully set, remove the tin from the freezer. If you used a silicone mold, they should pop out with a gentle push from the bottom. For a regular tin with liners, just lift them out. Let them sit at room temperature for 2-3 minutes before eating—this allows the texture to perfect from rock-hard to satisfyingly firm yet creamy.
Serving Suggestions
Complementary Dishes
- A simple fruit platter — The fresh, bright acidity of berries or orange slices provides a lovely contrast to the rich, dense cups, making a dessert platter feel more complete.
- A warm cup of Greek yoghurt — Placing a slightly thawed cup on top of creamy yoghurt adds a decadent twist to your breakfast or snack, with a fantastic mix of temperatures and textures.
Drinks
- Cold brew coffee or a strong espresso — The bitterness of the coffee is a classic pairing with dark chocolate and peanut butter, cutting through the richness beautifully.
- A glass of unsweetened almond milk — For a truly cozy and nostalgic experience, nothing beats the combination of peanut butter cups and a cold glass of milk—it’s a timeless duo.
Something Sweet
- A small bowl of mixed berries — If you want to keep things light, fresh raspberries or strawberries offer a tart, juicy counterpoint that prevents the cups from feeling too heavy.
- A dollop of coconut whipped cream — For a seriously indulgent moment, a little cloud of lightly sweetened coconut cream turns one cup into a restaurant-worthy dessert.
Top Mistakes to Avoid
- Mistake: Using chocolate that’s too low in cocoa. Milk chocolate has a higher sugar content and is more prone to melting at room temperature, which can make your cups messy and too soft. The higher cocoa content in dark chocolate provides a better structure and a more sophisticated, less cloying taste.
- Mistake: Rushing the freezing steps. If you don’t let the base layer set fully before adding the filling, the two layers can bleed together. Similarly, not freezing them long enough at the end means they’ll be impossible to remove from the tin in one piece. Patience is key!
- Mistake: Making the filling too wet. Adding too much milk to the peanut butter mixture can make it seep into the chocolate layers, creating a muddy texture. Add liquid sparingly, just until the mixture is pliable and holds together when pressed.
- Mistake: Skipping the parchment paper if using a metal tin. I’ve messed this up before too… trying to pry out frozen cups with a knife. It’s not pretty. The liner or parchment strip is a simple step that guarantees perfect, intact cups every single time.
Expert Tips
- Tip: Grate a little of the chocolate bar before melting. Save a small piece of the chocolate bar and grate it finely. Sprinkle these tiny curls over the top along with the salt before freezing for a professional, bakery-style finish.
- Tip: Warm your spoon for a smooth top. Dipping your spoon in hot water and drying it quickly before smoothing the final chocolate layer will help you achieve a mirror-like, perfectly glossy surface with ease.
- Tip: Experiment with nut butters. While peanut butter is classic, feel free to try this with almond butter, cashew butter, or even sunflower seed butter for a nut-free version. Each one brings a unique flavour profile that’s equally delicious.
- Tip: For a firmer, snappier cup, use coconut oil. Adding a teaspoon of coconut oil to the melting chocolate will make the shell even harder and give it a more dramatic snap when you break into it. It’s a great trick for hot climates.
FAQs
Can I use a different protein powder?
Absolutely! The beauty of this recipe is its flexibility. A chocolate or even a peanut butter-flavoured protein powder would be fantastic. If you’re using an unflavoured or a very subtly flavoured powder, you might want to add an extra dash of vanilla extract or a touch more maple syrup to compensate. Just be mindful that some plant-based powders can be more absorbent, so you may need to adjust the amount of milk added to get the right dough-like consistency.
How should I store these, and how long do they last?
Because of the fresh peanut butter, these cups are best stored in an airtight container in the freezer. They’ll keep perfectly for up to 2 months—though I doubt they’ll last that long! You can eat them straight from the freezer (they’re like a frozen candy bar) or let them sit out for a few minutes to soften slightly. I don’t recommend storing them in the fridge, as they can become too soft and lose their satisfying texture.
My chocolate seized and became grainy. What happened?
Ah, the dreaded seized chocolate! This usually happens if a tiny bit of moisture or steam gets into the chocolate while melting. Even a drop of water can cause the fats to bind tightly and create a grainy, thick mess. If this happens, don’t panic. You can sometimes save it by stirring in a teaspoon of a neutral oil (like coconut or vegetable oil) off the heat until it smooths out again. To prevent it, always ensure your bowls, spoons, and hands are completely dry.
Can I make these without a muffin tin?
You can! A mini muffin tin is ideal for the classic cup shape, but if you don’t have one, a small ice cube tray with rectangular compartments works wonderfully. You could even simply spoon layers onto a parchment-lined baking sheet to create more free-form “bark” or clusters. They might not look as uniform, but they’ll taste just as incredible.
Are these cups keto-friendly?
You can easily adapt them to be keto! The main adjustments would be to use a sugar-free chocolate sweetened with stevia or monk fruit, and swap the maple syrup for a keto-friendly liquid sweetener like allulose or erythritol syrup. Just be sure to check the labels on your protein powder and peanut butter to ensure they have no added sugars. With those swaps, you can enjoy a keto-approved version of this treat.
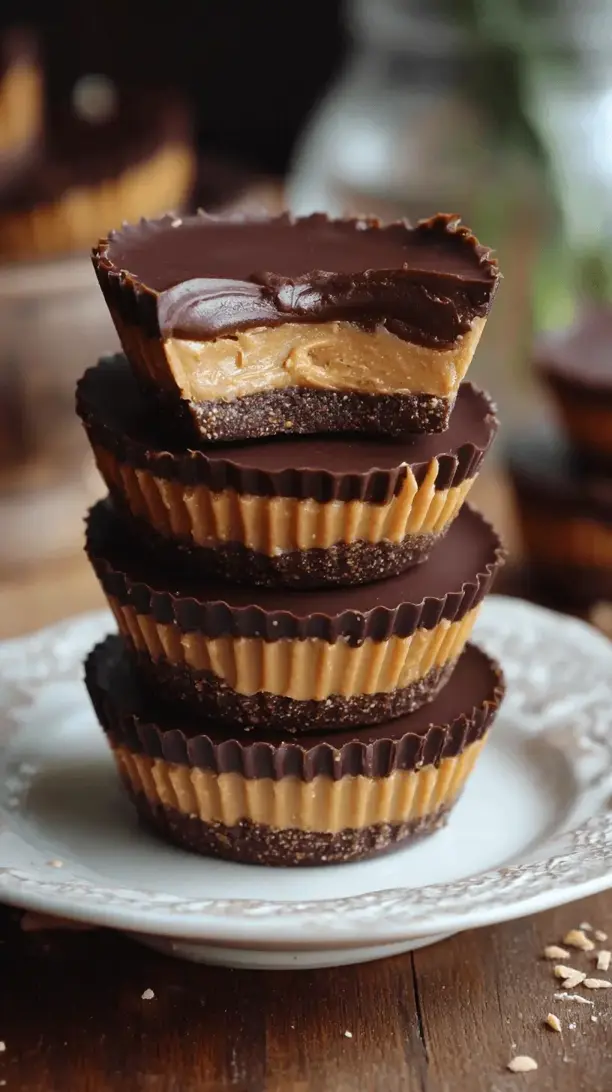
Protein Pb Chocolate Cups
Whip up decadent Protein PB Chocolate Cups! This easy, no-bake recipe combines dark chocolate & a creamy peanut butter protein filling for a healthy-ish snack that satisfies cravings.
Ingredients
Ingredients
-
200 g high-quality dark chocolate chips or a bar (70% cacao or higher works best)
-
1/2 cup creamy, natural peanut butter (the runny kind is ideal)
-
1/4 cup vanilla or chocolate protein powder (whey or plant-based both work)
-
2-3 tbsp maple syrup or honey (to taste)
-
1-2 tbsp milk of choice (almond, oat, or dairy) (as needed)
-
1/4 tsp fine sea salt (plus more for sprinkling)
-
1/2 tsp vanilla extract (optional, but boosts flavour)
Instructions
-
Prepare Your Station. First things first, grab your muffin tin. If you're not using a flexible silicone mold, I highly recommend lining the cups with parchment paper strips or using mini cupcake liners. This makes popping the finished cups out an absolute breeze. Trust me on this—it saves a lot of frustration later.01
-
Melt the Chocolate. This is where a little patience pays off. Break your chocolate into small, even pieces if using a bar. Place it in a heatproof bowl set over a saucepan of gently simmering water, making sure the bottom of the bowl doesn't touch the water. Stir occasionally with a dry spoon or spatula until it's completely smooth and glossy. You'll notice the aroma is just incredible. Once melted, take it off the heat immediately.02
-
Create the Chocolate Base. Using a small spoon, add about a teaspoon of the melted chocolate to the bottom of each muffin cup. The goal is to create a solid base layer. Now, here's a pro move: lift the tin and gently tap it on the counter a few times. This helps the chocolate settle into an even layer. Pop the entire tin into the freezer for about 5-7 minutes, just until the chocolate is set. It should look matte and feel firm to a light touch.03
-
Make the Protein Peanut Butter Filling. While the base sets, let's make the heart of the cup. In a medium bowl, combine the runny peanut butter, protein powder, maple syrup, vanilla extract (if using), and that important 1/4 teaspoon of salt. Stir vigorously with a spoon or spatula. It will thicken up quickly. If it seems too dry or crumbly to stick together, add a tablespoon of milk at a time until it reaches a thick, cookie-dough-like consistency that's easy to scoop.04
-
Add the Filling Layer. Take the tin out of the freezer. Scoop up small portions of the peanut butter mixture—about a heaping teaspoon each—and roll them into little balls between your palms. Flatten each ball slightly into a disc and gently press it onto the set chocolate base, leaving a small border around the edge. This border is crucial for the final chocolate layer to seal everything in.05
-
The Final Chocolate Seal. If the remaining melted chocolate has thickened up, you can gently re-warm it for a few seconds. Spoon the chocolate over each peanut butter disc, covering it completely and sealing the edges. Use the back of your spoon to smooth the top. This is the time for that fancy flaky sea salt sprinkle—it looks beautiful and tastes even better.06
-
Freeze Until Solid. Carefully transfer the filled tin back to the freezer. Now, the hard part: waiting! Let them freeze for at least 25-30 minutes, or until completely firm. You'll know they're ready when the top chocolate shell is hard and doesn't give when you press it.07
-
Pop Them Out & Enjoy! Once fully set, remove the tin from the freezer. If you used a silicone mold, they should pop out with a gentle push from the bottom. For a regular tin with liners, just lift them out. Let them sit at room temperature for 2-3 minutes before eating—this allows the texture to perfect from rock-hard to satisfyingly firm yet creamy.08


