
Why You’ll Love This Protein Packed Chocolate Muffins
- They’re genuinely satisfying. Unlike many store-bought muffins that are basically cupcakes in disguise, these have a balanced mix of protein, fiber, and healthy fats that actually keep you full. No more reaching for another snack twenty minutes later.
- The texture is a dream. We’re using a clever combination of ingredients to achieve a moist, tender crumb that rivals any traditional recipe. You get that satisfying crack when you break one open, revealing a soft, chocolatey interior.
- They’re incredibly versatile. This recipe is a fantastic base. Love chocolate chips? Toss in a handful. Feeling adventurous? A swirl of peanut butter or a sprinkle of sea salt on top takes them to a whole new level of deliciousness.
- Meal-prep magic. These muffins freeze like a dream. Making a batch on Sunday means you have a quick, healthy breakfast or snack ready to go all week long. Just pop one in the microwave for 20 seconds, and it’s like it just came out of the oven.
Ingredients & Tools
- 2 ripe bananas, mashed (about 1 cup)
- 2 large eggs
- 1/2 cup creamy almond butter (or nut/seed butter of choice)
- 1/3 cup pure maple syrup or honey
- 1 tsp vanilla extract
- 1/4 cup milk of choice (dairy, almond, oat)
- 1 cup oat flour (certified gluten-free if needed)
- 1/2 cup vanilla or chocolate protein powder (whey or plant-based)
- 1/2 cup unsweetened cocoa powder
- 1 tsp baking soda
- 1/2 tsp baking powder
- 1/4 tsp salt
- 1/2 cup dark chocolate chips (plus more for topping)
Tools: 12-cup muffin tin, muffin liners (highly recommended!), two mixing bowls, whisk, spatula, cooling rack.
A quick note on the ingredients—using ripe bananas is non-negotiable here. They provide natural sweetness and moisture, meaning we can cut back on added sugars. And don’t stress about the protein powder; just use a brand you enjoy the taste of, as its flavor will come through.
Serves: 12 | Prep Time: 15 minutes | Cook Time: 18-20 minutes | Total Time: 35 minutes
Before You Start: Tips & Ingredient Notes
- Banana ripeness is key. The more brown spots, the better! They’ll be easier to mash and will contribute a much sweeter, more pronounced banana flavor that complements the chocolate beautifully.
- Choosing your protein powder. This recipe is quite forgiving, but the type of protein powder can affect moisture. Whey protein tends to make a lighter muffin, while plant-based proteins (like pea or brown rice) can be a bit denser. Both work wonderfully, so use what you have.
- Don’t skip the liners. Because these muffins are lower in oil, they can stick a bit more than traditional recipes. Lining your tin is the easiest way to ensure perfect, clean removal every single time.
- Let your eggs come to room temperature. If you have a spare minute, taking the chill off your eggs helps them incorporate more smoothly into the batter, leading to a better rise and more uniform texture.
How to Make Protein Packed Chocolate Muffins
Step 1: Prep and Preheat. Start by preheating your oven to 350°F (175°C). This is crucial for getting that initial oven spring that creates a beautiful dome. Line your muffin tin with 12 liners. Trust me, this small step saves a lot of frustration later.
Step 2: Combine the wet ingredients. In a large mixing bowl, mash your ripe bananas until they’re mostly smooth with just a few small lumps for texture. Add the eggs, almond butter, maple syrup, vanilla extract, and milk. Whisk everything together until it’s well combined and you have a relatively smooth, albeit thick, liquid base. You’ll notice the almond butter might resist at first, but keep whisking—it will come together.
Step 3: Whisk the dry ingredients. In a separate, medium-sized bowl, add the oat flour, protein powder, cocoa powder, baking soda, baking powder, and salt. Whisk them together thoroughly. This isn’t just about mixing; it’s about ensuring the leavening agents (baking soda and powder) are evenly distributed so your muffins rise evenly and you don’t get a bitter bite of baking soda.
Step 4: Combine wet and dry. Pour the dry ingredient mixture into the bowl with the wet ingredients. Use a spatula to gently fold everything together. The trick is to mix until the flour streaks have *just* disappeared. A few lumps are absolutely fine—overmixing is the enemy of a tender muffin! Once it’s almost combined, fold in the 1/2 cup of chocolate chips.
Step 5: Portion the batter. Divide the batter evenly among the 12 prepared muffin cups. I like to use a large cookie scoop or two spoons for this; it keeps things neat and ensures they all bake at the same rate. The cups should be filled almost to the top. This is a thicker batter, so it won’t run over, and filling them high is the secret to that classic muffin top. Sprinkle a few extra chocolate chips on top of each one for a bakery-style finish.
Step 6: Bake to perfection. Place the muffin tin in the preheated oven and bake for 18-20 minutes. You’ll know they’re done when the tops are firm to the touch and a toothpick inserted into the center of a muffin comes out clean or with just a few moist crumbs (not wet batter). The amazing chocolate aroma will fill your kitchen—it’s a good sign!
Step 7: The all-important cool down. This might be the hardest step: patience. Let the muffins cool in the tin for at least 10 minutes before transferring them to a wire rack to cool completely. They finish setting up as they cool, and trying to remove them too early can cause them to break apart.
Serving Suggestions
Complementary Dishes
- A bowl of fresh berries — The bright, tart acidity of raspberries or strawberries cuts through the rich chocolate flavor beautifully, creating a perfectly balanced bite.
- A dollop of Greek yogurt — For an extra protein boost, serve a muffin slightly warm with a spoonful of creamy, plain Greek yogurt. The contrast between warm muffin and cool yogurt is divine.
Drinks
- A cold glass of milk — It’s a classic for a reason. Whether it’s dairy or your favorite plant-based alternative, the creaminess is the perfect partner for chocolate.
- A hot cup of coffee — The bitterness of a good, strong brew enhances the deep cocoa notes in the muffin, making for a sophisticated and satisfying breakfast or afternoon break.
Something Sweet
- A small scoop of vanilla bean ice cream — Turn a muffin into a decadent dessert by splitting it warm and topping it with ice cream. The melting ice cream seeping into the warm crumb is honestly a little bit of magic.
- A drizzle of salted caramel sauce — For a next-level treat, a simple drizzle of salted caramel over the top adds a buttery, salty-sweet dimension that takes these muffins from snack to celebration.
Top Mistakes to Avoid
- Mistake: Overmixing the batter. When you overwork the gluten in the oat flour, the muffins can become tough and dense. Mix until just combined—a few lumps are your friend!
- Mistake: Using green, unripe bananas. They lack the necessary sweetness and moisture, which can result in a bland, dry muffin. Wait for those spots!
- Mistake: Not filling the muffin cups enough. This batter doesn’t spread much, so if you underfill, you’ll end up with sad, flat muffins. Be brave and fill them almost to the top.
- Mistake: Skipping the cooling step. I know it’s tempting, but these muffins need time to set. If you try to peel the liner off while they’re piping hot, you’ll leave half the muffin behind.
Expert Tips
- Tip: Make your own oat flour in seconds. No need to buy a special bag! Simply add rolled oats to a high-speed blender or food processor and blitz until they form a fine powder. It’s fresher and often more economical.
- Tip: For an extra flavor boost, toast your oat flour. Spread your homemade or store-bought oat flour on a baking sheet and toast it in a 350°F oven for 5-7 minutes until fragrant. This deepens the nutty flavor of the oats, which pairs wonderfully with chocolate.
- Tip: Add a textural surprise. Fold in 1/4 cup of chopped walnuts or pecans along with the chocolate chips for a delightful crunch in every bite.
- Tip: Create a swirled effect. Before baking, drop a tiny spoonful of peanut butter or almond butter onto the top of each muffin and use a toothpick to swirl it into the batter. It creates a gorgeous marbled look and a burst of flavor.
FAQs
Can I make these muffins without protein powder?
You can, but you’ll need to make a substitution to account for the missing dry ingredient. I’d recommend replacing the 1/2 cup of protein powder with an additional 1/2 cup of oat flour. The texture will be a bit more dense and cake-like, and they won’t have the same protein content, obviously, but they’ll still be deliciously chocolatey. You might want to add a touch more maple syrup (maybe an extra tablespoon) to compensate for the sweetness often found in protein powder.
How should I store these muffins, and how long do they last?
Once completely cooled, store them in an airtight container at room temperature for 2-3 days. For longer storage, they freeze exceptionally well. Place them in a single layer on a baking sheet to freeze solid, then transfer to a freezer bag. They’ll keep for up to 3 months. To enjoy, just thaw at room temperature or microwave for 20-30 seconds for a warm, fresh-from-the-oven experience.
My muffins turned out a bit dry. What happened?
This usually points to two potential issues: overbaking or overmixing. First, check your oven temperature with an oven thermometer—it might be running hot, causing the muffins to bake too quickly. Second, remember the mixing rule: gentle folds only! Overmixing develops the gluten and squeezes out air, leading to a tougher, drier crumb. Also, ensure you’re using those very ripe, spotty bananas for maximum moisture.
Can I use a different flour instead of oat flour?
Oat flour gives a great texture, but you can experiment. Whole wheat pastry flour is a good 1:1 substitute. Almond flour will work, but it will make the muffins much denser and more fragile due to its high fat content. I don’t recommend using coconut flour, as it’s highly absorbent and requires a complete recipe reformulation.
Are these muffins considered gluten-free?
They can be, but you have to be diligent. Make sure you use certified gluten-free oat flour (as oats are often cross-contaminated with wheat during processing) and double-check that your baking powder and protein powder are also certified gluten-free. If all those boxes are ticked, then yes, they are happily gluten-free!
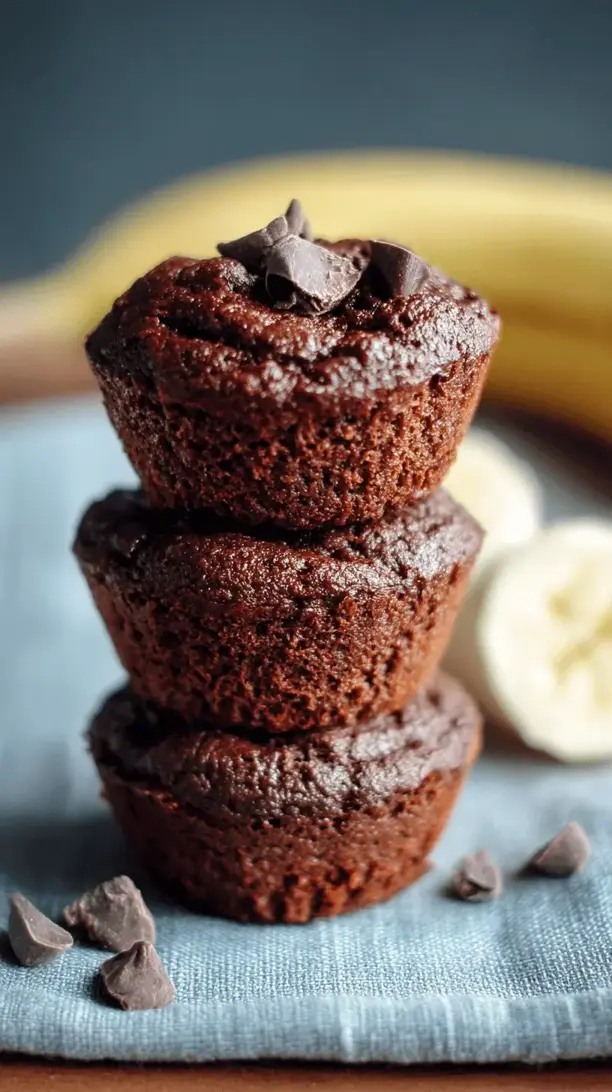
Protein Packed Chocolate Muffins
Craving chocolate but want to feel good? My Protein Packed Chocolate Muffins are moist, rich, and secretly healthy. Perfect for breakfast or a snack! Easy recipe inside.
Ingredients
Ingredients
-
2 ripe bananas (mashed (about 1 cup))
-
2 large eggs
-
1/2 cup creamy almond butter (or nut/seed butter of choice)
-
1/3 cup pure maple syrup or honey
-
1 tsp vanilla extract
-
1/4 cup milk of choice (dairy, almond, oat)
-
1 cup oat flour (certified gluten-free if needed)
-
1/2 cup vanilla or chocolate protein powder (whey or plant-based)
-
1/2 cup unsweetened cocoa powder
-
1 tsp baking soda
-
1/2 tsp baking powder
-
1/4 tsp salt
-
1/2 cup dark chocolate chips (plus more for topping)
Instructions
-
Prep and Preheat. Start by preheating your oven to 350°F (175°C). This is crucial for getting that initial oven spring that creates a beautiful dome. Line your muffin tin with 12 liners. Trust me, this small step saves a lot of frustration later.01
-
Combine the wet ingredients. In a large mixing bowl, mash your ripe bananas until they're mostly smooth with just a few small lumps for texture. Add the eggs, almond butter, maple syrup, vanilla extract, and milk. Whisk everything together until it's well combined and you have a relatively smooth, albeit thick, liquid base. You'll notice the almond butter might resist at first, but keep whisking—it will come together.02
-
Whisk the dry ingredients. In a separate, medium-sized bowl, add the oat flour, protein powder, cocoa powder, baking soda, baking powder, and salt. Whisk them together thoroughly. This isn't just about mixing; it's about ensuring the leavening agents (baking soda and powder) are evenly distributed so your muffins rise evenly and you don't get a bitter bite of baking soda.03
-
Combine wet and dry. Pour the dry ingredient mixture into the bowl with the wet ingredients. Use a spatula to gently fold everything together. The trick is to mix until the flour streaks have *just* disappeared. A few lumps are absolutely fine—overmixing is the enemy of a tender muffin! Once it's almost combined, fold in the 1/2 cup of chocolate chips.04
-
Portion the batter. Divide the batter evenly among the 12 prepared muffin cups. I like to use a large cookie scoop or two spoons for this; it keeps things neat and ensures they all bake at the same rate. The cups should be filled almost to the top. This is a thicker batter, so it won't run over, and filling them high is the secret to that classic muffin top. Sprinkle a few extra chocolate chips on top of each one for a bakery-style finish.05
-
Bake to perfection. Place the muffin tin in the preheated oven and bake for 18-20 minutes. You'll know they're done when the tops are firm to the touch and a toothpick inserted into the center of a muffin comes out clean or with just a few moist crumbs (not wet batter). The amazing chocolate aroma will fill your kitchen—it's a good sign!06
-
The all-important cool down. This might be the hardest step: patience. Let the muffins cool in the tin for at least 10 minutes before transferring them to a wire rack to cool completely. They finish setting up as they cool, and trying to remove them too early can cause them to break apart.07


