
Why You’ll Love This Peanut Butter Oatmeal Balls
- Incredibly simple and fast. Seriously, if you can stir ingredients in a bowl, you can make these. There’s no oven, no complicated techniques—just mix, roll, and enjoy. It’s the kind of recipe that feels almost too easy to be true.
- Perfect for meal prep. This recipe makes a generous batch that stores beautifully in the fridge or freezer. Making a big batch on a Sunday means you’re set with healthy snacks for the entire week, which is a total game-changer for busy schedules.
- Endlessly customizable. Think of the base recipe as a blank canvas. Not a fan of chocolate chips? Swap in dried cranberries. Want a protein boost? Add a scoop of protein powder. The possibilities are honestly limitless, so you can make a new version every time.
- Family-friendly and fuss-free. Kids absolutely adore making these (and eating them!). It’s a fantastic way to get little hands involved in the kitchen, and you can feel good about what they’re snacking on.
Ingredients & Tools
- 1 cup creamy peanut butter (see notes below!)
- 1/3 cup honey or pure maple syrup
- 1 teaspoon pure vanilla extract
- 1 ¼ cups old-fashioned rolled oats
- 1/4 cup ground flaxseed
- 1/4 cup chia seeds
- 1/2 teaspoon ground cinnamon
- 1/4 teaspoon fine sea salt
- 1/2 cup mini chocolate chips (or other mix-ins)
Tools: A large mixing bowl, a sturdy spatula or spoon, a small cookie scoop (optional but helpful!), a baking sheet or plate, and parchment paper.
A quick note on the peanut butter—this is key! You’ll want to use a natural, drippy peanut butter for the best texture. The kind that’s just peanuts and maybe salt. The oily kind that separates is perfect here because it helps bind everything together without making the balls dry.
Serves: Makes about 18-20 balls | Prep Time: 15 minutes | Chill Time: 30 minutes | Total Time: 45 minutes
Before You Start: Tips & Ingredient Notes
- Peanut Butter is Paramount. I mentioned it above, but it’s worth repeating. Avoid using conventional peanut butter with added oils and sugars (like Jif or Skippy). They make the mixture too stiff and sweet. The natural, runny kind gives you the perfect, pliable consistency.
- Rolled Oats for the Win. Old-fashioned rolled oats provide the ideal chewy texture. Quick oats will work in a pinch, but the balls might be a bit softer. Do not use steel-cut oats, as they won’t soften properly.
- Toasting the Oats? A Game Changer. This is an optional but highly recommended step! Spread your oats on a baking sheet and toast them at 350°F (175°C) for 8-10 minutes until fragrant. It adds a wonderful, nutty depth of flavor that takes these balls to the next level.
- The Stickiness Factor. The mixture will seem a bit sticky when you first mix it. That’s normal! Chilling it for 20-30 minutes firms up the fats in the peanut butter and makes rolling much, much easier. Trust the process.
How to Make Peanut Butter Oatmeal Balls
Step 1: Combine the Wet Ingredients. In your large mixing bowl, add the peanut butter, honey (or maple syrup), and vanilla extract. Stir everything together until it’s completely smooth and well-combined. You’ll notice it becomes a lovely, glossy, thick liquid. If your peanut butter was refrigerated, you might need to microwave it for 15-20 seconds to make it easier to stir.
Step 2: Add the Dry Ingredients. Now, add the rolled oats, ground flaxseed, chia seeds, cinnamon, and salt to the bowl. Use your spatula to fold everything together. At first, it might seem like there aren’t enough wet ingredients, but keep folding! After a minute of stirring, you’ll see the oats and seeds fully absorb the moisture and the mixture will come together into a thick, sticky dough.
Step 3: Incorporate the Mix-ins. This is the fun part! Stir in your mini chocolate chips. If you’re using any other add-ins like dried fruit, shredded coconut, or seeds, add them now. Make sure they’re evenly distributed throughout the dough so every ball gets a little bit of everything.
Step 4: The All-Important Chill. This step is crucial for easy handling. Cover the bowl with plastic wrap or a lid and pop it into the refrigerator for at least 30 minutes. You’ll know it’s ready when you press the mixture and it holds its shape without sticking excessively to your fingers. This firming-up time makes the next step a breeze.
Step 5: Roll into Balls. Line a baking sheet or plate with parchment paper. Using a small cookie scoop (about 1 tablespoon in size) or a spoon, portion out the dough. Then, roll each portion between your palms to form a smooth, compact ball. If the mixture starts sticking to your hands, lightly dampen your palms with water—this little trick works wonders.
Step 6: Set and Store. Place the rolled balls on the prepared parchment paper. You can enjoy one right away—they’re delicious at room temperature! But for the best texture and to help them hold their shape, I recommend storing them in an airtight container in the refrigerator. They’ll keep for up to two weeks, or you can freeze them for up to three months.
Serving Suggestions
Complementary Dishes
- A Fresh Fruit Platter — The natural sweetness of berries, apple slices, or banana chunks provides a lovely, fresh contrast to the rich, dense texture of the oatmeal balls.
- A Cup of Greek Yogurt — Crumble one or two balls over a bowl of plain Greek yogurt for a breakfast that’s packed with protein and staying power. It adds a fantastic crunch and flavor.
Drinks
- Cold Glass of Milk — It’s a classic for a reason! The creaminess of milk is the perfect partner for the peanut butter and chocolate. Almond milk or oat milk are delicious dairy-free alternatives.
- Hot Coffee or Tea — Enjoy one with your morning cup of coffee or an afternoon tea. The combination is wonderfully comforting and satisfying.
Something Sweet
- Dark Chocolate-Dipped Strawberries — If you’re serving these as part of a dessert spread, the bright, tart flavor of strawberries dipped in dark chocolate complements the balls without being overly heavy.
- A Small Scoop of Vanilla Ice Cream — For a real treat, place a couple of oatmeal balls alongside a scoop of high-quality vanilla ice cream. The warm, chewy balls with cold, creamy ice cream is divine.
Top Mistakes to Avoid
- Mistake: Using the wrong peanut butter. This is the number one reason recipes fail. Stiff, sugary peanut butter won’t bind properly and will result in crumbly balls that don’t hold their shape. I’ve messed this up before too, trying to use what I had on hand—it’s worth buying the natural kind for this.
- Mistake: Skipping the chill time. I know, it’s tempting to just roll them right away. But if you do, you’ll have a sticky mess on your hands, literally. The chilling step is non-negotiable for easy rolling and the perfect final texture.
- Mistake: Over-measuring the oats. Be sure to use the “spoon and level” method for measuring your oats. Don’t scoop the measuring cup directly into the oat container, as this packs them in and can lead to too-dry, crumbly balls.
- Mistake: Not compacting the balls enough. When you roll them, apply a little pressure to make sure they’re compact. If they’re too loose, they might fall apart when you pick them up. A firm roll ensures they stay together.
Expert Tips
- Tip: Roll with damp hands. This is my absolute best hack for preventing sticky hands. Just run your palms under cold water and shake off the excess before you start rolling each batch. The water creates a barrier that stops the mixture from sticking without adding any extra moisture to the balls themselves.
- Tip: Make a double batch for the freezer. These balls freeze exceptionally well. Place them in a single layer on a parchment-lined baking sheet to “flash freeze” for an hour, then transfer them to a freezer bag. This way, they don’t stick together, and you can grab one or two whenever you need a quick snack.
- Tip: Get creative with coatings. After you roll the balls, try rolling them in extra ingredients for added texture and flavor. Unsweetened shredded coconut, crushed nuts, or even a dusting of cocoa powder can make them look and taste extra special.
- Tip: Add a protein punch. For a more substantial snack, especially post-workout, stir in a scoop of your favorite vanilla or chocolate protein powder. You might need to add an extra tablespoon of honey or peanut butter to counter the drying effect of the powder.
FAQs
Can I use a different nut or seed butter?
Absolutely! Almond butter, cashew butter, or sunflower seed butter (for a nut-free version) work beautifully. Just make sure, again, that it’s the natural, drippy kind. Sunflower seed butter will give the balls a slightly greenish tint over time—that’s completely normal and safe to eat!
My mixture is too dry and crumbly. How can I fix it?
This usually happens if the peanut butter was too thick or the oats were over-measured. Don’t worry, it’s an easy fix! Simply add more peanut butter or a tiny bit more honey, one teaspoon at a time, stirring after each addition until the mixture holds together when you press it.
My mixture is too wet and sticky. What should I do?
If your balls won’t hold their shape and are overly sticky, the mixture likely needs more dry ingredients. Add a tablespoon or two of extra oats or ground flaxseed and mix well. Let it chill for another 15 minutes to see if that firms it up.
How long do these last, and how should I store them?
Store them in an airtight container in the refrigerator for up to 2 weeks. They firm up nicely when chilled. For longer storage, freeze them for up to 3 months. You can eat them straight from the freezer—they have a great frozen candy-bar texture—or let them thaw for 10-15 minutes.
Can I make these without honey for a vegan version?
Yes, definitely! Pure maple syrup is the perfect one-to-one substitute for honey. Agave nectar would also work well. The flavor will be slightly different but just as delicious. Just ensure your chocolate chips are vegan-friendly if that’s a concern.
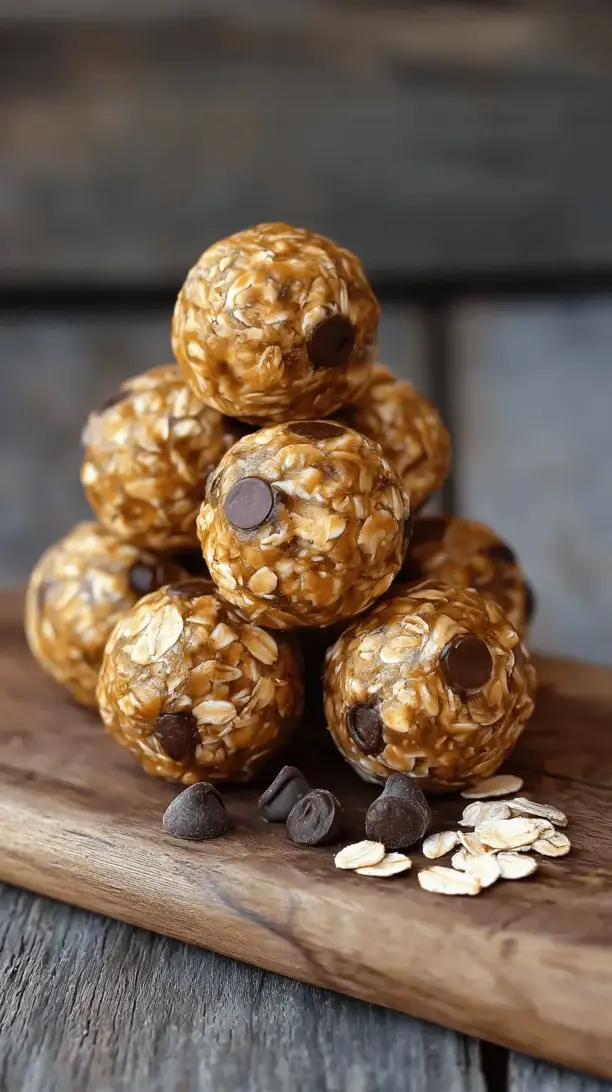
Peanut Butter Oatmeal Balls
Whip up no-bake Peanut Butter Oatmeal Balls in 15 mins! This easy, healthy snack recipe is perfect for energy boosts, meal prep, and lunch boxes. Customizable & kid-friendly.
Ingredients
Ingredients
-
1 cup creamy peanut butter (see notes below!)
-
1/3 cup honey or pure maple syrup
-
1 teaspoon pure vanilla extract
-
1 ¼ cups old-fashioned rolled oats
-
1/4 cup ground flaxseed
-
1/4 cup chia seeds
-
1/2 teaspoon ground cinnamon
-
1/4 teaspoon fine sea salt
-
1/2 cup mini chocolate chips (or other mix-ins)
Instructions
-
Combine the Wet Ingredients. In your large mixing bowl, add the peanut butter, honey (or maple syrup), and vanilla extract. Stir everything together until it's completely smooth and well-combined. You'll notice it becomes a lovely, glossy, thick liquid. If your peanut butter was refrigerated, you might need to microwave it for 15-20 seconds to make it easier to stir.01
-
Add the Dry Ingredients. Now, add the rolled oats, ground flaxseed, chia seeds, cinnamon, and salt to the bowl. Use your spatula to fold everything together. At first, it might seem like there aren't enough wet ingredients, but keep folding! After a minute of stirring, you'll see the oats and seeds fully absorb the moisture and the mixture will come together into a thick, sticky dough.02
-
Incorporate the Mix-ins. This is the fun part! Stir in your mini chocolate chips. If you're using any other add-ins like dried fruit, shredded coconut, or seeds, add them now. Make sure they're evenly distributed throughout the dough so every ball gets a little bit of everything.03
-
The All-Important Chill. This step is crucial for easy handling. Cover the bowl with plastic wrap or a lid and pop it into the refrigerator for at least 30 minutes. You'll know it's ready when you press the mixture and it holds its shape without sticking excessively to your fingers. This firming-up time makes the next step a breeze.04
-
Roll into Balls. Line a baking sheet or plate with parchment paper. Using a small cookie scoop (about 1 tablespoon in size) or a spoon, portion out the dough. Then, roll each portion between your palms to form a smooth, compact ball. If the mixture starts sticking to your hands, lightly dampen your palms with water—this little trick works wonders.05
-
Set and Store. Place the rolled balls on the prepared parchment paper. You can enjoy one right away—they're delicious at room temperature! But for the best texture and to help them hold their shape, I recommend storing them in an airtight container in the refrigerator. They'll keep for up to two weeks, or you can freeze them for up to three months.06


