
Why You’ll Love This Peanut Butter Jelly Thumbprint Cookies
- Nostalgia in Every Bite. This recipe captures the simple, joyful flavor of a PB&J sandwich but in a delightful, bake-sale-worthy cookie form. It’s a treat that will make you smile, whether you’re eight or eighty.
- Incredibly Simple to Make. You honestly don’t need any special skills or equipment here. The dough comes together in one bowl, and the “thumbprint” part is as fun and easy as it sounds—a perfect recipe to make with little helpers.
- The Perfect Texture Combo. You get the soft, slightly sandy crumb of a classic peanut butter cookie contrasting beautifully with the bright, gooey burst of jam in the center. It’s a textural experience that’s really hard to beat.
- Endlessly Customizable. While we’re using classic grape jelly here, you can truly make these your own. Swap in raspberry jam, apricot preserves, or even a spicy pepper jelly for a grown-up twist. The base cookie is your canvas.
Ingredients & Tools
- 1 cup (226 g) unsalted butter, softened to room temperature
- 1 cup (260 g) smooth peanut butter (not natural/oily style)
- 1 cup (200 g) granulated sugar
- 1 cup (220 g) packed light brown sugar
- 2 large eggs, at room temperature
- 2 teaspoons pure vanilla extract
- 3 cups (375 g) all-purpose flour
- 1 teaspoon baking powder
- 1/2 teaspoon baking soda
- 1/2 teaspoon salt
- About 1/2 cup of your favorite jelly or jam (grape, strawberry, and raspberry are classics)
Tools: Two large baking sheets, parchment paper or silicone baking mats, a stand mixer or handheld electric mixer, a medium bowl, a small bowl for the jam, and a teaspoon or a small spoon.
A quick note on the peanut butter: using a standard, shelf-stable brand (like Jif or Skippy) works best here because it has stabilizers that give the cookie a better structure. Natural peanut butters can make the cookies spread too much and become greasy. And room-temperature ingredients are key for a dough that comes together smoothly!
Serves: About 36 cookies | Prep Time: 20 minutes | Cook Time: 10-12 minutes per batch | Total Time: About 1 hour (with chilling and baking in batches)
Before You Start: Tips & Ingredient Notes
- Butter Temperature is Everything. Your butter should be soft enough that you can press a finger into it easily and leave an indent, but not so soft that it’s oily or melted. This is crucial for creaming it properly with the sugar, which creates air pockets for a lighter cookie.
- Why Not Natural Peanut Butter? I know, I know—it’s often healthier. But for baking, the oils in natural peanut butter tend to separate, leading to cookies that spread into sad, flat puddles. The emulsifiers in conventional peanut butter help the cookies hold their shape and give you that perfect texture.
- Don’t Skip the Chill Time. I know it’s tempting to rush straight to baking, but chilling the dough for that 30 minutes is non-negotiable. It solidifies the fat, which prevents excessive spreading in the oven, ensuring your thumbprints stay defined and your cookies are thick and chewy.
- Choosing Your Jam. You can use any jam or jelly you love! Thicker preserves will hold their shape a bit better, while looser jellies might pool a little more—both are delicious. If your jam is very seedy or chunky, you might want to give it a quick stir to break it up for easier spooning.
How to Make Peanut Butter Jelly Thumbprint Cookies
Step 1: Cream the Butter and Sugars. In the bowl of your stand mixer fitted with the paddle attachment (or in a large bowl using a hand mixer), beat the softened butter, peanut butter, granulated sugar, and brown sugar together on medium-high speed. You’ll want to mix for a good 2-3 minutes, until the mixture is very light, fluffy, and pale in color. This step is where you build the foundation for a tender cookie, so don’t rush it!
Step 2: Add the Wet Ingredients. Scrape down the sides of the bowl with a spatula to ensure everything is incorporated. Add the eggs one at a time, beating well after each addition until fully combined. Then, mix in the vanilla extract. The mixture might look a little curdled at this point—that’s perfectly normal and will come together once you add the dry ingredients.
Step 3: Combine the Dry Ingredients. In a separate medium bowl, whisk together the flour, baking powder, baking soda, and salt. This whisking action not only combines them but also aerates the flour a little, contributing to a lighter cookie. With the mixer on low speed, gradually add the dry ingredients to the wet ingredients. Mix just until the flour disappears and no dry streaks remain. Overmixing at this stage can lead to tough cookies.
Step 4: Chill the Dough. Cover the bowl with plastic wrap and refrigerate the dough for at least 30 minutes. This is the perfect time to preheat your oven to 350°F (175°C) and line your baking sheets with parchment paper. Chilling is the secret weapon against flat cookies—it gives the fat a chance to firm up.
Step 5: Shape and Create the Thumbprints. Once chilled, scoop the dough by the tablespoonful and roll it into smooth balls. Place them about 2 inches apart on the prepared baking sheets. Now, for the fun part! Use your thumb, the back of a small teaspoon, or even the end of a wooden spoon to press a deep, clear indentation into the center of each dough ball. Don’t be shy—you want a good well to hold that jam.
Step 6: Fill with Jam. Spoon about half a teaspoon of your chosen jelly or jam into each indentation. You don’t want to overfill them, or the jam will bubble over the sides during baking. A little goes a long way here, creating that perfect sweet pocket.
Step 7: Bake to Perfection. Bake for 10-12 minutes, or until the edges of the cookies are very lightly golden brown. The centers will still look quite soft and pale, and that’s exactly what you want. They will firm up as they cool. You’ll notice the jam will be bubbling happily—that’s a good sign!
Step 8: Cool Completely. Allow the cookies to cool on the baking sheet for 5 minutes before transferring them to a wire rack to cool completely. This resting time on the hot pan helps them set. The jam will be extremely hot straight from the oven, so resist the urge to taste one immediately!
Serving Suggestions
Complementary Dishes
- A cold glass of milk — It’s the classic, unbeatable pairing. The cool, creamy milk cuts through the richness of the peanut butter and complements the sweet jam perfectly, just like the old days.
- A scoop of vanilla bean ice cream — For an incredible à la mode moment, place a warm cookie (gently rewarmed for 10 seconds is magic) underneath a scoop of high-quality vanilla ice cream. The contrast of temperatures and textures is divine.
- A fresh fruit platter — If you’re serving these as part of a brunch or gathering, a platter of sliced strawberries, grapes, and apple wedges adds a fresh, light element that balances the indulgence of the cookies.
Drinks
- Black coffee or a latte — The bitterness of a good, strong coffee is a fantastic counterpoint to the sweetness of the cookie. It turns your snack into a sophisticated little coffee break.
- Chai tea latte — The warm spices in chai—cinnamon, cardamom, ginger—echo the warm, toasty notes in the peanut butter cookie, creating a really cozy and aromatic pairing.
- A glass of Riesling — For a grown-up treat, the slight sweetness and bright acidity of an off-dry Riesling wine complements the fruitiness of the jam and the saltiness of the peanut butter beautifully.
Something Sweet
- Lemon sorbet — After the rich, nutty cookies, a small scoop of sharp, refreshing lemon sorbet acts as a palate cleanser and ends the meal on a bright, zesty note.
- Dark chocolate truffles — A single piece of high-cocoa dark chocolate offers a sophisticated, not-too-sweet finish that contrasts nicely with the cookie’s homestyle vibe.
- A simple berry compote — Warm up some extra berries with a touch of sugar and spoon them over the cookies for a double-berry delight that feels extra special.
Top Mistakes to Avoid
- Mistake: Using melted or too-soft butter. This is the number one reason cookies spread too much. If your butter is oily, your cookies will lose their shape and the thumbprint will bake closed. Properly softened butter is key.
- Mistake: Skipping the dough chilling step. I’ve messed this up before too, thinking I could save time. The result is always a flat, greasy cookie. The chill time is what gives them their perfect, slightly domed shape.
- Mistake: Overbaking the cookies. You want the edges to be just set and lightly golden. If you wait for the centers to look fully cooked in the oven, they’ll be dry and crumbly once cooled. They continue to cook on the hot baking sheet.
- Mistake: Overfilling the thumbprints. It’s tempting to load up on jam, but too much will bubble over and burn on the pan, creating a sticky mess and making the cookies difficult to remove. A modest half-teaspoon is perfect.
Expert Tips
- Tip: Use a small melon baller or cookie scoop. For perfectly uniform cookies that bake evenly, a small scoop is your best friend. It’s faster than rolling by hand and ensures every cookie is the same size.
- Tip: Dust your thumb with flour. If the dough is sticking to your thumb when you make the indentations, lightly dust your thumb with a bit of flour before pressing. This little trick prevents any tearing or sticking.
- Tip: Re-shape the thumbprints after baking. If the wells puff up a bit during baking, you can take the back of a teaspoon and gently press the indentation back down as soon as the cookies come out of the oven. The dough is soft and pliable at this stage.
- Tip: Experiment with savory-sweet combos. For a truly next-level cookie, try a spoonful of spicy pepper jelly or a dab of fig jam with a tiny sprinkle of flaky sea salt on top before baking. The sweet-salty-spicy combination is incredible.
FAQs
Can I make these cookies ahead of time?
Absolutely! You have a couple of great options. You can prepare the dough, roll it into balls, and freeze them on a baking sheet before transferring to a freezer bag. They’ll keep for up to 3 months. When you’re ready to bake, just thaw the balls on the baking sheet for 15-20 minutes, make the thumbprints, add jam, and bake—you might need to add a minute or two to the baking time. Alternatively, you can bake the cookies completely and store them in an airtight container at room temperature for up to 4 days.
My jam bubbled over and made a mess. What happened?
This usually means the thumbprint wasn’t quite deep enough or was overfilled. The well needs to be a good, clear indentation to contain the jam as it liquefies and bubbles in the heat of the oven. Next time, press a little deeper and be a bit more conservative with the jam. A little goes a long way! If it does bubble over, just let the cookies cool completely on the pan—they’ll often release easily once the jam has reset.
Can I use crunchy peanut butter instead of smooth?
You sure can! Using crunchy peanut butter will give you the same great flavor with the added bonus of little peanut bits throughout the cookie for extra texture. It’s a fantastic variation if you enjoy a bit of crunch. Just make sure it’s still the standard, non-natural kind for the best baking results.
Why are my cookies dry and crumbly?
This is typically a sign of overbaking or accidentally measuring too much flour. The most common way to end up with too much flour is by scooping the measuring cup directly from the bag, which packs the flour in. Instead, spoon the flour into your measuring cup and level it off with a knife for an accurate, light measure. And remember, take the cookies out when the edges are just golden!
Can I use something other than jam for the filling?
Definitely! Get creative. You could use a dollop of Nutella for a chocolate-hazelnut twist, a piece of soft caramel that will melt into a pool, or even a small chunk of peanut butter cup. If you’re using a thicker filling like chocolate, you might want to press it in slightly so it doesn’t roll off during baking. The possibilities are endless.
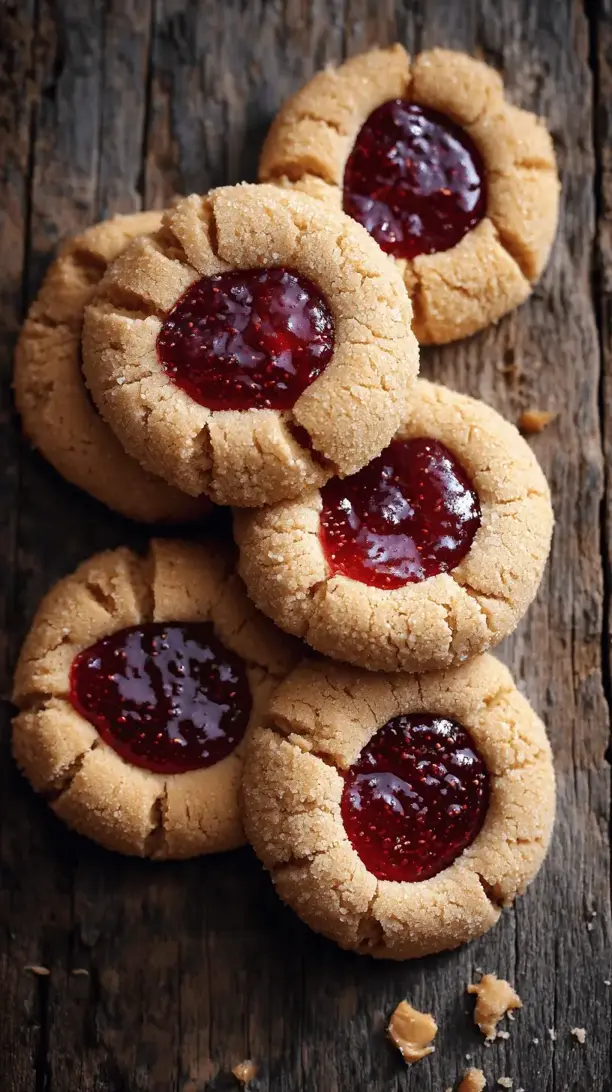
Peanut Butter Jelly Thumbprint Cookies
Transform your favorite PB&J sandwich into soft, crumbly thumbprint cookies! This easy, nostalgic recipe delivers the perfect combo of peanut butter & sweet jam in every bite.
Ingredients
Ingredients
-
1 cup unsalted butter (softened to room temperature (226 g))
-
1 cup smooth peanut butter (not natural/oily style (260 g))
-
1 cup granulated sugar ((200 g))
-
1 cup packed light brown sugar ((220 g))
-
2 large eggs (at room temperature)
-
2 teaspoon pure vanilla extract
-
3 cup all-purpose flour ((375 g))
-
1 teaspoon baking powder
-
0.5 teaspoon baking soda
-
0.5 teaspoon salt
-
0.5 cup your favorite jelly or jam (grape, strawberry, and raspberry are classics)
Instructions
-
Cream the Butter and Sugars. In the bowl of your stand mixer fitted with the paddle attachment (or in a large bowl using a hand mixer), beat the softened butter, peanut butter, granulated sugar, and brown sugar together on medium-high speed. You'll want to mix for a good 2-3 minutes, until the mixture is very light, fluffy, and pale in color. This step is where you build the foundation for a tender cookie, so don't rush it!01
-
Add the Wet Ingredients. Scrape down the sides of the bowl with a spatula to ensure everything is incorporated. Add the eggs one at a time, beating well after each addition until fully combined. Then, mix in the vanilla extract. The mixture might look a little curdled at this point—that's perfectly normal and will come together once you add the dry ingredients.02
-
Combine the Dry Ingredients. In a separate medium bowl, whisk together the flour, baking powder, baking soda, and salt. This whisking action not only combines them but also aerates the flour a little, contributing to a lighter cookie. With the mixer on low speed, gradually add the dry ingredients to the wet ingredients. Mix just until the flour disappears and no dry streaks remain. Overmixing at this stage can lead to tough cookies.03
-
Chill the Dough. Cover the bowl with plastic wrap and refrigerate the dough for at least 30 minutes. This is the perfect time to preheat your oven to 350°F (175°C) and line your baking sheets with parchment paper. Chilling is the secret weapon against flat cookies—it gives the fat a chance to firm up.04
-
Shape and Create the Thumbprints. Once chilled, scoop the dough by the tablespoonful and roll it into smooth balls. Place them about 2 inches apart on the prepared baking sheets. Now, for the fun part! Use your thumb, the back of a small teaspoon, or even the end of a wooden spoon to press a deep, clear indentation into the center of each dough ball. Don't be shy—you want a good well to hold that jam.05
-
Fill with Jam. Spoon about half a teaspoon of your chosen jelly or jam into each indentation. You don't want to overfill them, or the jam will bubble over the sides during baking. A little goes a long way here, creating that perfect sweet pocket.06
-
Bake to Perfection. Bake for 10-12 minutes, or until the edges of the cookies are very lightly golden brown. The centers will still look quite soft and pale, and that's exactly what you want. They will firm up as they cool. You'll notice the jam will be bubbling happily—that's a good sign!07
-
Cool Completely. Allow the cookies to cool on the baking sheet for 5 minutes before transferring them to a wire rack to cool completely. This resting time on the hot pan helps them set. The jam will be extremely hot straight from the oven, so resist the urge to taste one immediately!08


