
Why You’ll Love This Peanut Butter Banana Smoothie Squares
- No-Bake & Incredibly Easy. Honestly, if you can press a button on a blender, you can make these. There’s no oven required, which is a lifesaver when you want a treat without heating up the kitchen.
- The Perfect Make-Ahead Snack. These squares live in the freezer, waiting patiently for you. They’re the ultimate grab-and-go option for a quick breakfast, a post-workout refuel, or a healthy-ish dessert that feels indulgent.
- Endlessly Customizable. The base recipe is fantastic, but it’s also a wonderful canvas for your own creations. Think a swirl of chocolate, a sprinkle of cinnamon, or even a handful of spinach sneaked in—the possibilities are truly endless.
- A Texture You’ll Dream About. The combination of ripe bananas and creamy peanut butter creates a frozen texture that’s smooth and creamy, not icy or hard. It’s seriously satisfying to bite into.
Ingredients & Tools
- 3 large very ripe bananas (the spottier, the better!)
- 1/2 cup creamy, natural peanut butter
- 1/3 cup plain Greek yogurt (or a dairy-free alternative)
- 2-3 tablespoons maple syrup or honey (adjust to your sweetness preference)
- 1 teaspoon pure vanilla extract
- A pinch of fine sea salt
- 2-4 tablespoons milk of choice (any kind will work, just to help with blending)
- Optional add-ins: a handful of rolled oats, a tablespoon of chia seeds, or a scoop of protein powder.
Tools: An 8×8 inch baking pan, parchment paper, a high-speed blender or food processor, and a spatula.
The beauty of this recipe is in its simplicity. Using those super-ripe bananas is non-negotiable—they provide the bulk of the natural sweetness and that unmistakable banana flavor. And for the peanut butter, go for the natural, drippy kind without added sugars or oils for the purest taste and creamiest result.
Serves: 9 squares | Prep Time: 10 minutes | Freeze Time: 4+ hours | Total Time: 4 hours 10 minutes (mostly inactive)
Before You Start: Tips & Ingredient Notes
- Banana Ripeness is Key. Don’t even think about using yellow bananas! You want them to be covered in brown spots. This ensures maximum sweetness and that creamy, almost pudding-like texture when blended. If your bananas aren’t ripe enough, the squares can taste a bit starchy.
- What Kind of Peanut Butter to Use? I really recommend a natural peanut butter where the only ingredients are peanuts and maybe salt. The kind with added oils and sugars can make the texture a bit greasy and overly sweet. Give the jar a really good stir before you measure it out.
- To Sweeten or Not to Sweeten? This is totally up to you! The ripe bananas provide a lot of sweetness. I suggest blending everything first, tasting the mixture, and then deciding if you want to add the maple syrup or honey. It’s easier to add sweetness than to take it away.
- Line That Pan! This might be the most important step for easy removal. Use parchment paper and let a little overhang on two sides. This creates “handles” that let you lift the entire block of frozen squares out of the pan in one go, making slicing so much cleaner.
How to Make Peanut Butter Banana Smoothie Squares
Step 1: Prepare Your Pan. First things first, let’s set ourselves up for success. Grab your 8×8 inch baking pan and line it neatly with a sheet of parchment paper. You want the paper to cover the bottom and come up two opposite sides—this is your secret weapon for a clean release later. A little spritz of cooking spray on the pan before the parchment can help it stick in place, but it’s not strictly necessary.
Step 2: The Blender Magic. Now for the fun part. Peel your very ripe bananas and break them into chunks directly into your blender or food processor. Add the peanut butter, Greek yogurt, vanilla extract, and that pinch of salt. Hold off on the maple syrup and milk for just a moment. Pop the lid on and start blending on low, gradually increasing the speed. You’ll notice it might be a bit thick at first.
Step 3: Achieving the Perfect Consistency. Once the ingredients start to come together, stop the blender and scrape down the sides with a spatula. Now, assess the texture. It should be super smooth and thick, like a very dense smoothie. If it’s struggling to blend, add your milk one tablespoon at a time until it moves freely. This is also the time to taste it! Decide if you’d like it sweeter and add your maple syrup or honey if needed. Blend for another 30 seconds until everything is perfectly incorporated and silky.
Step 4: Pour and Smooth. Pour the beautiful, creamy mixture into your prepared pan. Use your spatula to spread it into an even layer, making sure to get it into all the corners. You want a nice, uniform thickness so all your squares freeze evenly. Give the pan a gentle tap on the countertop to release any air bubbles that might be lurking.
Step 5: The Patient Part—Freezing. Carefully place the pan in the freezer on a flat surface. Now, the hard part: waiting. You’ll want to let it freeze solid, which will take at least 4 hours, but I often leave mine overnight to be safe. The top should be completely firm to the touch. You’re looking for an ice-cream-bar level of firmness.
Step 6: Slicing and Storing. When you’re ready to serve, take the pan out of the freezer. Using the parchment paper handles, gently lift the entire frozen slab out of the pan and onto a cutting board. Use a large, sharp knife to slice it into 9 even squares (or more if you prefer smaller bites). For the cleanest cuts, you can run the knife under hot water and wipe it dry between slices. Enjoy immediately, and store any leftovers in a freezer-safe bag or container.
Serving Suggestions
Complementary Dishes
- A Bowl of Fresh Berries — The bright, tart pop of raspberries or blueberries cuts through the richness of the peanut butter beautifully, creating a lovely balance of flavors.
- A Crisp Apple on the Side — The crunch of a fresh apple slice provides a fantastic textural contrast to the creamy, frozen square, making it a more substantial snack.
Drinks
- Cold Brew Coffee — The deep, roasted notes of coffee are a classic partner for peanut butter and banana. It turns your square into a complete breakfast experience.
- A Glass of Cold Milk — Sometimes, the simple pairing is the best. A sip of cold milk alongside a bite of the square is pure, nostalgic comfort.
Something Sweet
- A Drizzle of Melted Dark Chocolate — For a truly decadent treat, melt a few dark chocolate chips and drizzle it over the top of your square right before eating. It adds a slight crunch and a sophisticated bitterness.
- A Sprinkle of Cinnamon — A light dusting of warm cinnamon over the squares enhances the banana flavor and adds a lovely, aromatic warmth that feels really special.
Top Mistakes to Avoid
- Mistake: Using under-ripe bananas. This is the number one reason the squares might not taste sweet enough or could have a weird, starchy texture. The bananas need to be soft and speckled.
- Mistake: Not lining the pan. I’ve messed this up before, trying to be lazy, and ended up with a crumbly mess trying to pry the squares out. The parchment paper is a non-negotiable step for clean, beautiful squares.
- Mistake: Blending without enough liquid. If your blender is straining and the mixture isn’t moving, it’s okay to add that extra tablespoon of milk. Forcing a too-thick mixture can overheat your blender motor and won’t give you a smooth result.
- Mistake: Not freezing long enough. If the center is still soft, the squares won’t hold their shape when you try to cut them. Be patient and let the freezer work its magic for a full 4 hours, at least.
Expert Tips
- Tip: For an ultra-creamy texture, use frozen bananas. If you have frozen banana chunks on hand, you can use them! You might need to let them thaw for just 10-15 minutes so your blender can handle them, but they create an even creamier, ice-cream-like consistency.
- Tip: Add a secret boost of nutrition. A handful of fresh spinach blends in completely without altering the flavor—promise! It’s a fantastic way to add some greens, especially if you’re making these for kids.
- Tip: Create fun variations. Before freezing, you can swirl in a couple of tablespoons of melted chocolate or a spoonful of berry jam. Just drop it on top and use a knife or toothpick to create pretty swirls for a marbled effect.
- Tip: Prevent freezer burn. To keep your squares tasting fresh for weeks, store them in a single layer in an airtight container with a piece of parchment paper between layers if you stack them. This locks in the creamy texture.
FAQs
Can I make these dairy-free and vegan?
Absolutely! This recipe is incredibly adaptable. Simply use a plant-based yogurt (like coconut or almond-based) and choose maple syrup instead of honey to keep it vegan. For the milk, any unsweetened almond, oat, or soy milk will work perfectly. The result will be just as creamy and delicious.
How long do these smoothie squares last in the freezer?
When stored properly in an airtight container, they will keep well for up to 2-3 months. Honestly, they’ve never lasted that long in my house! For the best texture and flavor, try to enjoy them within the first month. After that, they can sometimes develop a little freezer frost if not sealed tightly.
My squares are too hard to eat right out of the freezer. What should I do?
This is a common question! The beauty of these is that they are meant to be eaten frozen, but if they are rock solid, just let the individual square sit on a plate at room temperature for 5-7 minutes before digging in. This slight thaw softens them up to the perfect creamy, biteable consistency.
Can I use a different nut or seed butter?
You sure can. Almond butter, cashew butter, or even sunflower seed butter (for a nut-free version) would all be fantastic substitutes. Just keep in mind that each will impart its own unique flavor. Almond butter will be a bit milder, while sunflower seed butter will give the squares a slightly greener hue.
Why did my squares turn out icy instead of creamy?
This usually happens if there was too much liquid in the mixture or if the bananas weren’t ripe enough. Ripe bananas have a higher sugar content, which helps prevent large ice crystals from forming. Also, be sure you’re using the thick Greek yogurt and a natural, no-stir peanut butter that isn’t oily. The fat content helps create that smooth, creamy mouthfeel.
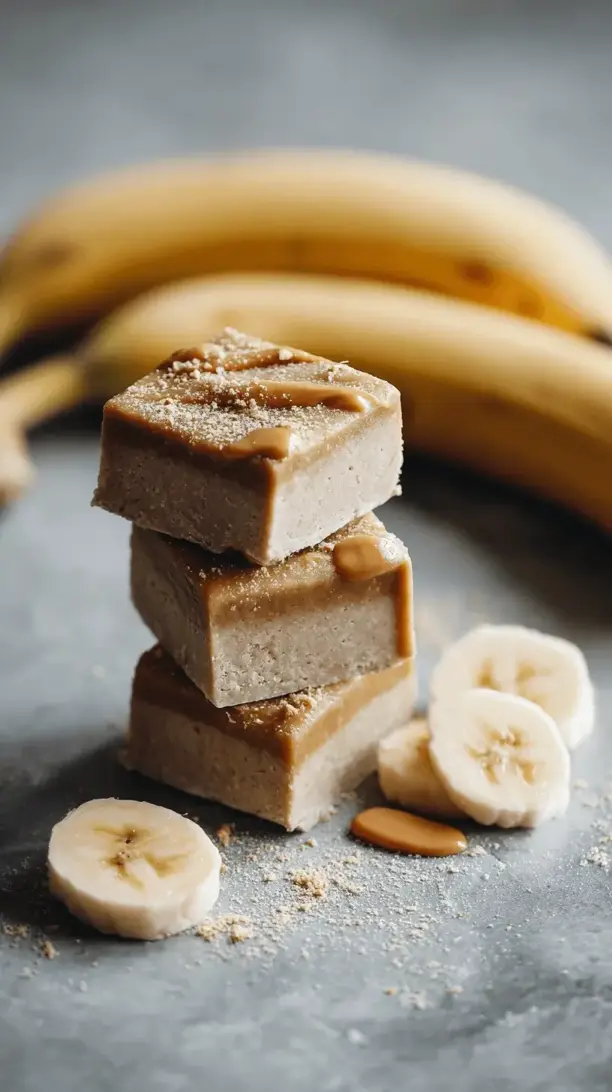
Peanut Butter Banana Smoothie Squares
Turn your favorite smoothie into a frozen treat! These no-bake Peanut Butter Banana Smoothie Squares are an easy, make-ahead snack perfect for busy mornings or a healthy dessert.
Ingredients
Ingredients
-
3 large very ripe bananas (the spottier, the better!)
-
1/2 cup creamy, natural peanut butter
-
1/3 cup plain Greek yogurt (or a dairy-free alternative)
-
2-3 tablespoons maple syrup or honey (adjust to your sweetness preference)
-
1 teaspoon pure vanilla extract
-
A pinch fine sea salt
-
2-4 tablespoons milk of choice (any kind will work, just to help with blending)
-
Optional add-ins (a handful of rolled oats, a tablespoon of chia seeds, or a scoop of protein powder)
Instructions
-
Prepare Your Pan. First things first, let's set ourselves up for success. Grab your 8x8 inch baking pan and line it neatly with a sheet of parchment paper. You want the paper to cover the bottom and come up two opposite sides—this is your secret weapon for a clean release later. A little spritz of cooking spray on the pan before the parchment can help it stick in place, but it's not strictly necessary.01
-
The Blender Magic. Now for the fun part. Peel your very ripe bananas and break them into chunks directly into your blender or food processor. Add the peanut butter, Greek yogurt, vanilla extract, and that pinch of salt. Hold off on the maple syrup and milk for just a moment. Pop the lid on and start blending on low, gradually increasing the speed. You'll notice it might be a bit thick at first.02
-
Achieving the Perfect Consistency. Once the ingredients start to come together, stop the blender and scrape down the sides with a spatula. Now, assess the texture. It should be super smooth and thick, like a very dense smoothie. If it's struggling to blend, add your milk one tablespoon at a time until it moves freely. This is also the time to taste it! Decide if you'd like it sweeter and add your maple syrup or honey if needed. Blend for another 30 seconds until everything is perfectly incorporated and silky.03
-
Pour and Smooth. Pour the beautiful, creamy mixture into your prepared pan. Use your spatula to spread it into an even layer, making sure to get it into all the corners. You want a nice, uniform thickness so all your squares freeze evenly. Give the pan a gentle tap on the countertop to release any air bubbles that might be lurking.04
-
The Patient Part—Freezing. Carefully place the pan in the freezer on a flat surface. Now, the hard part: waiting. You'll want to let it freeze solid, which will take at least 4 hours, but I often leave mine overnight to be safe. The top should be completely firm to the touch. You're looking for an ice-cream-bar level of firmness.05
-
Slicing and Storing. When you're ready to serve, take the pan out of the freezer. Using the parchment paper handles, gently lift the entire frozen slab out of the pan and onto a cutting board. Use a large, sharp knife to slice it into 9 even squares (or more if you prefer smaller bites). For the cleanest cuts, you can run the knife under hot water and wipe it dry between slices. Enjoy immediately, and store any leftovers in a freezer-safe bag or container.06


