
Why You’ll Love This Peanut Butter Banana Cookies
- They’re incredibly soft and chewy. The mashed banana adds natural moisture, ensuring every bite is tender and satisfyingly soft, without being cakey.
- They use up those ripe bananas perfectly. No more guilt about bananas turning brown! This recipe gives them a glorious purpose, and the riper they are, the sweeter your cookies will be.
- The flavor combination is a classic for a reason. The rich, savory depth of peanut butter pairs beautifully with the mellow sweetness of banana, creating a taste that’s both nostalgic and exciting.
- They’re surprisingly simple to make. Honestly, you probably have all the ingredients in your pantry right now. It’s a one-bowl situation with no fancy techniques—just mix, scoop, and bake.
Ingredients & Tools
- 2 large, very ripe bananas (about 1 cup mashed)
- 1 cup creamy peanut butter (see notes below!)
- 1/2 cup packed light brown sugar
- 1 large egg
- 1 tsp vanilla extract
- 1 cup old-fashioned rolled oats
- 1/2 cup all-purpose flour
- 1 tsp baking soda
- 1/2 tsp ground cinnamon
- 1/4 tsp salt
- 1/2 cup chocolate chips (optional, but highly recommended)
Tools: A large mixing bowl, a fork or potato masher, a baking sheet, parchment paper or a silicone baking mat, and a cookie scoop or two spoons.
You’ll notice the ingredient list is pretty straightforward, but a little note on the peanut butter: for the best texture, use a standard, no-stir creamy peanut butter. The natural, oily kinds can sometimes make the cookies spread too much. And those bananas? The spottier, the better—they mash easily and add more natural sweetness.
Serves: Makes about 18 cookies | Prep Time: 10 minutes | Cook Time: 10-12 minutes | Total Time: 25 minutes
Before You Start: Tips & Ingredient Notes
- Banana Ripeness is Key. Don’t even think about using yellow bananas. We’re talking brown, speckled, super-soft ones here. They mash into a smooth, sweet puree that blends seamlessly into the dough.
- Measure Your Mashed Banana. Bananas vary in size, so after you mash them, spoon the banana into a measuring cup to ensure you have a full cup. Too much can make the cookies too wet; too little can make them dry.
- Peanut Butter Matters. As mentioned, a conventional creamy peanut butter like Jif or Skippy works best for structure. If you use a natural peanut butter, make sure it’s well-stirred and consider reducing the brown sugar by a tablespoon if it’s sweetened.
- Don’t Skip the Oats. The rolled oats give these cookies a wonderful, hearty texture and help soak up the extra moisture from the banana. Quick oats will work in a pinch, but the texture will be less pronounced.
How to Make Peanut Butter Banana Cookies
Step 1: Prep and Preheat. Start by preheating your oven to 350°F (175°C). This is crucial for even baking. Then, line your baking sheet with parchment paper or a silicone mat. This prevents sticking and makes cleanup an absolute dream—trust me on this.
Step 2: Mash the Bananas. Peel your very ripe bananas and add them to your large mixing bowl. Use a fork or a potato masher to mash them until they’re relatively smooth, with just a few small lumps for texture. You should have about one cup of mashed banana.
Step 3: Create the Wet Base. To the mashed banana, add the creamy peanut butter, packed brown sugar, egg, and vanilla extract. Stir everything together with a wooden spoon or spatula until it’s well combined and smooth. You’ll notice the mixture will be thick and glossy. The smell at this stage is already fantastic.
Step 4: Combine the Dry Ingredients. In a separate, small bowl, whisk together the old-fashioned oats, all-purpose flour, baking soda, cinnamon, and salt. This little extra step ensures the leavening agents are evenly distributed, so you don’t get a pocket of baking soda in one cookie and not another.
Step 5: Bring the Dough Together. Add the dry ingredient mixture to the wet ingredients. Stir gently until just combined—you don’t want to overmix. The dough will be thick and a bit sticky, which is exactly what we want. Now is the time to fold in those chocolate chips if you’re using them. A little goes a long way for a burst of sweetness.
Step 6: Scoop and Shape. Using a cookie scoop or two spoons, drop rounded tablespoons of dough onto your prepared baking sheet, spacing them about 2 inches apart. These cookies don’t spread a huge amount, but they need a little room to breathe. You can gently flatten the tops with the back of a spoon if you like a flatter cookie.
Step 7: Bake to Perfection. Bake for 10 to 12 minutes. The trick is to pull them out when the edges are just starting to turn a light golden brown, but the centers still look a little soft and underdone. They will continue to set as they cool on the hot baking sheet.
Step 8: The Most Important Step: Cool. Let the cookies cool on the baking sheet for at least 5 minutes before transferring them to a wire rack to cool completely. I know it’s tempting, but this resting time is what gives them that perfect, chewy texture. They’re worth the wait, I promise.
Serving Suggestions
Complementary Dishes
- A cold glass of milk — It’s the ultimate classic for a reason. The cool, creamy milk is the perfect contrast to the warm, spiced cookie.
- A scoop of vanilla bean ice cream — Sandwich a slightly warm cookie around a scoop for an incredible ice cream sandwich. The vanilla enhances the banana flavor beautifully.
- A bowl of fresh berries — The bright, tart acidity of strawberries or raspberries cuts through the richness of the peanut butter for a lovely balance.
Drinks
- Hot coffee — The nutty notes in the coffee echo the peanut butter, making for a sophisticated and cozy pairing, perfect for an afternoon break.
- Chai latte — The warm spices in chai—cinnamon, cardamom, cloves—complement the cinnamon in the cookies, creating a wonderfully aromatic experience.
- A cold glass of almond milk — A great dairy-free option that still gives you that classic cookie-and-milk feeling.
Something Sweet
- A simple fruit salad — If you want to keep things light, a mix of melon, berries, and a squeeze of lime provides a refreshing, palate-cleansing finish.
- A small square of dark chocolate — For the true chocolate lovers, a piece of high-quality dark chocolate alongside a cookie amplifies the cocoa notes.
- A dollop of Greek yogurt with honey — This feels indulgent but is packed with protein, making it a satisfying end to a meal.
Top Mistakes to Avoid
- Mistake: Using underripe bananas. Yellow bananas lack the intense sweetness and soft texture needed. Your cookies will be bland and less moist.
- Mistake: Overmixing the dough. Once you add the dry ingredients, mix just until the flour disappears. Overmixing develops gluten, which can lead to tough, dense cookies.
- Mistake: Overbaking. I’ve messed this up before too—it’s easy to do! Remember, the cookies will firm up as they cool. If you wait for them to look fully set in the oven, they’ll be dry and crumbly once cooled.
- Mistake: Skipping the cooling time on the pan. This step is non-negotiable for achieving the ideal chewy texture. Transferring them immediately can cause them to break apart.
Expert Tips
- Tip: Chill the dough if it’s too sticky. If your bananas were particularly large and the dough feels unmanageable, pop the whole bowl in the fridge for 20-30 minutes. This makes scooping much easier.
- Tip: Add a sprinkle of flaky salt on top. Right when the cookies come out of the oven, add a tiny pinch of flaky sea salt on top of each one. It enhances every single flavor and takes them to a professional bakery level.
- Tip: Customize your mix-ins. Not a chocolate fan? Try chopped peanuts for extra crunch, or raisins for a more traditional oatmeal-raisin vibe. You could even add a dash of nutmeg for extra warmth.
- Tip: Make them uniform. Using a cookie scoop isn’t just for neatness; it ensures all your cookies bake at the same rate, so you don’t have some burnt and some underdone.
FAQs
Can I make these cookies gluten-free?
Absolutely! You can easily make these gluten-free by using a 1-to-1 gluten-free flour blend in place of the all-purpose flour. Just make sure your oats are certified gluten-free, as oats are often processed in facilities that also handle wheat. The texture might be a tiny bit more delicate, but they’ll be just as delicious.
How should I store these cookies, and how long do they last?
Store cooled cookies in an airtight container at room temperature for up to 3 days. They’re best enjoyed within the first day or two while they’re still soft. If you want to keep them longer, you can freeze the baked cookies for up to 2 months. Just thaw them at room temperature when you’re ready for a treat.
Can I freeze the cookie dough?
Yes, this dough freezes beautifully! Scoop the dough onto a parchment-lined baking sheet and freeze until solid. Then, transfer the frozen dough balls to a freezer bag. You can bake them straight from the freezer—just add 1-2 minutes to the baking time. It’s perfect for having fresh cookies on demand.
My cookies didn’t spread much. What happened?
This usually happens if the dough was a bit too cold or if there was slightly too much flour. Next time, make sure your ingredients are at room temperature and fluff your flour before spooning it into the measuring cup and leveling it off. Don’t pack the flour into the cup!
Can I use chunky peanut butter?
Of course! Using chunky peanut butter will give you cookies with little bits of peanut throughout, adding a lovely texture. If you’re also adding chocolate chips, you’ll have a cookie packed with all kinds of delightful surprises in every bite.
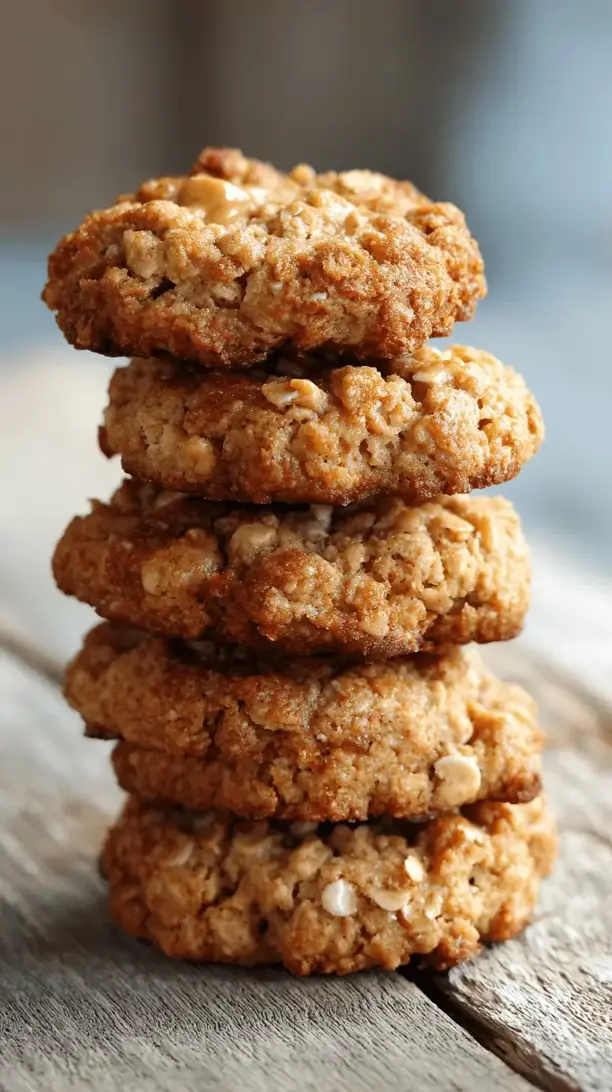
Peanut Butter Banana Cookies
Whip up incredibly soft Peanut Butter Banana Cookies in just 25 minutes! This easy one-bowl recipe uses ripe bananas for the perfect chewy texture. Your kitchen will smell amazing!
Ingredients
Ingredients
-
2 large, very ripe bananas (about 1 cup mashed)
-
1 cup creamy peanut butter (see notes below!)
-
1/2 cup packed light brown sugar
-
1 large egg
-
1 tsp vanilla extract
-
1 cup old-fashioned rolled oats
-
1/2 cup all-purpose flour
-
1 tsp baking soda
-
1/2 tsp ground cinnamon
-
1/4 tsp salt
-
1/2 cup chocolate chips (optional, but highly recommended)
Instructions
-
Prep and Preheat. Start by preheating your oven to 350°F (175°C). This is crucial for even baking. Then, line your baking sheet with parchment paper or a silicone mat. This prevents sticking and makes cleanup an absolute dream—trust me on this.01
-
Mash the Bananas. Peel your very ripe bananas and add them to your large mixing bowl. Use a fork or a potato masher to mash them until they're relatively smooth, with just a few small lumps for texture. You should have about one cup of mashed banana.02
-
Create the Wet Base. To the mashed banana, add the creamy peanut butter, packed brown sugar, egg, and vanilla extract. Stir everything together with a wooden spoon or spatula until it's well combined and smooth. You'll notice the mixture will be thick and glossy. The smell at this stage is already fantastic.03
-
Combine the Dry Ingredients. In a separate, small bowl, whisk together the old-fashioned oats, all-purpose flour, baking soda, cinnamon, and salt. This little extra step ensures the leavening agents are evenly distributed, so you don't get a pocket of baking soda in one cookie and not another.04
-
Bring the Dough Together. Add the dry ingredient mixture to the wet ingredients. Stir gently until just combined—you don't want to overmix. The dough will be thick and a bit sticky, which is exactly what we want. Now is the time to fold in those chocolate chips if you're using them. A little goes a long way for a burst of sweetness.05
-
Scoop and Shape. Using a cookie scoop or two spoons, drop rounded tablespoons of dough onto your prepared baking sheet, spacing them about 2 inches apart. These cookies don't spread a huge amount, but they need a little room to breathe. You can gently flatten the tops with the back of a spoon if you like a flatter cookie.06
-
Bake to Perfection. Bake for 10 to 12 minutes. The trick is to pull them out when the edges are just starting to turn a light golden brown, but the centers still look a little soft and underdone. They will continue to set as they cool on the hot baking sheet.07
-
The Most Important Step: Cool. Let the cookies cool on the baking sheet for at least 5 minutes before transferring them to a wire rack to cool completely. I know it's tempting, but this resting time is what gives them that perfect, chewy texture. They're worth the wait, I promise.08


