This Orange Glazed Shrimp recipe combines sweet citrus and savory seafood in a vibrant, sticky-sweet glaze. It comes together in under 20 minutes but delivers huge flavor, making it perfect for weeknights or entertaining. The aroma of orange, ginger, and garlic is intoxicating as it cooks.
Why You’ll Love This Orange Glazed Shrimp
Fast & easy: Ready in 15–20 minutes with minimal fuss.
Perfect flavor balance: Bright orange, savory soy, and aromatic ginger and garlic.
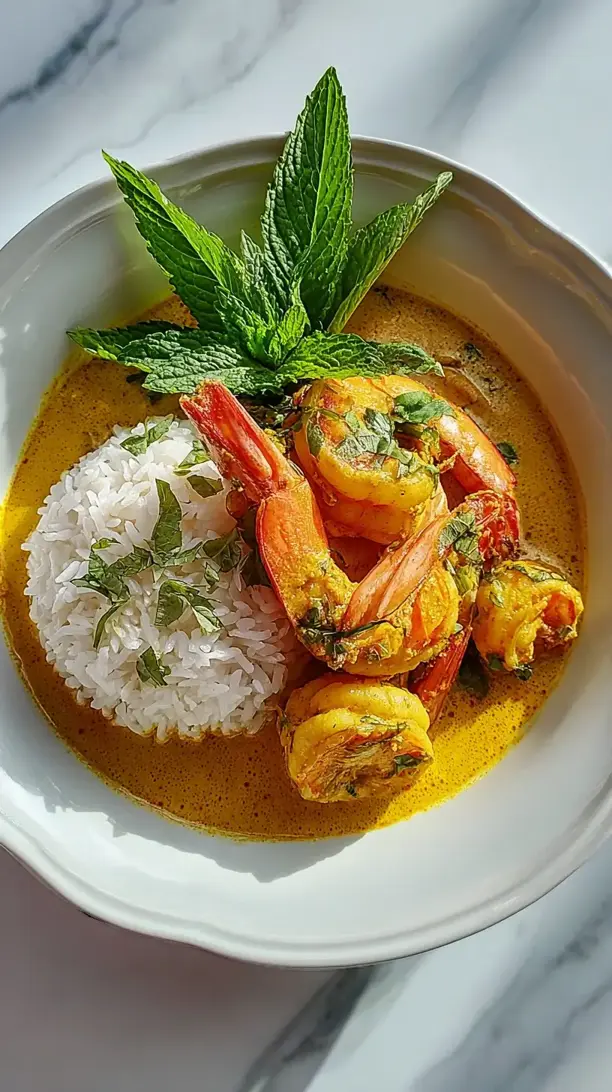
Versatile serving: Great over rice, noodles, salads, or lettuce cups.
Fancy yet affordable: Impressive restaurant-quality vibe on a budget.
Ingredients & Tools
- 450 g large raw shrimp, peeled and deveined
- 2 large oranges
- 3 cloves garlic, minced
- 1 tbsp fresh ginger, grated
- 2 tbsp soy sauce
- 1 tbsp honey or maple syrup
- 1 tsp rice vinegar
- 1/2 tsp red pepper flakes (adjust to taste)
- 1 tbsp cornstarch
- 2 tbsp cooking oil (avocado or vegetable)
- 2 spring onions, sliced
- 1 tbsp toasted sesame seeds
- Salt and black pepper to taste
Tools: A large skillet (non-stick or cast iron works great), a microplane or fine grater for the ginger, a citrus juicer, and a small whisk.
Notes: Use fresh orange juice for the brightest flavor, and don’t skip the fresh ginger and garlic—they’re essential for the aromatic backbone.
Nutrition (per serving)
| Calories: | 245 kcal |
| Protein: | 24 g |
| Fat: | 8 g |
| Carbs: | 18 g |
| Fiber: | 2 g |
Serves: 4 | Prep Time: 10 minutes | Cook Time: 10 minutes | Total Time: 20 minutes
Before You Start: Tips & Ingredient Notes
- Pat your shrimp completely dry. This is the single most important step for getting a good sear instead of steaming. Use paper towels and press gently to remove all surface moisture—you’ll be rewarded with beautifully caramelized shrimp.
- Use fresh orange juice, please! I know it’s tempting to grab a carton, but the flavor difference is night and day. Fresh juice has a brighter, more complex flavor and will give your glaze a much cleaner, more vibrant taste.
- Don’t overcrowd the pan. If your skillet isn’t large enough to hold all the shrimp in a single layer without touching, cook them in two batches. Crowding will cause the shrimp to steam and release liquid, preventing that lovely sear we’re after.
- Have your mise en place ready. This recipe moves quickly once you start cooking. Having your garlic minced, ginger grated, and sauce ingredients measured out beforehand will make the process smooth and stress-free.
How to Make Orange Glazed Shrimp
Step 1: First, prep your shrimp. Make sure they are peeled and deveined, with the tails on or off—your choice! Pat them very dry with paper towels and season lightly with a pinch of salt and black pepper. This initial seasoning helps build flavor from the inside out. Zest one of the oranges—you’ll need about a teaspoon of zest—then juice both oranges. You should get roughly ¾ to 1 cup of fresh juice.
Step 2: Now, let’s make the glaze slurry. In a small bowl, whisk together the fresh orange juice, soy sauce, honey, rice vinegar, and red pepper flakes. Then, add the cornstarch and whisk vigorously until it’s completely smooth with no lumps. This cornstarch is our thickening agent, and ensuring it’s fully dissolved now prevents a clumpy sauce later. Set this bowl aside near your stove.
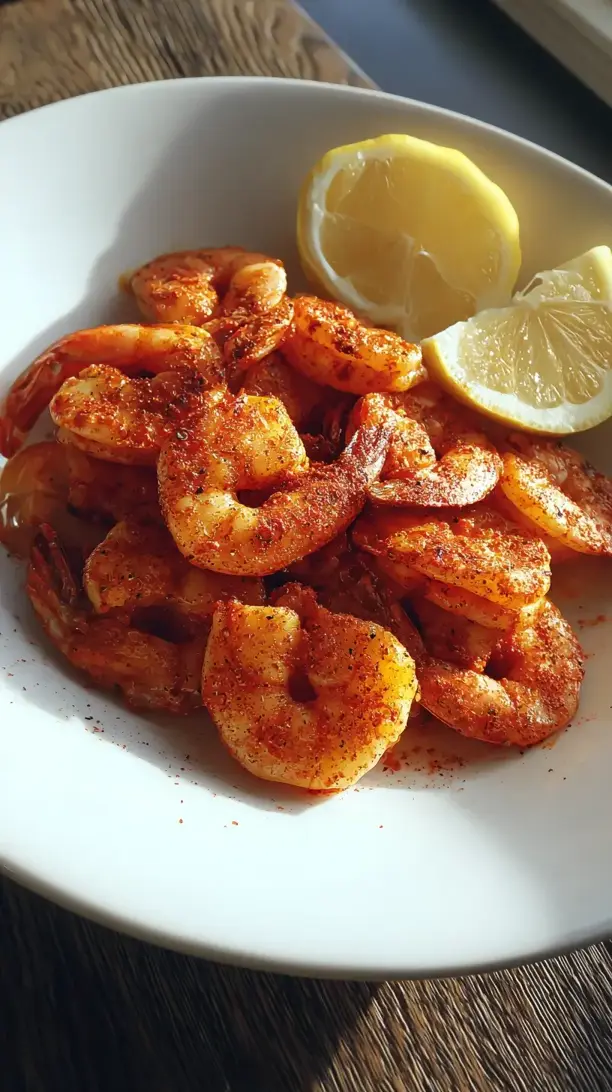
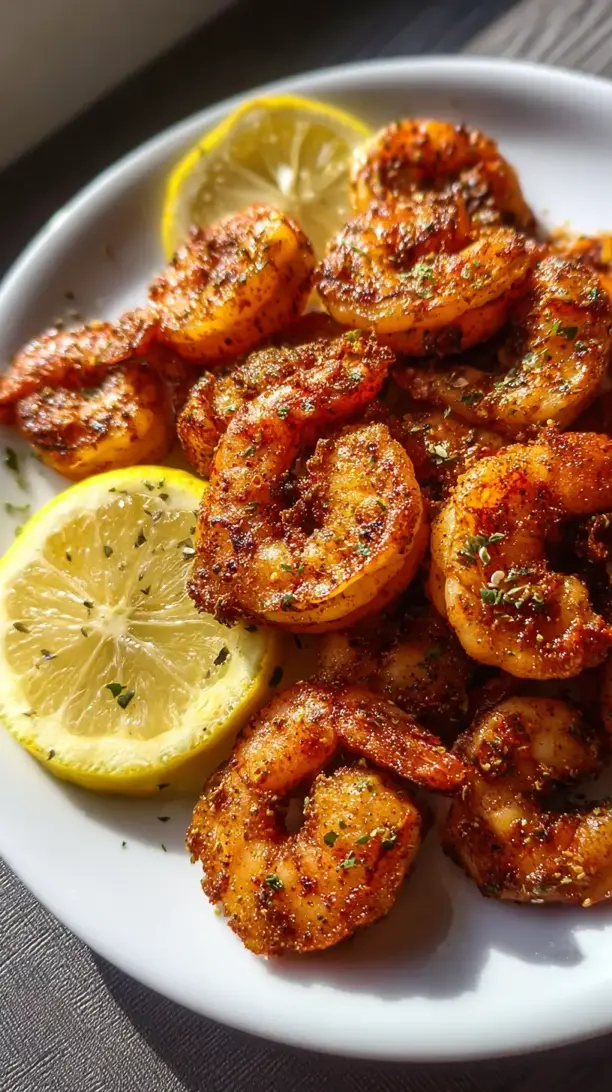
Step 3: Time to cook the shrimp. Heat your large skillet over medium-high heat and add the oil. When the oil is shimmering hot, add the shrimp in a single layer. You should hear a satisfying sizzle. Let them cook undisturbed for about 1–2 minutes, until the bottoms turn pink and get a nice sear. Flip them and cook for another minute—they should be just opaque but still a little underdone in the center. Remove them to a clean plate immediately; they’ll continue to cook from residual heat.
Step 4: In the same skillet, lower the heat to medium. Add the minced garlic and grated ginger. They’ll sizzle and become fragrant very quickly—this should only take about 30 seconds. You don’t want them to burn, so keep things moving. The pan will have lovely browned bits from the shrimp, which will add incredible depth to our sauce.
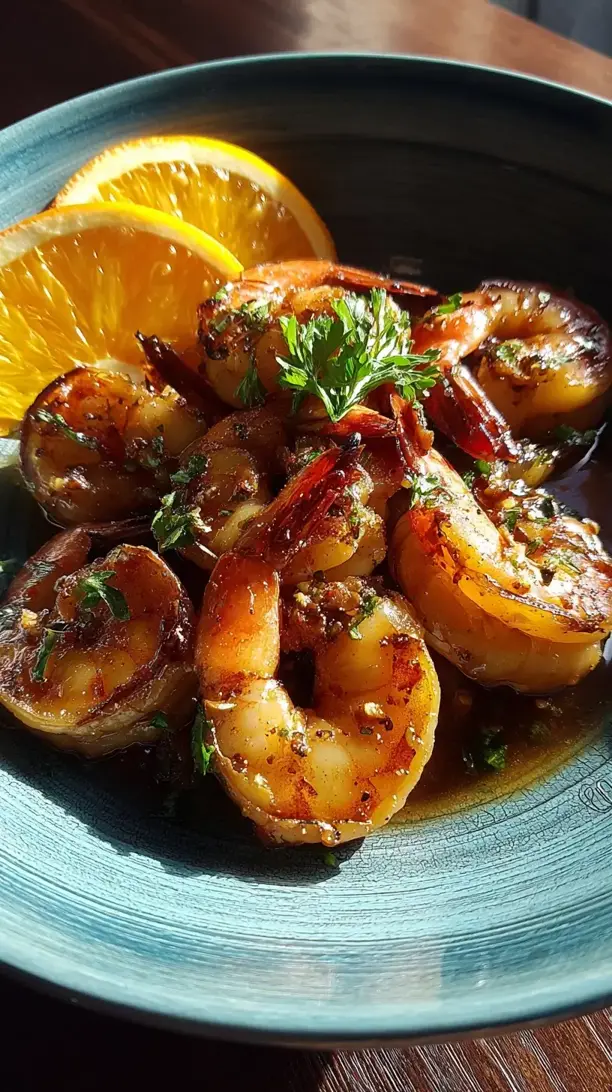
Step 5: Give your orange-soy mixture another quick whisk (the cornstarch can settle) and pour it into the skillet. It will bubble and thicken almost immediately. Keep stirring and simmer for 1–2 minutes until the sauce becomes glossy and thick enough to coat the back of a spoon. You’ll notice the color darken slightly as it reduces.
Step 6: Return the shrimp (and any accumulated juices) to the skillet, along with the orange zest. Toss everything together to coat the shrimp evenly in that gorgeous, sticky glaze. Let it heat through for just another 30–60 seconds—this is just to finish cooking the shrimp and let them soak up the sauce. Be careful not to overcook them at this stage!
Step 7: Finally, take the skillet off the heat. Stir in most of your sliced spring onions, saving some for garnish. Give it one final taste and adjust seasoning if needed—sometimes a tiny extra splash of soy sauce or a squeeze of fresh orange juice is perfect. Serve immediately, sprinkled with the reserved spring onions and a generous sprinkle of toasted sesame seeds.
Storage & Freshness Guide
- Fridge: Store in an airtight container for up to 2 days.
- Freezer: Not recommended—shrimp can become watery and mealy.
- Reviving: Reheat gently in a skillet with a splash of water or orange juice to loosen the glaze.
Serving Suggestions
Complementary Dishes
- Jasmine or Basmati Rice — The fluffy, fragrant grains are the perfect canvas for soaking up every last drop of that incredible orange glaze. It creates a complete, satisfying meal with minimal effort.
- Simple Steamed Broccoli or Bok Choy — The mild, green flavor and crisp-tender texture provide a lovely contrast to the rich, saucy shrimp, making the plate feel balanced and vibrant.
- Quinoa or Cauliflower Rice — A fantastic low-carb option that still carries the sauce beautifully. It’s a great way to keep the meal light yet deeply flavorful.
Drinks
- A Crisp Sauvignon Blanc — Its bright acidity and citrus notes mirror the flavors in the dish perfectly, cleansing the palate between bites and enhancing the overall dining experience.
- Ginger Beer or Iced Green Tea — For a non-alcoholic pairing, the spicy-sweet kick of ginger beer or the clean, slightly bitter notes of green tea complement the sweet and savory glaze wonderfully.
Something Sweet
- Lemon Sorbet — A scoop of tart, refreshing sorbet is the perfect palate-cleanser after a meal that’s both rich and bright. It feels light and elegant.
- Fortune Cookies and Fresh Mandarin Oranges — A playful, thematic end to the meal that doubles down on the citrus theme in the most delightful, simple way.
Top Mistakes to Avoid
- Overcooking the shrimp. Shrimp cook incredibly fast and become rubbery and tough if left on the heat for too long. They are done as soon as they turn opaque and form a loose “C” shape. Remember, they continue to cook even after you remove them from the pan.
- Adding the sauce to a cold pan. After cooking the aromatics, the pan should still be nice and hot when you pour in the glaze. A hot pan is essential for the sauce to bubble and thicken immediately, creating that perfect glossy consistency.
- Not dissolving the cornstarch properly. If you just dump cornstarch into the liquid ingredients, you’ll end up with a lumpy sauce. Always whisk it into a small amount of cold liquid first to create a slurry before combining it with the rest.
- Skipping the sear on the shrimp. Taking the extra minute to get a good sear on the shrimp before saucing adds a layer of caramelized, complex flavor that you just can’t get from boiled or steamed shrimp.
Expert Tips
- Tip: For a more complex citrus flavor, use a mix of oranges. Try one navel orange for sweetness and one blood orange for a slightly tart, berry-like note. It adds a beautiful depth and a stunning color to the glaze.
- Tip: If you want a spicier kick, add a teaspoon of sriracha or chili garlic sauce to the glaze mixture. It integrates seamlessly and adds another layer of flavor beyond just heat.
- Tip: To make this ahead for a party, you can cook the shrimp and make the sauce separately. Keep them apart until you’re ready to serve, then quickly reheat the sauce, add the shrimp, and toss to combine. This prevents the shrimp from overcooking and becoming tough upon reheating.
- Tip: For a beautiful glossy finish, stir in a half-tablespoon of cold butter off the heat at the very end. It’s a classic chef’s technique called *monter au beurre* that gives the sauce an incredible silkiness and sheen.
FAQs
Can I use frozen shrimp?
Absolutely! Frozen shrimp are often fresher than “fresh” shrimp at the counter, which are typically previously frozen and thawed. Just make sure to thaw them properly overnight in the fridge or in a bowl of cold water. The most important step is to pat them completely dry before cooking to ensure a good sear.
How can I tell when the shrimp are cooked perfectly?
Raw shrimp are gray and translucent. As they cook, they’ll turn pink and opaque. The best visual cue is the shape: they go from straight to a loose “C” shape. If they curl into a tight “O”, they are almost certainly overcooked. They should feel firm but still slightly springy to the touch.
My sauce is too thin. How can I thicken it?
If your sauce hasn’t thickened to a glaze-like consistency, don’t worry! Mix another teaspoon of cornstarch with a tablespoon of cold water to make a new slurry. Push the shrimp to one side of the pan, add the slurry to the simmering liquid, and stir. It should thicken up within a minute.
Can I make this recipe with chicken instead?
Yes, it works wonderfully with chicken! Use boneless, skinless chicken thighs or breasts cut into bite-sized pieces. You’ll need to cook the chicken a bit longer—about 5-7 minutes—until fully cooked through before proceeding with the sauce steps in the recipe.
How long do leftovers last in the fridge?
Leftovers will keep in an airtight container in the refrigerator for up to 2 days. Reheat gently in a skillet over low heat, adding a tiny splash of water or orange juice to loosen the glaze. I don’t recommend freezing, as the texture of the shrimp can become watery and mealy upon thawing.
Orange Glazed Shrimp
Make restaurant-quality Orange Glazed Shrimp in just 20 minutes! This sweet & savory recipe is perfect for busy weeknights. Get the easy recipe now!
Ingredients
For the Ingredients
-
450 g large raw shrimp (peeled and deveined)
-
2 large oranges
-
3 cloves garlic (minced)
-
1 tbsp fresh ginger (grated)
-
2 tbsp soy sauce
-
1 tbsp honey or maple syrup
-
1 tsp rice vinegar
-
0.5 tsp red pepper flakes (adjust to taste)
-
1 tbsp cornstarch
-
2 tbsp cooking oil (avocado or vegetable)
-
2 spring onions (sliced)
-
1 tbsp toasted sesame seeds
-
Salt and black pepper (to taste)
Instructions
-
First, prep your shrimp. Make sure they are peeled and deveined, with the tails on or off—your choice! Pat them very dry with paper towels and season lightly with a pinch of salt and black pepper. This initial seasoning helps build flavor from the inside out. Zest one of the oranges—you’ll need about a teaspoon of zest—then juice both oranges. You should get roughly ¾ to 1 cup of fresh juice.01
-
Now, let’s make the glaze slurry. In a small bowl, whisk together the fresh orange juice, soy sauce, honey, rice vinegar, and red pepper flakes. Then, add the cornstarch and whisk vigorously until it’s completely smooth with no lumps. This cornstarch is our thickening agent, and ensuring it’s fully dissolved now prevents a clumpy sauce later. Set this bowl aside near your stove.02
-
Time to cook the shrimp. Heat your large skillet over medium-high heat and add the oil. When the oil is shimmering hot, add the shrimp in a single layer. You should hear a satisfying sizzle. Let them cook undisturbed for about 1–2 minutes, until the bottoms turn pink and get a nice sear. Flip them and cook for another minute—they should be just opaque but still a little underdone in the center. Remove them to a clean plate immediately; they’ll continue to cook from residual heat.03
-
In the same skillet, lower the heat to medium. Add the minced garlic and grated ginger. They’ll sizzle and become fragrant very quickly—this should only take about 30 seconds. You don’t want them to burn, so keep things moving. The pan will have lovely browned bits from the shrimp, which will add incredible depth to our sauce.04
-
Give your orange-soy mixture another quick whisk (the cornstarch can settle) and pour it into the skillet. It will bubble and thicken almost immediately. Keep stirring and simmer for 1–2 minutes until the sauce becomes glossy and thick enough to coat the back of a spoon. You’ll notice the color darken slightly as it reduces.05
-
Return the shrimp (and any accumulated juices) to the skillet, along with the orange zest. Toss everything together to coat the shrimp evenly in that gorgeous, sticky glaze. Let it heat through for just another 30–60 seconds—this is just to finish cooking the shrimp and let them soak up the sauce. Be careful not to overcook them at this stage!06
-
Finally, take the skillet off the heat. Stir in most of your sliced spring onions, saving some for garnish. Give it one final taste and adjust seasoning if needed—sometimes a tiny extra splash of soy sauce or a squeeze of fresh orange juice is perfect. Serve immediately, sprinkled with the reserved spring onions and a generous sprinkle of toasted sesame seeds.07