
Why You’ll Love This Nut Butter Chocolate Rice Bar
- Seriously Simple. Honestly, if you can stir things in a pot, you can make these bars. There’s no fancy equipment or complicated techniques involved—just straightforward, satisfying cooking.
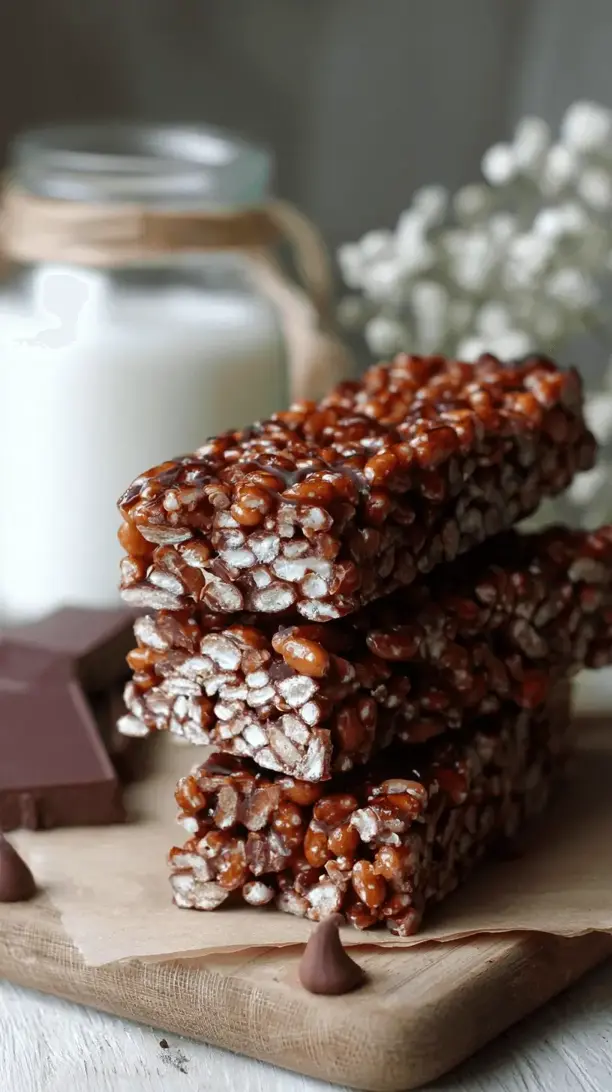
- The Perfect Texture Trio. You get the airy crunch from the puffed rice, the chewy, fudgy bite from the nut butter mixture, and that final snap from the dark chocolate coating. It’s a textural symphony in every single bite.
- Your Kitchen, Your Rules. This recipe is a fantastic canvas. Don’t have maple syrup? Use honey or agave. Want a crunchier bar? Add some chopped nuts or seeds. It’s incredibly forgiving and adaptable to what you have on hand.
- Meal-Prep Magic. These bars keep beautifully in the fridge or freezer, making them the ultimate make-ahead snack. Whip up a batch on Sunday, and you’ve got a week’s worth of healthy-ish treats ready to go.
Ingredients & Tools
- 150 g (about 5 cups) puffed rice cereal
- 250 g (about 1 cup) smooth nut butter (peanut, almond, or cashew work wonderfully)
- 120 ml (½ cup) pure maple syrup or honey
- 60 g (¼ cup) coconut oil, divided
- 1 tsp vanilla extract
- A generous pinch of fine sea salt
- 150 g (about 1 cup) dark chocolate chips or chopped dark chocolate
Tools: Medium saucepan, 8×8 inch (20×20 cm) baking pan, parchment paper, large mixing bowl, spatula.
The quality of your nut butter really makes a difference here—a natural, runny one will blend much more smoothly than a stiff, processed one. And that pinch of salt? It’s not optional. It’s the secret weapon that makes all the chocolate and nutty flavours pop.
Serves: 9 bars | Prep Time: 15 minutes | Cook Time: 10 minutes | Total Time: 1 hour 25 minutes (includes chilling)
Before You Start: Tips & Ingredient Notes
- Nut Butter Consistency is Key. For the best results, use a natural, drippy nut butter. If yours is stiff and dry, gently warm it in a jar placed in a bowl of hot water to make it easier to mix. A stiff butter can lead to a crumbly bar.
- To Stir or Not to Stir? When you’re heating the nut butter, maple syrup, and coconut oil, you want to stir just until everything is melted and smooth. Avoid vigorous boiling—we’re just melting and combining, not cooking the mixture down.
- Puffed Rice Power. Make sure you’re using plain, unsweetened puffed rice cereal, not Rice Krispies Treats cereal or something similar. You want a neutral, crisp base to carry all the other flavours.
- The Chocolate Tempering Trick (Sort Of). When melting the chocolate for the topping, adding a small amount of the reserved coconut oil is a little hack. It helps the chocolate set with a beautiful snap but keeps it a bit more forgiving and easy to slice without shattering.
How to Make Nut Butter Chocolate Rice Bar
Step 1: First, line your 8×8 inch baking pan with parchment paper, making sure there’s some overhang on two opposite sides. This is your “sling” that will make lifting the whole block of bars out later an absolute breeze. Trust me, you don’t want to skip this step. Then, measure out your puffed rice into the large mixing bowl and set it aside.
Step 2: Now, for the glue that holds it all together. In your medium saucepan, combine the nut butter, maple syrup, and 2 tablespoons of the coconut oil. Place it over low to medium heat. You’ll want to stir this constantly with a spatula until everything is melted, glossy, and completely smooth. It should only take a few minutes—you’re not trying to boil it, just warm it through. Once it’s smooth, take it off the heat and stir in the vanilla extract and that all-important pinch of salt.
Step 3: Here’s where the magic happens. Pour the warm, liquid nut butter mixture over the puffed rice in the bowl. Now, using your spatula, gently fold everything together. The goal is to coat every single piece of puffed rice without crushing them all. You’ll notice the mixture becomes fragrant and starts to clump together beautifully. Take your time here to ensure there are no dry spots.
Step 4: Transfer the mixture into your prepared pan. Now, get a little hands-on. Use slightly wet fingers or the flat bottom of a measuring cup to press the mixture down firmly and evenly into every corner of the pan. This compacting step is crucial for getting bars that hold their shape and don’t crumble when you bite into them.
Step 5: Pop the pan into the freezer for about 30 minutes to let the base set rock solid. This will make adding the chocolate layer so much easier. Meanwhile, clean your saucepan (or use a heatproof bowl over a pot of simmering water) to melt the chocolate with the remaining 2 tablespoons of coconut oil. Stir until it’s completely smooth and liquid.
Step 6: Take the chilled base out of the freezer—it should be firm to the touch. Pour the melted chocolate over the top and use your spatula to spread it into a thin, even layer that covers the entire surface. A little goes a long way here. You can add a sprinkle of flaky sea salt on top now for a gourmet touch.
Step 7: Return the pan to the freezer for another 20-30 minutes, or until the chocolate topping is completely set and hard. Once set, use the parchment paper sling to lift the whole block out of the pan onto a cutting board. Use a sharp knife to slice it into 9 even bars. For the cleanest cuts, you can warm the knife under hot water and dry it quickly between slices.
Serving Suggestions
Complementary Dishes
- A bowl of fresh berries — The bright, tart acidity of raspberries or strawberries cuts through the richness of the chocolate and nut butter perfectly, creating a lovely balance.
- A scoop of vanilla bean coconut yogurt — For a truly decadent but still dairy-free dessert, serve a bar alongside some creamy yogurt. The vanilla echoes the flavour in the bar and adds a cool, creamy contrast.
Drinks
- Cold oat milk or almond milk — A classic pairing for a reason. The cold, slightly sweet plant-milk is the ideal companion to these chewy, chocolatey bars.
- A strong cup of black coffee — The bitterness of a good espresso or filter coffee highlights the deep notes of the dark chocolate and makes the whole experience feel a bit more sophisticated.
Something Sweet
- A simple fruit sorbet — If you’re serving these as a dessert, a scoop of mango or lemon sorbet on the side keeps things light and refreshing, preventing the treat from feeling too heavy.
Top Mistakes to Avoid
- Mistake: Not pressing the base mixture firmly enough. If you just dollop it in the pan and give it a casual pat, the bars will be crumbly and fall apart. You really need to compact it well for that perfect chewy-yet-crunchy texture.
- Mistake: Overheating the chocolate. If you melt the chocolate on too high a heat or for too long, it can seize up and become grainy. Low and slow is the way to go, stirring frequently until just melted.
- Mistake: Using the wrong nut butter. I’ve messed this up before too—using a super thick, “no-stir” nut butter that’s full of stabilizers. It won’t blend properly with the other wet ingredients and can leave you with a greasy, separated mess.
- Mistake: Skipping the chilling steps. Impatience is the enemy here. If you try to slice the bars before the chocolate is fully set, you’ll have a smeared, messy situation. Let the freezer do its work.
Expert Tips
- Tip: Add some crunch. For an extra layer of texture, fold in ¼ cup of chopped roasted nuts, sunflower seeds, or even a tablespoon of chia seeds along with the puffed rice. It adds a lovely little surprise in every bite.
- Tip: Get creative with toppings. Before the chocolate sets, sprinkle on more than just salt. Try crushed freeze-dried raspberries for a tangy punch, a dusting of cinnamon, or even some cacao nibs for an intense chocolate hit.
- Tip: For perfect squares, score the chocolate. After you spread the melted chocolate, let it sit for just a minute or two until a skin starts to form. Then, use a sharp knife to gently score the lines where you’ll cut later. This guides your final cut and prevents the chocolate from cracking unpredictably.
- Tip: Freeze them individually. If you’re making a big batch for later, slice the bars first, then layer them between parchment paper in an airtight container before freezing. This way, you can grab just one bar whenever the craving strikes.
FAQs
Can I use brown rice syrup instead of maple syrup?
Absolutely! Brown rice syrup is actually a fantastic option because it’s less sweet and creates a chewier, more robust bar that holds together really well. The flavour is more neutral, so the nut butter and chocolate will really shine through. You can use it as a direct 1:1 substitute for the maple syrup.
My bars are too hard/too soft. What happened?
This usually comes down to the nut butter to sweetener ratio or the chilling time. If they’re rock hard, you might have used a bit too much nut butter or chilled them for too long. If they’re too soft, the opposite might be true—a little more nut butter or a longer chill in the fridge (rather than the freezer) can help firm them up. It can take one batch to perfectly calibrate to your specific ingredients.
How long do these bars keep for?
They’re best stored in an airtight container in the fridge for up to 10 days. The cold keeps the chocolate firm and the bar intact. You can also freeze them for up to 3 months. Just let a frozen bar sit at room temperature for 5-10 minutes before eating to take the edge off the chill.
Can I make these nut-free?
Yes, you can! Simply substitute the nut butter with a seed butter like sunflower seed butter (sunbutter). Just be aware that some seed butters can have a stronger, more distinct flavour, and some (like sunflower seed butter) can react with baking soda, but that’s not an issue in this no-bake recipe. Tahini (sesame seed paste) also works for a more grown-up, slightly bitter twist.
The chocolate is melting on my fingers when I eat it. Help!
This is a common issue with homemade chocolate coatings, especially if your kitchen is warm. The coconut oil helps, but these are really best eaten straight from the fridge. If you’re taking them on the go, consider keeping them in a small insulated lunch bag with an ice pack. It’s a small price to pay for such a delicious treat!


