
Why You’ll Love This No Bake Peanut Butter Bars
- They’re incredibly simple. Honestly, if you can stir ingredients together and press them into a pan, you’ve got this. There’s no baking, no tricky techniques, and minimal cleanup—just straightforward, delicious results.
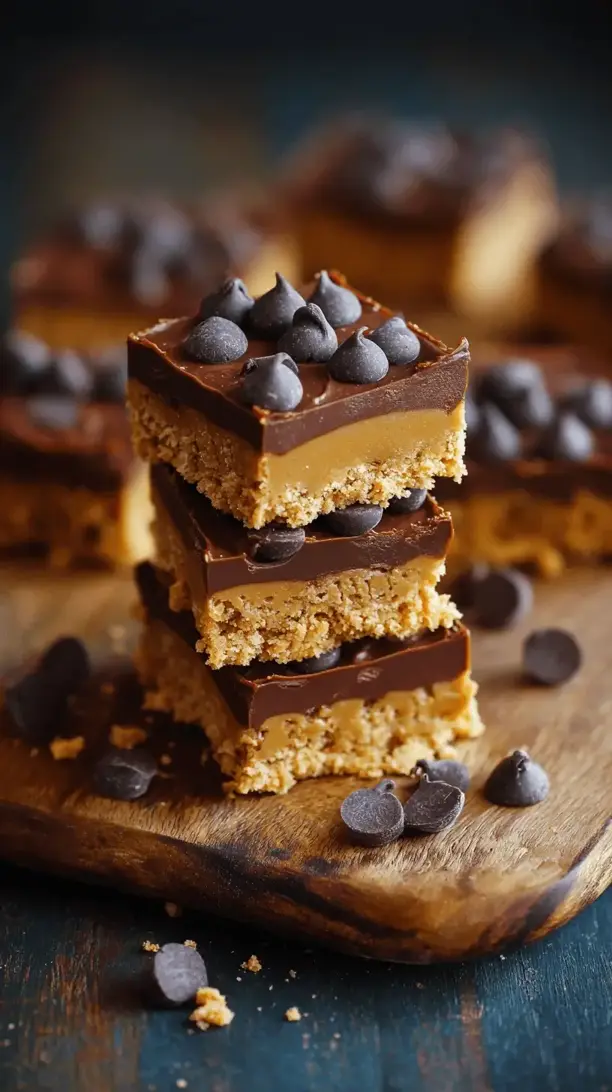
- The texture is pure perfection. You get this wonderful contrast between the slightly sandy, buttery graham cracker crust, the smooth and intensely peanut-buttery middle, and the crisp snap of the dark chocolate on top. It’s a symphony in every bite.
- They’re wonderfully adaptable. Feel like adding a sprinkle of sea salt on top? Go for it. Want to mix in some chopped peanuts for extra crunch? Absolutely. This recipe is a fantastic canvas for your own personal touches.
- They make you look like a pastry pro. These bars look and taste incredibly decadent, like something from a fancy bakery. No one needs to know how little effort it actually took—that can be our little secret.
Ingredients & Tools
- 1 ½ cups graham cracker crumbs
- 1 cup creamy peanut butter (see notes below!)
- ½ cup unsalted butter, melted
- 1 ½ cups powdered sugar
- 1 teaspoon vanilla extract
- ¼ teaspoon fine sea salt
- 1 ½ cups semi-sweet or dark chocolate chips
- 1 tablespoon coconut oil (or more butter)
Tools: 8×8 or 9×9 inch baking pan, parchment paper, two medium mixing bowls, a spatula, and a saucepan or microwave-safe bowl.
A quick word on the peanut butter—the trick is to use a standard, no-stir creamy peanut butter, not the natural kind that separates. The stabilized oils in the conventional kind help the bars set up with the perfect firm-yet-creamy texture. And that little bit of coconut oil with the chocolate? It’s the secret to getting a glossy, easy-to-slice shell that doesn’t crack into a million pieces.
Serves: 16 | Prep Time: 20 minutes | Chill Time: 2 hours | Total Time: 2 hours 20 minutes
Before You Start: Tips & Ingredient Notes
- Your peanut butter choice matters. I know I mentioned it above, but it’s worth repeating! Using a classic, shelf-stable creamy peanut butter (like Skippy or Jif) is key. The natural, oily kinds can make the filling layer too soft and greasy, preventing it from setting properly.
- Don’t skip the fine sea salt. It might seem like a small amount, but it’s crucial for balancing the sweetness and making the peanut butter flavor really pop. If you only have table salt, use a tiny bit less.
- How to make graham cracker crumbs. No store-bought crumbs? No problem! Just place whole graham crackers in a zip-top bag and roll over them with a rolling pin until you have fine, even crumbs. You’ll need about 10-12 full-sheet crackers for 1 ½ cups.
- Line your pan properly. Taking a moment to line your pan with parchment paper, leaving some overhang on two sides, is a game-changer. It creates a “sling” that lets you lift the entire block of bars out for clean, easy slicing.
How to Make No Bake Peanut Butter Bars
Step 1: First, get your pan ready. Line your 8×8 or 9×9 inch square baking pan with parchment paper, making sure there’s some extra paper hanging over the edges. This little trick is honestly the best way to get perfect, clean-cut bars later. Give the parchment a very light spritz with cooking spray or a quick rub with butter—this just helps everything release effortlessly.
Step 2: Now, for the base layer. In a medium bowl, combine the graham cracker crumbs, powdered sugar, and that ¼ teaspoon of fine sea salt. Whisk them together until they’re well incorporated and there are no big clumps of sugar. You’ll notice the mixture looks pale and sandy, which is exactly what you want.
Step 3: In a separate, microwave-safe bowl (or a small saucepan), melt the ½ cup of unsalted butter until it’s completely liquid. Pour the melted butter and the 1 cup of creamy peanut butter into the dry ingredients. Add the teaspoon of vanilla extract as well. Now, stir everything together with a spatula. At first, it might seem a bit dry, but keep stirring—it will quickly come together into a thick, cohesive, and slightly crumbly dough.
Step 4: Transfer this peanut butter mixture into your prepared pan. Using your fingers or the flat bottom of a measuring cup, press the mixture down firmly and evenly into every corner. You really want to compact it well; this ensures the bars hold their shape when sliced. A little trick is to lay a piece of parchment on top before pressing to keep your hands or the cup clean.
Step 5: Time for the chocolate topping! Clean out one of your bowls (or just use a new one) and combine the chocolate chips with the tablespoon of coconut oil. Melt this gently, either in short 20-second bursts in the microwave, stirring well between each, or over a double boiler on the stove. The coconut oil is the magic ingredient here—it makes the chocolate fluid and glossy, and helps it set with a perfect snap.
Step 6: Pour the melted chocolate over the pressed peanut butter layer. Tilt the pan gently to spread the chocolate into a smooth, even layer that covers everything. If you’re feeling fancy, this is the moment to add a sprinkle of flaky sea salt on top for a gorgeous sweet-and-salty finish.
Step 7: The final, most difficult step: patience. Carefully place the pan in the refrigerator for at least 2 hours, or until the chocolate top is completely firm to the touch. Don’t try to rush this by putting it in the freezer, as it can cause the chocolate to bloom (get those white streaks). Once set, use the parchment paper sling to lift the whole block out onto a cutting board. Use a sharp knife to slice into bars, wiping the blade clean between cuts for the neatest edges.
Serving Suggestions
Complementary Dishes
- A scoop of vanilla bean ice cream — The cool, creamy simplicity of vanilla is the perfect contrast to the rich, dense bars. It turns a simple bar into a proper dessert plate.
- A bowl of fresh berries — The bright, slightly tart burst of raspberries or strawberries cuts through the sweetness beautifully and makes the whole thing feel a bit more balanced.
Drinks
- A cold glass of milk — It’s a classic for a reason. The creaminess is the ultimate partner for peanut butter and chocolate, creating that nostalgic, comforting combination.
- A strong cup of black coffee — The bitterness of a good brew highlights the deep notes of the dark chocolate and makes each bite feel even more sophisticated.
Something Sweet
- A simple fruit sorbet — A light, refreshing mango or lemon sorbet served alongside offers a palate-cleansing effect, making you ready for another bite of the rich bar.
Top Mistakes to Avoid
- Mistake: Using natural or homemade peanut butter. This is the number one reason bars don’t set. The loose oils prevent the mixture from firming up properly, leading to a messy, greasy result that’s hard to slice.
- Mistake: Not pressing the base layer firmly enough. If you just dollop the mixture in and give it a casual pat, the crust will be crumbly and fall apart. You really need to compact it with some force to get that perfect, bar-like texture.
- Mistake: Skipping the fat in the chocolate topping. If you melt the chocolate chips alone, the topping will be very thick, difficult to spread, and can set up too hard and brittle. The coconut oil (or butter) is essential for a silky, snappy finish.
- Mistake: Cutting the bars before they’re fully set. I know it’s tempting, but if you slice into them too early, the layers can smudge and you won’t get those clean, defined lines. Wait until the chocolate top no longer gives when you gently press it.
Expert Tips
- Tip: Warm your knife for cleaner cuts. For absolutely pristine slices, run your knife under very hot water, wipe it dry, and then make your cut. The heat glides through the chocolate without cracking it. Wipe the blade clean and reheat between each cut.
- Tip: Add texture for a custom twist. Stir ½ cup of chopped roasted peanuts or even some crispy rice cereal into the peanut butter layer before pressing it into the pan. It adds a wonderful crunch that breaks up the creaminess.
- Tip: Get creative with toppings. Before the chocolate sets, you can sprinkle on more than just salt. Try a dusting of crushed pretzels for salty crunch, or even a handful of mini peanut butter cups for over-the-top peanut butter goodness.
- Tip: For perfect storage, layer them. These bars keep beautifully in the fridge for up to a week. Place them in an airtight container with sheets of parchment paper between layers to prevent them from sticking together.
FAQs
Can I use honey or maple syrup instead of powdered sugar?
You can try, but the results will be different. Liquid sweeteners will make the filling much softer and more fudge-like, and the bars may not hold their shape as well when sliced. Powdered sugar contains a small amount of cornstarch which helps absorb the oils and create a firmer, sliceable texture. If you do substitute, reduce the amount slightly and expect a softer, more decadent bar that might need to be eaten with a fork.
How long do these bars need to chill before eating?
A minimum of two hours in the refrigerator is essential for them to set up properly. I often make them the night before I need them so they’re perfectly firm. If you’re in a real pinch, you can place the pan in the freezer for about 45-60 minutes, but keep a close eye on it to prevent the chocolate from freezing so hard it becomes difficult to bite.
Can I make these gluten-free?
Absolutely! Just ensure your graham crackers are a certified gluten-free brand. Many stores carry them now. Alternatively, you can use an equal amount of gluten-free crisp rice cereal or even gluten-free oat flour as the base—though the texture will be slightly different, it will still be delicious.
Why did my chocolate topping get white streaks on it?
Those white streaks are called “bloom,” and it happens when the chocolate is exposed to temperature changes or moisture. It’s completely safe to eat and doesn’t affect the taste! It’s usually caused by chilling the bars too quickly (like in the freezer) or if there was a bit of condensation. To avoid it, stick to the refrigerator for setting and make sure your pan is completely cool before adding the chocolate.
Can I freeze these peanut butter bars?
Yes, they freeze exceptionally well! Once the bars are fully set and sliced, place them in a single layer on a parchment-lined baking sheet and freeze until solid (about an hour). Then, transfer the frozen bars to an airtight container or freezer bag, with parchment between layers. They’ll keep for up to 3 months. Thaw in the fridge for a few hours before serving.
No Bake Peanut Butter Bars
Craving peanut butter bliss? My No Bake Peanut Butter Bars are the ultimate easy dessert! A creamy, crunchy treat with a chocolate shell, ready in 30 mins. No oven needed!
Ingredients
Ingredients
-
1 ½ cups graham cracker crumbs
-
1 cup creamy peanut butter (see notes below!)
-
½ cup unsalted butter (melted)
-
1 ½ cups powdered sugar
-
1 teaspoon vanilla extract
-
¼ teaspoon fine sea salt
-
1 ½ cups semi-sweet or dark chocolate chips
-
1 tablespoon coconut oil (or more butter)
Instructions
-
First, get your pan ready. Line your 8x8 or 9x9 inch square baking pan with parchment paper, making sure there's some extra paper hanging over the edges. This little trick is honestly the best way to get perfect, clean-cut bars later. Give the parchment a very light spritz with cooking spray or a quick rub with butter—this just helps everything release effortlessly.01
-
Now, for the base layer. In a medium bowl, combine the graham cracker crumbs, powdered sugar, and that ¼ teaspoon of fine sea salt. Whisk them together until they're well incorporated and there are no big clumps of sugar. You'll notice the mixture looks pale and sandy, which is exactly what you want.02
-
In a separate, microwave-safe bowl (or a small saucepan), melt the ½ cup of unsalted butter until it's completely liquid. Pour the melted butter and the 1 cup of creamy peanut butter into the dry ingredients. Add the teaspoon of vanilla extract as well. Now, stir everything together with a spatula. At first, it might seem a bit dry, but keep stirring—it will quickly come together into a thick, cohesive, and slightly crumbly dough.03
-
Transfer this peanut butter mixture into your prepared pan. Using your fingers or the flat bottom of a measuring cup, press the mixture down firmly and evenly into every corner. You really want to compact it well; this ensures the bars hold their shape when sliced. A little trick is to lay a piece of parchment on top before pressing to keep your hands or the cup clean.04
-
Time for the chocolate topping! Clean out one of your bowls (or just use a new one) and combine the chocolate chips with the tablespoon of coconut oil. Melt this gently, either in short 20-second bursts in the microwave, stirring well between each, or over a double boiler on the stove. The coconut oil is the magic ingredient here—it makes the chocolate fluid and glossy, and helps it set with a perfect snap.05
-
Pour the melted chocolate over the pressed peanut butter layer. Tilt the pan gently to spread the chocolate into a smooth, even layer that covers everything. If you're feeling fancy, this is the moment to add a sprinkle of flaky sea salt on top for a gorgeous sweet-and-salty finish.06
-
The final, most difficult step: patience. Carefully place the pan in the refrigerator for at least 2 hours, or until the chocolate top is completely firm to the touch. Don't try to rush this by putting it in the freezer, as it can cause the chocolate to bloom (get those white streaks). Once set, use the parchment paper sling to lift the whole block out onto a cutting board. Use a sharp knife to slice into bars, wiping the blade clean between cuts for the neatest edges.07


