Why You’ll Love This Maple Pecan Snack Balls
- Perfectly balanced texture and flavor. You get the delightful chewiness from the dates, the satisfying crunch from toasted pecans, and that warm, cozy sweetness from pure maple syrup. It’s a symphony in every bite.
- Incredibly quick and easy to make. Honestly, there’s no baking involved. You just blend, roll, and chill. It’s the kind of recipe you can pull off even on your busiest day, with minimal cleanup.
- Wonderfully versatile and customizable. Feel like adding a pinch of cinnamon or a dash of vanilla? Go for it. You can easily tweak the ingredients to suit your mood or what you have in your pantry.
- A truly satisfying and portable snack. These little balls are packed with natural energy, making them ideal for on-the-go moments. Toss a couple in a container, and you’ve got a healthy pick-me-up wherever you are.
Ingredients & Tools
- 1 cup raw pecans
- 1 cup Medjool dates, pitted
- 3 tablespoons pure maple syrup
- 2 tablespoons almond flour
- 1 tablespoon chia seeds
- 1/2 teaspoon vanilla extract
- 1/4 teaspoon sea salt
- 1-2 tablespoons unsweetened shredded coconut, for rolling (optional)
Tools: A food processor, a baking sheet, and parchment paper.
The quality of your ingredients really shines through here. Using soft, fresh Medjool dates is key—they’re the glue that holds everything together. And don’t skip toasting the pecans; it deepens their flavor so much and makes the whole snack taste richer.
Nutrition (per serving)
- Calories: 98 kcal
- Protein: 1.5 g
- Fat: 6 g
- Carbohydrates: 11 g
- Fiber: 2 g
Serves: 12 balls | Prep Time: 20 minutes | Cook Time: 0 minutes | Total Time: 20 minutes (plus chilling)
Before You Start: Tips & Ingredient Notes
- Check your dates. If your Medjool dates are a little dry or firm, soak them in warm water for about 10 minutes before using. Then, be sure to drain them thoroughly and pat them dry. This little step ensures a perfectly soft and sticky texture.
- Toast those pecans. I know it’s an extra step, but honestly, it’s a game-changer. Toasting unlocks their natural oils and gives them a deeper, nuttier flavor that makes these snack balls truly special. Just watch them carefully so they don’t burn!
- Use pure maple syrup. The flavor of the real stuff is incomparable. Pancake syrup or artificial versions just won’t give you that rich, caramel-like depth. A little goes a long way in providing the perfect sweetness.
- Don’t over-process the mixture. You want a texture that holds together when pressed but still has some tiny pecan pieces for crunch. If you blend it into a completely smooth paste, the final texture will be a bit too uniform.
How to Make Maple Pecan Snack Balls
Step 1: First, let’s toast the pecans to bring out their flavor. Preheat your oven to 350°F (175°C). Spread the raw pecans in a single layer on a small baking sheet. Toast them for 5-7 minutes, until they become fragrant and take on a slightly darker color. You’ll notice that amazing, warm nutty aroma filling your kitchen—that’s how you know they’re ready. Set them aside to cool completely. This is crucial because if they’re warm, they could melt the other ingredients and make the mixture oily.
Step 2: While the pecans are cooling, prepare your dates. Make sure all the dates are pitted. If they feel a bit dry, give them that quick soak I mentioned earlier. Once they’re ready, you can add them to the bowl of your food processor. Add the cooled, toasted pecans, almond flour, chia seeds, maple syrup, vanilla extract, and sea salt. The almond flour helps absorb any excess moisture and gives a lovely crumb, while the chia seeds add a nutritional boost and help bind everything.
Step 3: Now for the fun part—pulsing! Pulse the mixture in short bursts until it starts to clump together. You’re looking for a texture where it holds together when you pinch a bit between your fingers, but you can still see small pieces of pecans. This should only take about 10-15 pulses. If the mixture seems too dry and isn’t sticking, you can add another half teaspoon of maple syrup. If it seems too wet, add another tablespoon of almond flour.
Step 4: Time to get your hands involved. Scoop the mixture out of the food processor and into a mixing bowl. Let it sit for a minute—this allows the chia seeds to start absorbing the moisture, which will make rolling easier. Then, using a tablespoon or a small cookie scoop, portion out the mixture. Roll each portion firmly between your palms into a smooth, compact ball. You should get about 12 balls from this recipe.
Step 5: If you’re using the shredded coconut for rolling, now is the time. Place the coconut in a small, shallow bowl. Take each ball and gently roll it in the coconut until it’s lightly coated. This adds a nice textural contrast and a subtle tropical flavor, but it’s completely optional if you prefer them plain.
Step 6: The final, most important step is chilling. Arrange the finished balls on a plate or a baking sheet lined with parchment paper. Pop them into the refrigerator for at least 30 minutes to firm up. This chilling time allows the fats from the nuts to solidify and the flavors to meld beautifully. They’ll become firmer, less sticky, and much easier to eat. After that, you can transfer them to an airtight container for storage.
Serving Suggestions
Complementary Dishes
- A simple green apple salad — The crisp, tart freshness of the apple cuts through the rich sweetness of the balls perfectly, creating a lovely balance on your palate.
- A bowl of creamy Greek yogurt — Crumble one or two snack balls over a bowl of plain yogurt for a delicious parfait-style breakfast or snack with extra protein.
- A warm cup of oatmeal — Chop up a snack ball and stir it into your morning porridge; it melts in slightly, adding wonderful pockets of pecan and maple flavor.
Drinks
- Hot black coffee — The bitterness of a good, strong brew is a fantastic counterpoint to the sweet, nutty notes of the snack balls, making for a truly satisfying break.
- Cold almond milk — The mild, nutty flavor of almond milk complements the pecans beautifully, making it a soothing and cohesive pairing.
- Earl Grey tea — The bergamot in the tea adds a subtle citrusy aroma that dances wonderfully with the warm maple and vanilla in the balls.
Something Sweet
- Dark chocolate-dipped strawberries — The intense, slightly bitter chocolate and the juicy berry offer a different kind of sweet experience that doesn’t compete with the snack balls.
- A small square of high-quality dark chocolate — Let a piece of dark chocolate (70% or higher) melt on your tongue after a snack ball for a simple, decadent finish.
- Vanilla bean ice cream — For a real treat, place a couple of chilled snack balls on top of a scoop of vanilla ice cream; the contrast in temperature and texture is divine.
Top Mistakes to Avoid
- Using warm nuts. If you add the pecans to the food processor while they’re still warm from toasting, they’ll release their oils too quickly. This can make the final mixture greasy and prevent it from binding properly, leading to crumbly balls.
- Over-processing the mixture. It’s tempting to just let the food processor run, but you’ll end up with a nut butter instead of a textured dough. You want a “crumble” that clumps together, not a smooth paste. I’ve messed this up before too, and the texture just isn’t the same.
- Skipping the chill time. I know it’s hard to wait, but this step is non-negotiable. The balls need time in the fridge to set and firm up. If you skip it, they’ll be too soft and might fall apart when you handle them.
- Using hard, dry dates. Old or improperly stored dates won’t have the necessary stickiness to bind the other ingredients. If your dates aren’t soft and juicy, that quick soak is your best friend for saving the batch.
Expert Tips
- Tip: For a flavor twist, add a pinch of warming spices like cinnamon, nutmeg, or even a tiny bit of cardamom to the food processor. It adds a whole new dimension that feels especially cozy in the autumn and winter months.
- Tip: If the mixture is too sticky to roll, lightly dampen your hands with water. This creates a barrier that prevents the dough from sticking to your palms, making the rolling process much smoother and less messy.
- Tip: For a protein boost, you can substitute a portion of the almond flour with your favorite unflavored or vanilla protein powder. Start with one tablespoon and see how the texture feels, adding more if needed.
- Tip: Make a double batch and freeze them! These snack balls freeze beautifully for up to three months. Just place them in a single layer on a baking sheet to freeze solid, then transfer to a freezer bag. They thaw quickly at room temperature.
FAQs
Can I use a different type of nut?
Absolutely! Walnuts or almonds would be fantastic substitutes for the pecans. Just make sure to toast them as well to maximize their flavor. If using almonds, you might want to use almond slices instead of whole nuts for a slightly different texture. The key is to use a nut that you enjoy and that will provide a nice crunch.
How long do these snack balls last?
Stored in an airtight container in the refrigerator, they will keep beautifully for up to two weeks. You can also freeze them for up to three months. I often make a big batch and pull out a few at a time. They are perfect for meal prep because they hold their texture and flavor so well over time.
My mixture is too dry and won’t stick together. What can I do?
This usually happens if the dates were a bit dry. Don’t worry, it’s an easy fix! Just add a little more liquid binder. Try adding an extra half tablespoon of maple syrup at a time, pulsing the mixture after each addition, until it reaches a consistency that holds together when you squeeze it in your hand.
Can I make these without a food processor?
You can, but it requires a bit more elbow grease. You’ll need to very finely chop the toasted pecans and dates by hand. Then, mix everything together in a bowl, using the back of a fork to really mash the dates and incorporate all the ingredients. It might not be as uniform, but it will still work!
Are these suitable for a school lunchbox?
Yes, they are a great lunchbox addition! Because they are nut-based, just be mindful of any school nut-allergy policies. If nuts are allowed, they are a fantastic, energy-packed snack for kids. They travel well and don’t need to be kept super cold, though a cool pack is always a good idea.
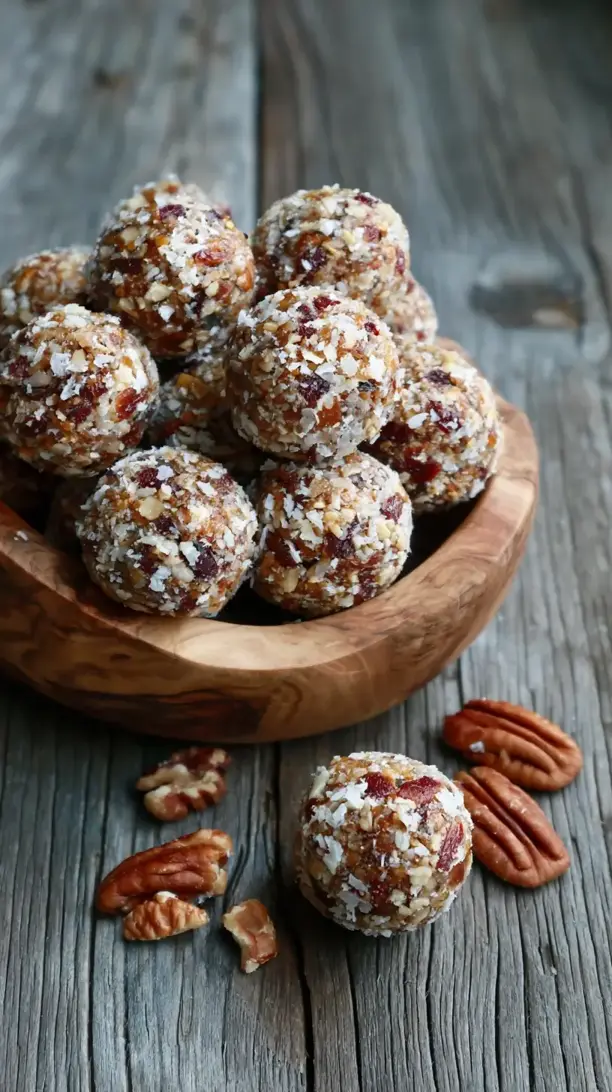
Maple Pecan Snack Balls
Make these easy no-bake Maple Pecan Snack Balls in 20 minutes! A healthy, energy-boosting treat perfect for on-the-go. Get the simple recipe now!
Ingredients
For the Ingredients
-
1 cup raw pecans
-
1 cup Medjool dates (pitted)
-
3 tablespoons pure maple syrup
-
2 tablespoons almond flour
-
1 tablespoon chia seeds
-
0.5 teaspoon vanilla extract
-
0.25 teaspoon sea salt
-
1-2 tablespoons unsweetened shredded coconut (for rolling (optional))
Instructions
-
First, let's toast the pecans to bring out their flavor. Preheat your oven to 350°F (175°C). Spread the raw pecans in a single layer on a small baking sheet. Toast them for 5-7 minutes, until they become fragrant and take on a slightly darker color. You’ll notice that amazing, warm nutty aroma filling your kitchen—that’s how you know they’re ready. Set them aside to cool completely. This is crucial because if they’re warm, they could melt the other ingredients and make the mixture oily.01
-
While the pecans are cooling, prepare your dates. Make sure all the dates are pitted. If they feel a bit dry, give them that quick soak I mentioned earlier. Once they’re ready, you can add them to the bowl of your food processor. Add the cooled, toasted pecans, almond flour, chia seeds, maple syrup, vanilla extract, and sea salt. The almond flour helps absorb any excess moisture and gives a lovely crumb, while the chia seeds add a nutritional boost and help bind everything.02
-
Now for the fun part—pulsing! Pulse the mixture in short bursts until it starts to clump together. You’re looking for a texture where it holds together when you pinch a bit between your fingers, but you can still see small pieces of pecans. This should only take about 10-15 pulses. If the mixture seems too dry and isn't sticking, you can add another half teaspoon of maple syrup. If it seems too wet, add another tablespoon of almond flour.03
-
Time to get your hands involved. Scoop the mixture out of the food processor and into a mixing bowl. Let it sit for a minute—this allows the chia seeds to start absorbing the moisture, which will make rolling easier. Then, using a tablespoon or a small cookie scoop, portion out the mixture. Roll each portion firmly between your palms into a smooth, compact ball. You should get about 12 balls from this recipe.04
-
If you're using the shredded coconut for rolling, now is the time. Place the coconut in a small, shallow bowl. Take each ball and gently roll it in the coconut until it’s lightly coated. This adds a nice textural contrast and a subtle tropical flavor, but it’s completely optional if you prefer them plain.05
-
The final, most important step is chilling. Arrange the finished balls on a plate or a baking sheet lined with parchment paper. Pop them into the refrigerator for at least 30 minutes to firm up. This chilling time allows the fats from the nuts to solidify and the flavors to meld beautifully. They’ll become firmer, less sticky, and much easier to eat. After that, you can transfer them to an airtight container for storage.06