
Why You’ll Love This Lemon Thyme Roasted Turkey
- Unbelievably Juicy Meat. By gently loosening the skin and massaging that herb-infused butter directly onto the turkey breast, you’re creating a self-basting situation. The butter melts slowly, keeping the white meat incredibly moist and tender—no more dry turkey anxiety!
- A Crispy, Flavor-Packed Skin. The same butter that moistens the meat also works its magic on the skin. As it roasts, the skin transforms into a beautifully bronzed, shatteringly crisp layer that’s infused with the savory notes of thyme and the subtle zing of lemon zest.
- The Most Incredible Aroma. Honestly, the scent of lemon, thyme, and roasting turkey filling your home is half the joy of making this recipe. It’s warm, comforting, and builds anticipation for the feast to come in the most wonderful way.
- It’s Surprisingly Simple. While it looks and tastes impressively gourmet, the process is really approachable. The ingredient list is short, and the active prep time is minimal—the oven does most of the heavy lifting for you.
Ingredients & Tools
- 1 whole turkey (12-14 lbs / 5.5-6.5 kg), thawed completely
- 1 cup (2 sticks / 225 g) unsalted butter, softened
- Zest of 2 large lemons
- 1/4 cup fresh lemon juice (from about 1-2 lemons)
- 1/4 cup fresh thyme leaves, finely chopped
- 6 garlic cloves, minced
- 2 tsp kosher salt, plus more for the cavity
- 1 tsp freshly ground black pepper
- 1 large onion, quartered
- 2 lemons, halved
- A few extra sprigs of fresh thyme and rosemary
Tools: Roasting pan with rack, kitchen twine, probe thermometer (highly recommended!), small bowl, zester, microplane, and a pastry brush.
The quality of your butter and herbs really matters here—they are the primary flavor agents. Using fresh thyme and real lemon zest, rather than dried, makes a world of difference in creating that bright, vibrant taste.
Serves: 10-12 | Prep Time: 30 minutes | Cook Time: 3-3.5 hours (approx.) | Total Time: 4-5 hours (including resting)
Before You Start: Tips & Ingredient Notes
- Thawing is non-negotiable. A frozen or partially frozen turkey will cook unevenly. The safest method is to thaw it in the refrigerator, allowing about 24 hours for every 4-5 pounds of turkey. Plan ahead!
- Pat that bird DRY. Before you do anything else, take paper towels and thoroughly dry the skin, inside and out. This is the single best trick for achieving crispy skin, as any surface moisture will just steam instead of browning.
- Why unsalted butter? This gives you complete control over the salt level. Kosher salt adheres better to the skin and meat than table salt, so you get a more even seasoning.
- Get your butter to room temp. Soft, spreadable butter is crucial for easily mixing in the flavors and for sliding it under the skin without tearing it. If you’re short on time, you can gently soften it in the microwave in 5-second bursts.
- Invest in a probe thermometer. This is the ultimate tool for turkey success. You can monitor the internal temperature without constantly opening the oven door, which lets heat escape and can disrupt the cooking process.
How to Make Lemon Thyme Roasted Turkey
Step 1: Prep the Flavor Bomb Butter. In a small bowl, combine the softened butter, lemon zest, lemon juice, chopped thyme, minced garlic, salt, and pepper. Use a fork or a small spatula to mash everything together until it’s fully incorporated and fragrant. You’ll notice the butter turning a pale yellow and smelling absolutely incredible. Set this aside while you prepare the turkey.
Step 2: Prepare the Turkey. Place your thoroughly dried turkey on a stable cutting board. Remove any giblets or neck from the cavity. Using your hands, gently loosen the skin from the breast meat. Start at the cavity opening and carefully slide your fingers between the skin and the meat, moving upwards towards the neck. Be gentle to avoid tearing the skin—it’s more resilient than you think! Season the inside of the cavity generously with a little extra salt and pepper.
Step 3: Apply the Butter. Now for the fun part! Take about two-thirds of the lemon-thyme butter and, using your hands, spread it directly onto the breast meat under the skin. Massage it gently to create an even layer over the entire breast. Then, take the remaining butter and rub it all over the outside of the turkey, covering the legs, wings, and back. This double-layer approach ensures maximum flavor and moisture.
Step 4: Stuff the Aromatics and Truss. Stuff the turkey cavity with the quartered onion, halved lemons, and the extra herb sprigs. These aren’t for eating, but they’ll steam from the inside, perfuming the meat with a subtle, wonderful flavor. Tuck the wing tips behind the turkey’s back, and tie the legs together with kitchen twine. This helps the turkey cook evenly and gives it a nicer presentation.
Step 5: Roast to Perfection. Preheat your oven to 325°F (165°C). Place the turkey, breast-side up, on a rack set inside a roasting pan. If you’re using a probe thermometer, insert it into the thickest part of the thigh, making sure it doesn’t touch the bone. Roast the turkey. You’ll start to smell the amazing aromas after about an hour. The skin will gradually turn a deep, golden brown. If you notice any areas browning too quickly, you can tent those spots loosely with a small piece of foil.
Step 6: Check for Doneness and Rest. The turkey is done when the thermometer reads 165°F (74°C) in the thigh and 160°F (71°C) in the breast. The juices should run clear when you pierce the thigh. This can take anywhere from 3 to 3.5 hours for a 12-14 lb bird, but always trust the thermometer, not the clock! Once done, carefully remove the turkey from the oven, transfer it to a clean cutting board or platter, and tent it loosely with foil. Let it rest for at least 30-45 minutes. This is critical—it allows the juices to redistribute throughout the meat, resulting in a much juicier carve.
Serving Suggestions
Complementary Dishes
- Classic Mashed Potatoes — The ultimate vehicle for that delicious pan gravy you’ll make from the drippings. Their creamy, mild flavor is the perfect canvas for the zesty turkey.
- Sausage & Herb Stuffing — A hearty stuffing baked separately ensures it gets crispy edges and soaks up all the fantastic lemon and thyme notes from the turkey.
- Roasted Honey-Glazed Carrots — The sweetness of the carrots provides a lovely contrast to the savory, herbal notes of the turkey, balancing the plate beautifully.
Drinks
- A Crisp Chardonnay or Viognier — The bright acidity and citrus notes in these white wines will mirror the lemon in the turkey and cut through the richness of the meal.
- Sparkling Apple Cider — For a non-alcoholic option, the effervescence and slight sweetness are refreshing and festive, cleansing the palate between bites.
Something Sweet
- Warm Apple Pie with Vanilla Ice Cream — You can’t go wrong with this classic. The warm spices in the pie are a comforting, familiar end to a meal centered around herbal and citrus flavors.
- Lemon Tart — Doubling down on the lemon theme creates a wonderfully cohesive flavor journey from the main course to dessert, ending on a bright, zesty note.
Top Mistakes to Avoid
- Mistake: Not letting the turkey rest. I know it’s tempting to carve right in, but if you skip the resting period, all those precious juices will just run out onto the cutting board, leaving you with drier meat. Patience is a virtue here!
- Mistake: Relying solely on pop-up timers. Those little plastic timers that come with the turkey are notoriously unreliable. They often pop too late, resulting in overcooked meat. A good digital probe thermometer is your best friend.
- Mistake: Putting a cold turkey in the oven. Let the turkey sit at room temperature for about 30-60 minutes before roasting. This helps it cook more evenly, preventing the outside from drying out before the inside is done.
- Mistake: Basting too often. Every time you open the oven door, you let out heat and drop the oven temperature, which can actually increase the total cooking time and prevent the skin from getting properly crisp. Trust the butter under the skin to do its job.
Expert Tips
- Tip: Make the butter ahead. You can prepare the lemon-thyme butter up to two days in advance. Just wrap it in plastic wrap, shape it into a log, and keep it in the fridge. This makes prep day so much smoother.
- Tip: Use the drippings for gravy. Don’t discard the flavorful bits and fat in the bottom of the roasting pan! After removing the turkey, deglaze the pan with a little chicken broth or white wine over medium heat, scraping up all the browned bits. This is the foundation for an incredible gravy.
- Tip: Carve like a pro. Remove the legs and wings first, then slice the breast meat against the grain. This ensures each slice is tender. A sharp, long carving knife is essential for clean, beautiful slices.
- Tip: Save the carcass. After your feast, don’t throw away the turkey bones! Toss them in a slow cooker or large pot with water, onion, celery, and carrots to make a deeply flavorful homemade turkey stock for soups later.
FAQs
Can I use dried thyme instead of fresh?
You can, but the flavor will be much more subtle and less bright. If you must use dried, reduce the amount to about 1 tablespoon. Fresh herbs really make this recipe sing, so I highly recommend seeking them out. The difference is night and day in terms of aroma and taste.
How do I know when the turkey is done without a thermometer?
Honestly, I can’t stress enough how valuable a thermometer is. But if you’re in a pinch, pierce the thickest part of the thigh with a skewer or fork. The juices should run completely clear, not pink. Also, the leg should wiggle freely in its joint. That said, this method is less precise and carries a higher risk of over or undercooking.
My skin is browning too fast. What should I do?
This can happen, especially in some ovens. If the skin is getting dark brown more than halfway through the cooking time, simply tent the entire turkey loosely with a large piece of aluminum foil. This will shield it from direct heat and allow the inside to continue cooking without the outside burning.
Can I prepare the turkey the night before?
Absolutely! You can fully prepare the turkey up to the end of Step 4 (applying the butter and stuffing the cavity). Cover it loosely with plastic wrap and refrigerate overnight. On cooking day, just take it out of the fridge about an hour before roasting to take the chill off.
What’s the best way to reheat leftover turkey?
To prevent it from drying out, avoid the microwave. Instead, place slices in a baking dish with a little chicken broth or gravy, cover tightly with foil, and warm it in a 325°F (165°C) oven until heated through. This gentle method helps keep the meat moist and delicious.
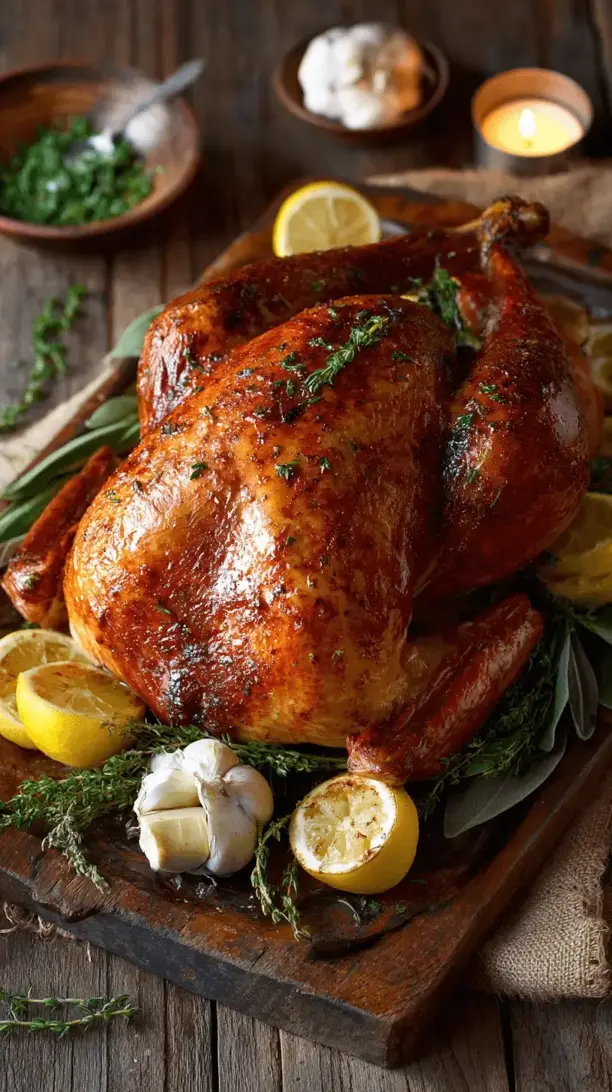
Lemon Thyme Roasted Turkey
My Lemon Thyme Roasted Turkey recipe guarantees juicy, flavorful meat & crackling skin. A simple, no-brine method using herb butter for the ultimate holiday centerpiece.
Ingredients
Ingredients
-
1 whole turkey (12-14 lbs / 5.5-6.5 kg, thawed completely)
-
1 cup unsalted butter (2 sticks / 225 g, softened)
-
2 large lemons lemon zest
-
1/4 cup fresh lemon juice (from about 1-2 lemons)
-
1/4 cup fresh thyme leaves (finely chopped)
-
6 garlic cloves (minced)
-
2 tsp kosher salt (plus more for the cavity)
-
1 tsp freshly ground black pepper
-
1 large onion (quartered)
-
2 lemons (halved)
-
few extra sprigs fresh thyme and rosemary
Instructions
-
Prep the Flavor Bomb Butter. In a small bowl, combine the softened butter, lemon zest, lemon juice, chopped thyme, minced garlic, salt, and pepper. Use a fork or a small spatula to mash everything together until it's fully incorporated and fragrant. You'll notice the butter turning a pale yellow and smelling absolutely incredible. Set this aside while you prepare the turkey.01
-
Prepare the Turkey. Place your thoroughly dried turkey on a stable cutting board. Remove any giblets or neck from the cavity. Using your hands, gently loosen the skin from the breast meat. Start at the cavity opening and carefully slide your fingers between the skin and the meat, moving upwards towards the neck. Be gentle to avoid tearing the skin—it's more resilient than you think! Season the inside of the cavity generously with a little extra salt and pepper.02
-
Apply the Butter. Now for the fun part! Take about two-thirds of the lemon-thyme butter and, using your hands, spread it directly onto the breast meat under the skin. Massage it gently to create an even layer over the entire breast. Then, take the remaining butter and rub it all over the outside of the turkey, covering the legs, wings, and back. This double-layer approach ensures maximum flavor and moisture.03
-
Stuff the Aromatics and Truss. Stuff the turkey cavity with the quartered onion, halved lemons, and the extra herb sprigs. These aren't for eating, but they'll steam from the inside, perfuming the meat with a subtle, wonderful flavor. Tuck the wing tips behind the turkey's back, and tie the legs together with kitchen twine. This helps the turkey cook evenly and gives it a nicer presentation.04
-
Roast to Perfection. Preheat your oven to 325°F (165°C). Place the turkey, breast-side up, on a rack set inside a roasting pan. If you're using a probe thermometer, insert it into the thickest part of the thigh, making sure it doesn't touch the bone. Roast the turkey. You'll start to smell the amazing aromas after about an hour. The skin will gradually turn a deep, golden brown. If you notice any areas browning too quickly, you can tent those spots loosely with a small piece of foil.05
-
Check for Doneness and Rest. The turkey is done when the thermometer reads 165°F (74°C) in the thigh and 160°F (71°C) in the breast. The juices should run clear when you pierce the thigh. This can take anywhere from 3 to 3.5 hours for a 12-14 lb bird, but always trust the thermometer, not the clock! Once done, carefully remove the turkey from the oven, transfer it to a clean cutting board or platter, and tent it loosely with foil. Let it rest for at least 30-45 minutes. This is critical—it allows the juices to redistribute throughout the meat, resulting in a much juicier carve.06


