This Kimchi Shrimp Fried Rice is a vibrant one-pan wonder that comes together in under 20 minutes. The combination of tangy kimchi and juicy shrimp creates a deeply savory, satisfying meal. It’s the perfect way to use up leftover rice for a restaurant-quality dinner at home.
Why You’ll Love This Kimchi Shrimp Fried Rice
Flavor explosion: Tangy kimchi, briny shrimp, and savory sauces create mouthwatering harmony.
Fast & easy: Ready in 15 minutes with prepped rice and shrimp.
Versatile template: Easily swap proteins or add extra veggies.
Perfect texture: Day-old rice fries up with separate, chewy grains and no mushiness.
Ingredients & Tools
- 450 g cooked and cooled jasmine or medium-grain rice (preferably day-old)
- 225 g raw shrimp, peeled and deveined
- 240 g kimchi, roughly chopped, plus 2 tbsp of the kimchi juice
- 2 large eggs, lightly beaten
- 3 spring onions, thinly sliced (whites and greens separated)
- 3 cloves garlic, minced
- 1 tbsp fresh ginger, grated
- 2 tbsp soy sauce (or tamari)
- 1 tbsp toasted sesame oil
- 1 tbsp gochujang (Korean chili paste), optional for extra heat
- 2 tbsp vegetable or canola oil, for frying
- 1 tsp sugar
- Toasted sesame seeds and nori strips, for garnish
Tools: A large wok or a 12-inch non-stick skillet, a sturdy spatula
Notes: Using well-fermented, sour kimchi provides the most complex flavor. Don’t forget the kimchi juice—it’s liquid gold for seasoning.
Nutrition (per serving)
| Calories: | 415 kcal |
| Protein: | 24 g |
| Fat: | 14 g |
| Carbs: | 48 g |
| Fiber: | 3 g |
Serves: 3 | Prep Time: 10 minutes | Cook Time: 12 minutes | Total Time: 22 minutes
Before You Start: Tips & Ingredient Notes
- Your rice must be cold. This is the single most important step for perfect fried rice. Warm, freshly cooked rice is too moist and will steam and clump together in the pan, resulting in a gummy texture. Day-old rice that’s been chilled in the fridge is ideal.
- Get your mise en place ready. Fried rice cooks fast, so have all your ingredients chopped, measured, and within arm’s reach. Once you start cooking, there’s no time to run to the fridge for that spring onion you forgot!
- Don’t skip the kimchi juice. That tangy, spicy brine is packed with umami and will help season the rice from the inside out, giving it a much more vibrant and uniform flavor than just adding the kimchi chunks alone.
- Pat your shrimp dry. Before they hit the hot pan, give the shrimp a good pat with a paper towel. This ensures they sear and brown nicely instead of steaming, which gives them a much better texture and flavor.
How to Make Kimchi Shrimp Fried Rice
Step 1: Start by prepping your shrimp. If they’re large, you can cut them in half. Pat them thoroughly dry with a paper towel and season lightly with a pinch of salt. This is a small step, but it makes a world of difference in getting a nice sear.
Step 2: Heat your wok or large skillet over high heat until it’s seriously hot. You should see a faint wisp of smoke. Add one tablespoon of the vegetable oil and swirl it around. Add the shrimp in a single layer and cook for about 1-2 minutes per side, just until they turn pink and opaque. You’re not cooking them through entirely—they’ll finish cooking later. Remove them to a clean plate and set aside.
Step 3: Reduce the heat to medium-high and add the remaining tablespoon of oil. Pour in your beaten eggs and scramble them quickly, breaking them up into small curds with your spatula. As soon as they’re just set—still a little soft—scoot them to one side of the pan.
Step 4: To the empty side of the pan, add the white parts of your spring onions, the minced garlic, and grated ginger. Stir-fry for just 30-60 seconds until incredibly fragrant—you’ll notice that amazing aroma immediately. Be careful not to let the garlic burn!
Step 5: Now, add the chopped kimchi and its 2 tablespoons of juice. Stir everything together and cook for another 1-2 minutes. This step is key—it wakes up the kimchi’s flavor and allows it to caramelize slightly, deepening the entire dish.
Step 6: It’s rice time! Crumble the cold rice into the pan with your hands as you add it, breaking up any large clumps. Use your spatula to press and toss the rice, ensuring every grain gets coated in the kimchi mixture and turns a lovely pinkish color. This should take 2-3 minutes.
Step 7: Drizzle the soy sauce and toasted sesame oil around the edges of the pan so it sizzles and gets absorbed directly into the rice. If you’re using the gochujang and sugar, add it now. Toss everything to combine thoroughly. The rice should look glossy and smell incredible.
Step 8: Return the cooked shrimp (and any accumulated juices) to the pan, along with most of the green spring onions. Give everything a final, vigorous toss to heat the shrimp through and combine, about 1 more minute. Taste and adjust seasoning if needed.
Step 9: Your masterpiece is ready! Serve immediately, garnished generously with the remaining green spring onions, a sprinkle of toasted sesame seeds, and some crispy nori strips if you have them.
Storage & Freshness Guide
- Fridge: Store in an airtight container for up to 3 days.
- Freezer: Freeze for up to 1 month, though texture may soften upon thawing.
- Reviving: Reheat in a skillet over medium heat with a splash of water to restore texture.
Serving Suggestions
Complementary Dishes
- A simple cucumber salad — The cool, crisp, and slightly sweet vinegar-dressed cucumbers provide a refreshing contrast that cuts through the richness and spice of the fried rice beautifully.
- Korean-style spinach side dish (Sigeumchi-namul) — This classic banchan, made with blanched spinach and sesame, adds another layer of savory, nutty flavor and a different, soft texture to your meal.
- Steamed or roasted broccoli — An easy, healthy addition that soaks up the flavors of the rice and makes the meal feel a bit more substantial and balanced.
Drinks
- A cold, crisp lager — The carbonation and mild bitterness of a light beer are fantastic for cleansing the palate between bites of the savory, umami-packed rice.
- Iced barley tea (boricha) — A traditional, non-caffeinated Korean drink that is subtly toasty and refreshing, making it a perfect, calming companion to the dish’s bold flavors.
- Citrus-forward white wine — A Sauvignon Blanc or Pinot Grigio with bright acidity and citrus notes can stand up to the spice and tang without overpowering the delicate shrimp.
Something Sweet
- Green tea ice cream — The slightly bitter, earthy notes of matcha are a wonderful, sophisticated finish that cools the palate after the spicy kick of the kimchi.
- Fresh, juicy mango slices — The natural sweetness and vibrant flavor of ripe mango are
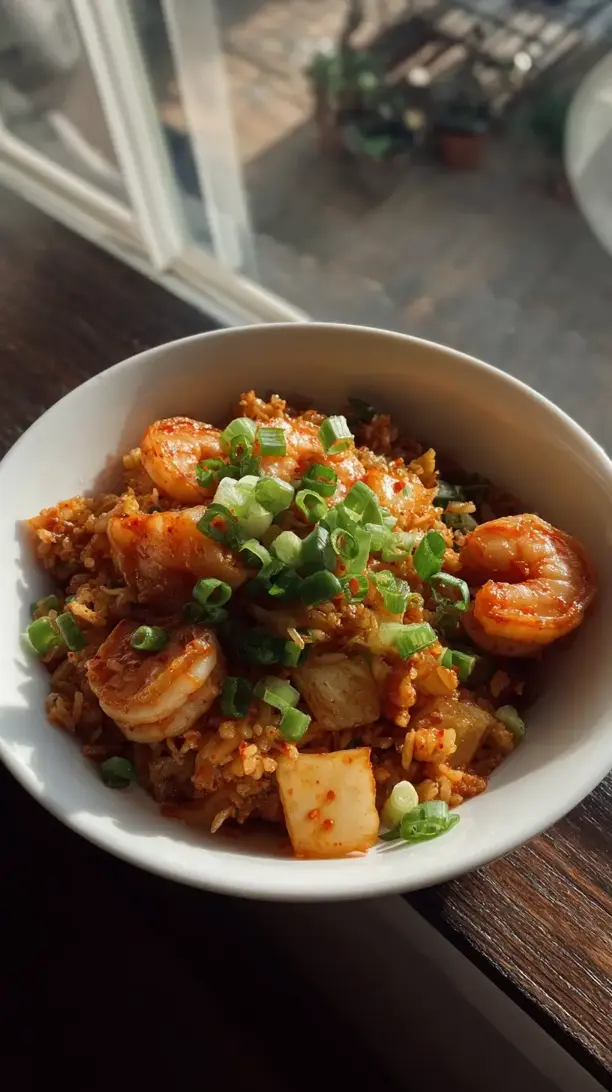
Kimchi Shrimp Fried Rice
Make this easy Kimchi Shrimp Fried Rice in under 20 minutes! Tangy kimchi and juicy shrimp create the ultimate savory meal. Get the recipe and cook it tonight!
Ingredients
For the Main Ingredients
-
450 g cooked and cooled jasmine or medium-grain rice (preferably day-old)
-
225 g raw shrimp (peeled and deveined)
-
240 g kimchi (roughly chopped, plus 2 tbsp of the kimchi juice)
-
2 large eggs (lightly beaten)
-
3 spring onions (thinly sliced (whites and greens separated))
-
3 cloves garlic (minced)
-
1 tbsp fresh ginger (grated)
-
2 tbsp soy sauce (or tamari)
-
1 tbsp toasted sesame oil
-
1 tbsp gochujang (Korean chili paste, optional for extra heat)
-
2 tbsp vegetable or canola oil (for frying)
-
1 tsp sugar
-
Toasted sesame seeds and nori strips (for garnish)
Instructions
-
Start by prepping your shrimp. If they’re large, you can cut them in half. Pat them thoroughly dry with a paper towel and season lightly with a pinch of salt.01
-
Heat your wok or large skillet over high heat until it’s seriously hot. Add one tablespoon of the vegetable oil and swirl it around. Add the shrimp in a single layer and cook for about 1-2 minutes per side, just until they turn pink and opaque. Remove them to a clean plate and set aside.02
-
Reduce the heat to medium-high and add the remaining tablespoon of oil. Pour in your beaten eggs and scramble them quickly, breaking them up into small curds with your spatula. As soon as they’re just set—still a little soft—scoot them to one side of the pan.03
-
To the empty side of the pan, add the white parts of your spring onions, the minced garlic, and grated ginger. Stir-fry for just 30-60 seconds until incredibly fragrant.04
-
Now, add the chopped kimchi and its 2 tablespoons of juice. Stir everything together and cook for another 1-2 minutes.05
-
Crumble the cold rice into the pan with your hands as you add it, breaking up any large clumps. Use your spatula to press and toss the rice, ensuring every grain gets coated in the kimchi mixture and turns a lovely pinkish color. This should take 2-3 minutes.06
-
Drizzle the soy sauce and toasted sesame oil around the edges of the pan so it sizzles and gets absorbed directly into the rice. If you’re using the gochujang and sugar, add it now. Toss everything to combine thoroughly.07
-
Return the cooked shrimp (and any accumulated juices) to the pan, along with most of the green spring onions. Give everything a final, vigorous toss to heat the shrimp through and combine, about 1 more minute. Taste and adjust seasoning if needed.08
-
Serve immediately, garnished generously with the remaining green spring onions, a sprinkle of toasted sesame seeds, and some crispy nori strips if you have them.09