Why You’ll Love This Healthy Hot Cocoa Cups
- It’s genuinely nourishing. We’re using ingredients that do more than just taste good. Raw cacao is packed with antioxidants, and the natural sweetness comes from sources that won’t cause a major energy crash.
- The texture is dreamily creamy. Forget that thin, watery stuff. By using a combination of milk and a touch of your favorite creamy element, we achieve a luxurious, velvety mouthfeel that coats your spoon beautifully.
- It’s endlessly customizable. Are you team peppermint? A dash of cinnamon? Maybe a pinch of cayenne for a kick? This base recipe is your playground, ready to be tailored to your exact mood.
- It’s a five-minute wonder. From pantry to mug in less time than it takes to find your slippers. It’s the perfect solution for when that chocolate craving strikes, and you want something satisfying without any fuss.
Ingredients & Tools
- 2 cups milk of choice (whole, almond, or oat work beautifully)
- 2 tbsp raw cacao powder
- 1–2 tbsp pure maple syrup or honey
- 1/4 tsp pure vanilla extract
- A tiny pinch of sea salt
- Optional for topping: a dollop of whipped coconut cream, a few cacao nibs, or a dusting of cinnamon
Tools: A small saucepan, a whisk, and two mugs.
The quality of your cacao powder really makes a difference here—it’s the star of the show, so using a good one will give you that deep, complex chocolate flavor. And that pinch of salt? It’s not optional in my book; it makes all the other flavors pop.
Nutrition (per serving)
- Calories: 180 kcal
- Protein: 8 g
- Fat: 5 g
- Carbohydrates: 25 g
- Fiber: 3 g
Serves: 2 | Prep Time: 2 minutes | Cook Time: 5 minutes | Total Time: 7 minutes
Before You Start: Tips & Ingredient Notes
- Milk matters, but you do you. Whole milk will give you the creamiest, most classic result, but don’t be afraid to use a barista-style oat or almond milk. They froth up nicely and add their own subtle sweetness.
- Raw cacao vs. cocoa powder—what’s the deal? Raw cacao is less processed and has a more intense, slightly fruity chocolate flavor. Regular cocoa powder works perfectly fine too; it will just yield a milder, more traditional hot cocoa taste.
- Sweeten to your taste. Start with the lower amount of maple syrup. You can always add more, but you can’t take it out! Taste as you go—your perfect sweetness might be different from mine.
- Don’t rush the warming process. The goal is to heat the milk gently so it doesn’t scorch or form a skin. A low and slow approach is your best friend here for the smoothest texture.
How to Make Healthy Hot Cocoa Cups
Step 1: Gather all your ingredients. This is a fast-moving recipe, so having everything measured and within arm’s reach makes the process seamless. Place your small saucepan on the stove, but don’t turn the heat on just yet.
Step 2: Add the cacao powder and maple syrup (or honey) directly into the cold milk in the saucepan. This is a little trick to prevent the cacao from clumping. If you add it to hot liquid, it can turn into stubborn little lumps. Starting cold allows you to whisk it into a smooth, dark paste before any heat is applied.
Step 3: Now, turn the stove on to a low-medium heat. You’ll want to warm the mixture gradually. As it heats, continue to whisk constantly. You’ll notice the cacao paste dissolving into the milk, turning it a beautiful, rich brown. The whisking also incorporates a little air, which starts to make the cocoa feel lighter and frothier.
Step 4: Keep a close eye on the temperature. You are not trying to bring this to a rolling boil—just a gentle, steaming heat where small bubbles might form around the edges of the pan. This should take about 4-5 minutes. If you see it starting to simmer aggressively, reduce the heat immediately.
Step 5: Once the cocoa is hot and steaming, turn off the heat. Now, stir in the vanilla extract and that all-important tiny pinch of sea salt. Give it one final, vigorous whisk. The salt will balance the sweetness and enhance the chocolate flavor dramatically, making it taste so much more complex.
Step 6: Pour the hot cocoa immediately into your pre-warmed mugs. To warm mugs, simply fill them with hot water from the tap while you’re making the cocoa, then empty them right before pouring. This keeps your drink hotter for longer. Now’s the time to add any of your optional toppings—a fluffy cloud of coconut cream or a sprinkle of cacao nibs for a delightful crunch.
Serving Suggestions
Complementary Dishes
- A warm, chewy oatmeal cookie — The spiced, homey flavor of a good oatmeal cookie is a perfect textural contrast to the smooth, liquid cocoa.
- Buttered whole-wheat toast with cinnamon — A simple, comforting side that doesn’t overpower the cocoa but adds a lovely, crunchy element to your cozy moment.
- A small bowl of fresh berries — The bright, tart pop of a raspberry or strawberry provides a refreshing palate cleanser between sips of the rich chocolate.
Drinks
- A small glass of cold water — It might sound simple, but a sip of cool water between sips of hot cocoa really resets your palate and makes each taste of chocolate feel new again.
- A shot of espresso (for an affogato-style treat) — For the adults, pouring a shot of hot espresso over the top creates a delicious mocha experience that’s both energizing and comforting.
Something Sweet
- A square of dark chocolate with sea salt — Double down on the chocolate theme! Let a piece of high-quality dark chocolate melt slowly on your tongue as you sip.
- A few dried orange slices — The chewy, citrusy sweetness of a dried orange slice is a surprising and elegant pairing that cuts through the richness beautifully.
Top Mistakes to Avoid
- Mistake: Boiling the milk. This is the number one way to ruin the texture. Boiled milk can become grainy, develop a skin, and even scorch on the bottom of the pan, giving your cocoa a burnt flavor. Gentle heat is key.
- Mistake: Adding cacao powder to hot liquid. I’ve made this mistake before, and you end up with a lumpy, gritty drink that no amount of whisking can fully fix. Always mix your cacao with cold milk first.
- Mistake: Skipping the salt. It seems insignificant, but that tiny pinch is what transforms your cocoa from “sweet and chocolatey” to “complex and crave-worthy.” It balances all the flavors perfectly.
- Mistake: Using a spoon instead of a whisk. A whisk is essential for breaking up the cacao powder and creating a little froth. A spoon just can’t incorporate everything as smoothly or give you that lovely light texture.
Expert Tips
- Tip: Make a big batch of the dry mix. Multiply the cacao powder and salt (not the sweetener) and keep it in a jar. When a craving hits, just scoop out a tablespoon or two, add to cold milk, and you’re halfway there. It’s a serious game-changer for busy mornings.
- Tip: Infuse your milk first. For a next-level flavor, gently warm your milk with a cinnamon stick, a strip of orange zest, or a few cardamom pods for 10 minutes before making the cocoa. Strain it out, then proceed with the recipe. The subtle background notes are incredible.
- Tip: Froth it up! If you have a handheld milk frother, use it for the last 30 seconds of heating or right after you pour it into the mug. It creates a professional-quality, cafe-style foam that makes the drink feel incredibly luxurious.
- Tip: Pre-warm your mugs. This is a tiny step with a huge payoff. A warm mug keeps your cocoa hot for nearly twice as long, letting you savor every last sip without it going lukewarm.
FAQs
Can I make this dairy-free and vegan?
Absolutely, and it works wonderfully. Just choose a creamy, unsweetened plant-based milk. My top picks are oat milk or cashew milk because of their naturally rich texture. For the sweetener, make sure to use maple syrup instead of honey to keep it vegan. The process is exactly the same, and you’ll still get that velvety, satisfying cup.
How can I store and reheat leftovers?
Let the cocoa cool completely, then store it in a sealed jar in the fridge for up to two days. When you’re ready, reheat it gently in a saucepan over low heat, whisking as it warms. I don’t recommend the microwave, as it can heat unevenly and might make the texture a bit odd. A slow warm-up on the stove is always best.
My cocoa tastes a bit bitter. What did I do wrong?
This usually means you need a touch more sweetness to balance the natural bitterness of the cacao. Add another half teaspoon of maple syrup, stir it in, and taste again. Raw cacao is more intense than standard cocoa powder, so it often requires a bit more sweetener to hit that perfect balance for your palate.
Can I make this in a slow cooker for a crowd?
You sure can! It’s a fantastic idea for a party. Simply combine all the ingredients (except the vanilla) in your slow cooker, whisk well, and set it to the “warm” setting for an hour or two. Stir it occasionally. Add the vanilla right before serving to preserve its delicate flavor.
What’s the best way to make it extra creamy?
For an ultra-indulgent texture, replace about a quarter of the milk with full-fat canned coconut milk or a splash of heavy cream. You could also stir in a tablespoon of coconut butter or almond butter at the end—it melts in and adds incredible richness and a subtle nutty flavor.
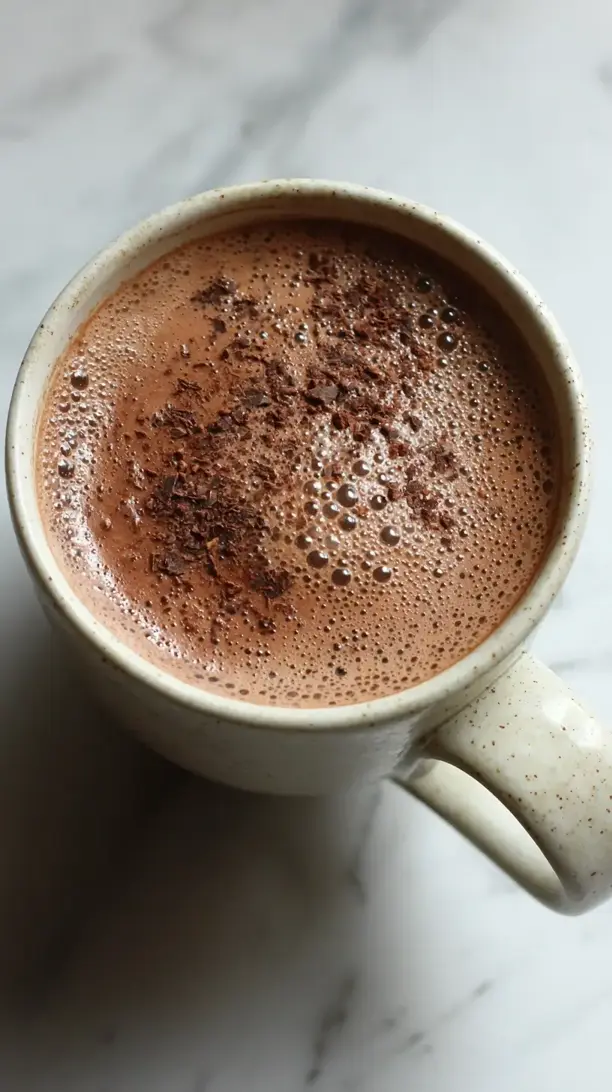
Healthy Hot Cocoa Cups
Make the best Healthy Hot Cocoa Cups in just 5 minutes! This easy recipe uses real ingredients for a rich, creamy, and guilt-free treat. Get the recipe now!
Ingredients
For the Ingredients
-
2 cups milk of choice (whole, almond, or oat work beautifully)
-
2 tbsp raw cacao powder
-
1–2 tbsp pure maple syrup or honey
-
1/4 tsp pure vanilla extract
-
A tiny pinch sea salt
-
Optional for topping (a dollop of whipped coconut cream, a few cacao nibs, or a dusting of cinnamon)
Instructions
-
Gather all your ingredients. This is a fast-moving recipe, so having everything measured and within arm's reach makes the process seamless. Place your small saucepan on the stove, but don't turn the heat on just yet.01
-
Add the cacao powder and maple syrup (or honey) directly into the cold milk in the saucepan. This is a little trick to prevent the cacao from clumping. If you add it to hot liquid, it can turn into stubborn little lumps. Starting cold allows you to whisk it into a smooth, dark paste before any heat is applied.02
-
Now, turn the stove on to a low-medium heat. You’ll want to warm the mixture gradually. As it heats, continue to whisk constantly. You’ll notice the cacao paste dissolving into the milk, turning it a beautiful, rich brown. The whisking also incorporates a little air, which starts to make the cocoa feel lighter and frothier.03
-
Keep a close eye on the temperature. You are not trying to bring this to a rolling boil—just a gentle, steaming heat where small bubbles might form around the edges of the pan. This should take about 4-5 minutes. If you see it starting to simmer aggressively, reduce the heat immediately.04
-
Once the cocoa is hot and steaming, turn off the heat. Now, stir in the vanilla extract and that all-important tiny pinch of sea salt. Give it one final, vigorous whisk. The salt will balance the sweetness and enhance the chocolate flavor dramatically, making it taste so much more complex.05
-
Pour the hot cocoa immediately into your pre-warmed mugs. To warm mugs, simply fill them with hot water from the tap while you’re making the cocoa, then empty them right before pouring. This keeps your drink hotter for longer. Now’s the time to add any of your optional toppings—a fluffy cloud of coconut cream or a sprinkle of cacao nibs for a delightful crunch.06