
Why You’ll Love This Healthy Chocolate Fudge Truffles
- Seriously Simple to Make. Honestly, if you can operate a food processor, you can make these truffles. There’s no baking, no tempering chocolate, and no fancy techniques required. It’s a wonderfully forgiving recipe.
- Incredibly Customizable. This is your blank canvas for creativity. You can roll the finished truffle dough in cocoa powder, shredded coconut, crushed nuts, or even a little sea salt. The flavour possibilities are endless, which means you’ll never get bored.
- Packed with Wholesome Ingredients. We’re using whole foods like dates for natural sweetness and nuts for healthy fats and protein. You’re getting a treat that satisfies your sweet tooth while actually giving your body some good stuff.
- The Perfect Make-Ahead Treat. These truffles actually get better after a day or two in the fridge, as the flavours have more time to meld. Having a container of these on hand means you’re always prepared for a snack emergency.
Ingredients & Tools
- 1 cup (about 150g) raw walnuts or almonds
- 1 ½ cups (about 200g) pitted Medjool dates
- ⅓ cup (30g) unsweetened cocoa powder, plus extra for rolling
- 1 tablespoon coconut oil, melted
- 1 teaspoon pure vanilla extract
- A generous pinch of sea salt
- 1-2 tablespoons water or maple syrup, if needed
Tools: A food processor (a high-powered blender can work in a pinch, but a processor is easier), a small bowl, a baking sheet or plate, and parchment paper.
The quality of your cocoa powder really makes a difference here—since it’s a star ingredient, using a good-quality one will give you a much deeper, richer chocolate flavour. And don’t worry if your dates are a little firm; we’ll talk about how to handle that in the tips section.
Serves: 12-14 truffles | Prep Time: 20 minutes | Chill Time: 30 minutes | Total Time: 50 minutes
Before You Start: Tips & Ingredient Notes
- Are your dates dry? If your Medjool dates have been in the pantry for a while and feel a bit hard, simply soak them in warm water for 10-15 minutes before using. Just be sure to drain them thoroughly and pat them dry, otherwise your mixture will be too wet.
- The Power of Pinching. That pinch of salt isn’t just for show—it’s crucial for balancing the sweetness of the dates and enhancing the chocolate flavour. Don’t skip it! It makes the whole thing taste more complex.
- Why Coconut Oil? The melted coconut oil is our binding agent here. It helps bring the mixture together and gives the truffles a lovely melt-in-your-mouth quality once they’re chilled. If you don’t have it, a neutral-tasting oil like avocado oil can work.
- Texture is Key. The goal is a dough that holds together when you pinch it. If it’s too crumbly, add water or maple syrup one teaspoon at a time. If it’s too sticky, a little more cocoa powder will fix it right up.
How to Make Healthy Chocolate Fudge Truffles
Step 1: Pulse the Nuts. Start by adding your walnuts or almonds to the bowl of your food processor. Pulse them until they break down into a fine, sandy crumb. You don’t want to over-process them into nut butter, so just a few short pulses should do the trick. You’ll know it’s ready when it looks like coarse sand.
Step 2: Create the Chocolate Base. Add the pitted dates, cocoa powder, melted coconut oil, vanilla extract, and that all-important pinch of sea salt to the food processor with the ground nuts. Now, lock the lid on and process everything. At first, it will look like a crumbly mess, but just keep going. After about a minute, you’ll notice it start to clump together on the sides of the bowl.
Step 3: Check the Consistency. Stop the processor and pinch a small amount of the mixture between your fingers. It should hold together firmly. If it’s too dry and crumbly, add a tablespoon of water or maple syrup and process again for another 30 seconds. The mixture will be quite sticky, and that’s exactly what we want for fudgy truffles.
Step 4: Chill the Dough. Transfer the sticky chocolate mixture to a bowl, cover it, and pop it into the refrigerator for about 15-20 minutes. This short chill makes the dough much easier to handle and roll. It firms up the coconut oil just enough so it won’t stick to your hands excessively.
Step 5: Roll and Coat. Line a small plate or baking sheet with parchment paper. Take the chilled dough out of the fridge. Using a teaspoon or a small cookie scoop, portion out the dough and roll it quickly between your palms to form smooth, round balls. Now, roll each ball in your chosen coating—cocoa powder, desiccated coconut, or finely chopped nuts work beautifully. Place each finished truffle on the prepared parchment.
Step 6: The Final Set. Once all your truffles are rolled and coated, transfer the plate or baking sheet to the refrigerator for a final 30-minute chill. This step is non-negotiable for that perfect, firm-yet-fudgy texture. They’ll be ready to enjoy straight from the fridge!
Serving Suggestions
Complementary Dishes
- A Fresh Fruit Platter — The bright, juicy acidity of berries, orange segments, or sliced mango provides a lovely contrast to the rich, dense chocolate. It turns the truffles into a more complete dessert experience.
- A Cup of Greek Yogurt — Crumble a truffle over a bowl of plain Greek yogurt for a decadent yet protein-packed breakfast or snack. The tanginess of the yogurt is a fantastic partner for the sweet chocolate.
Drinks
- A Strong Cup of Coffee — There’s no better pairing for dark chocolate than coffee. The bitterness of a good espresso or black coffee highlights the deep cocoa notes in the truffles perfectly.
- A Glass of Cold Almond Milk — For a caffeine-free option, a glass of chilled, unsweetened almond milk is wonderfully soothing and complements the nutty base of the truffles.
Something Sweet
- Orange Segments Drizzled with Honey — The combination of chocolate and orange is a classic for a reason. Simple, fresh, and it feels incredibly elegant with minimal effort.
Top Mistakes to Avoid
- Mistake: Using rock-hard dates. If your dates aren’t soft and sticky, the mixture won’t bind properly. You’ll end up with a crumbly mess that’s impossible to roll. Remember to soak hard dates first!
- Mistake: Skipping the chilling steps. I know, waiting is the hardest part. But if you try to roll the dough right after processing, it will stick to your hands like crazy. The initial chill is a game-changer for clean rolling.
- Mistake: Over-processing the nuts. If you let the food processor run too long in the first step, you’ll end up with nut butter instead of a crumb. We want a texture that will bind with the dates, not a oily paste.
- Mistake: Not tasting the mixture. Before you roll, taste a tiny bit! This is your chance to adjust. Want more salt? A hint more vanilla? Now’s the time to add it and give it one last quick pulse.
Expert Tips
- Tip: Warm your hands. If you find the dough is still a bit sticky when rolling, quickly run your hands under warm water and dry them thoroughly. The slight warmth helps smooth the truffles without sticking.
- Tip: Get creative with flavours. Add a pinch of cinnamon, a dash of espresso powder, or even a few drops of orange extract to the food processor along with the other ingredients. It’s an easy way to create your own signature truffle.
- Tip: Use a cookie scoop for uniformity. For truffles that are all the same size (and look super professional), use a small cookie scoop or a melon baller to portion the dough before rolling. It makes the process faster and neater.
- Tip: Double the batch for gifting. These truffles are fantastic homemade gifts. Double the recipe and pack them into a nice box or jar. They keep well, and everyone appreciates a thoughtful, handmade treat.
FAQs
How long do these truffles keep?
Stored in an airtight container in the refrigerator, they’ll stay fresh and delicious for up to two weeks. You can also freeze them for up to three months. Just place them in a single layer on a parchment-lined tray to freeze solid first, then transfer to a freezer bag. Thaw in the fridge for a few hours before serving.
Can I use a different type of nut?
Absolutely! Walnuts and almonds are my favourites, but pecans, cashews, or even hazelnuts would work wonderfully. Just make sure they’re raw, not roasted and salted, so you can control the flavour. Hazelnuts would give a fantastic Nutella-like vibe.
My mixture is too wet and sticky. What can I do?
This usually happens if the dates were very fresh and juicy. Don’t panic! Just add another tablespoon of cocoa powder and pulse to combine. If it’s still too sticky, you can add a tablespoon of almond flour or more ground nuts until it reaches a workable consistency.
Are these truffles vegan?
Yes, as long as you use maple syrup instead of honey (if needed for moisture), this recipe is naturally vegan. It’s also gluten-free and dairy-free, making it a great option for sharing with friends who have dietary restrictions.
Can I make these without a food processor?
It’s a challenge, but not impossible. You would need to very finely chop the nuts and dates by hand—which takes some patience—and then really work the mixture together in a bowl with a sturdy spoon or even your hands. The texture might be a bit more rustic, but the flavour will still be there.
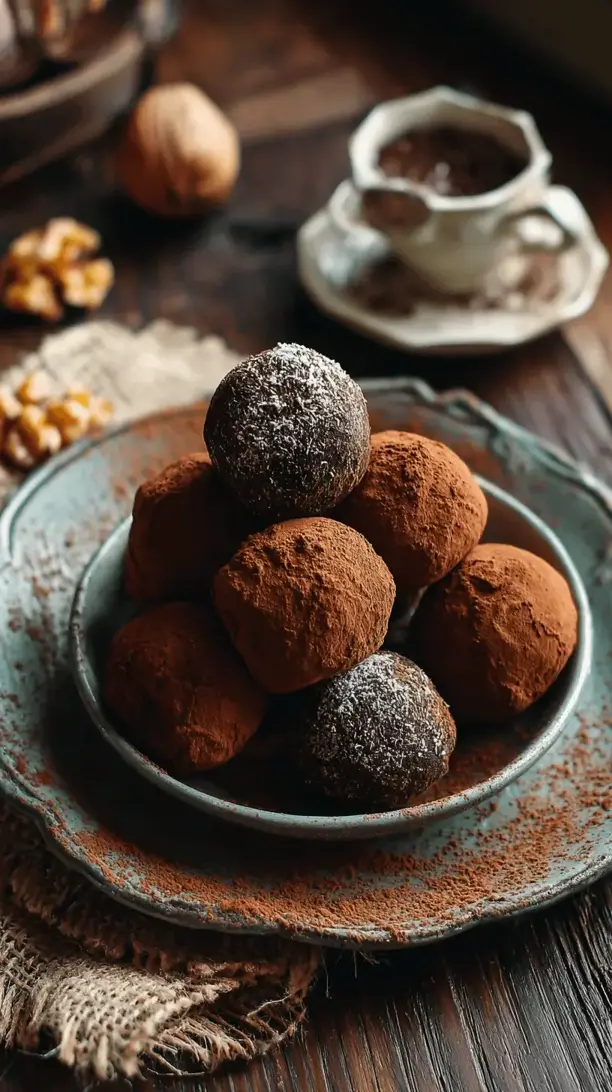
Healthy Chocolate Fudge Truffles
Whip up decadent Healthy Chocolate Fudge Truffles in 20 mins! No-bake, sugar-free, & made with dates & nuts. A guilt-free, fudgy treat that's seriously easy & delicious.
Ingredients
Ingredients
-
1 cup raw walnuts or almonds (about 150g)
-
1.5 cup pitted Medjool dates (about 200g)
-
0.33 cup unsweetened cocoa powder (30g, plus extra for rolling)
-
1 tablespoon coconut oil (melted)
-
1 teaspoon pure vanilla extract
-
1 pinch sea salt (generous)
-
1-2 tablespoon water or maple syrup (if needed)
Instructions
-
Pulse the Nuts. Start by adding your walnuts or almonds to the bowl of your food processor. Pulse them until they break down into a fine, sandy crumb. You don't want to over-process them into nut butter, so just a few short pulses should do the trick. You'll know it's ready when it looks like coarse sand.01
-
Create the Chocolate Base. Add the pitted dates, cocoa powder, melted coconut oil, vanilla extract, and that all-important pinch of sea salt to the food processor with the ground nuts. Now, lock the lid on and process everything. At first, it will look like a crumbly mess, but just keep going. After about a minute, you'll notice it start to clump together on the sides of the bowl.02
-
Check the Consistency. Stop the processor and pinch a small amount of the mixture between your fingers. It should hold together firmly. If it's too dry and crumbly, add a tablespoon of water or maple syrup and process again for another 30 seconds. The mixture will be quite sticky, and that's exactly what we want for fudgy truffles.03
-
Chill the Dough. Transfer the sticky chocolate mixture to a bowl, cover it, and pop it into the refrigerator for about 15-20 minutes. This short chill makes the dough much easier to handle and roll. It firms up the coconut oil just enough so it won't stick to your hands excessively.04
-
Roll and Coat. Line a small plate or baking sheet with parchment paper. Take the chilled dough out of the fridge. Using a teaspoon or a small cookie scoop, portion out the dough and roll it quickly between your palms to form smooth, round balls. Now, roll each ball in your chosen coating—cocoa powder, desiccated coconut, or finely chopped nuts work beautifully. Place each finished truffle on the prepared parchment.05
-
The Final Set. Once all your truffles are rolled and coated, transfer the plate or baking sheet to the refrigerator for a final 30-minute chill. This step is non-negotiable for that perfect, firm-yet-fudgy texture. They'll be ready to enjoy straight from the fridge!06


