
Why You’ll Love This Hard Boiled Eggs with Everything Seasoning
- Effortless Gourmet Appeal. With just one extra step—a simple sprinkle—you transform a basic ingredient into something that looks and tastes incredibly sophisticated. It’s the ultimate kitchen hack for when you want to feel fancy without any fuss.
- A Textural Dream. The contrast is just… wow. You get the smooth, creamy yolk and the tender-but-firm white, and then BAM—a delightful crunch from the seeds and a little grit from the garlic and onion. It’s a party in your mouth.
- Meal Prep Magic. These eggs are your best friend for a busy week. Cook a batch on Sunday, keep them unpeeled in the fridge, and then peel and season whenever hunger strikes. They’re a portable, protein-packed powerhouse.
- Endlessly Customizable. While we’re using classic everything seasoning, this concept is a springboard. Love a little heat? Add some chili flakes. Prefer an herby vibe? Mix in some dried dill. You are the master of your egg destiny.
Ingredients & Tools
- 6 large eggs – preferably not super fresh (see tips below for why!).
- 2–3 tablespoons everything bagel seasoning – use your favorite store-bought blend or make your own.
- 1 teaspoon olive oil or neutral oil (optional) – a tiny bit helps the seasoning stick if you’re not eating them immediately.
- Flaky sea salt (optional) – for a final flourish if your seasoning blend isn’t too salty.
Tools: A medium saucepan with a lid, a slotted spoon or spider strainer, a large bowl, ice, water.
The beauty here is in the simplicity. The eggs are the star, and the seasoning is the supporting actor that steals the show. Using a good-quality everything seasoning makes all the difference—you want one with a nice balance of seeds and spices.
Serves: 3 (2 eggs per person) | Prep Time: 2 minutes | Cook Time: 12 minutes | Total Time: 20 minutes (plus cooling)
Before You Start: Tips & Ingredient Notes
- Egg Age Matters. Honestly, this is the secret to easy-peel eggs. Slightly older eggs (about 7-10 days old) are ideal. As eggs age, the air pocket inside enlarges and the pH changes, which causes the membrane to pull away from the shell, making peeling a breeze.
- To Salt or Not to Salt the Water? This is a classic debate. Adding salt to the boiling water can sometimes help prevent leaks if an egg cracks, but it doesn’t significantly affect peeling. I usually skip it, but if it makes you feel better, go for it!
- Your Seasoning, Your Rules. Taste your everything seasoning before you commit. Some blends are saltier than others. If it’s very salty, you might not need that extra flaky salt at the end. If you’re making your own, you can control the ratios perfectly.
- The Ice Bath is Non-Negotiable. Don’t be tempted to just let the eggs cool on the counter. Plunging them into an ice bath immediately stops the cooking process, prevents that dreaded grey ring around the yolk, and makes the eggs contract away from the shell. It’s the key to perfection.
How to Make Hard Boiled Eggs with Everything Seasoning
Step 1: The Perfect Boil. Place your eggs in a single layer at the bottom of your saucepan. Cover them with cold water by about an inch—you don’t want them swimming in a vast ocean of water, just enough to fully submerge them. Place the pot, uncovered, over high heat and bring it to a full, rolling boil. You’ll see big, aggressive bubbles. The second it reaches that point, immediately put the lid on and remove the pot from the heat.
Step 2: The Steamy Rest. This is where the magic happens. Set a timer for 10-12 minutes. For a firm but still vibrant yellow yolk, 10 minutes is perfect. If you prefer a yolk that’s completely set and a bit drier, go for 12 minutes. Let the eggs just hang out in the hot water with the lid on. This gentle, residual heat cooks them through evenly without making the whites rubbery.
Step 3: The Shock Treatment. While the eggs are resting, prepare your ice bath. Fill a large bowl with cold water and a generous amount of ice—you want it to be really cold. As soon as the timer goes off, use your slotted spoon to carefully transfer the eggs from the hot pot directly into the ice bath. You’ll hear a satisfying sizzle. Let them chill out for at least 5 minutes, but 10-15 is even better. They need to be completely cool to the touch.
Step 4: The Peel. Now for the moment of truth. Take an egg from the ice bath and gently tap it on the counter to crack the shell all over. I like to roll it gently under my palm to loosen the shell further. Start peeling from the wider end, where the air pocket is—you can usually find a little gap to get under the membrane. Peeling under a thin stream of running water can help wash away any tiny shell fragments and make the process even smoother.
Step 5: The Grand Finale. Pat your perfectly peeled eggs dry with a paper towel. If you’re planning to eat them right away, you can just roll them lightly in the everything seasoning on a plate. If you’re prepping them for later, give them a very light brush or spritz with a tiny bit of oil first—this acts like a glue, ensuring the seasoning stays put in the fridge. Be generous with the sprinkle! You want every bite to be packed with flavor.
Serving Suggestions
Complementary Dishes
- A Simple Green Salad — The richness of the egg is fantastic with crisp, bitter greens like arugula or radicchio. A lemony vinaigrette will cut through the creaminess beautifully.
- Avocado Toast — Slice the seasoned eggs and arrange them on top of your favorite avocado toast. It’s a next-level breakfast or lunch that feels incredibly decadent.
- A Charcuterie or Cheese Board — Halved or quartered, these eggs add a fantastic protein element and a pop of flavor that pairs wonderfully with sharp cheeses and cured meats.
Drinks
- A Crisp Lager or Pilsner — The clean, effervescent quality of a light beer is a fantastic palate cleanser against the savory, umami-rich seasoning.
- Iced Green Tea — The slight bitterness and grassy notes of green tea provide a refreshing and healthy contrast that doesn’t overpower the eggs.
- Bloody Mary — For a brunch scenario, the spicy, savory notes of a Bloody Mary are a classic and unbeatable pairing with any egg dish.
Something Sweet
- Fresh Berries with a Dollop of Yogurt — After a savory, protein-rich meal, the bright, sweet acidity of berries and the creaminess of yogurt is a light and perfect finish.
- A Dark Chocolate Square — A small piece of high-quality dark chocolate (70% or higher) offers a rich, bittersweet endnote that contrasts wonderfully with the savory eggs.
- A Simple Shortbread Cookie — The buttery, crumbly sweetness of a shortbread cookie is a delightful, simple treat that cleanses the palate without being too heavy.
Top Mistakes to Avoid
- Mistake: Starting with boiling water. Placing cold eggs directly into boiling water dramatically increases the chance they’ll crack from the thermal shock. Always start with cold water and bring it up to a boil together with the eggs for a gentle, even cook.
- Mistake: Using a knife to slice the egg. A sharp knife will crush the delicate white and make the yolk crumble. For clean, beautiful slices, use a proper egg slicer or unflavored dental floss—just pull the strand taut and slice right through.
- Mistake: Seasoning way too early. If you sprinkle the seasoning on and then store the eggs for days, the moisture from the egg will cause the seasoning to get soggy and the garlic/onion to become unpleasantly sharp. Season right before eating for the best texture and flavor.
Expert Tips
- Tip: Add a splash of vinegar to the boiling water. If you’re paranoid about cracks (we’ve all been there!), adding a tablespoon of white vinegar to the water can help. If an egg does crack, the vinegar will cause the egg white to coagulate faster, sealing the leak.
- Tip: Make your own everything seasoning. It’s surprisingly easy and lets you customize the flavor. A basic recipe: 2 tbsp white sesame seeds, 1 tbsp black sesame seeds, 1 tbsp poppy seeds, 2 tsp dried minced garlic, 2 tsp dried minced onion, and 2 tsp flaky sea salt. Toast the seeds lightly in a dry pan first for an incredible depth of flavor.
- Tip: Use a steamer basket. For the most consistent results, try steaming your eggs. Place a steamer basket in a pot with an inch of boiling water, add the eggs, cover, and steam for 12-13 minutes. Many swear this is the absolute best method for easy peeling.
- Tip: The “Float Test” for freshness. Unsure about your eggs’ age? Place them in a bowl of water. Very fresh eggs will lie flat on the bottom. Older, but still good, eggs will stand upright on the bottom. Any egg that floats should be discarded.
FAQs
How long do these seasoned eggs last in the fridge?
This depends on when you season them. Unpeeled, hard boiled eggs will keep perfectly for up to a week in the fridge. Once peeled, they should be eaten within 2-3 days. If you’ve already added the everything seasoning, it’s best to eat them within 24 hours for optimal texture, as the seasoning can draw out a little moisture from the egg white over time. For meal prep, store the unpeeled eggs and the seasoning separately, and combine them just before you’re ready to eat.
Can I use this method for soft boiled eggs?
Absolutely! The process is identical until the resting stage. For a soft, runny yolk, reduce the steeping time significantly. For a jammy yolk, try a 6-7 minute steep before the ice bath. The everything seasoning adds a wonderful savory crunch that contrasts beautifully with a liquid yolk—just be prepared to eat them with a spoon or over toast to catch all the deliciousness.
My yolks are off-center. What did I do wrong?
This is usually caused by the eggs being stored on their sides and not rotated. The yolk, being less dense, will float upwards. To prevent this, store your eggs in the carton with the pointed end facing down. Also, avoid vigorously boiling the eggs; a gentle simmer or steam is better for keeping the yolk centered.
Is there a way to make these for a crowd without standing over the stove?
Yes! The oven method works surprisingly well for large batches. Preheat your oven to 325°F (160°C). Place each egg in a muffin tin cup (this keeps them from rolling around). Bake for 25-30 minutes, then transfer immediately to an ice bath. The shells may get some light brown spots, but the eggs inside cook evenly and peel easily.
What if I don’t have everything bagel seasoning?
No problem at all! This is a fantastic opportunity to get creative. A simple mix of sesame seeds, a pinch of garlic powder, onion powder, and salt will get you 90% of the way there. Or, try other seasonings like smoked paprika and black pepper, za’atar, or even a simple sprinkle of furikake (Japanese rice seasoning) for a completely different, equally delicious twist.
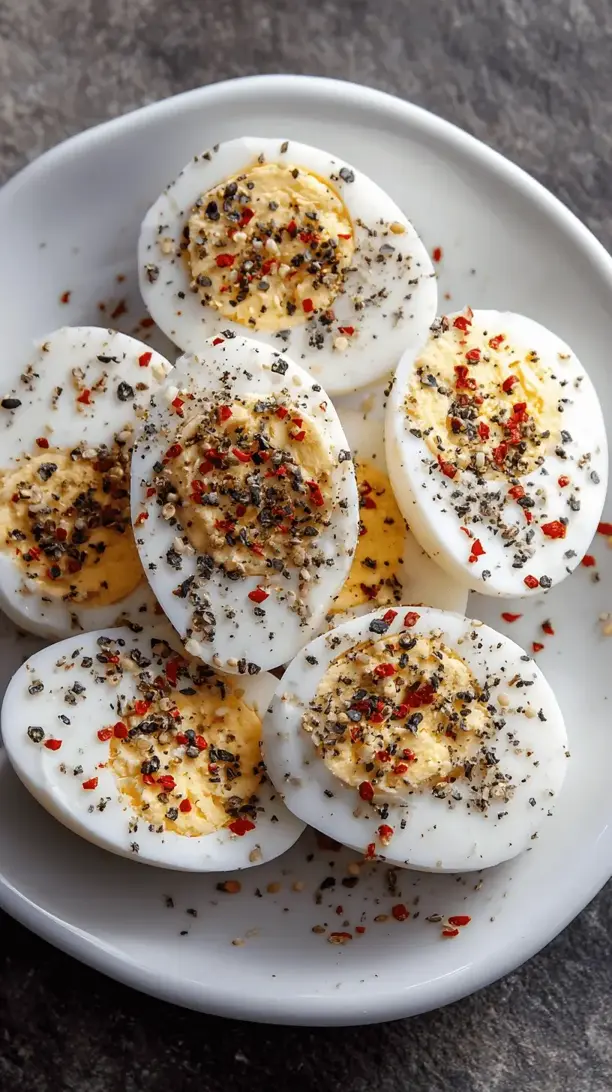
Hard Boiled Eggs With Everything Seasoning
Transform basic hard boiled eggs into a gourmet snack with everything bagel seasoning! My easy recipe delivers a savory, crunchy, protein-packed treat perfect for meal prep.
Ingredients
Ingredients
-
6 eggs (large, preferably not super fresh)
-
2-3 tablespoons everything bagel seasoning (use your favorite store-bought blend or make your own)
-
1 teaspoon olive oil or neutral oil (optional)
-
flaky sea salt (optional, for a final flourish if your seasoning blend isn't too salty)
Instructions
-
The Perfect Boil. Place your eggs in a single layer at the bottom of your saucepan. Cover them with cold water by about an inch—you don't want them swimming in a vast ocean of water, just enough to fully submerge them. Place the pot, uncovered, over high heat and bring it to a full, rolling boil. You'll see big, aggressive bubbles. The second it reaches that point, immediately put the lid on and remove the pot from the heat.01
-
The Steamy Rest. This is where the magic happens. Set a timer for 10-12 minutes. For a firm but still vibrant yellow yolk, 10 minutes is perfect. If you prefer a yolk that's completely set and a bit drier, go for 12 minutes. Let the eggs just hang out in the hot water with the lid on. This gentle, residual heat cooks them through evenly without making the whites rubbery.02
-
The Shock Treatment. While the eggs are resting, prepare your ice bath. Fill a large bowl with cold water and a generous amount of ice—you want it to be really cold. As soon as the timer goes off, use your slotted spoon to carefully transfer the eggs from the hot pot directly into the ice bath. You'll hear a satisfying sizzle. Let them chill out for at least 5 minutes, but 10-15 is even better. They need to be completely cool to the touch.03
-
The Peel. Now for the moment of truth. Take an egg from the ice bath and gently tap it on the counter to crack the shell all over. I like to roll it gently under my palm to loosen the shell further. Start peeling from the wider end, where the air pocket is—you can usually find a little gap to get under the membrane. Peeling under a thin stream of running water can help wash away any tiny shell fragments and make the process even smoother.04
-
The Grand Finale. Pat your perfectly peeled eggs dry with a paper towel. If you're planning to eat them right away, you can just roll them lightly in the everything seasoning on a plate. If you're prepping them for later, give them a very light brush or spritz with a tiny bit of oil first—this acts like a glue, ensuring the seasoning stays put in the fridge. Be generous with the sprinkle! You want every bite to be packed with flavor.05


