Why You’ll Love This Green Matcha Rice Krispie Treats
- A Flavor Adventure. The matcha introduces a wonderful, earthy depth that cuts through the sweetness of the marshmallows, creating a much more interesting and adult-friendly treat than the original.
- Stunning Visual Appeal. That vibrant green hue is just so fun and eye-catching. It instantly elevates these from a simple snack to something you’d be proud to serve at a party or give as a gift.
- Deceptively Simple. Honestly, if you can melt marshmallows and stir, you can make these. The process is nearly identical to the classic, with just one magical, green powder added to the mix.
- The Perfect Texture. We’re aiming for that iconic chewy-yet-crispy, perfectly-set texture that makes a Rice Krispie Treat so irresistible. It’s a little bit of kitchen magic that never gets old.
Ingredients & Tools
- 6 cups Rice Krispies cereal
- 1 (10 oz) bag mini marshmallows
- 4 tablespoons unsalted butter
- 2-3 tablespoons high-quality culinary-grade matcha powder
- 1/4 teaspoon fine sea salt
- Optional: 1/2 teaspoon vanilla extract
- For topping: Extra 1 tablespoon melted butter and 1 teaspoon matcha powder for dusting
Tools: A 9×13 inch baking pan, parchment paper, a large saucepan, a sturdy spatula, and a small sifter or fine-mesh strainer.
The quality of your matcha really makes a difference here—since it’s the star flavor, a vibrant, culinary-grade powder will give you the best color and taste without being overly bitter. And using mini marshmallows just makes the melting process so much smoother and faster.
Nutrition (per serving)
- Calories: 180 kcal
- Protein: 2 g
- Fat: 5 g
- Carbohydrates: 33 g
- Fiber: 0 g
Serves: 12 | Prep Time: 10 mins | Cook Time: 10 mins | Total Time: 1 hour 20 mins (includes setting)
Before You Start: Tips & Ingredient Notes
- Get the right matcha. Please, for the love of all that is green and good, use culinary-grade matcha, not ceremonial. Ceremonial grade is meant for drinking and is often too delicate and expensive for baking, while culinary grade has a bolder flavor that stands up to the other ingredients.
- Why mini marshmallows? They melt more evenly and quickly than large ones, which helps prevent you from over-heating the mixture and keeps the final texture soft and chewy instead of tough.
- Prepare your pan first. This is a classic “mise en place” moment. Lining your pan with parchment paper and greasing it lightly before you even turn on the stove is a lifesaver. When that hot, sticky mixture is ready, you won’t have a second to spare.
- Don’t skip the salt. It might seem odd in a sweet treat, but a pinch of salt is the secret weapon that makes the sweet marshmallow and earthy matcha flavors pop. It balances everything out beautifully.
How to Make Green Matcha Rice Krispie Treats
Step 1: Prepare your pan. This is your one chance to get organized before the marshmallow madness begins! Line your 9×13 inch baking pan with parchment paper, leaving some overhang on two opposite sides. This creates “handles” that will make it super easy to lift the whole block out later. Give the parchment a very light coating of butter or non-stick spray. Set the pan aside.
Step 2: Melt the butter and marshmallows. Place your large saucepan over low heat. Add the 4 tablespoons of butter and let it melt completely. Once it’s melted and just starting to foam, pour in the entire bag of mini marshmallows. Stir continuously with your spatula. You’ll notice they’ll start to slump and melt slowly—this is what we want. Keep the heat low to avoid browning or burning the sugar.
Step 3: Incorporate the matcha. Once the marshmallows are about 90% melted into a smooth, gooey liquid, take the pan off the heat. Now, quickly add your 2-3 tablespoons of matcha powder and the 1/4 teaspoon of salt. If you’re using it, add the vanilla extract now too. Stir vigorously! You want to get that matcha fully incorporated into the marshmallow base before it starts to set. The color will be a gorgeous, vibrant green.
Step 4: Add the cereal. Immediately dump all 6 cups of Rice Krispies cereal into the marshmallow-matcha mixture. Using a gentle but firm folding motion, stir until every single piece of cereal is coated in the green goo. The trick is to work quickly but not aggressively—you don’t want to crush all the crispies.
Step 5: Press into the pan. Transfer the mixture into your prepared pan. Now, here’s a pro-tip: lightly grease your hands with butter or a bit of cooking spray. This will prevent the treats from sticking to you as you press them into an even layer. Press down firmly and evenly across the entire surface. A firm press is the key to treats that hold their shape and don’t crumble when you cut them.
Step 6: Let them set and add the topping. Allow the pan to cool at room temperature for at least an hour, or until completely firm to the touch. Don’t rush this by putting them in the fridge, as it can cause condensation and make them soggy. Just before cutting, you can create a simple matcha dusting by mixing the extra melted butter and matcha powder and lightly brushing or dabbing it over the top for an extra pop of color and flavor.
Step 7: Slice and serve. Use the parchment paper handles to lift the entire block of treats out of the pan onto a cutting board. Use a sharp knife to slice them into squares. For super clean cuts, you can lightly grease the knife. And then… enjoy your beautiful, delicious creation!
Serving Suggestions
Complementary Dishes
- A simple fruit platter with berries — The bright, acidic burst of fresh raspberries or strawberries provides a lovely contrast to the sweet, earthy, and creamy notes of the matcha treats.
- A small cheese board with mild cheeses — A few slices of brie or a creamy goat cheese can be a surprisingly elegant pairing, balancing the sweetness with a savory, rich element.
- Matcha latte or hot green tea — It might seem obvious, but doubling down on the matcha theme with a warm, frothy drink creates a cohesive and comforting flavor experience.
Drinks
- Iced Oolong Tea — The lightly floral and toasty notes of oolong tea complement the earthiness of the matcha without competing with it, making for a very refreshing sip.
- Cold Brew Coffee — The deep, smooth, and slightly bitter notes of cold brew are a fantastic counterpoint to the sweet and creamy marshmallow base.
- Sparkling Water with Lemon — Sometimes you just need a palate cleanser. The crisp bubbles and citrus zing cut through the richness perfectly between bites.
Something Sweet
- Dark Chocolate-Dipped Orange Slices — The combination of bitter dark chocolate and bright citrus is a classic that works wonderfully with the complex profile of these matcha treats.
- White Chocolate and Macadamia Nut Cookies — The creamy sweetness of white chocolate and the buttery crunch of macadamias offer a different, but harmonious, texture and flavor profile.
- Vanilla Bean Panna Cotta — The simplicity and creamy, cool texture of a delicate panna cotta provides a lovely, soft contrast to the chewy, crispy squares.
Top Mistakes to Avoid
- Mistake: Using high heat to melt the marshmallows. This is the number one way to ruin your treats. High heat will cause the sugar to caramelize, harden, or burn, resulting in a tough, chewy, and discolored final product instead of a soft, pillowy one. Low and slow is the only way to go.
- Mistake: Not pressing the mixture firmly into the pan. A gentle pat won’t do it. You need to use some muscle to compact the cereal and marshmallow together. If you don’t press firmly, your treats will be crumbly and fall apart when you try to cut or eat them.
- Mistake: Adding the matcha powder too early. If you add the matcha to the saucepan while it’s still on high heat, the delicate compounds in the tea can become bitter. Always take the pan off the heat before stirring in the powder.
- Mistake: Refrigerating to set them faster. I know it’s tempting, but the fridge introduces moisture, which can make your crispy cereal lose its snap and become stale and soggy. Patience at room temperature is key for the perfect texture.
Expert Tips
- Tip: Sift your matcha. Before you even start, sift your matcha powder through a fine-mesh strainer. This breaks up any clumps and ensures it will incorporate smoothly into the marshmallow base, giving you a perfectly even color and flavor without any bitter little green lumps.
- Tip: Grease your tools. A little bit of butter or cooking spray on your spatula and especially on your hands before pressing the mixture into the pan makes the whole process infinitely less sticky and frustrating. It’s a small step with a huge payoff.
- Tip: Customize the mix-ins. Feel free to get creative! After you’ve mixed in the cereal, you can fold in a 1/2 cup of add-ins like chopped white chocolate, toasted coconut flakes, or even a handful of dried cranberries for a little tartness.
- Tip: For super clean cuts, use a plastic knife. It sounds weird, but it works brilliantly. A serrated plastic knife glides through the sticky marshmallow without tearing or squishing the treats, giving you picture-perfect squares every single time.
FAQs
Can I use a different type of cereal?
You absolutely can, but the texture will be different. Puffed rice cereal is key for that classic, light, and airy crunch. If you use something denser like cornflakes or bran flakes, the treats will be much heavier and more compact. You could also do a half-and-half mix with a cereal like Cocoa Krispies for a fun marbled effect, but just know it will alter the final product.
My treats turned out really hard. What happened?
This almost always comes down to the marshmallows being overheated. If you cook them for too long or on too high a heat, the sugar proteins tighten up and create a hard, candy-like texture once they cool. Next time, remember: low heat, and take the pan off the stove as soon as the marshmallows are just melted. It’s better to have a few tiny unmelted bits than to overcook the whole batch.
How long do these stay fresh, and how
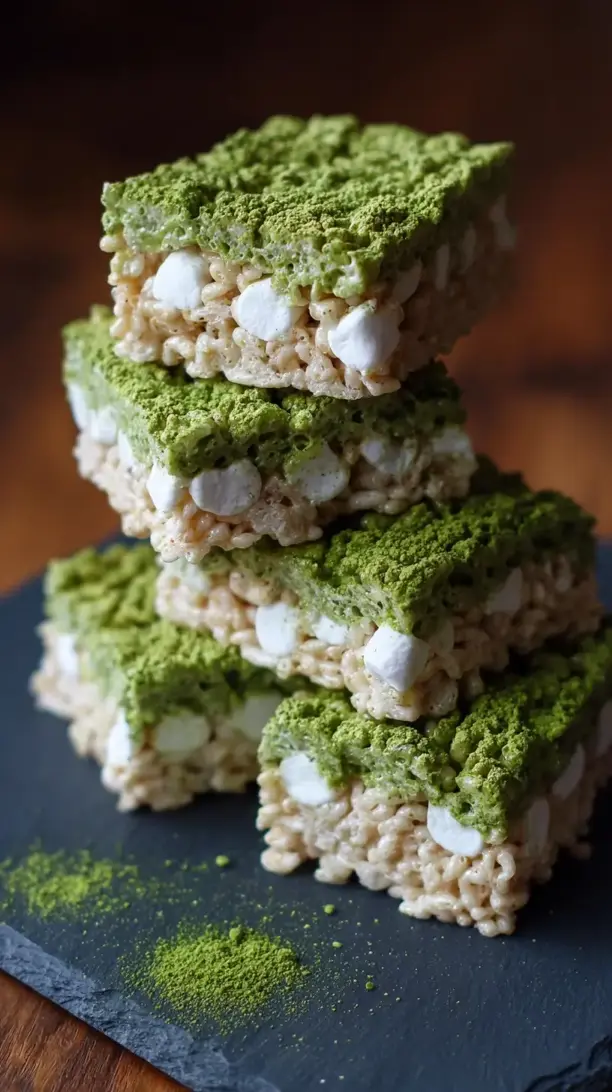
Green Matcha Rice Krispie Treats
Upgrade your snack game with these vibrant Green Matcha Rice Krispie Treats. An easy, no-bake recipe with an elegant, earthy twist. Get the simple recipe now!
Ingredients
For the main ingredients:
-
6 cups Rice Krispies cereal
-
1 bag mini marshmallows (10 oz)
-
4 tablespoons unsalted butter
-
2-3 tablespoons high-quality culinary-grade matcha powder
-
1/4 teaspoon fine sea salt
-
1/2 teaspoon vanilla extract
For the topping:
-
1 tablespoon melted butter
-
1 teaspoon matcha powder