Why You’ll Love This Gluten-Free Ginger Snap Cookies
- They have the perfect snap and chew. Getting that classic ginger snap texture without gluten can be tricky, but this recipe nails it. You get a crisp edge that gives way to a slightly softer, chewy center—it’s the best of both worlds.
- The spice level is just right. We’re not shy with the ginger here, but it’s balanced beautifully with cinnamon and a hint of cloves. It’s warm and spicy without being overwhelming, creating a really complex, cozy flavor.
- They’re surprisingly simple to make. You don’t need any fancy techniques—just a good mix of your dry ingredients, cream the butter and sugar, and you’re pretty much there. The dough is a dream to work with, and the baking time is forgiving.
- They fill your home with the best aroma. Honestly, baking these is an experience in itself. The scent of ginger, molasses, and cinnamon wafting through your kitchen is pure, unadulterated comfort.
Ingredients & Tools
- 150 g gluten-free 1:1 baking flour blend (with xanthan gum)
- 1 tsp baking soda
- 2 tsp ground ginger
- 1 tsp ground cinnamon
- 1/4 tsp ground cloves
- 1/4 tsp salt
- 115 g unsalted butter, softened
- 150 g granulated sugar, plus extra for rolling
- 50 g molasses (not blackstrap)
- 1 large egg, at room temperature
- 1 tsp vanilla extract
Tools: Mixing bowls, electric hand mixer or stand mixer, whisk, baking sheets, parchment paper, cooling rack.
Using a good, reliable gluten-free flour blend is key here—one that already includes xanthan gum. It does all the hard work of replacing the gluten structure for you. And don’t skip the step of rolling the dough balls in sugar; it gives them that classic sparkly, crackly top that’s just so inviting.
Nutrition (per serving)
- Calories: 120 kcal
- Protein: 1 g
- Fat: 5 g
- Carbohydrates: 19 g
- Fiber: 0.5 g
Serves: 24 cookies | Prep Time: 20 minutes | Cook Time: 10-12 minutes | Total Time: 35 minutes
Before You Start: Tips & Ingredient Notes
- Your flour blend matters. I can’t stress this enough. Use a trusted 1:1 gluten-free flour that contains xanthan gum. This acts as the binder that gluten would normally provide, ensuring your cookies hold together and have the right texture.
- What kind of molasses should I use? Go for a light or dark molasses for its robust, bittersweet flavor. Avoid blackstrap molasses—it’s too bitter and intense for this recipe and can throw off the whole flavor balance.
- Don’t rush the creaming process. When you beat the butter and sugar together, you’re incorporating air, which helps the cookies rise. Beat them for a good 2-3 minutes until the mixture is pale and fluffy. It makes a real difference in the final texture.
- Chilling the dough is non-negotiable. I know, it’s tempting to skip this step, but please don’t. Chilling the dough for at least an hour firms it up, prevents the cookies from spreading too much in the oven, and allows the flavors to meld together beautifully.
How to Make Gluten-Free Ginger Snap Cookies
Step 1: First, let’s get the dry ingredients ready. In a medium bowl, whisk together your gluten-free flour, baking soda, ground ginger, cinnamon, cloves, and salt. You really want to whisk this well—it ensures the leavening and spices are evenly distributed throughout the flour so every single cookie is perfectly spiced. Set this bowl aside for now.
Step 2: Now, for the wet ingredients. In a larger mixing bowl, use an electric mixer to cream the softened butter and granulated sugar together. You’ll want to beat it on medium-high speed for a good 2-3 minutes. The mixture should look light, pale, and fluffy. This step is where you’re building the structure of your cookie, so don’t cut it short.
Step 3: Once your butter and sugar are creamed, add in the molasses, egg, and vanilla extract. Mix on medium speed just until everything is combined and smooth. The batter might look a little separated or curdled at first—that’s totally normal. Just keep mixing, and it will come together into a lovely, homogenous, dark mixture.
Step 4: Time to bring it all together. Gradually add your dry ingredient mixture to the wet ingredients, mixing on low speed. Mix just until the flour disappears and no dry streaks remain. You’ll notice the dough will be quite soft and sticky—that’s exactly what you want. Overmixing can lead to tough cookies, so stop as soon as it’s combined.
Step 5: This is the crucial chilling step. Cover the bowl with plastic wrap and pop it into the refrigerator for at least one hour, or even overnight if you’re planning ahead. The dough needs to firm up so it’s easier to handle and so the cookies don’t spread into thin puddles in the oven.
Step 6: When you’re ready to bake, preheat your oven to 350°F (175°C) and line your baking sheets with parchment paper. Place some extra granulated sugar in a small bowl. Scoop out about a tablespoon of dough, roll it into a smooth ball between your palms, and then roll it generously in the sugar to coat it completely.
Step 7: Place the sugar-coated dough balls on your prepared baking sheet, leaving about 2 inches between them because they will spread. You can gently flatten them just a tiny bit with the palm of your hand if you like, but it’s not strictly necessary—they’ll flatten as they bake.
Step 8: Bake for 10-12 minutes. The cookies should look set around the edges but still a little soft in the center. You’ll see those lovely cracks forming on top. Remember, they will continue to firm up as they cool on the baking sheet, so don’t be tempted to overbake them for a crunchier cookie—that will happen as they cool completely.
Step 9: Let the cookies cool on the baking sheet for a full 5 minutes before transferring them to a wire rack to cool completely. This resting time on the hot pan is part of the cooking process and helps them set up perfectly. Then, try to resist eating them all in one go!
Serving Suggestions
Complementary Dishes
- A scoop of vanilla bean ice cream — The cool, creamy vanilla is a dream paired with the warm, spicy snap of the cookie. It’s a classic for a reason.
- A warm mug of apple cider — The autumnal spices in the cider and the cookies harmonize beautifully, making for the coziest snack imaginable.
- A sharp, tangy cheeseboard — Crumble these snaps over a soft goat cheese or a creamy blue cheese for a surprising and sophisticated sweet-and-savory bite.
Drinks
- Chai latte — The cardamom, cinnamon, and ginger in a chai latte are a perfect flavor echo to the spices in the cookie, creating a wonderfully cohesive experience.
- Strong black coffee — The bitterness of a good, strong brew cuts through the sweetness of the cookie and highlights its deep molasses and spice notes perfectly.
- A cold glass of milk — You can’t go wrong with this timeless duo. The milk softens the spice just a little and is just so comforting.
Something Sweet
- Pumpkin pie — Serve these on the side instead of a standard pie crust for a spiced, crunchy contrast to the smooth, spiced pumpkin filling.
- Dark chocolate mousse — The intense, bitter notes of dark chocolate provide a luxurious counterpoint to the fiery, sweet ginger.
- Poached pears — The gentle, wine-poached fruit feels elegant, and the ginger snap adds a delightful crunchy texture to each soft, juicy bite.
Top Mistakes to Avoid
- Mistake: Using a gluten-free flour blend without xanthan gum. This is the most common pitfall. Xanthan gum is essential for binding the ingredients and providing structure. Without it, your cookies are likely to crumble and spread excessively.
- Mistake: Not chilling the dough. I’ve messed this up before too, thinking I could get away with it. Warm dough spreads way too fast in the oven, resulting in thin, flat, and often burnt cookies instead of plump, chewy ones.
- Mistake> Overbaking the cookies. They might not look completely done when you take them out, but they are! They continue to cook on the hot baking sheet. Overbaking leads to cookies that are hard and bitter instead of snappy and flavorful.
- Mistake: Measuring flour incorrectly. Gluten-free flour can be dense. The best method is to spoon the flour into your measuring cup and level it off. Scooping directly from the bag packs in too much flour, leading to dry, cakey cookies.
Expert Tips
- Tip: Grate fresh ginger for an extra kick. If you’re a real ginger fiend, add a teaspoon of finely grated fresh ginger to the dough along with the dry spices. It gives a bright, pungent heat that’s just incredible.
- Tip: Make an ice cream sandwich. Let the cookies cool completely, then sandwich a scoop of your favorite dairy-free or regular vanilla ice cream between two. Press gently, wrap individually, and freeze. You’ve just created the best frozen treat.
- Tip: Use a cookie scoop for uniformity. A small cookie scoop (about 1 tablespoon capacity) isn’t just faster—it ensures all your cookies are the same size, which means they’ll bake evenly and look professionally made.
- Tip: Age your dough for deeper flavor. For a more complex, mature spice flavor, make the dough, wrap it tightly, and let it rest in the fridge for 24-48 hours before baking. The spices have time to meld and deepen, resulting in an even more incredible cookie.
FAQs
Can I make these cookies dairy-free?
Absolutely! The butter is an easy swap. Just use a high-quality vegan butter stick (not the kind from a tub) in a 1:1 ratio. Make sure it’s softened just like regular butter. The results are nearly identical—you’ll still get that wonderful crisp edge and chewy center.
Why are my cookies cakey and not snappy?
This usually points to two things: too much flour or undermixing the butter and sugar. If you pack your flour into the measuring cup, you’re adding more than the recipe calls for, which absorbs moisture and creates a cakey texture. Also, if you don’t cream the butter and sugar for long enough, you won’t get enough air incorporated, which affects the final texture.
Can I freeze the dough?
You sure can, and it’s a great timesaver! Scoop the dough into balls, roll them in sugar, and place them on a parchment-lined tray. Freeze until solid, then transfer to a freezer bag. You can bake them straight from frozen, just add 1-2 minutes to the baking time. The frozen dough also tends to spread a tiny bit less, which is a bonus.
My cookies spread too much. What happened?
This is almost always a temperature issue. Your dough was likely too warm when it went into the oven. Ensure you chill it for the full hour, and if your kitchen is particularly warm, you might even want to chill the dough balls on the baking sheet for 10 minutes before baking. Also, double-check that your baking soda is fresh!
Can I use honey instead of molasses?
I wouldn’t recommend it for this specific recipe. Molasses is responsible for that deep, almost bitter sweetness and the classic dark color of a ginger snap. Honey has a much lighter, floral flavor that would completely change the character of the cookie. If you’re in a pinch, dark corn syrup is a closer substitute, but molasses is really the star here.
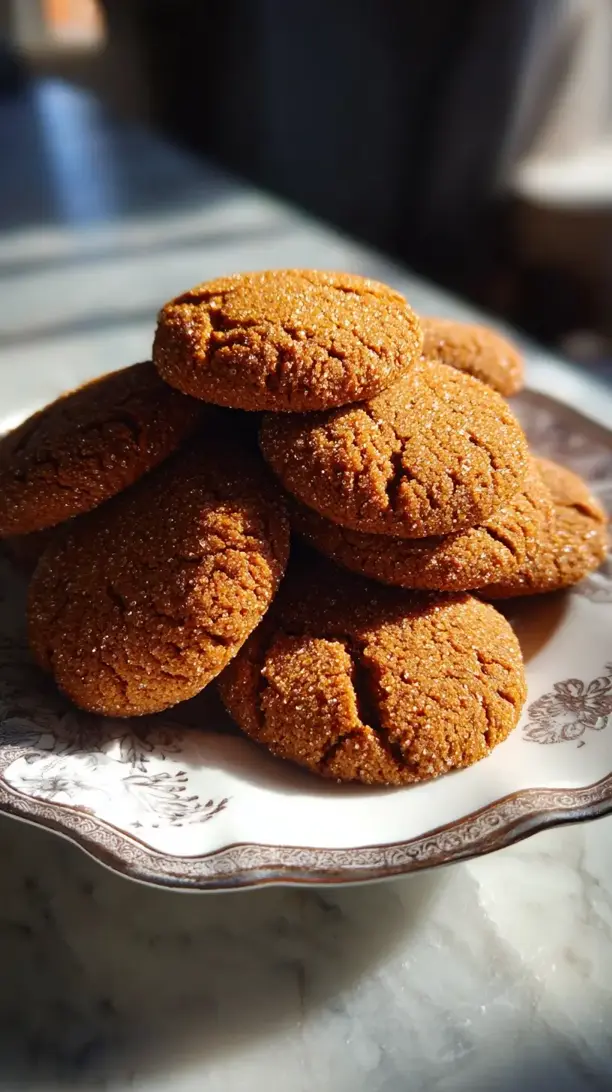
Gluten Free Ginger Snap Cookies
Make perfect Gluten-Free Ginger Snap Cookies with crisp edges and a chewy center. This easy recipe delivers classic flavor and texture. Bake a batch today!
Ingredients
For the dry ingredients:
-
150 g gluten-free 1:1 baking flour blend (with xanthan gum)
-
1 tsp baking soda
-
2 tsp ground ginger
-
1 tsp ground cinnamon
-
0.25 tsp ground cloves
-
0.25 tsp salt
For the wet ingredients:
-
115 g unsalted butter (softened)
-
150 g granulated sugar (plus extra for rolling)
-
50 g molasses (not blackstrap)
-
1 large egg (at room temperature)
-
1 tsp vanilla extract
Instructions
-
First, let’s get the dry ingredients ready. In a medium bowl, whisk together your gluten-free flour, baking soda, ground ginger, cinnamon, cloves, and salt. You really want to whisk this well—it ensures the leavening and spices are evenly distributed throughout the flour so every single cookie is perfectly spiced. Set this bowl aside for now.01
-
Now, for the wet ingredients. In a larger mixing bowl, use an electric mixer to cream the softened butter and granulated sugar together. You’ll want to beat it on medium-high speed for a good 2-3 minutes. The mixture should look light, pale, and fluffy. This step is where you’re building the structure of your cookie, so don’t cut it short.02
-
Once your butter and sugar are creamed, add in the molasses, egg, and vanilla extract. Mix on medium speed just until everything is combined and smooth. The batter might look a little separated or curdled at first—that’s totally normal. Just keep mixing, and it will come together into a lovely, homogenous, dark mixture.03
-
Time to bring it all together. Gradually add your dry ingredient mixture to the wet ingredients, mixing on low speed. Mix just until the flour disappears and no dry streaks remain. You’ll notice the dough will be quite soft and sticky—that’s exactly what you want. Overmixing can lead to tough cookies, so stop as soon as it’s combined.04
-
This is the crucial chilling step. Cover the bowl with plastic wrap and pop it into the refrigerator for at least one hour, or even overnight if you’re planning ahead. The dough needs to firm up so it’s easier to handle and so the cookies don’t spread into thin puddles in the oven.05
-
When you’re ready to bake, preheat your oven to 350°F (175°C) and line your baking sheets with parchment paper. Place some extra granulated sugar in a small bowl. Scoop out about a tablespoon of dough, roll it into a smooth ball between your palms, and then roll it generously in the sugar to coat it completely.06
-
Place the sugar-coated dough balls on your prepared baking sheet, leaving about 2 inches between them because they will spread. You can gently flatten them just a tiny bit with the palm of your hand if you like, but it’s not strictly necessary—they’ll flatten as they bake.07
-
Bake for 10-12 minutes. The cookies should look set around the edges but still a little soft in the center. You’ll see those lovely cracks forming on top. Remember, they will continue to firm up as they cool on the baking sheet, so don’t be tempted to overbake them for a crunchier cookie—that will happen as they cool completely.08
-
Let the cookies cool on the baking sheet for a full 5 minutes before transferring them to a wire rack to cool completely. This resting time on the hot pan is part of the cooking process and helps them set up perfectly. Then, try to resist eating them all in one go!09