
Why You’ll Love This Frozen Watermelon Popsicles
- Incredibly Simple. With just a handful of ingredients—or even just one!—this recipe is virtually foolproof. It’s the kind of thing you can decide to make on a whim and have ready to freeze in minutes.
- Naturally Sweet and Refreshing. These popsicles rely on the natural sugar of the watermelon, so there’s no need for added syrups or sweeteners. The result is a clean, light, and incredibly hydrating treat that truly tastes like summer.
- A Fun Activity for All Ages. From scooping the seeds to pouring the blend into the molds, this is a fantastic recipe to make with little helpers. It’s a great way to get everyone involved in the kitchen.
- Endlessly Customizable. While perfect on its own, this base recipe is a fantastic canvas for your creativity. A squeeze of lime, a few mint leaves, or a sprinkle of chili powder can take it in a whole new direction.
Ingredients & Tools
- 1 small seedless watermelon (about 4-5 pounds / 2 kg), yielding roughly 6 cups of cubed flesh
- 1-2 tablespoons fresh lime juice (from about 1 lime)
- A tiny pinch of salt
- Optional: 1-2 tablespoons honey or maple syrup, only if your watermelon isn’t very sweet
- Optional add-ins: a handful of fresh mint leaves, a pinch of chili powder, or a few blended strawberries
Tools: A high-speed blender or food processor, a fine-mesh sieve (optional, for ultra-smooth texture), popsicle molds, and popsicle sticks.
The beauty here is in the simplicity. The watermelon is obviously the star, but don’t underestimate the power of the lime juice and salt. The lime brightens everything up, and the salt—honestly, just a tiny pinch—works magic to enhance the watermelon’s natural sweetness without making it taste salty at all. It’s a little trick that makes a big difference.
Serves: 8-10 popsicles | Prep Time: 15 minutes | Freeze Time: 4-6 hours (or overnight) | Total Time: 4+ hours (mostly inactive)
Before You Start: Tips & Ingredient Notes
- Choosing Your Watermelon. The success of this recipe hinges on one thing: a sweet, ripe watermelon. Look for one that feels heavy for its size and has a creamy yellow spot on one side (where it rested on the ground). A ripe melon will have a deeper, more resonant sound when you tap it.
- To Seed or Not to Seed? I highly recommend using a seedless watermelon for sheer convenience. If you only have a seeded variety, that’s okay! Just take an extra minute to pick out the black seeds after cubing the flesh. A few tiny white seeds are fine and will blend up seamlessly.
- The Power of Lime and Salt. You might be tempted to skip these, but they are the secret weapons. The acidity from the lime juice prevents the popsicles from tasting flat or overly sugary, while the salt amplifies the fruit flavor. It’s the same principle as salting a chocolate chip cookie—it just makes everything pop.
- Sweetener? Probably Not. Taste your watermelon puree before you add any sweetener. A good, ripe melon will be plenty sweet on its own. Only add a tablespoon of honey or maple syrup if the melon is a bit bland. You want to taste the fruit, not the sugar.
How to Make Frozen Watermelon Popsicles
Step 1: Prepare the Watermelon. Start by cutting your watermelon into manageable chunks. Slice it in half, then into quarters. Use a sharp knife to carefully slice the red flesh away from the tough green rind. Cut the flesh into roughly 1- to 2-inch cubes. You’ll need about 6 cups of cubed watermelon. As you cube, if you’re using a seeded melon, this is the time to remove those large black seeds.
Step 2: Blend to Perfection. Place all the watermelon cubes into your blender or food processor. Add the fresh lime juice and that tiny, almost imperceptible pinch of salt. Now, blend on high speed until the mixture is completely smooth and liquid. This should only take about 30-60 seconds in a good blender. You’ll notice it turns a beautiful, vibrant pink color and becomes wonderfully frothy.
Step 3: Strain for Silkiness (Optional but Recommended). For the absolute smoothest texture, pour the puree through a fine-mesh sieve into a large bowl or a pitcher with a spout. This will catch any tiny, unblended fibers or seeds, giving you a perfectly silky base. It’s an extra step, but it really elevates the final product, making it feel more professional. If you don’t mind a slightly more rustic texture, you can skip this.
Step 4: Taste and Adjust. This is the most important step! Grab a spoon and taste your puree. Does it taste bright and watermelon-y? If it’s perfect, you’re done. If it tastes a little flat, add another squeeze of lime juice. If it’s not sweet enough (which is rare), now is the time to whisk in a tablespoon of honey or maple syrup.
Step 5: Fill the Molds. Carefully pour or ladle the watermelon puree into your popsicle molds, leaving about 1/4 to 1/2 inch of space at the top. The mixture will expand slightly as it freezes. If your molds come with attached lids, insert the sticks according to the manufacturer’s instructions. If you’re using open molds, first freeze the popsicles for about 1 hour until they are slushy enough to support the sticks upright, then insert them.
Step 6: The Long Freeze. Place the molds on a level shelf in your freezer and let them freeze completely. This will take at least 4-6 hours, but for the best results, I like to leave them overnight. Patience is key here—a fully frozen popsicle will release cleanly from the mold.
Step 7: The Grand Unmolding. When you’re ready to serve, don’t just yank the sticks out! Run the outside of the mold under warm water for just 10-15 seconds. You’ll feel the popsicle start to loosen. Gently pull on the stick, and it should slide out easily, revealing a perfectly formed, jewel-toned treat.
Serving Suggestions
Complementary Dishes
- Grilled Shrimp Skewers — The smoky, savory char of grilled shrimp creates a fantastic contrast to the icy, sweet popsicle. It’s a perfect balance for a summer lunch.
- A Simple Arugula Salad with Feta — The peppery arugula and salty feta cheese cleanse the palate and make the watermelon flavor seem even more vibrant and refreshing after each bite.
- Spicy Chicken Tacos — There’s nothing better than a cold, sweet treat to cool down your mouth after enjoying some spicy food. These popsicles are the ultimate palate soother.
Drinks
- Sparkling Water with a Twist — A crisp, bubbly glass of sparkling water with a slice of lemon or lime keeps the hydration going and doesn’t compete with the pure fruit flavor.
- Iced Green Tea — The slight bitterness and earthy notes of green tea are a sophisticated partner to the sweet watermelon, making for a very refreshing combination.
- A Crisp Rosé — For the adults, a glass of dry rosé wine shares similar fruity and refreshing notes, making it a lovely companion for a backyard gathering.
Something Sweet
- Dark Chocolate-Dipped Strawberries — The rich, bitter depth of dark chocolate and the bright berry flavor provide a more decadent counterpoint to the light popsicle if you’re serving a dessert spread.
- Lemon Shortbread Cookies — A buttery, crumbly shortbread cookie with a hint of lemon zest is a simple, elegant sweet bite that complements without overwhelming.
- A Bowl of Fresh Mixed Berries — Sometimes more fruit is the answer! A bowl of blueberries, raspberries, and blackberries continues the fresh, healthy theme beautifully.
Top Mistakes to Avoid
- Mistake: Using an underripe watermelon. This is the number one reason these popsicles can taste bland. A watermelon that isn’t sweet and flavorful on its own will not magically become so once frozen. Your final product is only as good as your starting ingredient.
- Mistake: Overfilling the molds. Remember that liquids expand when they freeze. If you fill the molds right to the very top, the expanding mixture can push the stick out or even cause the mold to leak, creating a messy freezer situation.
- Mistake: Skipping the unmolding trick. Trying to pull a popsicle straight out of a frozen mold will likely result in a broken stick or a popsicle that stays firmly lodged in place. The quick warm water bath is non-negotiable for a clean release.
- Mistake: Adding too much liquid. If you’re adding other juices, be cautious. Too much additional liquid can dilute the watermelon flavor and result in an icier, less creamy texture. A little goes a long way.
Expert Tips
- Tip: Add a creamy layer. For a fun twist, fill your molds only halfway with the watermelon puree. Freeze for an hour, then top them up with plain Greek yogurt or coconut milk mixed with a touch of honey. You’ll get a gorgeous two-toned popsicle with a creamy surprise.
- Tip: Boost the color naturally. If you want an even more vibrant, pink-red color, blend in a few strawberries or a small piece of beet along with the watermelon. It adds a subtle flavor dimension and makes the popsicles visually stunning.
- Tip: Create “watermelon chip” garnishes. Use a cookie cutter to cut thin slices of watermelon into fun shapes (stars, hearts). Dehydrate them in a low oven or a dehydrator, or simply freeze them solid. They make a beautiful and edible garnish stuck into the top of the popsicle.
- Tip: Turn leftovers into a granita. If you have extra puree but no more mold space, pour it into a shallow baking dish and freeze. Every 30 minutes, scrape it with a fork to form icy flakes. You’ll have a delightful watermelon granita in a few hours.
FAQs
Can I use frozen watermelon?
You absolutely can! In fact, using frozen watermelon chunks can speed up the freezing process a bit. Just let them thaw for about 10-15 minutes so your blender can handle them. The texture might be a tad less smooth, but the flavor will be great. It’s a fantastic way to use watermelon you froze at the peak of the season.
Why are my popsicles so icy and hard?
This is usually because the puree was mostly water. Watermelon is very high in water content, which freezes solid. To create a softer, more scoopable texture, you can try adding a tablespoon of a natural stabilizer like honey, agave, or even a splash of coconut milk. These ingredients interfere with ice crystal formation, leading to a smoother bite.
How long do these popsicles keep in the freezer?
They will keep for up to 2-3 months if stored in an airtight container or well-wrapped in the mold. However, for the best texture and flavor, I recommend enjoying them within the first few weeks. After a long time, they can develop freezer burn or become excessively icy.
Can I make these without a popsicle mold?
Yes, you can get creative! Small paper cups covered with aluminum foil (poke a stick through the foil) work perfectly. You can also use an ice cube tray to make mini watermelon ice pops, which are adorable for kids. Another option is to freeze the puree in a lidded container and eat it like a sorbet.
My popsicles stuck to the mold! What now?
Don’t panic. If the warm water trick didn’t work the first time, you probably just didn’t run it under water long enough. Try again for another 10-15 seconds, focusing on the area around the specific popsicle you’re trying to remove. If they are really stuck, you can let the mold sit on the counter for 3-4 minutes to soften slightly—but be careful not to let them melt completely.
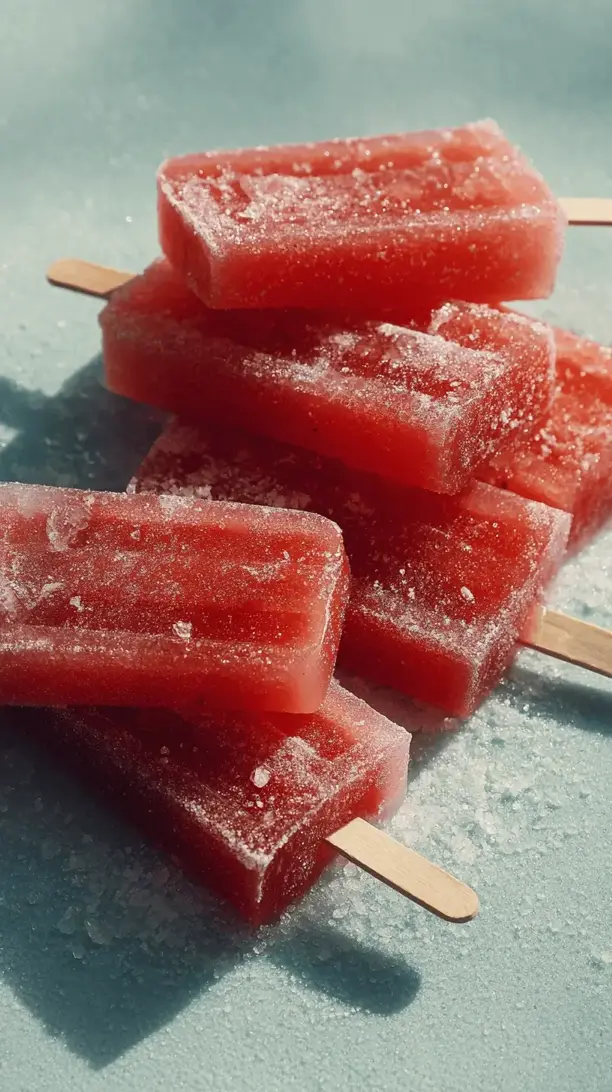
Frozen Watermelon Popsicles
Beat the heat with these incredibly easy Frozen Watermelon Popsicles! Just 3 ingredients & 15 minutes prep for the most natural, refreshing summer treat. A fun activity for the whole family!
Ingredients
Ingredients
-
1 small seedless watermelon (about 4-5 pounds / 2 kg, yielding roughly 6 cups of cubed flesh)
-
1-2 tablespoons fresh lime juice (from about 1 lime)
-
tiny pinch salt
-
1-2 tablespoons honey or maple syrup (optional, only if your watermelon isn't very sweet)
-
handful fresh mint leaves (optional add-in)
-
pinch chili powder (optional add-in)
-
few blended strawberries (optional add-in)
Instructions
-
Prepare the Watermelon. Start by cutting your watermelon into manageable chunks. Slice it in half, then into quarters. Use a sharp knife to carefully slice the red flesh away from the tough green rind. Cut the flesh into roughly 1- to 2-inch cubes. You'll need about 6 cups of cubed watermelon. As you cube, if you're using a seeded melon, this is the time to remove those large black seeds.01
-
Blend to Perfection. Place all the watermelon cubes into your blender or food processor. Add the fresh lime juice and that tiny, almost imperceptible pinch of salt. Now, blend on high speed until the mixture is completely smooth and liquid. This should only take about 30-60 seconds in a good blender. You'll notice it turns a beautiful, vibrant pink color and becomes wonderfully frothy.02
-
Strain for Silkiness (Optional but Recommended). For the absolute smoothest texture, pour the puree through a fine-mesh sieve into a large bowl or a pitcher with a spout. This will catch any tiny, unblended fibers or seeds, giving you a perfectly silky base. It's an extra step, but it really elevates the final product, making it feel more professional. If you don't mind a slightly more rustic texture, you can skip this.03
-
Taste and Adjust. This is the most important step! Grab a spoon and taste your puree. Does it taste bright and watermelon-y? If it's perfect, you're done. If it tastes a little flat, add another squeeze of lime juice. If it's not sweet enough (which is rare), now is the time to whisk in a tablespoon of honey or maple syrup.04
-
Fill the Molds. Carefully pour or ladle the watermelon puree into your popsicle molds, leaving about 1/4 to 1/2 inch of space at the top. The mixture will expand slightly as it freezes. If your molds come with attached lids, insert the sticks according to the manufacturer's instructions. If you're using open molds, first freeze the popsicles for about 1 hour until they are slushy enough to support the sticks upright, then insert them.05
-
The Long Freeze. Place the molds on a level shelf in your freezer and let them freeze completely. This will take at least 4-6 hours, but for the best results, I like to leave them overnight. Patience is key here—a fully frozen popsicle will release cleanly from the mold.06
-
The Grand Unmolding. When you're ready to serve, don't just yank the sticks out! Run the outside of the mold under warm water for just 10-15 seconds. You'll feel the popsicle start to loosen. Gently pull on the stick, and it should slide out easily, revealing a perfectly formed, jewel-toned treat.07


