
Why You’ll Love This Frozen Pineapple Coconut Popsicles
- Incredibly Simple to Make. Honestly, if you can press a button on a blender, you can make these popsicles. There’s no cooking, no complicated techniques—just blend, pour, and freeze. It’s the kind of recipe that makes you look like a kitchen pro with minimal effort.
- Naturally Sweet and Creamy. The magic here is in the ingredients. Ripe pineapple brings a bright, tangy sweetness, while full-fat coconut milk creates a luxuriously smooth and creamy texture that feels indulgent without any dairy. You really don’t need any added sugar if your fruit is sweet enough.
- A Refreshing & Healthy Treat. These are a fantastic way to satisfy a sweet tooth without any guilt. They’re packed with real fruit and healthy fats, making them a treat you can feel good about enjoying anytime. They’re like a little burst of hydration and energy.
- Perfect for Making Ahead. These popsicles are the ultimate make-ahead dessert. They live happily in your freezer for weeks, ready to be grabbed whenever a craving strikes. Having a stash of these on hand is a game-changer for busy weeks.
Ingredients & Tools
- 450 g fresh pineapple, chopped (about 3 cups)
- 400 ml can full-fat coconut milk, well-shaken
- 2 tbsp honey or maple syrup (optional, depending on pineapple sweetness)
- 1 tsp pure vanilla extract
- A pinch of fine sea salt
Tools: A high-speed blender, popsicle molds, and popsicle sticks.
The quality of your ingredients really shines through here, so try to find the sweetest, ripest pineapple you can—it makes all the difference. And don’t be tempted by light coconut milk; the full-fat version is essential for that rich, creamy texture that prevents icy popsicles.
Serves: 6-8 popsicles | Prep Time: 10 minutes | Freeze Time: 4-6 hours | Total Time: 4+ hours (mostly inactive)
Before You Start: Tips & Ingredient Notes
- Pineapple Ripeness is Key. The sweetness of your popsicles hinges entirely on your pineapple. Look for one that’s golden yellow, gives slightly to pressure, and smells fragrant at the stem. If it’s a bit underripe, the optional sweetener becomes much more necessary.
- Shake That Coconut Milk Can! This is a crucial step. Before you open the can, shake it vigorously for about 30 seconds. This helps reincorporate the thick cream that often separates from the water, ensuring a uniformly creamy mixture.
- To Sweeten or Not to Sweeten? I always recommend blending the base first without any added sweetener, then tasting it. A perfectly ripe pineapple might not need anything at all. If it tastes a bit tart, then add the honey or maple syrup a tablespoon at a time until it’s just right for you.
- Don’t Skip the Salt and Vanilla. I know it seems odd, but a tiny pinch of salt makes the pineapple flavor pop and balances the sweetness beautifully. The vanilla adds a warm, round note that takes the tropical vibe to the next level.
How to Make Frozen Pineapple Coconut Popsicles
Step 1: Prep Your Pineapple. Start by peeling and coring your pineapple. Chop the flesh into rough chunks—they don’t have to be perfect since they’re going straight into the blender. You’ll need about three cups, but it’s okay to be a little over or under. If you’re using frozen pineapple, there’s no need to thaw it; it will help create a slightly slushier texture that’s lovely.
Step 2: Combine Everything in the Blender. Add the pineapple chunks, the entire can of well-shaken coconut milk, the vanilla extract, and that all-important pinch of salt to your blender. If you’ve decided to use a sweetener, add it now. The trick is to start simple and adjust after blending.
Step 3: Blend Until Ultra-Smooth. Now, blend on high speed for a good minute or two. You’re looking for a completely smooth, creamy, and pale yellow mixture. No pineapple chunks should remain. If your blender is struggling, you can stop and scrape down the sides once. The mixture should pour easily but have a little body to it.
Step 4: The All-Important Taste Test. This is your moment to be the chef. Pour a little of the mixture into a spoon and taste it. Is it sweet enough? Tangy enough? Creamy enough? Now is the time to adjust. You can add more sweetener, a squeeze of lime juice for extra zing, or even a handful of shredded coconut for texture. Blend again briefly to incorporate any additions.
Step 5: Fill the Molds Carefully. Place your popsicle molds on a stable, level surface. Using a liquid measuring cup with a spout or a funnel, carefully pour the mixture into each mold, leaving about a half-inch of space at the top to allow for expansion as it freezes. Try to avoid dripping on the edges for cleaner pops later.
Step 6: Insert the Sticks and Freeze. Tap the molds gently on the counter to release any air bubbles. Then, place the lids on top and insert the sticks according to your mold’s instructions. If your mold doesn’t have a lid, you can cover the top with a piece of aluminum foil and poke the sticks through the foil to hold them upright. Freeze for at least 4-6 hours, or ideally overnight, until completely solid.
Step 7: The Great Unmolding. When you’re ready to serve, don’t just yank! The easiest way to unmold them is to run the outside of the mold under warm water for just 10-15 seconds. This will loosen the popsicles from the sides. Then, gently pull on the stick—they should slide out perfectly.
Serving Suggestions
Complementary Dishes
- Grilled Shrimp Skewers — The smoky, savory char of the shrimp creates a fantastic contrast with the sweet, cold popsicle. It turns a simple treat into a full tropical-themed meal.
- A Fresh Green Papaya Salad — The spicy, salty, and sour notes of a classic Som Tum salad are brilliantly balanced by the creamy sweetness of the popsicles for a truly authentic experience.
- Jerk Chicken Thighs — The fiery heat from the jerk seasoning is wonderfully cooled down by these frosty pops, making for a dynamic and exciting flavor combination.
Drinks
- Iced Hibiscus Tea — The tart, floral notes of hibiscus (or Jamaica) complement the pineapple beautifully without competing. It’s a wonderfully refreshing non-alcoholic pairing.
- A Crisp Vinho Verde — This slightly effervescent Portuguese white wine has hints of lime and green apple that sing alongside the tropical flavors.
- A Dark & Stormy Mocktail — Ginger beer, lime, and a splash of soda water provide a spicy kick that makes the popsicle taste even creamier and more decadent.
Something Sweet
- Chewy Ginger Cookies — The warm spice of ginger snaps is a classic pairing with pineapple. Dunking a cookie into a melting bite of popsicle is pure bliss.
- Toasted Coconut Macaroons — Doubling down on the coconut flavor, these chewy, sweet macaroons add a delightful textural contrast.
- Dark Chocolate-Dipped Banana Slices — For a real dessert spread, the bitterness of dark chocolate and the mellow banana flavor create a sophisticated trio with our star popsicle.
Top Mistakes to Avoid
- Mistake: Using watery coconut milk. Light coconut milk or coconut water will result in popsicles that are icy and lack creaminess. The fat in full-fat coconut milk is essential for that smooth, luxurious mouthfeel.
- Mistake: Overfilling the molds. Liquid expands as it freezes. If you fill the molds to the very top, you’ll end up with messy overflow in your freezer. Leave that half-inch of space to avoid a sticky situation.
- Mistake: Skipping the taste test. This is your one chance to adjust the flavor! Tart pineapple can make for a surprisingly sour popsicle. Tasting the base ensures the final product is perfectly balanced to your preference.
- Mistake: Trying to unmold without warming. Pulling stubbornly on the stick will likely result in a broken popsicle or a stick coming out on its own. A quick run under warm water is the secret to a perfect release every time.
Expert Tips
- Tip: Add a textural swirl. For a fancy touch, pour the main mixture into the molds only three-quarters of the way. Then, swirl in a tablespoon of pureed mango, passionfruit pulp, or even a drizzle of melted dark chocolate before adding the final layer and inserting the stick.
- Tip: Create creamy layers. Make a plain coconut layer by blending just coconut milk, a touch of sweetener, and vanilla. Freeze in the molds for about 30 minutes until slushy, then top with the pineapple mixture and freeze completely. You’ll get a beautiful two-toned effect.
- Tip: Boost the tropical flavor. Add a tablespoon of lime or lemon juice to the blender to brighten everything up, or a tablespoon of rum or Malibu for an adults-only version (alcohol will make them freeze a bit softer).
- Tip: No popsicle molds? No problem. You can use small paper cups covered with foil (poke the stick through) or even an ice cube tray to make mini, bite-sized frozen treats perfect for kids.
FAQs
Can I use canned pineapple instead of fresh?
You absolutely can! Canned pineapple in juice (not heavy syrup) works well in a pinch. Just be sure to drain it thoroughly before blending. The flavor will be a bit different—often sweeter and less vibrant than fresh—so your taste test becomes even more important. You might find you don’t need any added sweetener at all. If using frozen pineapple chunks, they work great and can help create a thicker blend.
How long do these popsicles keep in the freezer?
They will keep perfectly for about 2-3 months if stored in an airtight container or if your popsicle molds have a tight-fitting lid. This prevents them from absorbing any off-flavors from the freezer and protects against freezer burn. After a long time, they might develop a few ice crystals, but they’ll still taste delicious.
My popsicles are too hard to eat! What can I do?
This usually happens if the coconut milk-to-fruit ratio is off or if you used a light coconut milk. For future batches, ensure you’re using full-fat coconut milk. For your current batch, let the popsicle sit at room temperature for 5-7 minutes before eating. This softens them up to the perfect creamy consistency.
Can I make this recipe vegan?
It’s naturally vegan if you use maple syrup instead of honey! Just double-check that your vanilla extract is pure and not an imitation that sometimes contains dairy. Coconut milk is plant-based, and pineapple is, of course, a fruit, so you’re all set for a delicious vegan-friendly treat.
Why did my popsicles separate or become icy?
Separation can happen if the coconut milk wasn’t emulsified properly during blending. Make sure you blend on high speed for a full minute to get a perfectly homogenous mixture. Iciness is almost always due to using a low-fat liquid. Stick with full-fat coconut milk for the creamiest results, and remember that all fruit-based popsicles will be a bit icier than dairy-based ones—that’s part of their refreshing charm!
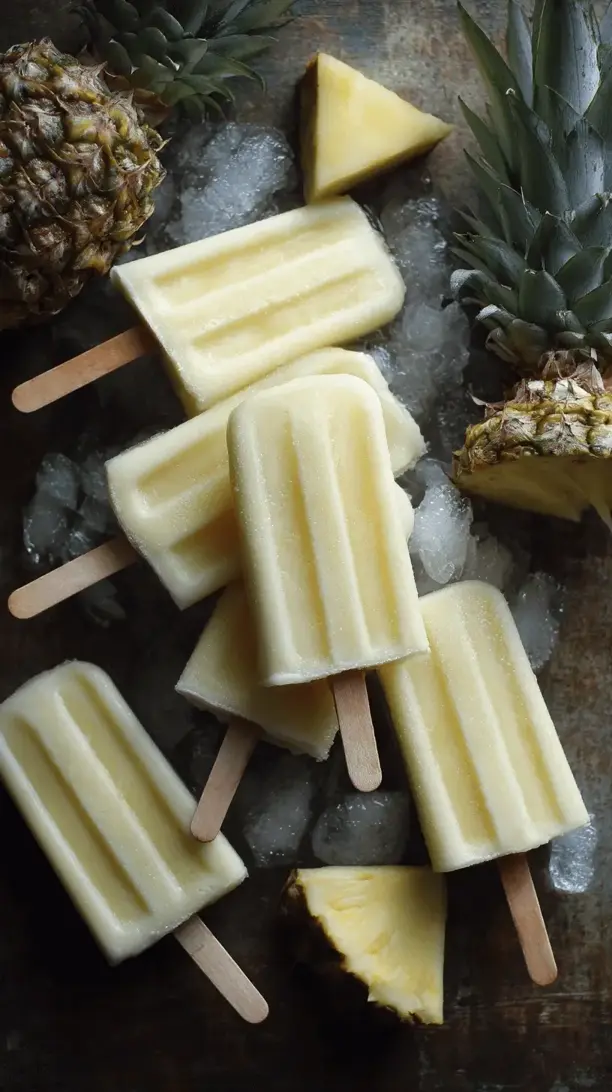
Frozen Pineapple Coconut Popsicles
Beat the heat with these easy Frozen Pineapple Coconut Popsicles! A creamy, healthy 3-ingredient treat that tastes like a tropical vacation. No added sugar needed!
Ingredients
Ingredients
-
450 g fresh pineapple, chopped (about 3 cups)
-
400 ml full-fat coconut milk (can, well-shaken)
-
2 tbsp honey or maple syrup (optional, depending on pineapple sweetness)
-
1 tsp pure vanilla extract
-
A pinch fine sea salt
Instructions
-
Prep Your Pineapple. Start by peeling and coring your pineapple. Chop the flesh into rough chunks—they don't have to be perfect since they're going straight into the blender. You'll need about three cups, but it's okay to be a little over or under. If you're using frozen pineapple, there's no need to thaw it; it will help create a slightly slushier texture that's lovely.01
-
Combine Everything in the Blender. Add the pineapple chunks, the entire can of well-shaken coconut milk, the vanilla extract, and that all-important pinch of salt to your blender. If you've decided to use a sweetener, add it now. The trick is to start simple and adjust after blending.02
-
Blend Until Ultra-Smooth. Now, blend on high speed for a good minute or two. You're looking for a completely smooth, creamy, and pale yellow mixture. No pineapple chunks should remain. If your blender is struggling, you can stop and scrape down the sides once. The mixture should pour easily but have a little body to it.03
-
The All-Important Taste Test. This is your moment to be the chef. Pour a little of the mixture into a spoon and taste it. Is it sweet enough? Tangy enough? Creamy enough? Now is the time to adjust. You can add more sweetener, a squeeze of lime juice for extra zing, or even a handful of shredded coconut for texture. Blend again briefly to incorporate any additions.04
-
Fill the Molds Carefully. Place your popsicle molds on a stable, level surface. Using a liquid measuring cup with a spout or a funnel, carefully pour the mixture into each mold, leaving about a half-inch of space at the top to allow for expansion as it freezes. Try to avoid dripping on the edges for cleaner pops later.05
-
Insert the Sticks and Freeze. Tap the molds gently on the counter to release any air bubbles. Then, place the lids on top and insert the sticks according to your mold's instructions. If your mold doesn't have a lid, you can cover the top with a piece of aluminum foil and poke the sticks through the foil to hold them upright. Freeze for at least 4-6 hours, or ideally overnight, until completely solid.06
-
The Great Unmolding. When you're ready to serve, don't just yank! The easiest way to unmold them is to run the outside of the mold under warm water for just 10-15 seconds. This will loosen the popsicles from the sides. Then, gently pull on the stick—they should slide out perfectly.07


