
Why You’ll Love This Frozen Kiwi Chocolate Pops
- They’re a textural masterpiece. The contrast between the snappy, rich chocolate coating and the soft, sorbet-like frozen kiwi is honestly something you have to experience. It’s a party in your mouth.
- They’re deceptively simple. With just a few core ingredients and no fancy equipment needed, these pops feel like a gourmet hack. You’ll impress everyone without breaking a sweat.
- They’re a healthier indulgence. Using real fruit and high-quality dark chocolate means you’re treating yourself to something that’s naturally sweet and packed with flavor, not just sugar.
- They’re incredibly versatile. Once you master the basic technique, you can get creative with different fruits, chocolates, and even toppings like chopped nuts or coconut.
Ingredients & Tools
- 4-5 ripe but firm kiwis
- 200 g high-quality dark chocolate (around 70%), finely chopped
- 1 tablespoon coconut oil (or a neutral oil like grapeseed)
- Optional: A pinch of flaky sea salt for sprinkling
Tools: A sharp knife, a small saucepan or heatproof bowl for a double boiler, popsicle sticks (wooden skewers or lollipop sticks work too), a baking sheet lined with parchment paper.
The quality of your chocolate really is the star here, so choose one you enjoy eating on its own. The coconut oil is the secret weapon—it makes the melted chocolate fluid and easy to dip, and gives the finished shell an incredibly smooth, professional snap.
Serves: 4-5 pops | Prep Time: 20 minutes | Freeze Time: 4+ hours | Total Time: 4 hours 20 minutes (mostly inactive)
Before You Start: Tips & Ingredient Notes
- Kiwi ripeness is key. You want kiwis that yield slightly to gentle pressure but are still firm. If they’re too soft, they’ll be difficult to peel and slice neatly.
- Why chop the chocolate? Finely chopping your chocolate bar before melting helps it melt evenly and smoothly, preventing any dreaded seizing or burning. Chocolate chips work, but a bar often has a better snap.
- Don’t skip the oil. That tablespoon of coconut oil is non-negotiable for a successful dip. It thins the chocolate to the perfect dipping consistency, ensuring a thin, even coat that freezes solid.
- Patience is your friend. The freezing steps are crucial. If your kiwi slices aren’t fully frozen before dipping, they’ll melt the chocolate on contact and create a messy, thick shell.
How to Make Frozen Kiwi Chocolate Pops
Step 1: Prep the Kiwi. Start by peeling your kiwis. You can slice off the ends and use a spoon to scoop out the flesh, but I find a sharp vegetable peeler works wonders. Slice the peeled kiwis into rounds that are about 1 cm (just under 1/2 inch) thick. You’ll notice this thickness gives you a great bite—not too thin that it’s flimsy, not too thick that it’s difficult to eat.
Step 2: First Freeze. Carefully lay the kiwi slices in a single layer on your parchment-lined baking sheet. Gently insert a popsicle stick into the flat side of each slice, pushing it about halfway through. You want it to be secure. Now, pop the entire baking sheet into the freezer. This initial freeze is critical—you need the kiwi slices to be completely solid, which will take at least 3-4 hours, but overnight is even better. They should feel rock hard.
Step 3: Melt the Chocolate. When you’re ready to dip, create a double boiler. Fill your small saucepan with an inch or two of water and bring it to a gentle simmer. Place the chopped chocolate and coconut oil in a heatproof bowl that fits snugly on top of the saucepan, ensuring the bottom of the bowl doesn’t touch the water. Stir gently and continuously with a dry spatula or spoon until the chocolate is completely melted and glossy. The trick is to keep the heat low and steady to avoid scorching. Once melted, remove the bowl from the heat.
Step 4: The Big Dip. Take your baking sheet of frozen kiwi pops out of the freezer. Working relatively quickly, hold a pop by the stick and dip it into the melted chocolate, swirling it gently to coat all sides. Let the excess chocolate drip back into the bowl for a moment. If you’re using sea salt, now is the time to sprinkle a tiny bit over the top—a little goes a long way!
Step 5: Set the Shell. Place the freshly dipped pop back onto the parchment paper. You’ll notice the chocolate will start to set almost immediately because the kiwi is so cold. Once all pops are dipped, return the entire baking sheet to the freezer for at least 30 minutes to allow the chocolate shell to fully harden. This final freeze ensures that perfect snap.
Step 6: Serve and Store. Once fully set, your pops are ready! You can serve them straight from the freezer. To store them long-term, carefully transfer them to an airtight container or a freezer bag, placing a small piece of parchment between layers to prevent sticking. They’ll keep beautifully for up to a month—if they last that long!
Serving Suggestions
Complementary Dishes
- A light summer salad — The crisp, fresh flavors of a simple arugula salad with lemon vinaigrette provide a lovely savory counterpoint to the sweet and tangy pops.
- Grilled shrimp or fish tacos — These pops are a fantastic, light dessert after a meal with zesty, spicy, or smoky flavors from the grill.
Drinks
- A crisp Prosecco or sparkling wine — The bubbles and acidity cut through the richness of the chocolate and elevate the kiwi’s brightness beautifully.
- Iced green tea with mint — For a non-alcoholic option, the grassy notes of green tea and the coolness of mint are a refreshing companion.
Something Sweet
- Almond tuile cookies — Their delicate, lacy texture and nutty flavor add another dimension of crunch and sophistication without overwhelming the main event.
- A small bowl of fresh berries — Sometimes simplicity is best. A few raspberries or blueberries on the side complement the kiwi and make the dessert feel even more abundant.
Top Mistakes to Avoid
- Mistake: Using warm or soft kiwi. If the kiwi isn’t fully frozen solid before dipping, it will cause the chocolate to clump, seize, and create a thick, messy coating instead of a thin, elegant shell.
- Mistake: Getting water in the chocolate. Even a single drop of water can cause melted chocolate to “seize,” turning it into a grainy, stiff mess. Ensure all your tools are completely dry.
- Mistake: Melting chocolate over direct high heat. Chocolate burns easily. Always use a double boiler or microwave in short bursts, stirring frequently, for gentle, even melting.
- Mistake: Skipping the second freeze. That final 30-minute freeze after dipping is essential for the chocolate shell to fully harden and achieve that satisfying snap when you bite into it.
Expert Tips
- Tip: Add a flavor twist to the chocolate. As the chocolate melts, stir in a tiny pinch of chili powder for a kick, or some orange zest for a classic combination. It’s an easy way to customize.
- Tip: Use a tall, narrow glass for dipping. If your melting bowl is wide, pouring the melted chocolate into a glass makes it easier to get a deep dip without needing a huge quantity of chocolate.
- Tip: For a super-smooth finish, after the first dip and freeze, you can do a quick second dip. This fills in any gaps and creates an extra-thick, professional-looking shell.
- Tip: If your chocolate gets too thick, don’t panic. Just place the bowl back over the simmering water for a few seconds and stir in another tiny drizzle of coconut oil to loosen it up.
FAQs
Can I use milk or white chocolate instead?
Absolutely! The method is exactly the same. Milk chocolate will give you a sweeter, creamier pop, while white chocolate offers a stunning color contrast and a very sweet, vanilla-like flavor. Just be aware that white chocolate is more delicate and can burn even more easily, so keep a very close eye on it while melting.
My chocolate shell is soft and not snappy. What happened?
This usually points to one of two things. First, the kiwi might not have been frozen solid enough before dipping, causing the kiwi to slightly melt the chocolate from within. Second, it could be the chocolate itself. Lower-quality chocolate or chocolate with a lower cocoa butter content won’t set as firmly. Using a good-quality dark chocolate and that tablespoon of coconut oil is your best bet for the perfect snap.
Can I make these pops ahead of time?
You absolutely can—they’re a fantastic make-ahead dessert! Once fully frozen and set, store them in an airtight container or freezer bag. They’ll keep their perfect texture and flavor for up to a month. It’s a great way to have a fancy dessert on hand for unexpected guests or a quick treat.
Do I have to use popsicle sticks?
Not strictly! If you’re making these as more of a bonbon-style treat, you can skip the stick. Just freeze the kiwi slices on the tray, then use a fork or dipping tools to coat them. They’ll be a bit messier to eat, but just as delicious. The stick just makes them easier to handle and eat.
The kiwi is too tart for my taste. Any suggestions?
You can lightly sweeten the kiwi before freezing! A quick brush of a simple syrup (equal parts sugar and water, heated until dissolved, then cooled) on the kiwi slices before the first freeze can tame the tartness. Alternatively, you could use golden kiwis, which are naturally sweeter and less acidic than the classic green variety.
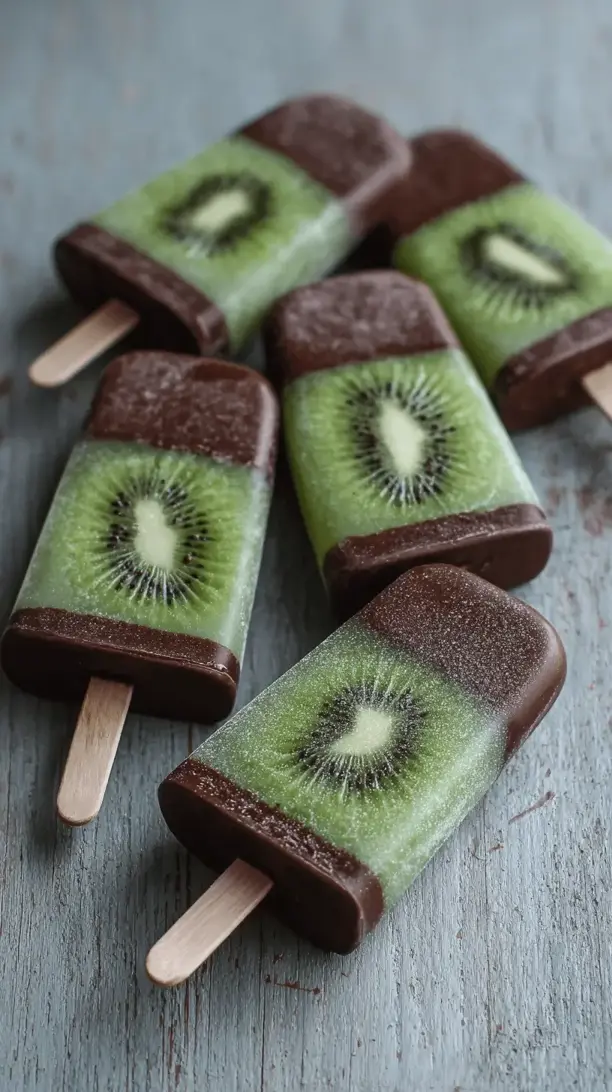
Frozen Kiwi Chocolate Pops
Whip up easy Frozen Kiwi Chocolate Pops! A healthy, 4-ingredient treat with a dark chocolate shell & tangy kiwi center. Perfect for summer, kids, & impressing guests. Simple recipe!
Ingredients
Ingredients
-
4-5 ripe but firm kiwis
-
200 g high-quality dark chocolate (around 70%, finely chopped)
-
1 tablespoon coconut oil (or a neutral oil like grapeseed)
-
flaky sea salt (Optional: for sprinkling)
Instructions
-
Prep the Kiwi. Start by peeling your kiwis. You can slice off the ends and use a spoon to scoop out the flesh, but I find a sharp vegetable peeler works wonders. Slice the peeled kiwis into rounds that are about 1 cm (just under 1/2 inch) thick. You'll notice this thickness gives you a great bite—not too thin that it's flimsy, not too thick that it's difficult to eat.01
-
First Freeze. Carefully lay the kiwi slices in a single layer on your parchment-lined baking sheet. Gently insert a popsicle stick into the flat side of each slice, pushing it about halfway through. You want it to be secure. Now, pop the entire baking sheet into the freezer. This initial freeze is critical—you need the kiwi slices to be completely solid, which will take at least 3-4 hours, but overnight is even better. They should feel rock hard.02
-
Melt the Chocolate. When you're ready to dip, create a double boiler. Fill your small saucepan with an inch or two of water and bring it to a gentle simmer. Place the chopped chocolate and coconut oil in a heatproof bowl that fits snugly on top of the saucepan, ensuring the bottom of the bowl doesn't touch the water. Stir gently and continuously with a dry spatula or spoon until the chocolate is completely melted and glossy. The trick is to keep the heat low and steady to avoid scorching. Once melted, remove the bowl from the heat.03
-
The Big Dip. Take your baking sheet of frozen kiwi pops out of the freezer. Working relatively quickly, hold a pop by the stick and dip it into the melted chocolate, swirling it gently to coat all sides. Let the excess chocolate drip back into the bowl for a moment. If you're using sea salt, now is the time to sprinkle a tiny bit over the top—a little goes a long way!04
-
Set the Shell. Place the freshly dipped pop back onto the parchment paper. You'll notice the chocolate will start to set almost immediately because the kiwi is so cold. Once all pops are dipped, return the entire baking sheet to the freezer for at least 30 minutes to allow the chocolate shell to fully harden. This final freeze ensures that perfect snap.05
-
Serve and Store. Once fully set, your pops are ready! You can serve them straight from the freezer. To store them long-term, carefully transfer them to an airtight container or a freezer bag, placing a small piece of parchment between layers to prevent sticking. They'll keep beautifully for up to a month—if they last that long!06


