
Why You’ll Love This Frozen Banana Yogurt Pops
- Incredibly Simple. You literally just blend and freeze. There’s no cooking, no fancy techniques, and the cleanup is a breeze.
- Naturally Sweet. The ripe bananas provide all the sweetness you need, so you’re in control of adding just a tiny bit of extra sweetness if you like.
- A Secret Protein Boost. Thanks to the Greek yogurt, these pops have a satisfying creaminess and a bit of protein, making them a much more substantial snack than an ice pop.
- Endlessly Customizable. This base recipe is a springboard for your imagination. Think swirls of peanut butter, a handful of spinach for a green monster pop, or a drizzle of dark chocolate.
Ingredients & Tools
- 3 large very ripe bananas (the spottier, the better!)
- 1 ½ cups plain Greek yogurt (full-fat for ultimate creaminess)
- 1-2 tablespoons honey or maple syrup (optional, depending on your sweetness preference)
- 1 teaspoon pure vanilla extract (highly recommended for that bakery-style flavor)
- A pinch of salt (to make all the flavors pop)
Tools: A blender or food processor, a liquid measuring cup, a spatula, and popsicle molds with sticks.
The quality of your bananas is key here—super ripe ones blend into a smoother, sweeter base. And don’t skip the salt! It might seem odd for a frozen treat, but it really balances the sweetness and enhances the vanilla.
Serves: 6-8 pops | Prep Time: 10 minutes | Freeze Time: 4-6 hours | Total Time: 4+ hours (mostly inactive)
Before You Start: Tips & Ingredient Notes
- Banana Ripeness is Non-Negotiable. If your bananas are still yellow with a little green, they won’t be sweet or soft enough. Wait until they are covered in brown spots for the best, most dessert-like flavor.
- To Yogurt or Not to Yogurt? I strongly recommend full-fat Greek yogurt for a luxuriously creamy texture that doesn’t get icy. If you use a low-fat variety, your pops might be a bit harder.
- What If I Don’t Have Molds? No worries! You can use small paper cups. Just pour the mixture in, cover the top with foil, and poke a popsicle stick through the foil to hold it upright.
- The Sweetener is Your Call. Taste the mixture before you freeze it! The bananas might be sweet enough on their own. The honey or maple syrup is just an insurance policy for ultimate deliciousness.
How to Make Frozen Banana Yogurt Pops
Step 1: First, get your bananas ready. Peel them, break them into chunks, and pop them right into your blender or food processor. You’ll notice that ripe bananas mash up incredibly easily, which is exactly what we want for a silky-smooth pop base.
Step 2: Now, add the rest of your ingredients. Scoop in the Greek yogurt, drizzle in the honey (if using), add the vanilla extract, and don’t forget that tiny pinch of salt. It’s all going in together—no need for complicated layering.
Step 3: Time to blend! Start on low and gradually increase the speed to high. Let it run for a good 45-60 seconds, or until the mixture is completely smooth and looks like a thick, pale yellow milkshake. Scrape down the sides with a spatula halfway through to make sure everything is incorporated. You shouldn’t see any lumps of banana.
Step 4: This is the fun part: pouring. Carefully pour or spoon the creamy banana-yogurt mixture into your popsicle molds. Leave about a ¼-inch gap at the top because the mixture will expand just a tiny bit as it freezes. Tap the molds gently on the counter to release any air bubbles.
Step 5: Insert the sticks! If your mold has a lid that holds the sticks, snap it on. If not, you’ll want to freeze the pops for about 45-60 minutes first, until they are slushy but not solid, then insert the sticks. This prevents them from sinking to the bottom.
Step 6: The final step is the test of patience. Place the molds in the freezer for at least 4-6 hours, or ideally overnight. They need to be completely frozen solid. You’ll know they’re ready when you can gently pull on the stick and the entire pop releases cleanly.
Serving Suggestions
Complementary Dishes
- A Fresh Fruit Salad — The bright, juicy acidity of berries and melon cuts through the creamy richness of the pops perfectly.
- A Handful of Toasted Nuts — The crunch and savory note from almonds or walnuts provide a lovely textural contrast if you’re enjoying the pop as a light dessert.
- Grilled Chicken or Fish — Seriously! These pops make a fantastic, refreshing side after a smoky, savory main course, especially in the summer.
Drinks
- Iced Coffee or Cold Brew — The bitter notes of coffee are a classic pairing with the sweet, banana-forward flavor of the pops.
- Sparkling Water with Lime — The bubbles and citrus cleanse the palate, making each bite of the pop taste brand new.
- A Creamy Smoothie — For the ultimate creamy-fest, enjoy one of these pops alongside a mango or strawberry smoothie.
Something Sweet
- A Dark Chocolate Square — Let a piece of high-quality dark chocolate melt on your tongue between bites for a decadent grown-up twist.
- Almond Biscotti — The hard, crunchy biscotti is fantastic for dipping into the slightly softened pop.
- Warm Berry Compote — For a dessert-worthy presentation, drizzle a warm, simple berry sauce over the pop right before serving.
Top Mistakes to Avoid
- Mistake: Using under-ripe bananas. This is the number one reason for a lackluster pop. Under-ripe bananas are starchy, not sweet, and they won’t blend into a smooth puree, leaving you with a weird, gritty texture.
- Mistake: Skipping the fat in the yogurt. Using a fat-free yogurt might seem healthier, but fat is what gives the pop a creamy, soft texture that’s easy to bite into. Without it, you risk an unpleasantly icy result.
- Mistake: Not tapping the molds. Those little air bubbles can create pockets of frost. A few firm taps on the counter ensures a denser, more uniform pop.
- Mistake: Impatience with freezing. If you try to unmold them too early, they might break. Give them a solid 4-6 hours. If they’re stubborn, run the mold under warm water for just 5-10 seconds to loosen it.
Expert Tips
- Tip: Freeze your banana chunks first. For an even creamier, almost soft-serve-like texture, peel and slice your ripe bananas and freeze the chunks on a parchment-lined baking sheet for 1-2 hours before blending. This changes the game!
- Tip: Create fun swirls. Before freezing, you can swirl in a tablespoon of peanut butter, a spoonful of raspberry jam, or even a bit of melted dark chocolate. Just use a knife or a skewer to gently marble it through the mixture.
- Tip: Add a texture surprise. After blending, fold in some mini chocolate chips, chopped nuts, or shredded coconut for little bursts of flavor and crunch in every bite.
- Tip: Make them a complete meal. For a powerhouse breakfast pop, blend in a handful of spinach (you won’t taste it, promise!), a scoop of protein powder, or a tablespoon of chia seeds.
FAQs
Can I make these pops dairy-free?
Absolutely! You can easily swap the Greek yogurt for a plain, unsweetened coconut yogurt or almond milk yogurt. Just make sure you’re using a thick, creamy variety to maintain the right texture. The result will be just as delicious and wonderfully creamy.
How long do these frozen pops last in the freezer?
They keep beautifully for up to 2-3 months if stored in an airtight container or if your popsicle molds are well-sealed. After that, they might start to develop a little freezer burn, but they’ll still be safe to eat. I doubt they’ll last that long, though!
My pops are too hard to eat! What can I do?
This usually happens if the yogurt was low-fat or if they’ve been frozen for a very long time. Let the pop sit at room temperature for 5-7 minutes before eating. This softens it up perfectly. You can also dip the mold in warm water for a few seconds to help it release and slightly soften the exterior.
Can I use frozen bananas instead of fresh?
You can, but it will change the texture. Using frozen bananas will create a much thicker, almost ice-cream-like mixture that is harder to pour. I’d recommend thawing them slightly first, or be prepared to spoon the mixture into the molds firmly. The benefit is an ultra-creamy final product.
What’s the best way to get the pops out of the mold?
Patience is key, but a little warm water is your best friend. If the pop won’t budge, run the outside of the mold under lukewarm water for 10-15 seconds. This will melt just the outermost layer and it should slide right out. Don’t run it under water for too long, or you’ll have a melty mess!
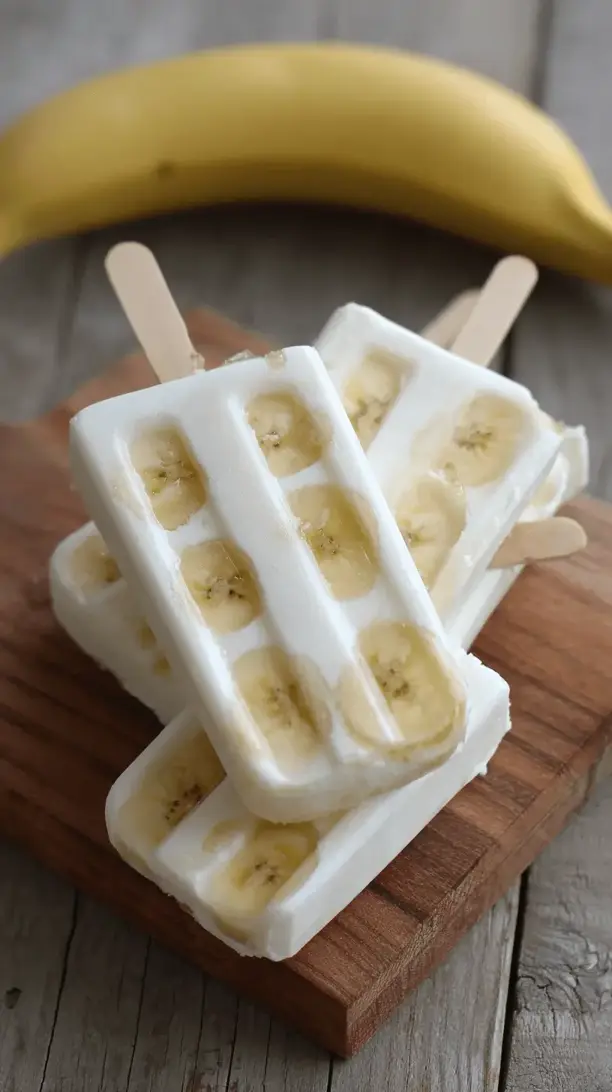
Frozen Banana Yogurt Pops
Whip up creamy Frozen Banana Yogurt Pops with just 3 ingredients! This easy, healthy snack is a guilt-free treat the whole family will love. No cooking required!
Ingredients
Ingredients
-
3 large very ripe bananas (the spottier, the better!)
-
1 ½ cups plain Greek yogurt (full-fat for ultimate creaminess)
-
1-2 tablespoons honey or maple syrup (optional, depending on your sweetness preference)
-
1 teaspoon pure vanilla extract (highly recommended for that bakery-style flavor)
-
A pinch salt (to make all the flavors pop)
Instructions
-
First, get your bananas ready. Peel them, break them into chunks, and pop them right into your blender or food processor. You'll notice that ripe bananas mash up incredibly easily, which is exactly what we want for a silky-smooth pop base.01
-
Now, add the rest of your ingredients. Scoop in the Greek yogurt, drizzle in the honey (if using), add the vanilla extract, and don't forget that tiny pinch of salt. It's all going in together—no need for complicated layering.02
-
Time to blend! Start on low and gradually increase the speed to high. Let it run for a good 45-60 seconds, or until the mixture is completely smooth and looks like a thick, pale yellow milkshake. Scrape down the sides with a spatula halfway through to make sure everything is incorporated. You shouldn't see any lumps of banana.03
-
This is the fun part: pouring. Carefully pour or spoon the creamy banana-yogurt mixture into your popsicle molds. Leave about a ¼-inch gap at the top because the mixture will expand just a tiny bit as it freezes. Tap the molds gently on the counter to release any air bubbles.04
-
Insert the sticks! If your mold has a lid that holds the sticks, snap it on. If not, you'll want to freeze the pops for about 45-60 minutes first, until they are slushy but not solid, then insert the sticks. This prevents them from sinking to the bottom.05
-
The final step is the test of patience. Place the molds in the freezer for at least 4-6 hours, or ideally overnight. They need to be completely frozen solid. You'll know they're ready when you can gently pull on the stick and the entire pop releases cleanly.06


