
Why You’ll Love This Frozen Banana Yogurt Bark
- It’s ridiculously easy and forgiving. You really can’t mess this up. No baking, no fancy equipment—just mixing, spreading, and freezing. It’s the perfect recipe for when you need a kitchen win without any stress.
- Completely customizable to your cravings. The base is a blank canvas. Feeling chocolatey? Add cocoa powder. Want a tropical vibe? Mix in some shredded coconut and diced mango. This recipe is more of a template for endless delicious possibilities.
- The perfect texture contrast. You get the smooth, almost ice-cream-like frozen yogurt base, the soft sweetness of the banana, and the delightful crunch from your toppings. It’s a party in your mouth, honestly.
- A secretly smart way to use up ripe bananas. We all have those bananas that go from perfectly yellow to spotty brown in what feels like an hour. This is a fantastic, no-waste solution that’s far more exciting than another loaf of banana bread.
Ingredients & Tools
- 2 large ripe bananas (the spottier, the sweeter!)
- 2 cups (500 g) plain Greek yogurt (full-fat for maximum creaminess)
- 2-3 tablespoons maple syrup or honey (adjust to your sweetness preference)
- 1 teaspoon pure vanilla extract
- A pinch of sea salt (to balance the sweetness)
- 1/2 cup of your favorite toppings (e.g., chopped dark chocolate, berries, nuts, seeds)
Tools: A medium mixing bowl, a fork or whisk, a rimmed baking sheet (approx. 9×13 inches), parchment paper or a silicone baking mat.
The quality of your yogurt really makes a difference here—a thick, creamy Greek yogurt will yield the best, least-icy results. And don’t skip the salt! It might seem odd, but it truly makes the other flavors pop.
Serves: 4-6 | Prep Time: 10 minutes | Freeze Time: 4 hours | Total Time: 4 hours 10 minutes
Before You Start: Tips & Ingredient Notes
- Banana ripeness is key. You want those bananas to be very ripe, with plenty of brown spots. This ensures they mash easily and contribute a natural, intense sweetness, meaning you might not need as much added sweetener.
- Why Greek yogurt? Its thick texture is crucial. Regular yogurt contains more whey, which will lead to a icier, less creamy bark. Greek yogurt has less moisture, so it freezes into a smoother, more satisfying treat.
- Don’t skip the parchment paper! Seriously, this is the most important step for easy removal. Press the parchment into the corners of the baking sheet so the mixture spreads evenly. A silicone mat works wonderfully too.
- Think about topping texture. Some toppings, like fresh berries, can become very hard when frozen. If you prefer, you can press softer toppings in after the bark has partially frozen (about 1-2 hours in) for a easier-to-bite experience.
How to Make Frozen Banana Yogurt Bark
Step 1: Prepare Your Pan. This is your one crucial setup step! Line your rimmed baking sheet with a piece of parchment paper or a silicone baking mat. Make sure it fits snugly. This guarantees your bark will release perfectly later—no scraping or breaking.
Step 2: Create the Banana-Yogurt Base. Peel your ripe bananas and add them to your mixing bowl. Use a fork to mash them until they’re mostly smooth, with just a few small lumps for texture. To this, add the Greek yogurt, maple syrup (start with 2 tablespoons), vanilla extract, and that all-important pinch of salt.
Step 3: Mix Until Harmonious. Grab a whisk or a spatula and mix everything together until it’s well combined and creamy. Now is the time to taste it. Want it sweeter? Add the extra tablespoon of maple syrup. Remember, freezing dulls sweetness slightly, so it should taste a touch sweeter than you’d like the final product to be.
Step 4: Spread and Smooth. Pour the creamy mixture onto your prepared baking sheet. Use a spatula or the back of a spoon to spread it into an even layer, about 1/4 to 1/2 inch thick. You don’t want it too thin, or it will be fragile, or too thick, or it won’t freeze properly. Aim for consistency.
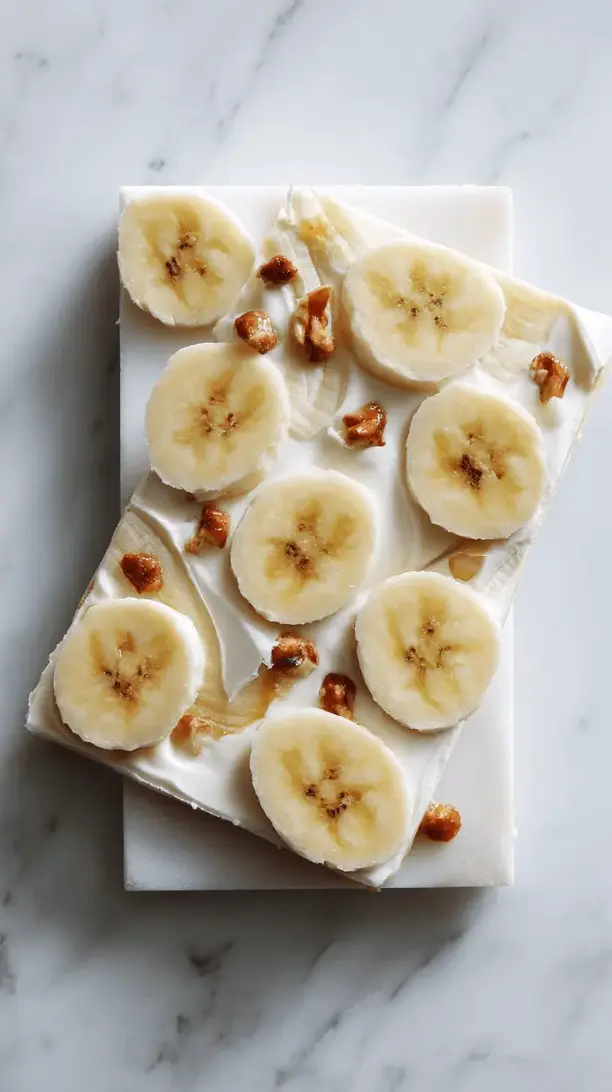
Step 5: The Fun Part – Add Toppings! This is where you get creative. Sprinkle your chosen toppings evenly over the entire surface. Gently press them down just a little so they adhere to the base. If you’re using chocolate chips, they’ll freeze solid, providing lovely little bursts of flavor.
Step 6: The Patient Wait – Freeze. Very carefully, transfer the baking sheet to your freezer. It needs to sit on a flat, level surface. Let it freeze, completely undisturbed, for at least 4 hours, but ideally overnight. You’ll know it’s ready when the top is firm to the touch and the bark doesn’t give when you press it.
Step 7: Break and Enjoy. Take the baking sheet out of the freezer. Lift the parchment paper or silicone mat to remove the entire frozen sheet. Now, simply use your hands to break it into irregular, rustic pieces. You can also use a knife to score and break it for more uniform pieces, but I love the free-form look.
Serving Suggestions
Complementary Dishes
- A fresh fruit salad — The cool, creamy bark paired with juicy, room-temperature berries or citrus segments creates a wonderful balance of temperatures and textures.
- A warm bowl of oatmeal — Crumble a piece of the bark over your morning porridge for a deliciously cool and creamy swirl that melts into the warmth.
- Alongside a cheese board — For a unique dessert spread, offer the bark as a sweet, frozen element next to sharp cheeses and crackers.
Drinks
- A hot cup of coffee — The bitterness of black coffee is a fantastic contrast to the sweet, cold creaminess of the bark. It’s a perfect afternoon pick-me-up.
- A green smoothie — Enjoy a piece as a “chaser” to your healthy morning smoothie. It feels like a treat but keeps the nutritious vibe going.
- Sparkling water with lemon — The clean, crisp bubbles help cleanse the palate between bites, making each piece taste fresh and new.
Something Sweet
- A warm, gooey chocolate chip cookie — The combination of hot cookie and cold bark is a textural dream. It’s an indulgence, but a perfectly balanced one.
- A simple drizzle of melted peanut butter — Right before serving, warm up a tablespoon of natural peanut butter and drizzle it over the bark pieces for an instant flavor upgrade.
- A few fresh raspberries on the side — Their bright acidity cuts through the richness of the yogurt and adds a beautiful pop of color.
Top Mistakes to Avoid
- Mistake: Using runny or regular yogurt. This is the number one reason for icy bark. The extra water content freezes into hard crystals. Stick with thick, strained Greek yogurt for the creamiest outcome.
- Mistake: Spreading the mixture too thick. If your layer is more than about 1/2 inch thick, the center will take forever to freeze and might remain unpleasantly soft, while the edges get too hard.
- Mistake: Skipping the parchment paper. You’ll end up with a frustrating situation trying to chisel your creation off the pan. The parchment paper is non-negotiable for easy cleanup and perfect bark retrieval.
- Mistake: Freezing for too short a time. If it’s not fully frozen solid, it will be mushy and difficult to break. Patience is key here—give it a full 4 hours, if not more.
Expert Tips
- Tip: Swirl in flavor boosters. Before adding chunky toppings, try swirling in a tablespoon of cocoa powder, a spoonful of nut butter, or even a swirl of fruit puree for a marbled effect and an extra layer of flavor.
- Tip: Grate frozen fruit for toppings. Instead of using fresh berries that can become little ice cubes, try grating a frozen strawberry or raspberry directly over the bark. It creates a beautiful, colorful, and easy-to-eat dust.
- Tip: Add a protein punch. For a more substantial snack, stir a scoop of your favorite unflavored or vanilla protein powder into the yogurt mixture before spreading. It’s a great post-workout option.
- Tip: Control the sweetness perfectly. If your bananas are very ripe, you might find you don’t need any added sweetener at all. Always taste the mixture before freezing and adjust to your preference.
FAQs
How long does Frozen Banana Yogurt Bark last in the freezer?
Stored correctly in an airtight container or a freezer bag with layers separated by parchment paper, it will keep well for up to 2 months. After that, it might start to develop freezer burn or lose its optimal texture. Honestly, it never lasts that long in my house!
Can I use a different type of fruit instead of banana?
You can, but the texture will change. Banana provides creaminess and acts as a natural sweetener. If you use, say, blended strawberries, the final bark will be much icier because of the higher water content. For best results, banana is really the ideal base, but feel free to experiment in small batches!
My bark is very hard to break. What did I do wrong?
It’s likely just too cold! Let it sit on the counter for 3-5 minutes after removing it from the freezer. This will slightly soften it, making it easier to break into pieces without shattering. It’s a fine line between rock-solid and perfectly snappable.
Is it possible to make this dairy-free?
Absolutely! Just use a thick, plain, dairy-free yogurt. Coconut yogurt works particularly well because of its high fat content, which helps it freeze creamier. Just make sure it’s unsweetened so you can control the sweetness yourself with maple syrup.
Why did my bark become soggy after I broke it?
If you leave the broken pieces out at room temperature for too long, they will start to thaw and become soft. The trick is to break it quickly and return the pieces you aren’t eating immediately to the freezer. Also, condensation can form if you put warm bark into a container—always make sure it’s fully frozen before storing.
Frozen Banana Yogurt Bark
Whip up this easy Frozen Banana Yogurt Bark! A healthy, customizable snack with Greek yogurt & ripe bananas. Perfect for dessert or a quick treat. Ready in 10 mins!
Ingredients
Ingredients
-
2 large ripe bananas (the spottier, the sweeter!)
-
2 cups plain Greek yogurt (full-fat for maximum creaminess (500 g))
-
2-3 tablespoons maple syrup or honey (adjust to your sweetness preference)
-
1 teaspoon pure vanilla extract
-
A pinch sea salt (to balance the sweetness)
-
1/2 cup your favorite toppings (e.g., chopped dark chocolate, berries, nuts, seeds)
Instructions
-
Prepare Your Pan. This is your one crucial setup step! Line your rimmed baking sheet with a piece of parchment paper or a silicone baking mat. Make sure it fits snugly. This guarantees your bark will release perfectly later—no scraping or breaking.01
-
Create the Banana-Yogurt Base. Peel your ripe bananas and add them to your mixing bowl. Use a fork to mash them until they're mostly smooth, with just a few small lumps for texture. To this, add the Greek yogurt, maple syrup (start with 2 tablespoons), vanilla extract, and that all-important pinch of salt.02
-
Mix Until Harmonious. Grab a whisk or a spatula and mix everything together until it's well combined and creamy. Now is the time to taste it. Want it sweeter? Add the extra tablespoon of maple syrup. Remember, freezing dulls sweetness slightly, so it should taste a touch sweeter than you'd like the final product to be.03
-
Spread and Smooth. Pour the creamy mixture onto your prepared baking sheet. Use a spatula or the back of a spoon to spread it into an even layer, about 1/4 to 1/2 inch thick. You don't want it too thin, or it will be fragile, or too thick, or it won't freeze properly. Aim for consistency.04
-
The Fun Part – Add Toppings! This is where you get creative. Sprinkle your chosen toppings evenly over the entire surface. Gently press them down just a little so they adhere to the base. If you're using chocolate chips, they'll freeze solid, providing lovely little bursts of flavor.05
-
The Patient Wait – Freeze. Very carefully, transfer the baking sheet to your freezer. It needs to sit on a flat, level surface. Let it freeze, completely undisturbed, for at least 4 hours, but ideally overnight. You'll know it's ready when the top is firm to the touch and the bark doesn't give when you press it.06
-
Break and Enjoy. Take the baking sheet out of the freezer. Lift the parchment paper or silicone mat to remove the entire frozen sheet. Now, simply use your hands to break it into irregular, rustic pieces. You can also use a knife to score and break it for more uniform pieces, but I love the free-form look.07


