Why You’ll Love This Festive Trail Mix Clusters
- Effortless Elegance. These clusters look like you spent hours in the kitchen, but the process is incredibly straightforward—no special skills required, just a bit of stirring and patience while they set.
- Endlessly Customizable. The beauty of this recipe is its flexibility. Got extra pecans? Toss them in. Prefer cranberries over cherries? Go for it. It’s a fantastic way to use up pantry bits and create your perfect blend.
- The Perfect Make-Ahead Treat. They store beautifully in an airtight container for over a week, making them the ultimate stress-free holiday snack or edible gift. You can whip up a big batch long before guests arrive.
- A Textural Dream. You get this incredible combination in every bite—crunchy, chewy, and a little bit sticky, with the warm spice from the cinnamon and the rich sweetness from the honey and chocolate. It’s a real party for your palate.
Ingredients & Tools
- 2 cups mixed nuts (like almonds, pecans, and cashews)
- 1/2 cup pumpkin seeds
- 1/2 cup dried cranberries
- 1/2 cup mini pretzel twists, lightly broken
- 1/3 cup honey
- 2 tablespoons coconut oil
- 1 teaspoon ground cinnamon
- 1/4 teaspoon sea salt
- 1/2 cup white chocolate chips
- 1/4 cup festive sprinkles (optional, for topping)
Tools: A medium saucepan, a baking sheet, parchment paper, a large mixing bowl, and a small spoon or cookie scoop.
The quality of your honey really shines through here, so if you have a favorite local variety, now’s the time to use it. And don’t skip the salt—it balances all the sweetness and makes the flavors pop.
Nutrition (per serving)
- Calories: 180 kcal
- Protein: 4 g
- Fat: 11 g
- Carbohydrates: 18 g
- Fiber: 2 g
Serves: 12 | Prep Time: 10 minutes | Cook Time: 5 minutes | Setting Time: 45 minutes | Total Time: 1 hour
Before You Start: Tips & Ingredient Notes
- Nut Choices Matter. Using a mix of raw or lightly toasted nuts gives the best texture. If you only have salted nuts, just reduce or omit the added sea salt in the recipe to avoid over-salting.
- The Sticky Situation. A little parchment paper goes a long way. Seriously, don’t try to skip it—these clusters will stick to a bare baking sheet, and you’ll have a frustrating cleanup job. Lining the sheet is non-negotiable for easy removal.
- Honey Temperature is Key. You don’t need a candy thermometer, but you do need to watch the honey mixture carefully. It should be bubbling gently and look thin and liquid enough to coat everything easily. If it gets too hot and dark, it can become bitter and too hard when it sets.
- Customize Your Mix-ins. This is your chance to get creative! Swap the cranberries for chopped dried apricots or cherries. Use dark or milk chocolate chips instead of white. Add a pinch of nutmeg or ginger along with the cinnamon. Make it your own!
How to Make Festive Trail Mix Clusters
Step 1: First, get your workstation ready. Line a large baking sheet with parchment paper—this is your insurance policy for perfect, non-stick clusters. Then, in your large mixing bowl, combine all your dry ingredients: the mixed nuts, pumpkin seeds, dried cranberries, and the broken pretzel pieces. Give it a good toss with a spoon or your hands so everything is evenly distributed. You’ll notice all the different colors and textures mingling together, which is part of the fun.
Step 2: Now, for the magical glue. In your medium saucepan, combine the honey, coconut oil, cinnamon, and sea salt. Place it over medium heat. Stir continuously with a spatula or wooden spoon until the coconut oil has completely melted and the mixture comes together into a smooth, fragrant liquid. You’ll see tiny bubbles start to form around the edges—this is what you want. Let it bubble gently for about 60-90 seconds, just enough to thicken slightly. The aroma of warm honey and cinnamon will fill your kitchen… it’s honestly the best part.
Step 3: Carefully pour the hot honey mixture over the dry ingredients in your bowl. Work quickly but carefully—the mixture is hot! Use a sturdy spatula to fold and stir everything together. You want to make sure every single nut, seed, and pretzel piece is thoroughly coated in that glossy, sticky syrup. It might feel a little challenging at first, but keep folding until there are no dry spots left.
Step 4: Time to form the clusters. Let the mixture sit for just a minute or two so it’s cool enough to handle. Then, using a small spoon or a cookie scoop, drop small mounds of the mixture onto your prepared baking sheet. Don’t press them down too firmly—you want them to look rustic and craggy. A little goes a long way here; aim for clusters that are about 1.5 to 2 inches in diameter. If they’re too big, they might not hold together as well.
Step 5: Now, for the final flourish. While the clusters are still warm and sticky, sprinkle the white chocolate chips and festive sprinkles (if using) over the top, gently pressing them in so they adhere. The residual heat from the clusters will slightly melt the chocolate chips, helping them stick beautifully. This step adds those lovely pops of color and extra sweetness.
Step 6: The hardest part: waiting. Let the clusters cool completely at room temperature until they are firm and solid. This usually takes about 45 minutes to an hour, depending on the temperature of your kitchen. You can speed this up by popping the tray into the refrigerator for 15-20 minutes. Once they’re completely set, they’re ready to be devoured or stored away!
Serving Suggestions
Complementary Dishes
- A Simple Cheese Board — The salty, creamy elements of a good cheese and cracker spread provide a lovely contrast to the sweet, crunchy clusters.
- Spiced Apple Cider — A warm mug of cider echoes the cinnamon notes in the clusters and makes for the coziest combination imaginable.
- A Bowl of Citrus Salad — The bright, acidic freshness of an orange and grapefruit salad cuts through the richness and cleanses the palate beautifully.
Drinks
- Hot Chocolate with a Cinnamon Stick — It’s a classic for a reason. The rich chocolate drink is a perfect partner for the nutty, honeyed clusters.
- Earl Grey Tea — The bergamot in the tea provides a subtle, floral counterpoint that makes each bite of the cluster feel even more sophisticated.
- Sparkling Water with Lemon — For a non-alcoholic option, the crisp bubbles and citrus zing are incredibly refreshing alongside the sweet snack.
Something Sweet
- Peppermint Bark — The cool minty flavor is a fantastic festive pairing that doesn’t compete with the warm spices in the clusters.
- Soft Gingerbread Cookies — Double down on the cozy spice theme. The soft, chewy cookie is a wonderful textural contrast to the crunchy clusters.
- Vanilla Bean Ice Cream — Crumble a cluster or two over a scoop for an instant, decadent sundae with amazing crunch.
Top Mistakes to Avoid
- Mistake: Cooking the honey syrup for too long. If you let it boil vigorously or for more than a couple of minutes, the sugar in the honey can caramelize too much. This leads to clusters that are overly hard, potentially bitter, and difficult to bite into. A gentle simmer is all you need.
- Mistake: Skipping the parchment paper. I’ve learned this the hard way. The honey acts like super glue on a bare baking sheet. You’ll spend more time chiseling than eating. Parchment paper is a non-negotiable for easy, clean removal.
- Mistake: Making the clusters too large. It’s tempting to make big, impressive clusters, but if they’re too hefty, they’re more likely to fall apart when you pick them up. Keeping them to a modest, bite-sized portion ensures they hold their shape perfectly.
- Mistake: Adding the chocolate chips to the hot mixture in the bowl. If you mix the chocolate chips in with the hot honey syrup, they’ll just melt into a messy, homogenous blob. Sprinkling them on top at the end preserves their shape and gives you those delightful little pockets of chocolate.
Expert Tips
- Tip: Toast your nuts first for a deeper flavor. Spread your raw nuts on a baking sheet and toast them in a 350°F (175°C) oven for 8-10 minutes until fragrant. Let them cool completely before using. This simple step adds a whole new layer of nutty, toasty complexity to your clusters.
- Tip: Use a cookie scoop for uniform clusters. A small (1.5 tablespoon) spring-loaded cookie scoop isn’t just for cookies. It’s the perfect tool for creating evenly-sized clusters quickly and with minimal mess. Your batches will look more professional and they’ll set at the same rate.
- Tip: Add a pinch of flaky salt on top. After you’ve added your chocolate chips and sprinkles, finish the clusters with a tiny sprinkle of flaky sea salt. It enhances every single flavor and provides a wonderful salty crunch against the sweet honey.
- Tip: For gift-giving, create a “cluster bar”. Package the clusters in clear cellophane bags tied with a ribbon, or layer them in a mason jar separated by parchment paper. They make a beautiful, heartfelt, and delicious homemade gift that everyone appreciates.
FAQs
Can I make these clusters vegan?
Absolutely! The only ingredient you need to swap is the honey. Use pure maple syrup or agave nectar in the same quantity. Just be aware that maple syrup can have a slightly thinner consistency, so you might need to simmer it for an extra 30 seconds to help it thicken up enough to bind everything together. Also, double-check that your chocolate chips are vegan-friendly.
How should I store them, and how long do they last?
The best way to store them is in an airtight container at room temperature. Layer them between sheets of parchment paper so they don’t stick together. They’ll stay perfectly fresh and crunchy for up to two weeks—if they last that long! Avoid the refrigerator for long-term storage, as the humidity can make them sticky.
My clusters didn’t harden. What went wrong?
This usually happens if the honey syrup wasn’t heated enough. It needs to reach a temperature where the water content reduces slightly, allowing it to harden as it cools. If yours are still sticky after a few hours, you can try placing the entire baking sheet in the oven on the absolute lowest setting (like “warm”) for 10-15 minutes with the door slightly ajar, then let them cool again. This can sometimes help drive off that extra moisture.
Can I use different mix-ins?
Please do! This recipe is a fantastic canvas. Think shredded coconut, other seeds like sunflower seeds, different types of cereal (like crispy rice or Chex), or even chopped-up candy canes for a real holiday twist. The rule of thumb is to keep the total volume of dry mix-ins roughly the same so the syrup can properly coat everything.
Why did my white chocolate chips turn yellow/brown?
This is a classic issue with white chocolate—it’s very heat-sensitive. If the clusters were still extremely hot when you added the chips, the cocoa butter in the chocolate can “seize” or discolor. The trick is to let the mixture cool just for a minute or two in the bowl before forming the clusters, so they are warm but not scalding hot when you add the chips on top.
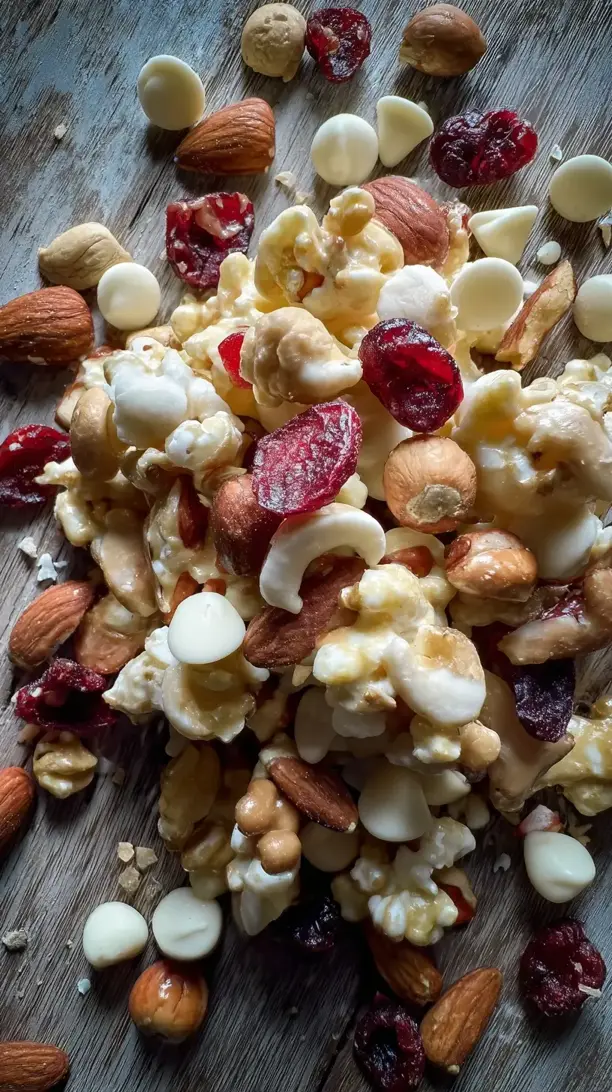
Festive Trail Mix Clusters
Make these easy Festive Trail Mix Clusters for a perfect holiday snack or gift. Ready in minutes with simple ingredients. Get the recipe now!
Ingredients
For the dry ingredients:
-
2 cups mixed nuts (like almonds, pecans, and cashews)
-
1/2 cup pumpkin seeds
-
1/2 cup dried cranberries
-
1/2 cup mini pretzel twists (lightly broken)
For the honey glaze:
-
1/3 cup honey
-
2 tablespoons coconut oil
-
1 teaspoon ground cinnamon
-
1/4 teaspoon sea salt
For topping:
-
1/2 cup white chocolate chips
-
1/4 cup festive sprinkles (optional, for topping)
Instructions
-
First, get your workstation ready. Line a large baking sheet with parchment paper—this is your insurance policy for perfect, non-stick clusters. Then, in your large mixing bowl, combine all your dry ingredients: the mixed nuts, pumpkin seeds, dried cranberries, and the broken pretzel pieces. Give it a good toss with a spoon or your hands so everything is evenly distributed. You’ll notice all the different colors and textures mingling together, which is part of the fun.01
-
Now, for the magical glue. In your medium saucepan, combine the honey, coconut oil, cinnamon, and sea salt. Place it over medium heat. Stir continuously with a spatula or wooden spoon until the coconut oil has completely melted and the mixture comes together into a smooth, fragrant liquid. You’ll see tiny bubbles start to form around the edges—this is what you want. Let it bubble gently for about 60-90 seconds, just enough to thicken slightly. The aroma of warm honey and cinnamon will fill your kitchen… it’s honestly the best part.02
-
Carefully pour the hot honey mixture over the dry ingredients in your bowl. Work quickly but carefully—the mixture is hot! Use a sturdy spatula to fold and stir everything together. You want to make sure every single nut, seed, and pretzel piece is thoroughly coated in that glossy, sticky syrup. It might feel a little challenging at first, but keep folding until there are no dry spots left.03
-
Time to form the clusters. Let the mixture sit for just a minute or two so it’s cool enough to handle. Then, using a small spoon or a cookie scoop, drop small mounds of the mixture onto your prepared baking sheet. Don’t press them down too firmly—you want them to look rustic and craggy. A little goes a long way here; aim for clusters that are about 1.5 to 2 inches in diameter. If they’re too big, they might not hold together as well.04
-
Now, for the final flourish. While the clusters are still warm and sticky, sprinkle the white chocolate chips and festive sprinkles (if using) over the top, gently pressing them in so they adhere. The residual heat from the clusters will slightly melt the chocolate chips, helping them stick beautifully. This step adds those lovely pops of color and extra sweetness.05
-
The hardest part: waiting. Let the clusters cool completely at room temperature until they are firm and solid. This usually takes about 45 minutes to an hour, depending on the temperature of your kitchen. You can speed this up by popping the tray into the refrigerator for 15-20 minutes. Once they’re completely set, they’re ready to be devoured or stored away!06