Why You’ll Love This Date-Sweetened Fudge Brownie Bites
- Naturally sweet with deep flavor. Dates bring more than just sweetness—they add a lovely caramel-like, almost butterscotch note that makes these brownies taste incredibly complex and rich.
- Incredibly fudgy texture. We’re not aiming for cakey here. The combination of dates, almond flour, and just the right amount of fat creates a dense, melt-in-your-mouth bite that’s deeply satisfying.
- Surprisingly easy to make. Honestly, the hardest part is pitting the dates. After that, it’s basically a dump-and-blend situation in your food processor, making cleanup a total breeze.
- Perfect for sneaky snacking. Their small, bite-sized nature makes them ideal for lunchboxes, afternoon pick-me-ups, or satisfying a late-night chocolate craving without any guilt.
Ingredients & Tools
- 200 g Medjool dates, pitted
- 2 large eggs, at room temperature
- 100 g almond flour
- 50 g cocoa powder (the best quality you have)
- 60 ml melted coconut oil (or unsalted butter)
- 1 tsp vanilla extract
- 1/2 tsp baking soda
- 1/4 tsp fine sea salt
- 75 g dark chocolate chips or chopped dark chocolate (70% or higher)
Tools: An 8×8 inch baking pan, parchment paper, a food processor, and a mixing bowl.
The quality of your dates and cocoa powder really makes a difference here. Go for soft, sticky Medjool dates if you can—they blend into a smoother paste. And a good cocoa powder will give you that intense, dark chocolate flavor we’re after.
Nutrition (per serving)
- Calories: 98 kcal
- Protein: 2 g
- Fat: 6 g
- Carbohydrates: 11 g
- Fiber: 2 g
Serves: 16 | Prep Time: 15 mins | Cook Time: 15 mins | Total Time: 30 mins
Before You Start: Tips & Ingredient Notes
- Are your dates dry? If your dates feel a little hard or dry, simply soak them in hot water for about 10 minutes before using. Just be sure to drain them thoroughly and pat them dry, as extra water can throw off the batter’s consistency.
- Why room temperature eggs? Cold eggs can cause the melted coconut oil to solidify on contact, which can make it harder to get a smooth, homogenous batter. Taking your eggs out about 30 minutes ahead of time makes a real difference.
- Don’t skip the salt. I know it seems like a small amount, but that pinch of salt is crucial for balancing the sweetness of the dates and enhancing the deep chocolate flavor. It keeps the brownies from tasting one-dimensional.
- Toasting your almond flour. This is an optional but fantastic step! Spread your almond flour on a baking sheet and toast it in a 175°C (350°F) oven for 5-7 minutes until fragrant. It adds a wonderful nutty depth to the final brownie.
How to Make Date-Sweetened Fudge Brownie Bites
Step 1: First, get your oven preheating to 175°C (350°F). This is key because these brownies bake quickly and need that instant heat. While it’s warming up, line your 8×8 inch baking pan with parchment paper, leaving some overhang on two sides. This creates little “handles” that will make lifting the entire slab of brownies out so much easier later—trust me on this.
Step 2: Now, for the magic. Place your pitted dates into the bowl of your food processor. Pulse them several times until they break down into a thick, sticky paste. You might need to stop and scrape down the sides once or twice. The goal is to have it as smooth as possible, but a few tiny bits are totally fine—they’ll add little pockets of caramel-like sweetness.
Step 3: To the date paste, add the room-temperature eggs, melted coconut oil, and vanilla extract. Process everything again until the mixture is completely smooth and well-combined. You’ll notice the color lightens slightly and the texture becomes creamy. This is your wet base, and getting it smooth now ensures no stray chunks of date later.
Step 4: Time for the dry ingredients. Add the almond flour, cocoa powder, baking soda, and salt directly into the food processor. Pulse in short bursts, just until the dry ingredients disappear into the wet. Be careful not to overmix here! Over-processing can make the brownies a bit tough. The batter will be thick, almost like a very soft cookie dough.
Step 5: Scrape the thick batter into a separate mixing bowl. This next part is best done by hand. Fold in the dark chocolate chips gently, making sure they’re evenly distributed. The batter is quite stiff, so this takes a little elbow grease, but it prevents over-mixing and keeps those chips intact for melty pockets.
Step 6: Transfer the batter to your prepared pan. Use a spatula or your fingers (a little water on your fingertips helps!) to press the batter into an even layer, all the way into the corners. The surface won’t be perfectly smooth, and that’s okay—it adds to the rustic, homemade charm.
Step 7: Pop the pan into your preheated oven and bake for 12-15 minutes. The trick is to pull them out when the top looks set and is slightly springy to the touch, but a toothpick inserted into the center will still come out with a few moist crumbs attached. They will continue to set as they cool, so this is how we guarantee that fudgy texture.
Step 8: This is the hardest part: let them cool completely in the pan on a wire rack. I know it’s tempting, but cutting into warm brownies will result in a gooey mess. As they cool, they firm up into the perfect fudgy-yet-sliceable consistency. Once cool, use the parchment paper to lift the whole slab out before cutting into 16 neat little squares.
Serving Suggestions
Complementary Dishes
- A scoop of vanilla bean ice cream — The classic pairing is classic for a reason. The cold, creamy vanilla provides a beautiful contrast to the rich, dense, and slightly warm brownie bite.
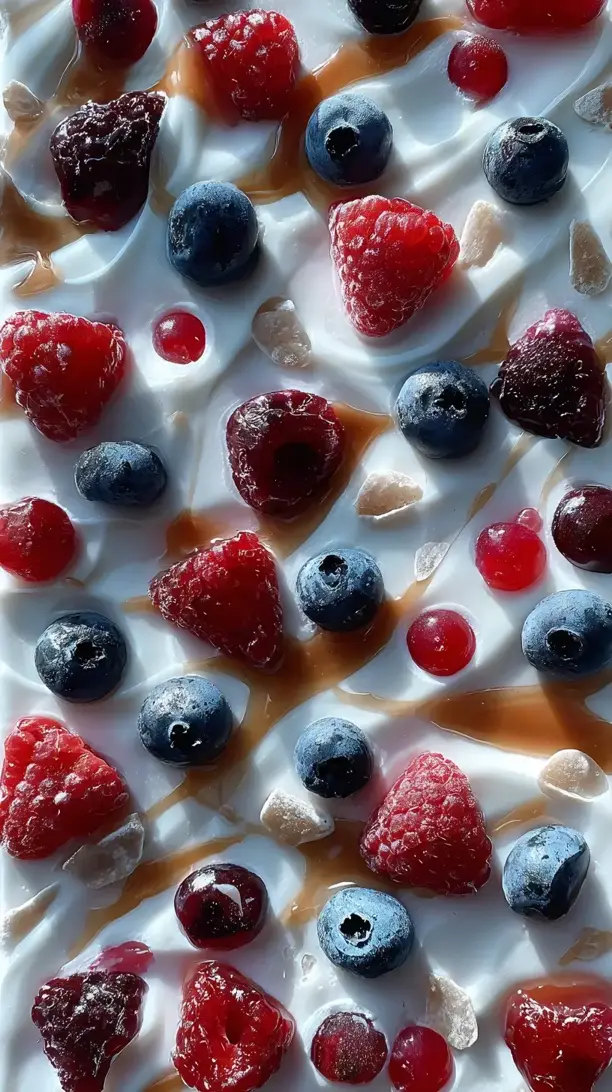
- A small bowl of fresh berries — The bright, tart pop of a raspberry or strawberry cuts through the deep chocolate richness beautifully and makes the whole thing feel a bit more balanced.
- A dollop of coconut whipped cream — For a dairy-free option, this adds a lovely light, fluffy texture and a subtle tropical note that complements the dates wonderfully.
Drinks
- A cold glass of oat milk — Its creamy, slightly sweet flavor is the perfect companion to these brownies, enhancing their natural notes without overpowering them.
- A strong cup of black coffee — The bitterness of a good espresso or French press coffee makes the chocolate flavor in the brownies taste even deeper and more complex.
- A warming chai tea latte — The spices in chai—cinnamon, cardamom, cloves—create a wonderfully cozy and aromatic pairing that feels like a real treat.
Something Sweet
- A small square of dark chocolate — For the true chocoholic, enjoy a brownie bite with a piece of high-cocoa dark chocolate on the side for an intense, layered chocolate experience.
- A few orange segments — The classic combination of chocolate and orange works brilliantly here, with the citrusy freshness lifting the entire flavor profile.
- A drizzle of salted caramel sauce — If you’re feeling indulgent, a little salted caramel amplifies the inherent caramel notes from the dates and adds a delicious salty-sweet kick.
Top Mistakes to Avoid
- Over-baking. This is the number one way to end up with dry, cakey brownies instead of fudgy ones. Remember, they continue to cook from residual heat as they cool, so take them out when they’re just set.
- Using rock-hard dates. If your dates aren’t soft and sticky, they won’t blend into a smooth paste. You’ll end up with chunky bits in your batter and an inconsistent sweetness. Soak them if needed!
- Over-mixing the batter after adding the dry ingredients. Once the almond flour and cocoa are in, you just want to incorporate them. Too much processing can develop the proteins in the almond flour and lead to a tougher texture.
- Cutting them while warm. I’ve messed this up before too, and you end up with a crumbly, messy square instead of a neat, fudgy bite. Patience is truly a virtue here.
Expert Tips
- Tip: For an ultra-gooey center, slightly under-bake them. If the recipe says 15 minutes, check at 13. The center should look a little underdone, which guarantees that amazing fudgy texture once cooled.
- Tip: Add a pinch of espresso powder to the dry ingredients. You won’t taste coffee, but it will deepen and intensify the chocolate flavor, making it taste even richer and more complex.
- Tip: Swap half the chocolate chips for chopped walnuts or pecans. The nutty crunch provides a lovely textural contrast to the soft, fudgy brownie and complements the almond flour beautifully.
- Tip: For a pretty finish, sprinkle a little flaky sea salt over the top of the brownies as soon as they come out of the oven. The heat will help it stick, and that salty crunch with each sweet bite is divine.
FAQs
Can I make these without a food processor?
You can, but it’s a bit more work. You’ll need to make sure your dates are very soft, then mash them thoroughly with a fork until you have a paste. Whisk the wet ingredients together in one bowl, mix the dry in another, then combine. The texture might be a little less uniform, but they’ll still taste great!
How should I store these brownie bites?
Keep them in an airtight container at room temperature for up to 3 days. For longer storage, they freeze beautifully. Just place them in a single layer on a baking sheet to freeze solid, then transfer to a freezer bag. They’ll keep for up to 3 months. You can eat them straight from the freezer—they have a lovely chewy, cold fudge texture.
Can I use a different type of flour?
Almond flour works best for the fudgy texture and moisture. You could try oat flour, but the result will be slightly more cakey and dense. I wouldn’t recommend coconut flour as it’s highly absorbent and would completely change the ratio of wet to dry ingredients, requiring a major recipe overhaul.
My batter is really thick—is that normal?
Yes, absolutely! This is not a pourable brownie batter; it’s a thick, scoopable dough that you press into the pan. If it’s so thick your food processor is struggling, you can add a tablespoon of water or plant-based milk to help it along, but be sparing. The thickness is what gives them their dense, fudgy quality.
Can I make these vegan?
You can try! A common flax “egg” substitution (1 tbsp ground flaxseed mixed with 3 tbsp water per egg) often works. The texture will be a bit denser and more crumbly, and they might not rise quite as much, but they should still be delicious. Let me know how it goes if you try it!

Date Sweetened Fudge Brownie Bites
Craving fudgy brownies without refined sugar? These Date-Sweetened Fudge Brownie Bites are naturally sweet, incredibly easy, and so satisfying. Get the recipe now!
Ingredients
For the brownie batter:
-
200 g Medjool dates (pitted)
-
2 large eggs (at room temperature)
-
100 g almond flour
-
50 g cocoa powder
-
60 ml melted coconut oil
-
1 tsp vanilla extract
-
0.5 tsp baking soda
-
0.25 tsp fine sea salt
-
75 g dark chocolate chips or chopped dark chocolate
Instructions
-
First, get your oven preheating to 175°C (350°F). While it's warming up, line your 8x8 inch baking pan with parchment paper, leaving some overhang on two sides.01
-
Place your pitted dates into the bowl of your food processor. Pulse them several times until they break down into a thick, sticky paste.02
-
To the date paste, add the room-temperature eggs, melted coconut oil, and vanilla extract. Process everything again until the mixture is completely smooth and well-combined.03
-
Add the almond flour, cocoa powder, baking soda, and salt directly into the food processor. Pulse in short bursts, just until the dry ingredients disappear into the wet.04
-
Scrape the thick batter into a separate mixing bowl. Fold in the dark chocolate chips gently, making sure they're evenly distributed.05
-
Transfer the batter to your prepared pan. Use a spatula or your fingers to press the batter into an even layer, all the way into the corners.06
-
Pop the pan into your preheated oven and bake for 12-15 minutes. Pull them out when the top looks set and is slightly springy to the touch, but a toothpick inserted into the center will still come out with a few moist crumbs attached.07
-
Let them cool completely in the pan on a wire rack. Once cool, use the parchment paper to lift the whole slab out before cutting into 16 neat little squares.08