Why You’ll Love This Cranberry Orange Oatmeal Crumble Bars
- Perfect texture harmony. You get a firm, buttery base, a soft and jammy fruit center, and a crunchy, oat-filled crumble topping all in one bite. It’s a symphony of textures that’s just so satisfying to eat.
- Brilliantly simple to make. The crust and topping are the same mixture, so you don’t have to make two separate components. You’ll just press about two-thirds of it into the pan for the base and sprinkle the rest on top—it honestly couldn’t be easier.
- The vibrant, tangy-sweet filling. The tartness of the cranberries is a beautiful counterpoint to the sweet, citrusy orange. It’s a flavor combination that wakes up your taste buds and feels incredibly festive, yet is welcome any time of year.
- They’re incredibly versatile. These bars are equally at home at a fancy brunch, packed in a lunchbox, or served as a simple dessert with a scoop of vanilla ice cream. They’re a real crowd-pleaser that everyone seems to adore.
Ingredients & Tools
- For the Crumble Base & Topping:
- 200 g all-purpose flour
- 160 g old-fashioned rolled oats
- 150 g light brown sugar, packed
- 1/2 tsp baking soda
- 1/2 tsp fine sea salt
- 170 g unsalted butter, melted and slightly cooled
- 1 tsp vanilla extract
- For the Cranberry Orange Filling:
- 340 g fresh or frozen cranberries (no need to thaw if frozen)
- 120 g granulated sugar
- Zest of 1 large orange
- 60 ml fresh orange juice (from about 1 orange)
- 1 tbsp cornstarch
Tools: 8×8-inch (20×20 cm) square baking pan, parchment paper, medium saucepan, two mixing bowls, zester, whisk
Using old-fashioned rolled oats is key here for that classic chewy-crunchy texture. And don’t skip the cornstarch in the filling—it’s what transforms the juicy cranberries into a lovely, sliceable jam that holds its shape when you cut the bars.
Nutrition (per serving)
- Calories: 285 kcal
- Protein: 3 g
- Fat: 11 g
- Carbohydrates: 45 g
- Fiber: 2 g
Serves: 9 | Prep Time: 20 minutes | Cook Time: 40 minutes | Total Time: 1 hour
Before You Start: Tips & Ingredient Notes
- Use cold ingredients for the crumble? Actually, no! The melted butter is the secret here. It helps the oat and flour mixture clump together perfectly, making it easy to press into the pan for the base and creating those lovely crumbly bits for the topping.
- Can I use dried cranberries instead? I really don’t recommend it for this recipe. The fresh or frozen cranberries break down and create their own saucy, tart filling, while dried cranberries are too sweet and chewy and won’t provide the same juicy texture.
- Don’t skip the orange zest. The zest is where the real, potent orange flavor lives. That bright, citrusy oil is what will make your kitchen smell amazing and give the bars that unmistakable orange essence.
- Why an 8×8-inch pan? This size gives you the perfect bar thickness—thick enough to have distinct layers but not so tall that they fall apart. If you use a 9×9-inch pan, the bars will be thinner and bake faster, so keep a close eye on them.
How to Make Cranberry Orange Oatmeal Crumble Bars
Step 1: Make the Cranberry-Orange Filling. In a medium saucepan, combine the cranberries, granulated sugar, orange zest, orange juice, and cornstarch. Give it a good stir to coat the cranberries. Place the pan over medium heat and cook, stirring frequently, for about 8-10 minutes. You’ll notice the cranberries will start to pop and release their juices, and the mixture will slowly thicken into a glossy, jam-like consistency. Once it’s thick enough that when you drag your spatula across the bottom of the pan, the path stays clear for a second or two, it’s done. Remove it from the heat and let it cool slightly while you prepare the crumble. This cooling time is important so it doesn’t melt the buttery base when you spread it on.
Step 2: Prepare the Oat Crumble Mixture. In a large mixing bowl, whisk together the flour, rolled oats, brown sugar, baking soda, and salt. Make sure these dry ingredients are well-combined. In a separate, smaller bowl or measuring cup, stir the vanilla extract into the melted butter. Pour the butter mixture over the dry ingredients. Use a fork or your hands to mix everything until it’s fully moistened and clumps form. The mixture will look a bit like wet sand that holds together when you pinch it. This is your magic mixture for both the base and the topping.
Step 3: Press in the Base Layer. Preheat your oven to 175°C (350°F). Line your 8×8-inch baking pan with parchment paper, leaving some overhang on two opposite sides—this will act as a sling to lift the finished bars out easily. Take about two-thirds of the crumble mixture and transfer it to the prepared pan. Press it down firmly and evenly into one compact layer. I like to use the bottom of a flat measuring cup to really press it down and get it smooth; a firm base is crucial for bars that hold their shape.
Step 4: Add the Filling and Topping. Spread the slightly cooled cranberry filling evenly over the pressed base, leaving a small border around the edges. Use an offset spatula or the back of a spoon to get it into an even layer. Now, take the remaining one-third of the crumble mixture and sprinkle it evenly over the cranberry layer. Don’t press it down! You want those clumps to stay loose and crumbly so they bake up nice and crisp.
Step 5: Bake to Golden Perfection. Place the pan in the preheated oven and bake for 35-40 minutes, or until the topping is a lovely golden brown and the edges of the filling are bubbling gently. The aroma in your kitchen will be absolutely divine. Rotate the pan halfway through baking for even browning if your oven has hot spots.
Step 6: Cool Completely Before Cutting. This is the hardest but most important step! Let the pan cool completely on a wire rack. I know it’s tempting to cut into them while they’re still warm, but if you do, the filling will be too runny and the bars won’t hold their shape. For the cleanest cuts, I sometimes even pop the fully cooled pan into the refrigerator for an hour to really firm everything up.
Serving Suggestions
Complementary Dishes
- A simple green salad with a sharp vinaigrette — The bitterness of the greens and the acidity in the dressing provide a fantastic savory counterpoint to the sweet and tart bars, making them feel like part of a complete meal.
- A sharp, creamy cheese plate — A slice of aged cheddar or a creamy goat cheese served alongside the bar is a classic and wonderful pairing. The saltiness and fat of the cheese balance the fruitiness beautifully.
Drinks
- Hot black tea or coffee — The slight bitterness of a strong brew is the perfect companion to the sweet, fruity bars, cutting through the richness and cleansing the palate.
- A glass of cold milk — It’s a nostalgic and utterly satisfying pairing. The creaminess of the milk is just so comforting with the oat and fruit flavors.
Something Sweet
- A scoop of high-quality vanilla bean ice cream — Serving a warm bar (gently reheated) with a scoop of cold, creamy ice cream is a next-level dessert experience. The vanilla enhances the orange and the cold melts into the warm crumble.
- A dollop of lightly sweetened whipped cream — For a lighter touch, a cloud of whipped cream adds a lovely richness without being too heavy, letting the cranberry and orange flavors remain the stars.
Top Mistakes to Avoid
- Mistake: Not letting the filling cool before assembling. If you spread the piping hot filling onto the buttery base, it will start to melt and cook the base, leading to a greasy, soggy bottom layer instead of a firm foundation.
- Mistake: Pressing the topping down. The topping is meant to be crumbly! If you press it into the filling, it will bake into a solid layer instead of the delightful, crunchy crumble you’re after. Just sprinkle it loosely.
- Mistake: Cutting the bars while they are warm. I’ve messed this up before too, and you end up with a delicious but messy fruit soup. The filling needs time to cool and set completely so it can hold its shape when you slice it.
- Mistake: Not pressing the base firmly enough. A loosely packed base will be crumbly and fall apart. Really put some muscle into it—a solid, compact base is what gives the bar its structural integrity.
Expert Tips
- Tip: Grate your cold butter for a shortcut. If you forget to melt your butter, you can make a classic cold-butter crumble. Just use cold, cubed butter and grate it on the large holes of a box grater directly into the dry ingredients. Then, use your fingers to rub it in until clumps form.
- Tip: Add a pinch of spice. For a warm, cozy undertone, whisk a 1/4 teaspoon of cinnamon or a pinch of nutmeg into the dry crumble ingredients. It complements the orange and cranberry flavors beautifully, especially in the autumn and winter months.
- Tip: Use a plastic knife for cutting. For the absolute cleanest cuts with no crumbly mess, use a plastic knife. It sounds strange, but it glides through the sticky filling and crumbly topping without dragging or tearing.
- Tip: Toast your oats for deeper flavor. Spread the rolled oats on a baking sheet and toast them in a 350°F oven for 5-7 minutes before using. Let them cool completely. This brings out a wonderful nutty flavor that elevates the entire bar.
FAQs
Can I use frozen cranberries?
Absolutely, and you don’t even need to thaw them! Frozen cranberries work perfectly in the filling. Just add them straight from the freezer into the saucepan. You might need to cook the filling for a minute or two longer since you’re starting from a colder temperature, but the result will be just as delicious and jammy.
How should I store these bars?
Once completely cooled, store the bars in an airtight container at room temperature for up to 3 days. For longer storage, you can keep them in the fridge for about a week. The chilled bars have a lovely firm texture. You can also freeze them for up to 3 months; just wrap individual bars tightly in plastic wrap and place them in a freezer bag.
Can I make these gluten-free?
Yes, you can! Simply use a 1-to-1 gluten-free all-purpose flour blend in place of the regular flour. Make sure your oats are certified gluten-free as well, as oats are often processed in facilities that also handle wheat. The texture might be slightly more delicate, but they will still be wonderfully tasty.
My filling is too runny. What happened?
This usually means it didn’t cook long enough for the cornstarch to fully activate and thicken the juices. Cornstarch needs to come to a simmer and cook for a minute or two to reach its full thickening power. If this happens, you can always pour the runny filling back into the saucepan and cook it for a few more minutes until it thickens up properly.
Can I use a different fruit?
The crumble base and topping are a fantastic canvas for other fruits! You can use the same quantity of other berry jams or fruit preserves. For fresh fruit, like blueberries or raspberries, you’ll want to adjust the sugar and cornstarch slightly depending on their natural sweetness and juiciness. The cranberry-orange combo is a classic, but feel free to experiment once you’ve mastered the original.

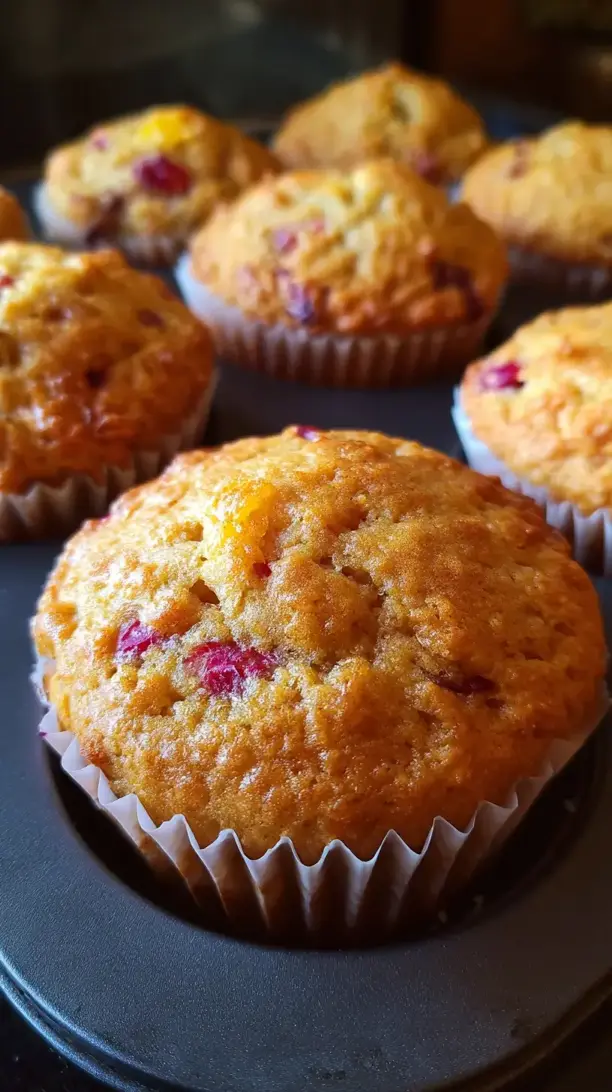
Cranberry Orange Oatmeal Crumble Bars
Make these easy Cranberry Orange Oatmeal Crumble Bars with a buttery oat crust and vibrant fruit filling. Perfect for dessert or a snack. Get the recipe now!
Ingredients
For the Crumble Base & Topping:
-
200 g all-purpose flour
-
160 g old-fashioned rolled oats
-
150 g light brown sugar (packed)
-
1/2 tsp baking soda
-
1/2 tsp fine sea salt
-
170 g unsalted butter (melted and slightly cooled)
-
1 tsp vanilla extract
For the Cranberry Orange Filling:
-
340 g fresh or frozen cranberries (no need to thaw if frozen)
-
120 g granulated sugar
-
Zest of 1 large orange
-
60 ml fresh orange juice (from about 1 orange)
-
1 tbsp cornstarch
Instructions
-
Make the Cranberry-Orange Filling. In a medium saucepan, combine the cranberries, granulated sugar, orange zest, orange juice, and cornstarch. Give it a good stir to coat the cranberries. Place the pan over medium heat and cook, stirring frequently, for about 8-10 minutes. You'll notice the cranberries will start to pop and release their juices, and the mixture will slowly thicken into a glossy, jam-like consistency. Once it's thick enough that when you drag your spatula across the bottom of the pan, the path stays clear for a second or two, it's done. Remove it from the heat and let it cool slightly while you prepare the crumble. This cooling time is important so it doesn't melt the buttery base when you spread it on.01
-
Prepare the Oat Crumble Mixture. In a large mixing bowl, whisk together the flour, rolled oats, brown sugar, baking soda, and salt. Make sure these dry ingredients are well-combined. In a separate, smaller bowl or measuring cup, stir the vanilla extract into the melted butter. Pour the butter mixture over the dry ingredients. Use a fork or your hands to mix everything until it's fully moistened and clumps form. The mixture will look a bit like wet sand that holds together when you pinch it. This is your magic mixture for both the base and the topping.02
-
Press in the Base Layer. Preheat your oven to 175°C (350°F). Line your 8x8-inch baking pan with parchment paper, leaving some overhang on two opposite sides—this will act as a sling to lift the finished bars out easily. Take about two-thirds of the crumble mixture and transfer it to the prepared pan. Press it down firmly and evenly into one compact layer. I like to use the bottom of a flat measuring cup to really press it down and get it smooth; a firm base is crucial for bars that hold their shape.03
-
Add the Filling and Topping. Spread the slightly cooled cranberry filling evenly over the pressed base, leaving a small border around the edges. Use an offset spatula or the back of a spoon to get it into an even layer. Now, take the remaining one-third of the crumble mixture and sprinkle it evenly over the cranberry layer. Don't press it down! You want those clumps to stay loose and crumbly so they bake up nice and crisp.04
-
Bake to Golden Perfection. Place the pan in the preheated oven and bake for 35-40 minutes, or until the topping is a lovely golden brown and the edges of the filling are bubbling gently. The aroma in your kitchen will be absolutely divine. Rotate the pan halfway through baking for even browning if your oven has hot spots.05
-
Cool Completely Before Cutting. This is the hardest but most important step! Let the pan cool completely on a wire rack. I know it's tempting to cut into them while they're still warm, but if you do, the filling will be too runny and the bars won't hold their shape. For the cleanest cuts, I sometimes even pop the fully cooled pan into the refrigerator for an hour to really firm everything up.06