
Why You’ll Love This Coconut Flour Chocolate Chip Cookies
- They’re Naturally Gluten-Free. Coconut flour is made from dried, ground coconut meat, so it’s a fantastic base for anyone avoiding gluten. You get all the comfort of a classic cookie without any of the wheat.
- The Texture is Uniquely Wonderful. Don’t expect a carbon copy of a traditional cookie—these are in a league of their own. They’re delightfully soft and almost cake-like in the center, with a slightly crisp edge that provides the perfect contrast.
- They Come Together in a Flash. Honestly, the mixing time is minimal. Since coconut flour doesn’t need to be worried about over-mixing like gluten flours do, you can stir away without fear. It’s a one-bowl wonder that’s ready for the oven in about 10 minutes flat.
- That Coconut Vibe is So Cozy. The subtle, tropical sweetness of the coconut flour pairs so beautifully with dark chocolate. It’s a flavor combination that feels a little bit special and incredibly comforting at the same time.
Ingredients & Tools
- 1/2 cup (56 g) coconut flour, sifted
- 1/4 tsp fine sea salt
- 1/4 tsp baking soda
- 1/2 cup (115 g) unsalted butter, softened (or coconut oil for a dairy-free version)
- 1/2 cup (100 g) coconut sugar or light brown sugar
- 1/4 cup (50 g) granulated sugar
- 2 large eggs, at room temperature
- 1 tsp pure vanilla extract
- 3/4 cup (135 g) dark chocolate chips or chopped chocolate bar
Tools: A medium mixing bowl, a hand mixer or stand mixer, a baking sheet, and parchment paper or a silicone baking mat.
A quick note on the coconut flour—you’ll really want to sift it. It has a tendency to clump, and sifting ensures you get a perfectly smooth batter without any dry pockets. And about those eggs… they’re not just a binder here; they provide essential structure and moisture that the thirsty coconut flour absolutely needs to create the right texture.
Serves: 12 cookies | Prep Time: 10 minutes | Cook Time: 12-14 minutes | Total Time: 25 minutes
Before You Start: Tips & Ingredient Notes
- Why Sift the Coconut Flour? This is non-negotiable, honestly. Coconut flour is very fine but loves to form little lumps. Sifting it with the other dry ingredients guarantees an even distribution and prevents you from having to over-mix the batter later to break up clumps.
- Room Temperature Ingredients are Key. If your butter and eggs are cold, your batter might look a bit curdled or separated when you mix it. Room-temperature ingredients emulsify beautifully, creating a smooth, cohesive dough that bakes up evenly.
- Don’t Skip the Two Sugars. The combination of coconut (or brown) sugar and granulated sugar is a classic for a reason. The brown sugar adds moisture and a deeper, caramel-like flavor, while the white sugar helps create those lovely crisp edges. Using just one type can throw off the texture.
- The Dough Will Be Thick. This isn’t a runny batter! When you first mix it, it might seem a bit dry, but keep stirring. It will come together into a very thick, almost play-dough-like consistency. This is exactly what you want for scoopable cookies.
How to Make Coconut Flour Chocolate Chip Cookies
Step 1: Prep and Combine Dry Ingredients. Start by preheating your oven to 350°F (175°C). This gives it plenty of time to come to the right temperature. Line your baking sheet with parchment paper or a silicone mat—this prevents sticking and makes cleanup a dream. Now, grab your mixing bowl and add the sifted coconut flour, salt, and baking soda. Give these a good whisk together. You’ll notice how light and airy the flour becomes. This little step ensures every bit of your cookie will be perfectly seasoned and leavened.
Step 2: Cream the Butter and Sugars. In a separate, larger bowl (or the bowl of your stand mixer), add the softened butter, coconut sugar, and granulated sugar. Beat them together on medium speed for a good 1-2 minutes. You’re looking for the mixture to become light, pale, and fluffy. This process incorporates air into the butter, which helps the cookies rise. Scrape down the sides of the bowl with a spatula to make sure everything is evenly mixed.
Step 3: Incorporate the Eggs and Vanilla. With the mixer on low speed, add the eggs one at a time, letting each one fully incorporate before adding the next. Then, pour in the vanilla extract. The mixture might look a little slick or even slightly separated at this point—that’s totally normal. Just mix until everything is combined. The vanilla aroma will start to come through, and it’s just… heavenly.
Step 4: Bring the Dough Together. Now, gradually add the dry ingredients to the wet ingredients. I like to do this in two additions, mixing on low speed until just combined after each. The trick is to stop mixing as soon as you no longer see streaks of flour. The dough will be very thick—this is where coconut flour shows its super-absorbent personality! Finally, switch to a sturdy spatula and fold in the chocolate chips. They might need a bit of encouragement to stick into the thick dough.
Step 5: Scoop and Shape. Using a cookie scoop or a tablespoon, portion out the dough. You should get about 12 equal-sized mounds. Because the dough is thick, you can roll them gently between your palms to form smooth balls. Place them on your prepared baking sheet, leaving about 2 inches between each cookie. They won’t spread as much as traditional cookies, but they do need a little room to breathe. For a bakery-style look, press a few extra chocolate chips onto the tops of the dough balls.
Step 6: Bake to Perfection. Slide the baking sheet into the preheated oven and bake for 12 to 14 minutes. You’ll know they’re done when the edges are a deep golden brown and the tops look set and maybe have a few tiny cracks. The centers will still look quite soft—this is crucial! They will continue to cook on the hot baking sheet as they cool. Over-baking is the enemy of a soft cookie here.
Step 7: The All-Important Cool Down. This is the hardest part, I know. But you must let the cookies cool on the baking sheet for at least 10-15 minutes before you try to move them. They are incredibly fragile when they first come out of the oven. As they cool, they firm up beautifully, developing that perfect soft-yet-sturdy texture. After that, transfer them to a wire rack to cool completely… or, you know, dig in immediately with a glass of cold milk.
Serving Suggestions
Complementary Dishes
- A scoop of vanilla bean ice cream — Placing a warm cookie underneath a melting scoop is a classic for a reason. The cool creaminess against the warm, soft cookie is pure bliss.
- A bowl of fresh berries — The bright, tart acidity of raspberries or strawberries cuts through the richness of the chocolate and coconut, making the whole experience feel a bit more balanced.
Drinks
- A tall glass of cold almond milk — The nutty flavor of almond milk is a fantastic companion to the coconut, creating a really harmonious, cozy flavor profile.
- A rich cup of coffee — The deep, roasted notes of a good brew make the dark chocolate in the cookies truly sing. It’s the ultimate afternoon pick-me-up.
Something Sweet
- A simple fruit sorbet — A light mango or passionfruit sorbet served alongside the cookie keeps things refreshing and continues the tropical theme in a delightful way.
- A small square of dark chocolate — For the true chocoholic, enjoying an extra piece of high-cacao chocolate with the cookie intensifies the entire experience.
Top Mistakes to Avoid
- Mistake: Packing the coconut flour into the measuring cup. This is probably the number one error. Coconut flour should be spooned lightly into the measuring cup and leveled off. If you pack it, you’ll end up with way too much flour, resulting in a dry, crumbly cookie.
- Mistake: Using cold eggs straight from the fridge. Cold eggs won’t blend properly with the creamed butter and sugar, which can lead to a broken, greasy-looking batter. Taking the extra five minutes to let them warm up makes a world of difference.
- Mistake: Over-baking because the center looks soft. Remember, these cookies set up as they cool. If you wait for the center to look fully firm in the oven, you’ll end up with a dry, cakey cookie instead of a soft and chewy one. Trust the golden edges!
- Mistake: Skipping the cooling time on the baking sheet. I’ve messed this up before too, and it leads to cookie breakage. They need that time on the hot pan to finish cooking through and become stable enough to handle.
Expert Tips
- Tip: Chill the dough for thicker cookies. If you have a little extra time, pop the scooped dough balls into the fridge for 20-30 minutes before baking. This helps the butter firm up, which minimizes spreading and gives you a slightly thicker, chewier cookie.
- Tip: Add a pinch of flavor boosters. A quarter teaspoon of cinnamon or a pinch of espresso powder can be whisked into the dry ingredients. These won’t overpower the cookie but will add a wonderful depth that complements the chocolate.
- Tip: Weigh your ingredients for precision. Baking with alternative flours is more of a science. Using a kitchen scale for the coconut flour and sugars guarantees perfect results every single time, taking the guesswork out of measuring.
- Tip: Customize your mix-ins. While chocolate chips are classic, feel free to swap in chopped nuts like macadamias or pecans, or even a mix of white and dark chocolate chunks. A little goes a long way in making these your own.
FAQs
Can I make these cookies dairy-free?
Absolutely! The easiest swap is to use refined coconut oil in place of the butter. Make sure the coconut oil is in a softened, solid state (similar to the texture of butter) when you cream it with the sugars. Unrefined coconut oil will give a stronger coconut flavor, which can be lovely, while refined will be more neutral. The results are equally delicious and just as soft.
Why is my dough so dry and crumbly?
This almost always comes down to the coconut flour. Either it was measured too generously (remember, spoon and level!), or your eggs were on the smaller side. Coconut flour brands can also vary slightly in absorbency. If your dough seems too dry to come together, add a teaspoon of milk (dairy or non-dairy) at a time until it forms a cohesive, thick dough that you can roll into a ball.
Can I freeze the cookie dough?
You sure can! This is a great make-ahead trick. Scoop the dough balls onto a parchment-lined plate or baking sheet and freeze them solid. Once frozen, transfer the dough balls to a freezer bag. You can bake them straight from the freezer, just add 1-2 minutes to the baking time. It’s the perfect way to have warm cookies on demand.
My cookies didn’t spread much. Is that normal?
Yes, that’s completely normal for coconut flour cookies. They don’t have the gluten that allows traditional cookies to spread and thin out. They will puff up a bit and the edges will spread slightly, but they will remain quite thick and cake-like. If you prefer a flatter cookie, you can gently press down on the dough balls with the palm of your hand before baking.
How should I store leftover cookies?
Because of their soft texture, it’s best to store them in an airtight container at room temperature. They’ll stay fresh for about 3-4 days. If you want to keep them longer, they freeze beautifully. Place cooled cookies in a single layer in a freezer-safe container, separated by parchment paper. They’ll keep for up to 2 months. Thaw at room temperature or pop them in the microwave for a few seconds to warm them up.
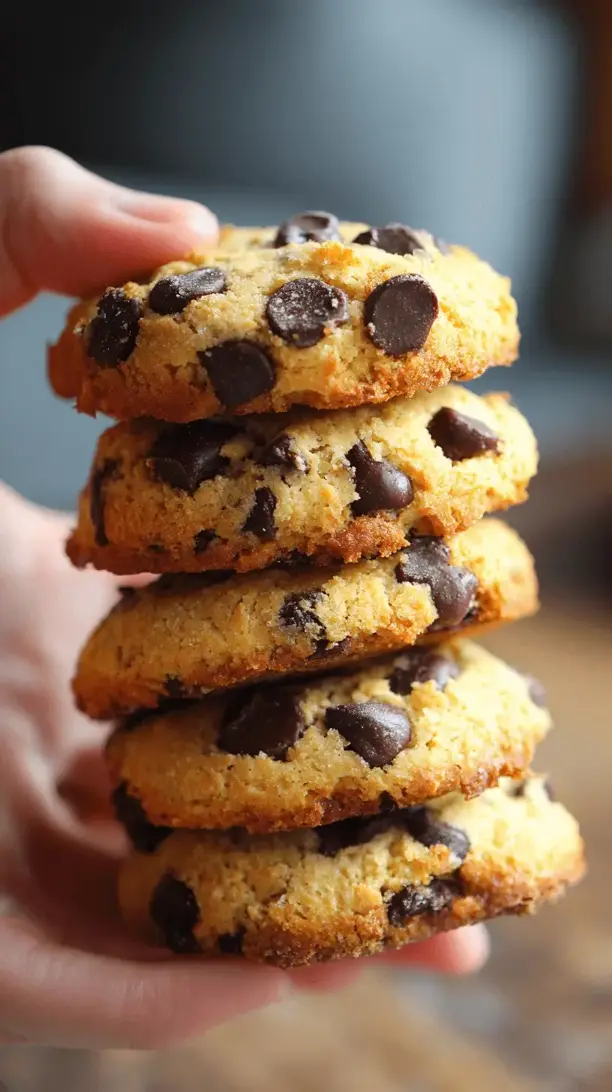
Coconut Flour Chocolate Chip Cookies
Craving gluten-free cookies? My soft & chewy coconut flour chocolate chip cookies are a game-changer! Easy 25-minute recipe with a secret for the perfect texture.
Ingredients
Ingredients
-
1/2 cup coconut flour (sifted (56 g))
-
1/4 tsp fine sea salt
-
1/4 tsp baking soda
-
1/2 cup unsalted butter (softened (or coconut oil for a dairy-free version) (115 g))
-
1/2 cup coconut sugar or light brown sugar ((100 g))
-
1/4 cup granulated sugar ((50 g))
-
2 large eggs (at room temperature)
-
1 tsp pure vanilla extract
-
3/4 cup dark chocolate chips or chopped chocolate bar ((135 g))
Instructions
-
Prep and Combine Dry Ingredients. Start by preheating your oven to 350°F (175°C). This gives it plenty of time to come to the right temperature. Line your baking sheet with parchment paper or a silicone mat—this prevents sticking and makes cleanup a dream. Now, grab your mixing bowl and add the sifted coconut flour, salt, and baking soda. Give these a good whisk together. You'll notice how light and airy the flour becomes. This little step ensures every bit of your cookie will be perfectly seasoned and leavened.01
-
Cream the Butter and Sugars. In a separate, larger bowl (or the bowl of your stand mixer), add the softened butter, coconut sugar, and granulated sugar. Beat them together on medium speed for a good 1-2 minutes. You're looking for the mixture to become light, pale, and fluffy. This process incorporates air into the butter, which helps the cookies rise. Scrape down the sides of the bowl with a spatula to make sure everything is evenly mixed.02
-
Incorporate the Eggs and Vanilla. With the mixer on low speed, add the eggs one at a time, letting each one fully incorporate before adding the next. Then, pour in the vanilla extract. The mixture might look a little slick or even slightly separated at this point—that's totally normal. Just mix until everything is combined. The vanilla aroma will start to come through, and it's just… heavenly.03
-
Bring the Dough Together. Now, gradually add the dry ingredients to the wet ingredients. I like to do this in two additions, mixing on low speed until just combined after each. The trick is to stop mixing as soon as you no longer see streaks of flour. The dough will be very thick—this is where coconut flour shows its super-absorbent personality! Finally, switch to a sturdy spatula and fold in the chocolate chips. They might need a bit of encouragement to stick into the thick dough.04
-
Scoop and Shape. Using a cookie scoop or a tablespoon, portion out the dough. You should get about 12 equal-sized mounds. Because the dough is thick, you can roll them gently between your palms to form smooth balls. Place them on your prepared baking sheet, leaving about 2 inches between each cookie. They won't spread as much as traditional cookies, but they do need a little room to breathe. For a bakery-style look, press a few extra chocolate chips onto the tops of the dough balls.05
-
Bake to Perfection. Slide the baking sheet into the preheated oven and bake for 12 to 14 minutes. You'll know they're done when the edges are a deep golden brown and the tops look set and maybe have a few tiny cracks. The centers will still look quite soft—this is crucial! They will continue to cook on the hot baking sheet as they cool. Over-baking is the enemy of a soft cookie here.06
-
The All-Important Cool Down. This is the hardest part, I know. But you must let the cookies cool on the baking sheet for at least 10-15 minutes before you try to move them. They are incredibly fragile when they first come out of the oven. As they cool, they firm up beautifully, developing that perfect soft-yet-sturdy texture. After that, transfer them to a wire rack to cool completely… or, you know, dig in immediately with a glass of cold milk.07


