
Why You’ll Love This Coconut Chocolate Energy Balls
- Effortless and No-Bake. Seriously, the hardest part is waiting for them to firm up in the fridge. There’s no oven to preheat, no complicated techniques—just a food processor and a little bit of rolling action. It’s the perfect recipe for a hot day or when you just can’t be bothered with a big kitchen project.
- The Perfect Texture Trio. You get the creamy richness from the nuts, the chewy sweetness from the dates, and the delightful crunch from the toasted coconut coating. It’s a symphony of textures in every single bite that keeps things interesting.
- Endlessly Customizable. Think of this recipe as a fantastic base camp. Not a fan of almonds? Use walnuts. Want a caffeine kick? Add a tablespoon of instant espresso powder. Love a bit of spice? A pinch of cayenne works wonders. This is your playground.
- Your Go-To Healthy Snack. These little balls are packed with natural energy from whole foods, making them a far superior choice to a processed candy bar. Toss a couple in your bag, your desk drawer, or your gym kit—they’re ready whenever you are.
Ingredients & Tools
- 1 cup (about 150g) pitted Medjool dates
- 1 cup (about 120g) raw almonds or cashews
- 3 tablespoons unsweetened cocoa powder
- 2 tablespoons pure maple syrup or agave nectar
- 1 tablespoon coconut oil, melted
- 1 teaspoon pure vanilla extract
- A generous pinch of sea salt
- 1/2 cup (about 40g) unsweetened shredded coconut, for rolling
Tools: A food processor (a high-speed blender can work in a pinch, but a processor is easier), a small baking sheet or plate, and an airtight container for storage.
The quality of your dates really makes a difference here—look for soft, sticky Medjool dates for the best fudgy texture. And that pinch of salt? It’s not optional! It brilliantly enhances the chocolate flavor and balances the sweetness.
Serves: Makes 12-14 balls | Prep Time: 15 minutes | Chill Time: 30 minutes | Total Time: 45 minutes
Before You Start: Tips & Ingredient Notes
- Are your dates dry? If your dates seem a little hard or dry, simply soak them in very hot water for about 10 minutes before starting. Just be sure to drain them thoroughly and pat them dry—excess water will prevent the mixture from binding properly.
- The Nut Situation. You can truly use any nut you love here. Almonds give a slightly firmer, grainier texture, while cashews create a creamier, smoother ball. A mix is lovely too! Just make sure they’re raw, not roasted and salted.
- Cocoa Powder Power. Use a good-quality unsweetened cocoa powder for the deepest chocolate flavor. Dutch-processed will give a richer, less acidic taste, but natural cocoa powder works perfectly well. This is where the main chocolate punch comes from.
- Toasting the Coconut (A Game Changer). While you can roll the balls in untoasted coconut, taking the extra five minutes to toast the shredded coconut in a dry pan over medium heat until golden brown adds an incredible depth of nutty flavor and aroma. It’s a little step with a big payoff.
How to Make Coconut Chocolate Energy Balls
Step 1: Prep Your Station. First things first, get your shredded coconut for rolling onto a small plate or baking sheet. If you’re toasting it, now’s the time. Spread it in an even layer in a dry skillet over medium heat. Stir it constantly for 2-4 minutes until it’s fragrant and turns a light golden brown. Transfer it immediately to the plate to stop the cooking. This toasting step honestly makes the whole kitchen smell amazing.
Step 2: Process the Base. Add the nuts to your food processor and pulse until they’re broken down into a coarse meal. You don’t want nut butter, just a fine crumb. Next, add the pitted dates, cocoa powder, maple syrup, melted coconut oil, vanilla extract, and that all-important pinch of sea salt. Now, lock the lid and process. You’ll notice it will go from a crumbly mess to a big clump that chases itself around the bowl. This is what you want! It should hold together when you pinch a bit between your fingers.
Step 3: The Texture Test. This is the most crucial part. Stop the processor and do the pinch test. If the mixture is too dry and won’t hold together, add a teaspoon of water or more maple syrup and process again for another 10-15 seconds. If it’s too sticky (which is rare, but can happen with very fresh dates), add another tablespoon of cocoa powder or some extra ground nuts and pulse to combine.
Step 4: Roll and Coat. Using a small cookie scoop or a tablespoon, portion out the mixture. Roll each portion firmly between your palms to form a smooth ball. Then, roll each ball in the prepared shredded coconut until it’s nicely coated. Press lightly to help the coconut adhere. If the mixture gets too soft or sticky from the heat of your hands, just pop the whole batch in the fridge for 10 minutes to firm up—it makes rolling so much easier.
Step 5: Chill and Set. Place all your beautifully coated energy balls on a plate or baking sheet lined with parchment paper. Pop them into the fridge for at least 30 minutes to firm up. This chilling time allows the coconut oil to solidify, giving them their perfect, firm-yet-chewy texture. And then… they’re ready to enjoy!
Serving Suggestions
Complementary Dishes
- A Fresh Fruit Platter — The bright, juicy acidity of berries, orange segments, or pineapple cuts through the richness of the chocolate and coconut beautifully, creating a refreshing balance.
- A Cup of Greek Yogurt — Crumble one or two balls over a bowl of plain Greek yogurt for a decadent-tasting but protein-packed breakfast or snack. The tangy yogurt is a fantastic contrast.
Drinks
- Cold Brew Coffee or Iced Latte — The bitter notes of coffee are a classic partner for dark chocolate. It’s the ultimate afternoon pick-me-up combo that feels incredibly indulgent.
- A Glass of Almond Milk — For a lighter, cozier pairing, a cold glass of your favorite nut milk complements the nutty flavors in the balls without overpowering them.
Something Sweet
- Fresh Strawberries — There’s a reason chocolate and strawberries are a classic duo. The sweet, slightly tart berries make each bite of the energy ball taste even more luxurious.
- A Small Square of Dark Chocolate — For the true chocoholic, enjoy a ball alongside a piece of high-cocoa dark chocolate for a double-hit of deep, satisfying cocoa flavor.
Top Mistakes to Avoid
- Mistake: Using old, dry dates. This is the number one reason a batch might not bind. Dry dates won’t provide enough moisture to hold the mixture together, leaving you with a crumbly mess instead of pliable dough. Always soak hard dates first!
- Mistake: Over-processing the nuts. If you blend the nuts for too long before adding the other ingredients, you’ll start making nut butter. This will release too much oil and result in a greasy, overly soft mixture that’s hard to roll.
- Mistake: Skipping the chill time. I know, the wait is tough! But these balls need time to set. Eating them right away will be a sticky experience. The fridge time is non-negotiable for the perfect texture.
- Mistake: Not tasting the mixture. Before you roll all the balls, taste a tiny bit of the mixture. This is your chance to adjust the seasoning! Does it need a touch more salt? A bit more maple syrup? Now’s the time to fix it.
Expert Tips
- Tip: For a super-smooth texture, use nut flour. If you or someone you’re cooking for dislikes any graininess, you can skip the processing step and use store-bought almond or cashew flour instead. This creates an incredibly velvety, truffle-like consistency.
- Tip: Add a hidden surprise. Press a single roasted coffee bean, a whole almond, or a dried cherry into the center of each ball as you roll them for a fun, flavorful surprise in the middle.
- Tip: Get creative with coatings. Don’t limit yourself to just coconut! Try rolling them in crushed freeze-dried raspberries, finely chopped pistachios, a dusting of extra cocoa powder, or even some cacao nibs for extra crunch.
- Tip: Double the batch and freeze. These balls freeze exceptionally well. Layer them between parchment paper in an airtight container and freeze for up to 3 months. They thaw in minutes, so you always have a healthy snack on hand.
FAQs
How long do these energy balls last?
Stored in an airtight container in the refrigerator, they will keep beautifully for up to two weeks. The coconut oil helps preserve them, and the cold fridge keeps them firm. You can also freeze them for up to 3 months—just let them thaw for 10-15 minutes before eating.
Can I make these without a food processor?
It’s a challenge, but not impossible! You would need to very finely chop the nuts and dates by hand, which takes some elbow grease. Then, you’d have to mix everything together in a bowl, really kneading it with your hands to incorporate the ingredients fully. A food processor is highly recommended for the right texture.
My mixture is too sticky! What did I do wrong?
This usually happens if your dates were exceptionally fresh and moist. Don’t worry! Just add a bit more of your dry ingredients to balance it out. Add another tablespoon of cocoa powder or a few more tablespoons of ground nuts and pulse to combine. Do this a little at a time until the mixture is no longer sticky.
Are these vegan and gluten-free?
Yes, as written, this recipe is naturally both vegan and gluten-free! Just always double-check your labels, especially on ingredients like cocoa powder, to ensure there are no hidden additives.
Can I use honey instead of maple syrup?
Absolutely! Honey works perfectly as a substitute for maple syrup. The flavor will be slightly different—a little more floral—but just as delicious. Use the same quantity.
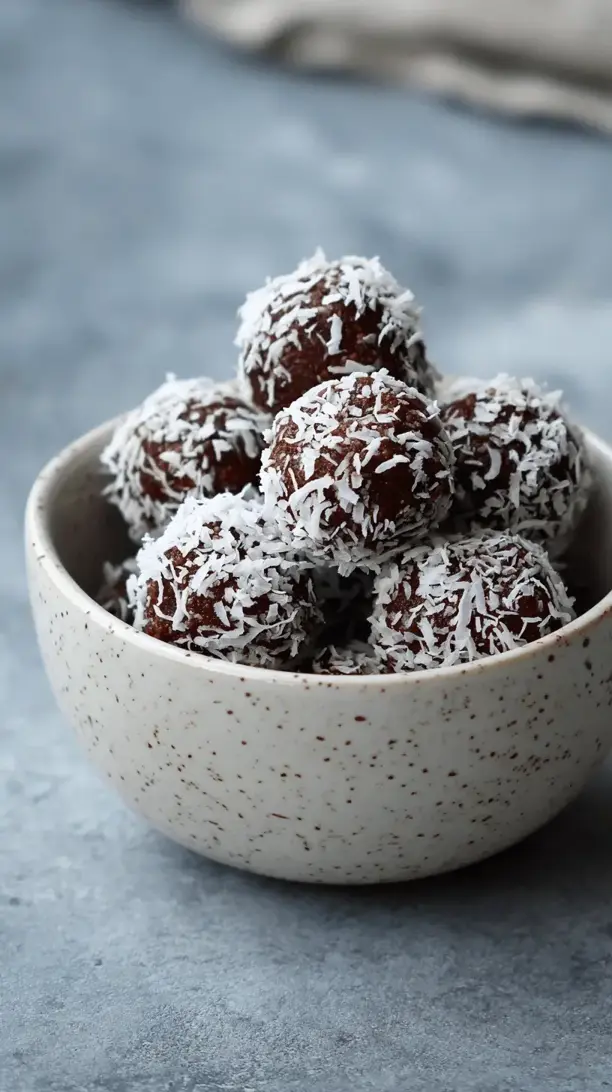
Coconut Chocolate Energy Balls
Whip up these no-bake Coconut Chocolate Energy Balls in 15 minutes! Perfect healthy snacks with dates, nuts & cocoa. Your new go-to for energy boosts & chocolate cravings.
Ingredients
Ingredients
-
1 cup pitted Medjool dates (about 150g)
-
1 cup raw almonds or cashews (about 120g)
-
3 tablespoons unsweetened cocoa powder
-
2 tablespoons pure maple syrup or agave nectar
-
1 tablespoon coconut oil (melted)
-
1 teaspoon pure vanilla extract
-
A generous pinch sea salt
-
1/2 cup unsweetened shredded coconut (about 40g, for rolling)
Instructions
-
Prep Your Station. First things first, get your shredded coconut for rolling onto a small plate or baking sheet. If you're toasting it, now's the time. Spread it in an even layer in a dry skillet over medium heat. Stir it constantly for 2-4 minutes until it's fragrant and turns a light golden brown. Transfer it immediately to the plate to stop the cooking. This toasting step honestly makes the whole kitchen smell amazing.01
-
Process the Base. Add the nuts to your food processor and pulse until they're broken down into a coarse meal. You don't want nut butter, just a fine crumb. Next, add the pitted dates, cocoa powder, maple syrup, melted coconut oil, vanilla extract, and that all-important pinch of sea salt. Now, lock the lid and process. You'll notice it will go from a crumbly mess to a big clump that chases itself around the bowl. This is what you want! It should hold together when you pinch a bit between your fingers.02
-
The Texture Test. This is the most crucial part. Stop the processor and do the pinch test. If the mixture is too dry and won't hold together, add a teaspoon of water or more maple syrup and process again for another 10-15 seconds. If it's too sticky (which is rare, but can happen with very fresh dates), add another tablespoon of cocoa powder or some extra ground nuts and pulse to combine.03
-
Roll and Coat. Using a small cookie scoop or a tablespoon, portion out the mixture. Roll each portion firmly between your palms to form a smooth ball. Then, roll each ball in the prepared shredded coconut until it's nicely coated. Press lightly to help the coconut adhere. If the mixture gets too soft or sticky from the heat of your hands, just pop the whole batch in the fridge for 10 minutes to firm up—it makes rolling so much easier.04
-
Chill and Set. Place all your beautifully coated energy balls on a plate or baking sheet lined with parchment paper. Pop them into the fridge for at least 30 minutes to firm up. This chilling time allows the coconut oil to solidify, giving them their perfect, firm-yet-chewy texture. And then... they're ready to enjoy!05


