
Why You’ll Love This Cinnamon Roasted Walnuts
- Incredibly Versatile. You can enjoy these walnuts in a dozen different ways. They’re a powerhouse snack on their own, but they also add a fantastic crunch and flavor boost to yogurt parfaits, salads, and even ice cream.
- Your Kitchen Will Smell Amazing. Seriously, the combination of warm cinnamon, a hint of vanilla, and toasting nuts is a scent you’ll want to bottle. It’s the ultimate cozy, autumnal aroma that makes the whole house feel inviting.
- Surprisingly Simple. With just a handful of pantry staples and about 30 minutes, you can create a gourmet-level snack. There’s no fancy equipment or complicated techniques involved—just a good bowl, a baking sheet, and a little patience.
- The Perfect Make-Ahead Treat. These walnuts store beautifully in an airtight container for weeks, meaning you always have a healthy, delicious snack on hand for unexpected guests or a quick energy boost.
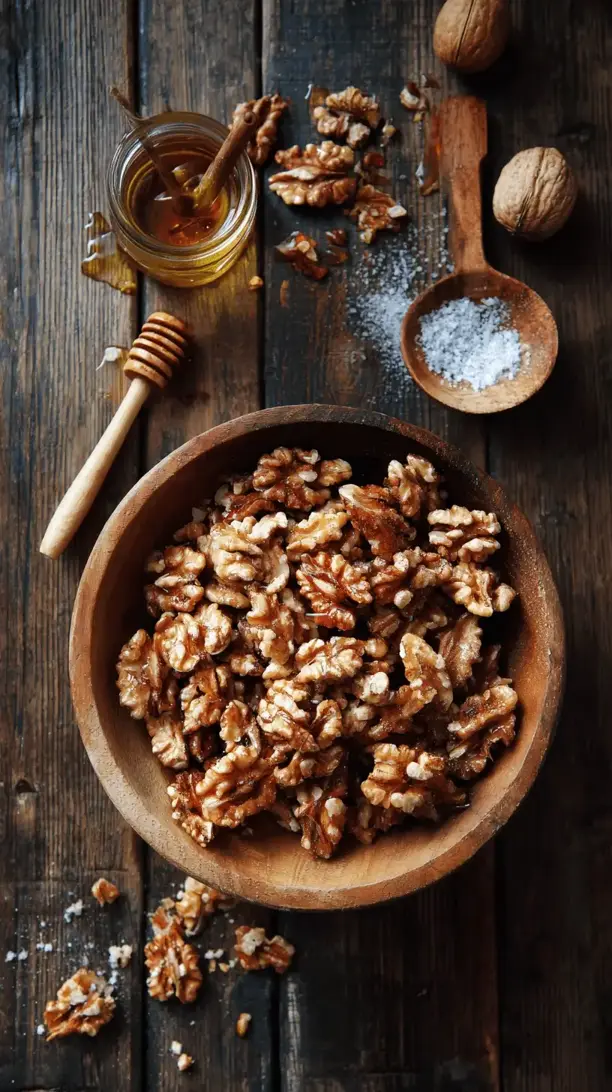
Ingredients & Tools
- 4 cups raw walnut halves
- 1/3 cup pure maple syrup
- 2 tablespoons coconut oil, melted (or avocado oil)
- 1 tablespoon ground cinnamon
- 1 teaspoon pure vanilla extract
- 1/2 teaspoon sea salt
- 1/4 teaspoon ground nutmeg (optional, but highly recommended)
- A tiny pinch of cayenne pepper (optional, for a subtle kick)
Tools: A large mixing bowl, a rimmed baking sheet, parchment paper or a silicone baking mat, and a spatula for stirring.
The quality of your ingredients really shines here, so it’s worth using pure maple syrup instead of pancake syrup for its deep, nuanced sweetness. And that vanilla extract? A little goes a long way in creating a warm, bakery-like fragrance.
Serves: 8 (as a snack) | Prep Time: 5 minutes | Cook Time: 25-30 minutes | Total Time: 35 minutes
Before You Start: Tips & Ingredient Notes
- Why raw walnuts? Starting with raw, unsalted nuts is crucial because we’re toasting them ourselves. This allows the nuts to absorb all the sweet and spicy flavors from the coating as they roast, creating a much deeper taste than using pre-toasted nuts.
- Maple syrup vs. other sweeteners. Maple syrup is my favorite because it has a rich flavor that pairs perfectly with cinnamon and it creates a lovely, crisp glaze. Honey can be used, but it tends to burn a little more easily, so you’d need to watch the oven more carefully.
- Don’t skip the parchment paper! This is a non-negotiable step for easy cleanup. The sugary coating can stick like glue to a bare baking sheet, but parchment paper or a silicone mat ensures your walnuts lift off perfectly without any fuss.
- The spice level is yours to play with. The recipe as written is warmly spiced and not too spicy. That tiny pinch of cayenne is a pro-move—it doesn’t make the walnuts “hot,” but it adds a subtle, intriguing warmth in the background that keeps you coming back for more.
How to Make Cinnamon Roasted Walnuts
Step 1: Preheat your oven to 300°F (150°C). This lower temperature is key—it allows the walnuts to toast and dry out slowly without burning the sugar in the maple syrup. While the oven heats up, line your rimmed baking sheet with parchment paper. Trust me, this simple step will save you from a serious scrubbing session later.
Step 2: In your large mixing bowl, combine the maple syrup, melted coconut oil, cinnamon, vanilla extract, sea salt, nutmeg, and that optional cayenne pepper. Whisk it all together until it forms a smooth, fragrant, dark syrup. You’ll notice the aroma is already incredible at this point.
Step 3: Add the raw walnut halves to the bowl. Using a spatula, gently fold and stir until every single walnut is evenly coated with the spiced syrup. Be patient here—you want a nice, thin, glossy layer on each piece. The walnuts will look dark and shiny.
Step 4: Spread the coated walnuts in a single, even layer on your prepared baking sheet. This is important! If the walnuts are piled on top of each other, they’ll steam instead of roast and won’t get that satisfying crunch. Make sure they have a little room to breathe.
Step 5: Roast for 15 minutes. Then, carefully remove the pan from the oven. The syrup will be bubbly. Use the spatula to stir and flip the walnuts, breaking up any clumps and moving the ones on the edge to the center. This ensures even cooking and prevents the edges from burning.
Step 6: Return the pan to the oven and roast for another 10 to 15 minutes. Keep a close eye on them during this final stretch. They’re done when they are deeply fragrant and the coating appears dry and matte, not wet or sticky. They will still feel a bit soft when hot but will crisp up beautifully as they cool.
Step 7: This is the hardest part: let them cool completely! Remove the pan from the oven and let the walnuts sit right on the baking sheet for at least 20-30 minutes. As they cool, the sugary coating hardens into a delicate, crisp shell. Breaking into them too early will result in a sticky mess, so patience truly is a virtue here.
Serving Suggestions
Complementary Dishes
- A simple green salad with goat cheese — The sweet, spiced crunch of the walnuts contrasts beautifully with creamy goat cheese and a sharp vinaigrette, adding a whole new dimension to your lunch.
- Morning oatmeal or yogurt bowls — They transform a simple breakfast into something special, providing texture and a warm spice flavor that pairs perfectly with berries and bananas.
- Roasted sweet potato or butternut squash soup — A handful of these walnuts scattered on top adds a necessary crunch and a sweet-spicy note that cuts through the soup’s velvety richness.
Drinks
- A hot chai latte — The spices in the walnuts and the chai are a match made in heaven, creating a deeply cozy and aromatic experience.
- A crisp, cold glass of apple cider — The autumnal flavors complement each other perfectly, making for a refreshing and satisfying non-alcoholic pairing.
- A rich stout or porter beer — The nutty, roasted notes in the beer harmonize with the toasted walnuts, while the sweetness provides a lovely counterpoint to the beer’s bitterness.
Something Sweet
- Vanilla bean ice cream — This is the ultimate simple dessert. The warm, crunchy walnuts over cold, creamy ice cream is a textural and flavor dream come true.
- A warm, fudgy brownie — Chopped up and sprinkled on top, they add a sophisticated spiced crunch that elevates the classic brownie to something truly memorable.
- Baked apples or pears — Use them as a streusel-like topping for baked fruit; the walnuts add a fantastic texture against the soft, warm fruit.
Top Mistakes to Avoid
- Mistake: Using too high of an oven temperature. If your oven is too hot, the sugar in the maple syrup will burn before the walnuts have a chance to toast properly, leaving you with a bitter, acrid taste. Low and slow is the way to go.
- Mistake: Skipping the mid-way stir. I’ve messed this up before too, thinking I could just set a timer and walk away. The walnuts on the edge of the pan will cook much faster than those in the center. Stirring them halfway through is non-negotiable for even roasting.
- Mistake: Not letting them cool completely. It’s so tempting to taste one right away, but the coating needs time to set and harden. If you break into them while they’re warm, they’ll be chewy and sticky instead of delightfully crisp.
- Mistake: Storing them before they’re completely cool. If you put slightly warm walnuts into a jar, the residual heat will create steam, which will make them lose their crunch and become soft. Let them cool on the pan until they are room temperature.
Expert Tips
- Tip: Toast your spices. For an even deeper flavor, you can gently warm the ground cinnamon (and nutmeg) in a dry skillet for about 30 seconds before adding it to the syrup. This wakes up the essential oils and makes the spice aroma incredibly vibrant.
- Tip: Add a protein powder boost. For an extra nutrient kick, try adding a tablespoon of unflavored collagen or vanilla protein powder to the spice mix. It incorporates seamlessly and adds a subtle richness to the coating.
- Tip: Create different flavor profiles. The base recipe is a perfect canvas. Try swapping the cinnamon for pumpkin pie spice, or add a tablespoon of orange zest to the syrup for a bright, citrusy twist. The possibilities are endless.
- Tip: Use for gifting. These walnuts make fantastic homemade gifts. Once completely cool, pack them into a clean mason jar, tie a ribbon around it, and attach a little tag. It’s a personal, delicious present that everyone appreciates.
FAQs
Can I use a different type of nut?
Absolutely! This method works wonderfully with pecans, almonds, or even cashews. Just keep an eye on the cooking time, as smaller nuts like almonds might cook a bit faster, and larger ones like pecans might need a minute or two longer. The key is to look for that dry, matte appearance on the coating.
How long do these cinnamon roasted walnuts last, and how should I store them?
Once completely cooled, store them in an airtight container at room temperature. They’ll stay perfectly crisp for about 2 weeks, sometimes even longer. I don’t recommend refrigerating them, as the moisture in the fridge can make them soften. If you live in a very humid climate, a silica gel packet in the container can help.
My walnuts turned out a bit soft, not crunchy. What happened?
This usually means they needed a bit more time in the oven, or they were stored before being 100% cool. The coating should look completely dry, not at all shiny or sticky, when you take them out. If you find they’re still a bit chewy after cooling, you can pop them back into a 300°F oven for another 5-10 minutes to dry them out further.
Can I make this recipe sugar-free?
You can experiment, but the results will be different. Maple syrup acts as both a sweetener and a binder that creates the crisp shell. A sugar-free maple syrup alternative might work, but it often contains ingredients that don’t caramelize the same way. You could try using an egg white wash with spices for a crunchy, sugar-free version, though the flavor profile will shift.
Are these walnuts gluten-free and vegan?
Yes, as written, this recipe is naturally both gluten-free and vegan. Just be sure to check that your vanilla extract is gluten-free if that’s a concern, as some brands may contain gluten. Otherwise, you’re good to go!
Cinnamon Roasted Walnuts
Warm, sweet & perfectly spiced Cinnamon Roasted Walnuts! An easy 5-minute prep snack. Your kitchen will smell amazing. Perfect for salads, oatmeal & gifts.
Ingredients
Ingredients
-
4 cups raw walnut halves
-
1/3 cup pure maple syrup
-
2 tablespoons coconut oil (melted (or avocado oil))
-
1 tablespoon ground cinnamon
-
1 teaspoon pure vanilla extract
-
1/2 teaspoon sea salt
-
1/4 teaspoon ground nutmeg (optional, but highly recommended)
-
A tiny pinch cayenne pepper (optional, for a subtle kick)
Instructions
-
Preheat your oven to 300°F (150°C). This lower temperature is key—it allows the walnuts to toast and dry out slowly without burning the sugar in the maple syrup. While the oven heats up, line your rimmed baking sheet with parchment paper. Trust me, this simple step will save you from a serious scrubbing session later.01
-
In your large mixing bowl, combine the maple syrup, melted coconut oil, cinnamon, vanilla extract, sea salt, nutmeg, and that optional cayenne pepper. Whisk it all together until it forms a smooth, fragrant, dark syrup. You'll notice the aroma is already incredible at this point.02
-
Add the raw walnut halves to the bowl. Using a spatula, gently fold and stir until every single walnut is evenly coated with the spiced syrup. Be patient here—you want a nice, thin, glossy layer on each piece. The walnuts will look dark and shiny.03
-
Spread the coated walnuts in a single, even layer on your prepared baking sheet. This is important! If the walnuts are piled on top of each other, they'll steam instead of roast and won't get that satisfying crunch. Make sure they have a little room to breathe.04
-
Roast for 15 minutes. Then, carefully remove the pan from the oven. The syrup will be bubbly. Use the spatula to stir and flip the walnuts, breaking up any clumps and moving the ones on the edge to the center. This ensures even cooking and prevents the edges from burning.05
-
Return the pan to the oven and roast for another 10 to 15 minutes. Keep a close eye on them during this final stretch. They're done when they are deeply fragrant and the coating appears dry and matte, not wet or sticky. They will still feel a bit soft when hot but will crisp up beautifully as they cool.06
-
This is the hardest part: let them cool completely! Remove the pan from the oven and let the walnuts sit right on the baking sheet for at least 20-30 minutes. As they cool, the sugary coating hardens into a delicate, crisp shell. Breaking into them too early will result in a sticky mess, so patience truly is a virtue here.07


