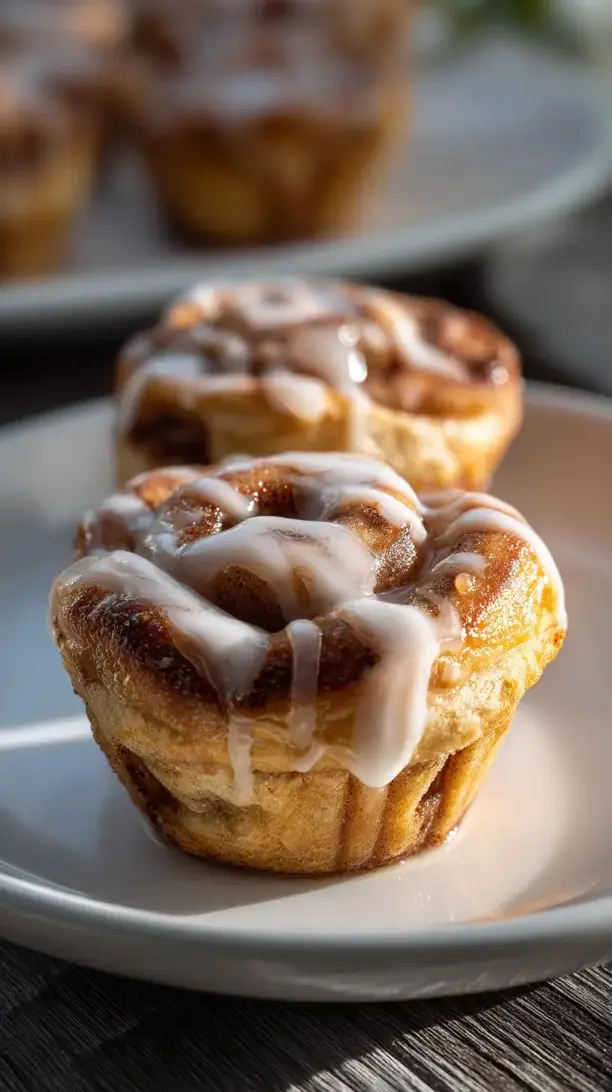
Why You’ll Love This Cinnamon Apple Crisp Cups
- Perfectly portioned for no fighting. Everyone gets their own little cup of happiness, which means no squabbling over who got more of the crispy topping—we all know that’s the best part.
- They feel fancy but are secretly simple. The ingredient list is humble, and the method is straightforward, but serving them in individual ramekins makes it look like you put in way more effort than you actually did.
- The texture contrast is everything. You get the soft, tender, almost jammy apples underneath, and then that incredible crunchy, buttery, oat-y topping that just sings.
- That unbeatable cozy aroma. The scent of cinnamon, nutmeg, and baking apples wafting through your house is a form of therapy. It just makes everything feel warm and inviting.
Ingredients & Tools
- For the Apple Filling:
- 4 medium apples (a mix like Granny Smith and Honeycrisp is ideal)
- 2 tbsp fresh lemon juice
- 3 tbsp light brown sugar, packed
- 1 tbsp all-purpose flour
- 1 tsp ground cinnamon
- 1/4 tsp ground nutmeg
- A pinch of fine sea salt
- 1 tsp pure vanilla extract
- For the Crisp Topping:
- 1/2 cup old-fashioned rolled oats
- 1/4 cup all-purpose flour
- 1/4 cup light brown sugar, packed
- 1/4 tsp ground cinnamon
- A pinch of fine sea salt
- 3 tbsp cold unsalted butter, cubed
- 2 tbsp chopped walnuts or pecans (optional, for extra crunch)
Tools: 4-6 oven-safe ramekins (about 6-ounce capacity), a large mixing bowl, a medium mixing bowl, a pastry cutter or your fingers, a baking sheet
The type of apple you use really matters here—a firm, tart variety holds its shape and balances the sweetness beautifully. And don’t skip the cold butter for the topping; that’s the secret to getting those lovely, craggy bits of crispiness.
Nutrition (per serving)
- Calories: 285 kcal
- Protein: 2 g
- Fat: 9 g
- Carbohydrates: 52 g
- Fiber: 5 g
Serves: 4 | Prep Time: 20 minutes | Cook Time: 30 minutes | Total Time: 50 minutes
Before You Start: Tips & Ingredient Notes
- Apple selection is key. Using a mix of tart (like Granny Smith) and sweet (like Honeycrisp) apples gives you the best flavor complexity and texture. The tart ones hold their shape, while the sweeter ones break down a bit for that saucy filling.
- Why cold butter is non-negotiable. For a truly crisp and crumbly topping, your butter must be cold. It doesn’t melt too quickly in the oven, which allows the flour and oats to cook around it, creating those perfect little crunchy pockets.
- Don’t forget the baking sheet. Placing your ramekins on a baking sheet isn’t just for easy transport. It catches any potential bubble-overs and ensures even heat distribution for a perfectly baked topping and filling.
- A squeeze of lemon does more than you think. It’s not just for flavor—the acid in the lemon juice prevents the apples from browning too much before they go in the oven and also brightens up the entire dish, cutting through the sweetness.
How to Make Cinnamon Apple Crisp Cups
Step 1: First, get your oven preheating to 375°F (190°C). This is a hot oven, and you want it ready to go so your crisp bakes evenly from the get-go. Grab your four to six ramekins and give them a light coating of butter or a quick spritz of non-stick spray. Place them all on a sturdy baking sheet—this makes everything so much easier to handle.
Step 2: Now, let’s tackle the apples. Peel them if you prefer, though I sometimes leave the skin on for extra fiber and texture. Core them and chop them into roughly 1/2-inch chunks—you want them bite-sized but not so small they turn to mush. As you chop, toss them into your large mixing bowl and drizzle with the lemon juice, giving them a stir. This little trick keeps them from turning brown and adds a lovely zing.
Step 3: To the apples, add the brown sugar, tablespoon of flour, cinnamon, nutmeg, salt, and vanilla. Now, get in there with your hands or a spatula and mix it all up until every single apple piece is coated in that spiced, sugary mixture. You’ll notice the flour will start to cling to the apples and the juices will begin to release—this is exactly what you want for a saucy, not watery, filling.
Step 4: Divide the apple mixture evenly among your prepared ramekins. Don’t be shy about piling them up—the apples will shrink down as they cook. You can gently press them down to fit a bit more in, but don’t pack them too tightly; you want the heat to circulate.
Step 5: Time for the star of the show: the crisp topping! In your medium bowl, whisk together the rolled oats, flour, brown sugar, cinnamon, and salt. Drop in your cold, cubed butter. Now, using a pastry cutter, two forks, or—my personal favorite—your clean fingertips, work the butter into the dry ingredients.
Step 6: Keep pinching and rubbing the mixture until it looks like coarse, wet sand with plenty of pebble-sized buttery lumps. Those lumps are pure gold—they’ll melt and create the most delicious crispy bits. If you’re using nuts, stir them in now.
Step 7: Sprinkle the oat topping generously over the apples in each ramekin, dividing it evenly. Don’t press it down! You want it to stay loose and airy so it can get nice and crunchy in the oven. It should look like a rustic, crumbly blanket over the apples.
Step 8: Carefully slide the baking sheet with all the ramekins into your preheated oven. Bake for 25-30 minutes. You’re looking for the filling to be visibly bubbling around the edges and the topping to be a deep, golden brown. Your kitchen will smell absolutely incredible by now.
Step 9: Once they’re out of the oven, this is the hardest part: you have to let them rest for at least 10-15 minutes. The filling is like molten lava straight out of the oven, and this resting time allows it to thicken up slightly and become safe to eat. The aroma will test your willpower, I promise.
Serving Suggestions
Complementary Dishes
- A scoop of vanilla bean ice cream — The classic pairing for a reason. The cold, creamy ice cream melting into the warm, spiced apples is a textural dream come true.
- A dollop of lightly sweetened whipped cream — For a lighter, airier alternative to ice cream that still adds a lovely creamy contrast to the crunchy topping.
- A sharp cheddar cheese slice on the side — Don’t knock it ’til you try it! The salty, sharp cheese is a fantastic counterpoint to the sweet, spiced apples—a very old-fashioned and delightful combination.
Drinks
- A hot mug of chai tea — The warm spices in the chai echo the cinnamon and nutmeg in the crisp, making the whole experience feel even cozier.
- A glass of cold apple cider — It’s a meta pairing that just works. The crisp, refreshing cider cleanses the palate between bites of the warm dessert.
- A rich, dark roast coffee — The bitterness of the coffee cuts through the sweetness of the dessert perfectly, making each bite taste fresh and new.
Something Sweet
- A drizzle of salted caramel sauce — This takes it over the top in the best way. The saltiness enhances all the other flavors and adds a gooey, rich element.
- A small piece of dark chocolate — Enjoy a square on the side. The deep, slightly bitter cocoa notes are a sophisticated partner for the fruity, spiced apples.
- A simple shortbread cookie — For those who can’t get enough buttery, crumbly texture. It’s like an extension of the crisp topping itself.
Top Mistakes to Avoid
- Using warm or melted butter for the topping. This is the number one way to end up with a greasy, flat, and soggy topping instead of a light and crispy one. Cold butter is absolutely essential.
- Skipping the flour in the apple filling. That single tablespoon is what thickens the natural juices from the apples as they bake. Without it, you’ll have a soupy bottom instead of a lovely, jammy sauce.
- Cutting the apples too thinly or unevenly. If they’re too thin, they’ll turn to complete mush. If they’re uneven, some pieces will be overcooked while others are still firm. Aim for consistent, 1/2-inch chunks.
- Not letting them rest after baking. I know it’s tempting to dive right in, but that filling is dangerously hot. The resting time also allows the juices to settle and thicken, so you get a perfect bite, not a runny one.
Expert Tips
- Tip: Make the topping in advance. You can mix the dry ingredients for the crisp topping and keep it in a bag in the fridge for up to 3 days. When you’re ready to bake, just cut in the cold butter and proceed. It’s a fantastic timesaver.
- Tip: Add a tablespoon of maple syrup to the filling. For a deeper, more caramel-like flavor in your apples, a little splash of maple syrup along with the brown sugar works wonders.
- Tip: Grate frozen butter for the topping. If you’re short on time or find rubbing butter in tedious, pop your stick of butter in the freezer for 20 minutes, then use the large holes of a box grater to grate it directly into the flour mixture. It incorporates perfectly with minimal effort.
- Tip: Add a pinch of cardamom. For a more complex, floral spice note, add just an eighth of a teaspoon of ground cardamom to the apple filling along with the cinnamon. A little goes a very long way, but it’s divine.
FAQs
Can I make these ahead of time?
Absolutely! You can assemble the cups completely—apple filling and crumble topping—cover them tightly, and refrigerate for up to 24 hours before baking. You might need to add a couple of extra minutes to the baking time since they’ll be going into the oven cold. They are best served fresh, but the components holding up well for a day makes them perfect for entertaining.
Can I use quick oats instead of old-fashioned rolled oats?
I really don’t recommend it. Old-fashioned rolled oats provide the best texture and structure for a truly crisp topping. Quick oats are cut smaller and will absorb moisture differently, often resulting in a softer, sometimes gummy texture rather than the lovely crunch you’re after. It’s worth having the right oats for this one.
My filling is too runny. What happened?
This usually happens for one of two reasons. Either the apples were very juicy and you skipped the thickening flour, or you didn’t bake them long enough for the filling to bubble and thicken properly. Next time, ensure you’re using the flour and bake until you see thick, slow bubbles around the edges, not just a few fast ones.
Can I make this gluten-free?
Of course! It’s a very easy swap. Just use a 1-to-1 gluten-free all-purpose flour blend in place of the regular flour in both the filling and the topping. Make sure your oats are certified gluten-free as well, as oats are often processed in facilities that also handle wheat.
How should I store and reheat leftovers?
Let any leftover cups cool completely, then cover them tightly with plastic wrap and store in the fridge for up to 3 days. To reheat, I find the oven or toaster oven (at 350°F for about 10-15 minutes) works best to re-crisp the topping. The microwave will work in a pinch, but it will make the topping soft.

Cinnamon Apple Crisp Cups
Make these easy Cinnamon Apple Crisp Cups for a warm, individual dessert. Get the simple recipe for soft apples & a crunchy oat topping. Bake yours now!
Ingredients
For the Apple Filling:
-
4 medium apples (a mix like Granny Smith and Honeycrisp is ideal)
-
2 tbsp fresh lemon juice
-
3 tbsp light brown sugar (packed)
-
1 tbsp all-purpose flour
-
1 tsp ground cinnamon
-
1/4 tsp ground nutmeg
-
A pinch fine sea salt
-
1 tsp pure vanilla extract
For the Crisp Topping:
-
1/2 cup old-fashioned rolled oats
-
1/4 cup all-purpose flour
-
1/4 cup light brown sugar (packed)
-
1/4 tsp ground cinnamon
-
A pinch fine sea salt
-
3 tbsp cold unsalted butter (cubed)
-
2 tbsp chopped walnuts or pecans (optional, for extra crunch)
Instructions
-
First, get your oven preheating to 375°F (190°C). This is a hot oven, and you want it ready to go so your crisp bakes evenly from the get-go. Grab your four to six ramekins and give them a light coating of butter or a quick spritz of non-stick spray. Place them all on a sturdy baking sheet—this makes everything so much easier to handle.01
-
Now, let's tackle the apples. Peel them if you prefer, though I sometimes leave the skin on for extra fiber and texture. Core them and chop them into roughly 1/2-inch chunks—you want them bite-sized but not so small they turn to mush. As you chop, toss them into your large mixing bowl and drizzle with the lemon juice, giving them a stir. This little trick keeps them from turning brown and adds a lovely zing.02
-
To the apples, add the brown sugar, tablespoon of flour, cinnamon, nutmeg, salt, and vanilla. Now, get in there with your hands or a spatula and mix it all up until every single apple piece is coated in that spiced, sugary mixture. You'll notice the flour will start to cling to the apples and the juices will begin to release—this is exactly what you want for a saucy, not watery, filling.03
-
Divide the apple mixture evenly among your prepared ramekins. Don't be shy about piling them up—the apples will shrink down as they cook. You can gently press them down to fit a bit more in, but don't pack them too tightly; you want the heat to circulate.04
-
Time for the star of the show: the crisp topping! In your medium bowl, whisk together the rolled oats, flour, brown sugar, cinnamon, and salt. Drop in your cold, cubed butter. Now, using a pastry cutter, two forks, or—my personal favorite—your clean fingertips, work the butter into the dry ingredients.05
-
Keep pinching and rubbing the mixture until it looks like coarse, wet sand with plenty of pebble-sized buttery lumps. Those lumps are pure gold—they'll melt and create the most delicious crispy bits. If you're using nuts, stir them in now.06
-
Sprinkle the oat topping generously over the apples in each ramekin, dividing it evenly. Don't press it down! You want it to stay loose and airy so it can get nice and crunchy in the oven. It should look like a rustic, crumbly blanket over the apples.07
-
Carefully slide the baking sheet with all the ramekins into your preheated oven. Bake for 25-30 minutes. You're looking for the filling to be visibly bubbling around the edges and the topping to be a deep, golden brown. Your kitchen will smell absolutely incredible by now.08
-
Once they're out of the oven, this is the hardest part: you have to let them rest for at least 10-15 minutes. The filling is like molten lava straight out of the oven, and this resting time allows it to thicken up slightly and become safe to eat. The aroma will test your willpower, I promise.09