
Why You’ll Love This Chocolate Peanut Butter Smoothie
- It tastes like a decadent treat. Seriously, the flavor profile is pure dessert bliss. The deep, rich cocoa and the creamy, salty-sweet peanut butter combine to create something that feels incredibly indulgent.
- It’s incredibly quick and easy. We’re talking about five minutes, from grabbing the ingredients to taking that first sip. There’s no cooking involved, just a quick blitz in the blender. It’s the ultimate fast food, but the good kind.
- The texture is luxuriously thick and creamy. The trick is using frozen banana—it acts like nature’s ice cream, giving the smoothie a wonderfully thick, almost soft-serve consistency that you can eat with a spoon if you’re feeling fancy.
- It’s endlessly customizable. Don’t have almond milk? Use oat. Want more protein? Add a scoop of your favorite powder. Feeling adventurous? A pinch of cinnamon or a handful of spinach can easily be incorporated without compromising the fantastic flavor.
Ingredients & Tools
- 1 large ripe banana, previously peeled, sliced, and frozen
- 2 tablespoons unsweetened cocoa powder
- 2 tablespoons creamy, natural peanut butter (the kind where the only ingredient is peanuts)
- 1 cup unsweetened almond milk (or milk of your choice)
- 1 tablespoon maple syrup, honey, or a pitted date (optional, depending on your sweetness preference)
- 1/2 teaspoon vanilla extract
- A large handful of ice cubes
- A pinch of sea salt (this is the secret weapon!)
Tools: A good-quality high-speed blender.
Honestly, the quality of your peanut butter and cocoa powder really makes a difference here. A good, natural peanut butter gives you that pure, roasted peanut flavor without any weird oils or added sugar, while a high-quality cocoa powder provides a deep, chocolatey intensity that cheap alternatives just can’t match. A little goes a long way.
Serves: 1 (generously!) | Prep Time: 5 minutes | Cook Time: 0 minutes | Total Time: 5 minutes
Before You Start: Tips & Ingredient Notes
- Freeze that banana! This is non-negotiable for the perfect texture. A frozen banana is the key to a thick, creamy, milkshake-like consistency without having to add ice cream. Peel, slice into chunks, and freeze on a parchment-lined tray for at least 2 hours before storing in a bag.
- Why natural peanut butter? The oils in natural peanut butter blend seamlessly into the smoothie, creating a silky mouthfeel. Skippy or Jif-style spreads can sometimes make the smoothie feel a bit gritty or overly sweet. You want that pure, unadulterated peanut taste.
- Don’t skip the salt. I know it sounds odd, but a tiny pinch of sea salt is a game-changer. It enhances the chocolate flavor and balances the sweetness from the banana, making the peanut butter taste even more pronounced. It’s the difference between a good smoothie and a great one.
- Sweeten to your taste. The ripeness of your banana will determine a lot of the sweetness. Taste your smoothie after blending before you add any extra sweetener. You might find it’s perfect as is!
How to Make Chocolate Peanut Butter Smoothie
Step 1: First, get your blender ready. I like to add the liquid ingredients first to help everything blend more smoothly. So, pour that cup of almond milk right into the blender pitcher. This creates a liquid base that the blades can easily grab onto.
Step 2: Next, add your peanut butter, cocoa powder, and vanilla extract. If you’re using a sticky sweetener like maple syrup or honey, add it now as well. Adding these thicker ingredients directly into the liquid helps prevent them from getting stuck to the bottom or sides of the blender jar.
Step 3: Now for the star of the show: the frozen banana chunks. Drop those in, followed by your handful of ice cubes and that all-important pinch of salt. The order here helps the blender process everything evenly. You’ll notice that the frozen fruit on top gets pushed down into the blades as the mixture below starts to move.
Step 4: It’s blending time! Start your blender on low speed for about 10 seconds to initially break up the big frozen pieces. Then, quickly ramp up to the highest speed. Let it run for 30-60 seconds. You’re looking for a completely smooth, homogenous mixture. The sound will change from a loud, chunky grinding to a smoother, quieter whir when it’s done.
Step 5: Stop the blender and take a peek. Use a spatula to scrape down the sides if needed, especially if you see any pockets of unmixed cocoa powder. Give it one final quick blast—maybe 10 seconds—to ensure everything is perfectly incorporated. The texture should be thick and pourable, like a melted milkshake.
Step 6: Pour your masterpiece into a tall glass. Honestly, I sometimes just drink it straight from the blender jar if I’m feeling particularly lazy—no judgment here! For a little extra flair, you can drizzle a tiny bit of extra peanut butter on top or a sprinkle of cacao nibs for crunch. Enjoy immediately for the best texture and temperature.
Serving Suggestions
Complementary Dishes
- A slice of whole-wheat toast with avocado — The creamy, savory fat from the avocado provides a lovely contrast to the sweet, rich smoothie, making it a truly balanced meal.
- A small bowl of Greek yogurt with berries — If you’re having the smoothie for a snack, this adds a tangy, fresh element and an extra protein boost.
- A handful of almonds or walnuts on the side — The extra crunch and healthy fats make the whole experience feel more substantial and satisfying.
Drinks
- A tall glass of cold water with lemon — It might sound simple, but it’s the perfect palate cleanser and ensures you stay hydrated.
- A hot cup of black coffee or espresso — The bitterness of the coffee is a fantastic counterpart to the sweetness of the smoothie, creating a mocha-like experience.
- A cup of herbal tea, like peppermint or chai — The warm tea is a nice contrast to the cold smoothie, and the flavors complement the chocolate and peanut butter beautifully.
Something Sweet
- A small, chewy oatmeal raisin cookie — The spices in the cookie pair wonderfully with the chocolate, and it feels like a classic, comforting combination.
- A few fresh strawberries or raspberries — The bright, tart burst of fruit cuts through the richness of the smoothie perfectly.
- A single square of dark chocolate — For the true chocolate lover, this doubles down on the rich, cocoa flavor and makes the whole moment feel extra special.
Top Mistakes to Avoid
- Mistake: Using a fresh, unfrozen banana. This is the number one reason for a watery, thin smoothie. The frozen banana is absolutely critical for that thick, creamy texture we’re after. I’ve messed this up before when I was out of frozen ones, and the difference is night and day.
- Mistake: Not scraping down the blender sides. Cocoa powder has a tendency to stick to the sides of the pitcher. If you don’t pause to scrape it down, you’ll end up with a patchy smoothie with bits of undissolved powder.
- Mistake: Over-blending. Once the smoothie is smooth, stop! Over-blending can actually cause the ingredients to separate slightly and warm up from the friction of the blades, leading to a less-than-ideal texture.
- Mistake: Skipping the taste test. Always taste your smoothie before you pour it. This is your chance to adjust the sweetness, add more cocoa for a deeper chocolate hit, or even a bit more milk if it’s too thick for your liking.
Expert Tips
- Tip: Make smoothie packs for busy mornings. Portion all your dry and frozen ingredients (banana, cocoa powder) into a zip-top bag and keep it in the freezer. In the morning, just dump the bag contents into the blender, add your liquid, and blend. It cuts the prep time down to literally seconds.
- Tip: Add a secret ingredient for a nutrient boost. A handful of fresh spinach is virtually undetectable in terms of flavor but adds a beautiful green color and nutrients. A tablespoon of chia seeds or flaxseed meal will add fiber and omega-3s without changing the taste.
- Tip: Turn it into a smoothie bowl. For an even thicker consistency that you can eat with a spoon, reduce the milk to about 3/4 cup. Blend, then pour into a bowl and top with granola, sliced banana, and a drizzle of peanut butter for a gorgeous, Instagram-worthy breakfast.
- Tip: For an ultra-creamy texture, try frozen cauliflower rice. I know it sounds wild, but a 1/4 cup of frozen cauliflower rice adds incredible creaminess and volume without any veggie taste. It’s a pro-hack for making smoothies even more filling.
FAQs
Can I make this smoothie ahead of time?
You can, but the texture is best immediately after blending. If you need to make it ahead, store it in a sealed jar in the fridge for up to 24 hours. It will separate—this is totally normal. Just give it a really good shake or a quick re-blend before drinking. I wouldn’t recommend freezing the prepared smoothie, as the texture can become icy and grainy when thawed.
What can I use instead of peanut butter?
Any nut or seed butter works wonderfully here! Almond butter is a fantastic alternative with a slightly milder flavor. Sunflower seed butter is a great nut-free option—just be aware it will turn the smoothie a slightly greenish-brown color (it’s a harmless chemical reaction with the cocoa, I promise!). Tahini can also work for a more earthy, savory twist.
My smoothie is too thick! How can I thin it out?
No problem at all—this is an easy fix. Simply add more liquid, one tablespoon at a time, with the blender running on low until it reaches your desired consistency. You can use more milk, or even a little water. The trick is to add slowly so you don’t overdo it and end up with a runny smoothie.
Is this smoothie good for a post-workout drink?
Absolutely! The carbohydrates from the banana help replenish energy stores, and the protein and healthy fats from the peanut butter aid in muscle recovery. For an extra protein punch, you can easily add a scoop of your favorite chocolate or vanilla protein powder. Just blend it in with the other ingredients—you might need to add a splash more milk to compensate for the extra powder.
Can I use cacao powder instead of cocoa powder?
Yes, you can! Cacao powder is less processed and has a more intense, slightly bitter chocolate flavor. It’s a great choice. Because it’s more potent, you might want to start with 1.5 tablespoons instead of 2 and adjust to your taste. The method remains exactly the same.
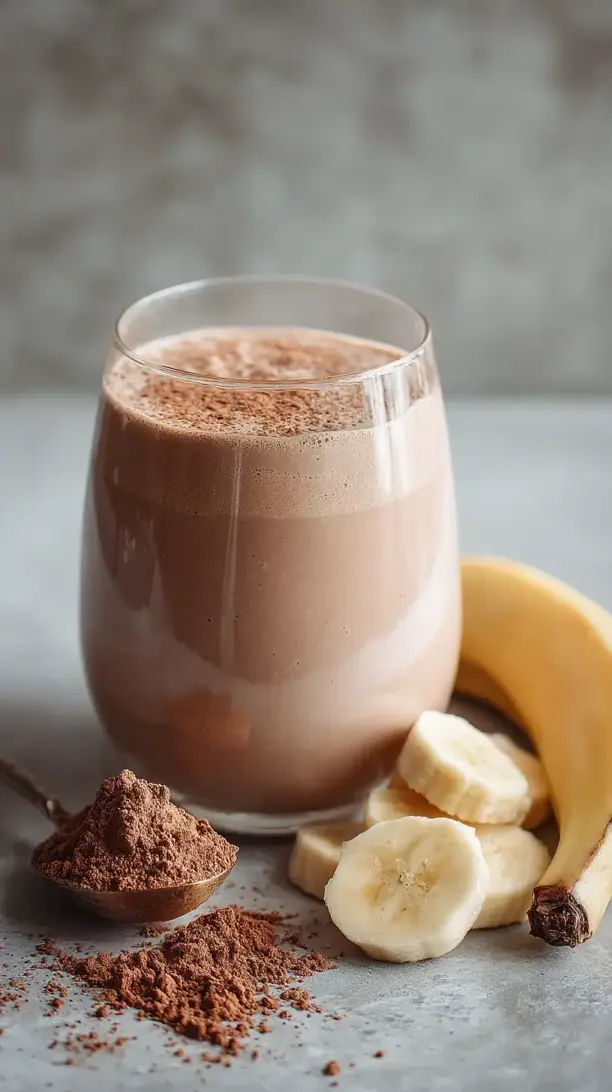
Chocolate Peanut Butter Smoothie
Indulge in a thick, creamy Chocolate Peanut Butter Smoothie that tastes like dessert but fuels your day! This easy 5-minute recipe is a healthy, protein-packed breakfast or snack.
Ingredients
Ingredients
-
1 large ripe banana (previously peeled, sliced, and frozen)
-
2 tablespoons unsweetened cocoa powder
-
2 tablespoons creamy, natural peanut butter (the kind where the only ingredient is peanuts)
-
1 cup unsweetened almond milk (or milk of your choice)
-
1 tablespoon maple syrup, honey, or a pitted date (optional, depending on your sweetness preference)
-
1/2 teaspoon vanilla extract
-
A large handful ice cubes
-
A pinch sea salt
Instructions
-
First, get your blender ready. I like to add the liquid ingredients first to help everything blend more smoothly. So, pour that cup of almond milk right into the blender pitcher. This creates a liquid base that the blades can easily grab onto.01
-
Next, add your peanut butter, cocoa powder, and vanilla extract. If you're using a sticky sweetener like maple syrup or honey, add it now as well. Adding these thicker ingredients directly into the liquid helps prevent them from getting stuck to the bottom or sides of the blender jar.02
-
Now for the star of the show: the frozen banana chunks. Drop those in, followed by your handful of ice cubes and that all-important pinch of salt. The order here helps the blender process everything evenly. You'll notice that the frozen fruit on top gets pushed down into the blades as the mixture below starts to move.03
-
It's blending time! Start your blender on low speed for about 10 seconds to initially break up the big frozen pieces. Then, quickly ramp up to the highest speed. Let it run for 30-60 seconds. You're looking for a completely smooth, homogenous mixture. The sound will change from a loud, chunky grinding to a smoother, quieter whir when it's done.04
-
Stop the blender and take a peek. Use a spatula to scrape down the sides if needed, especially if you see any pockets of unmixed cocoa powder. Give it one final quick blast—maybe 10 seconds—to ensure everything is perfectly incorporated. The texture should be thick and pourable, like a melted milkshake.05
-
Pour your masterpiece into a tall glass. Honestly, I sometimes just drink it straight from the blender jar if I'm feeling particularly lazy—no judgment here! For a little extra flair, you can drizzle a tiny bit of extra peanut butter on top or a sprinkle of cacao nibs for crunch. Enjoy immediately for the best texture and temperature.06


