
Why You’ll Love This Chocolate Dipped Kiwi Pops
- The Perfect Balance of Flavors. The natural tartness of the kiwi cuts through the sweetness of the chocolate in the most delightful way. It’s a combination that never fails to impress.
- Incredibly Easy to Make. Honestly, if you can slice fruit and melt chocolate, you’re 90% of the way there. It’s a no-bake, no-fuss recipe that yields seriously impressive results.
- A Guilt-Free Indulgence. You’re working with whole fruit and you have full control over the chocolate, meaning you can keep things as wholesome or as decadent as you like.
- They Look Absolutely Stunning. The vibrant green flesh of the kiwi against the dark chocolate is a visual treat. They’re almost too pretty to eat… almost.
Ingredients & Tools
- 4-5 large, firm kiwis
- 200 g high-quality dark chocolate (around 70% works beautifully)
- 1 tablespoon coconut oil
- Optional toppings: crushed pistachios, freeze-dried raspberry powder, desiccated coconut, flaky sea salt
- Wooden popsicle sticks or small skewers
Tools: A baking sheet, parchment paper, a small microwave-safe bowl or a double boiler, a sharp knife.
The quality of your ingredients really shines here, so choose ripe but firm kiwis that hold their shape. The coconut oil is the secret weapon—it makes the chocolate more fluid for dipping and gives it a lovely, crisp snap once set.
Serves: 8-10 pops | Prep Time: 20 minutes | Freezing Time: 2 hours | Total Time: 2 hours 20 minutes (mostly inactive)
Before You Start: Tips & Ingredient Notes
- Kiwi Selection is Key. You want kiwis that yield slightly to gentle pressure but are by no means mushy. If they’re too soft, they’ll be difficult to slice and spear.
- Why Coconut Oil? This little addition is non-negotiable for the perfect texture. It thins the chocolate just enough for a smooth, even coat and prevents it from becoming too thick and chewy when frozen.
- To Peel or Not to Peel? I highly recommend peeling the kiwis. The fuzzy skin can interfere with the chocolate adhering properly. A simple spoon can scoop the flesh right out of the skin effortlessly.
- Chocolate Choices. A good dark chocolate (around 70% cocoa) provides a beautiful bitter contrast to the sweet kiwi. You can use milk chocolate if you prefer, but it will be much sweeter. Chocolate chips are fine, but a bar of baking chocolate melted down often has a superior texture.
How to Make Chocolate Dipped Kiwi Pops
Step 1: Prep the Kiwi. Start by peeling your kiwis. The easiest way is to slice off both ends, then slide a small spoon between the skin and the flesh and work your way around—the skin should pop right off. Slice each kiwi into ¾-inch to 1-inch thick rounds. You’ll get about 2-3 good rounds from each kiwi. Lay the rounds in a single layer on a parchment paper-lined baking sheet.
Step 2: Insert the Sticks. Carefully insert a wooden popsicle stick or skewer into the side of each kiwi round, pushing it about halfway through. You want it to be secure but try not to push so hard that the kiwi cracks. This part is fun for little helpers! Once all sticks are in, place the entire baking sheet into the freezer for at least 2 hours, or until the kiwi rounds are completely frozen solid. This is a crucial step—if the kiwi isn’t frozen, it will release water and make the chocolate seize up.
Step 3: Melt the Chocolate. When the kiwi is almost frozen, prepare your chocolate. Chop the chocolate bar into small, even pieces—this helps it melt smoothly. Combine the chocolate and the tablespoon of coconut oil in a microwave-safe bowl. Microwave in 30-second bursts, stirring thoroughly after each interval, until the chocolate is completely melted and glossy. Alternatively, you can use a double boiler over simmering water. Stir until smooth. Let it cool for a minute or two; you want it warm but not scorching hot.
Step 4: The Big Dip! Take the frozen kiwi pops out of the freezer. Working quickly, hold a pop by the stick and dip it into the melted chocolate, swirling it gently to coat the sides. Let the excess chocolate drip back into the bowl. If you’re adding toppings like crushed pistachios or coconut, now is the time to sprinkle them on before the chocolate sets.
Step 5: Setting the Chocolate. Place the freshly dipped pops back onto the parchment-lined baking sheet. You can pop them back into the freezer for about 5-10 minutes to let the chocolate shell set completely. You’ll know it’s ready when you tap it and it feels hard. And that’s it! You’ve just made a stunning, delicious treat.
Serving Suggestions
Complementary Dishes
- A Summer Fruit Platter — The pops look gorgeous arranged alongside fresh berries, mango slices, and melon. It creates a vibrant, healthy-ish dessert spread that’s perfect for entertaining.
- Lemon Sorbet — Serve a pop alongside a small scoop of tangy lemon sorbet. The twin citrus notes from the kiwi and lemon are a match made in heaven.
- A Cheese Board Finale — After the savoury cheeses and crackers, bring out these pops for a refreshing, palate-cleansing end to the meal.
Drinks
- Sparkling Prosecco or Moscato d’Asti — The bubbles and slight sweetness complement the chocolate and fruit beautifully, making it feel extra celebratory.
- Iced Green Tea — The slightly grassy, bitter notes of green tea are a fantastic, non-alcoholic pairing that highlights the freshness of the kiwi.
- A Cold Brew Coffee — The deep, rich flavour of cold brew echoes the dark chocolate and provides a lovely caffeine kick.
Something Sweet
- Almond Shortbread Cookies — The buttery, nutty crunch of a simple shortbread is a wonderful textural contrast to the creamy, frozen pop.
- Vanilla Bean Panna Cotta — The delicate, silky vanilla flavour provides a calm, creamy base that lets the kiwi pop truly shine as the star.
- Dark Chocolate Truffles — For the ultimate chocolate lover, double down! A pop and a truffle make for an intensely rich and satisfying dessert experience.
Top Mistakes to Avoid
- Mistake: Not freezing the kiwi long enough. This is the number one reason for dipping disasters. If the kiwi is even slightly thawed, the moisture will cause the chocolate to seize up into a grainy, clumpy mess. Patience is key!
- Mistake: Using chocolate that’s too hot. If you dip the frozen fruit into scalding chocolate, the extreme temperature difference can cause the chocolate to crack as it sets. Let it cool slightly after melting.
- Mistake: Skipping the coconut oil. Without it, the chocolate coating can be too thick, chewy, and difficult to bite into when frozen. The oil gives it that perfect, delicate snap.
- Mistake: Dipping too deep. Try to avoid submerging the entire kiwi slice. Leave a little border of green visible—it looks more professional and ensures you get a burst of pure kiwi flavour with every bite.
Expert Tips
- Tip: Use a narrow, deep container for dipping. A tall, narrow glass or a small mason jar uses less chocolate and creates a deeper pool, making it easier to coat the sides of the kiwi pop evenly.
- Tip: Get creative with drizzles. After the main chocolate coat has set, melt a small amount of white chocolate and drizzle it over the top for a beautiful, professional finish.
- Tip: Prevent stickiness. Once fully set, you can store the pops in a single layer in an airtight container separated by layers of parchment paper. This prevents them from sticking together.
- Tip: The perfect bite. For the best eating experience, let the pop sit at room temperature for just 60-90 seconds before serving. This slightly softens the fruit, making it easier to bite into without hurting your teeth.
FAQs
Can I use milk or white chocolate instead?
Absolutely! Milk chocolate will be much sweeter, and white chocolate will create a lovely contrast with the kiwi. Just remember that white chocolate is more delicate to melt—use very low heat and stir constantly to avoid burning. The coconut oil trick works with any chocolate type.
How far in advance can I make these?
They are perfect for making ahead! Once fully frozen and set, they’ll keep beautifully in an airtight container in the freezer for up to 2 weeks. The chocolate shell protects the kiwi from freezer burn, so they stay fresh and vibrant.
My chocolate seized up and became grainy. What happened?
This almost always means a tiny bit of moisture got into the chocolate. This could be from a damp bowl, a splash of water from a double boiler, or—most commonly—the kiwi wasn’t frozen solid. Unfortunately, seized chocolate is difficult to salvage for dipping. It’s best to start over with a new batch.
Can I use other fruits?
Yes, this method works wonderfully with other firm fruits! Try it with banana slices (dip and freeze quickly as they brown), strawberry halves, or even orange segments (make sure they are well-dried). The key is that the fruit needs to be able to be speared and hold its shape when frozen.
The chocolate isn’t sticking in one spot. Why?
This usually happens if there’s a bit of moisture or ice crystal on the surface of the frozen kiwi. Just before dipping, quickly pat each kiwi round with a paper towel to ensure the surface is dry. This helps the chocolate adhere perfectly every time.
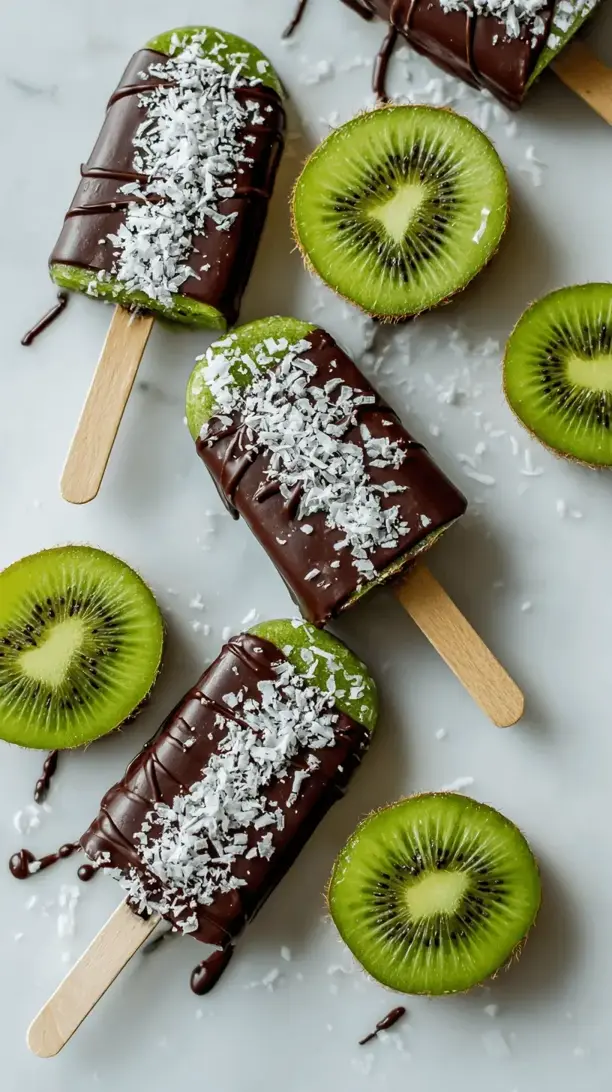
Chocolate Dipped Kiwi Pops
Whip up easy Chocolate Dipped Kiwi Pops! Frozen kiwi meets rich dark chocolate for a refreshing, guilt-free treat. Perfect for summer parties or a fun kitchen project. Ready in 20 minutes!
Ingredients
Ingredients
-
4-5 large, firm kiwis
-
200 g high-quality dark chocolate (around 70% works beautifully)
-
1 tablespoon coconut oil
-
Optional toppings (crushed pistachios, freeze-dried raspberry powder, desiccated coconut, flaky sea salt)
-
Wooden popsicle sticks or small skewers
Instructions
-
Prep the Kiwi. Start by peeling your kiwis. The easiest way is to slice off both ends, then slide a small spoon between the skin and the flesh and work your way around—the skin should pop right off. Slice each kiwi into ¾-inch to 1-inch thick rounds. You'll get about 2-3 good rounds from each kiwi. Lay the rounds in a single layer on a parchment paper-lined baking sheet.01
-
Insert the Sticks. Carefully insert a wooden popsicle stick or skewer into the side of each kiwi round, pushing it about halfway through. You want it to be secure but try not to push so hard that the kiwi cracks. This part is fun for little helpers! Once all sticks are in, place the entire baking sheet into the freezer for at least 2 hours, or until the kiwi rounds are completely frozen solid. This is a crucial step—if the kiwi isn't frozen, it will release water and make the chocolate seize up.02
-
Melt the Chocolate. When the kiwi is almost frozen, prepare your chocolate. Chop the chocolate bar into small, even pieces—this helps it melt smoothly. Combine the chocolate and the tablespoon of coconut oil in a microwave-safe bowl. Microwave in 30-second bursts, stirring thoroughly after each interval, until the chocolate is completely melted and glossy. Alternatively, you can use a double boiler over simmering water. Stir until smooth. Let it cool for a minute or two; you want it warm but not scorching hot.03
-
The Big Dip! Take the frozen kiwi pops out of the freezer. Working quickly, hold a pop by the stick and dip it into the melted chocolate, swirling it gently to coat the sides. Let the excess chocolate drip back into the bowl. If you're adding toppings like crushed pistachios or coconut, now is the time to sprinkle them on before the chocolate sets.04
-
Setting the Chocolate. Place the freshly dipped pops back onto the parchment-lined baking sheet. You can pop them back into the freezer for about 5-10 minutes to let the chocolate shell set completely. You'll know it's ready when you tap it and it feels hard. And that's it! You've just made a stunning, delicious treat.05


