
Why You’ll Love This Chocolate Cherry Recovery Shake
- It’s incredibly satisfying. This shake has a rich, creamy texture and a deep flavor profile that truly hits the spot, making it feel more like a dessert than a health drink.
- The ingredient list is simple and flexible. You probably have most of these items in your kitchen right now, and there are endless swaps you can make based on what you have available.
- It comes together in under five minutes. Seriously, just toss everything in the blender, whiz it up, and you’re moments away from sipping something wonderful. It’s the ultimate fast food for when you need a boost.
- It’s a flavor combination that just works. Chocolate and cherry are a classic pair for a reason—they complement each other perfectly, creating a taste that’s both nostalgic and refreshingly modern.
Ingredients & Tools
- 1 cup frozen dark sweet cherries
- 1 large ripe banana (preferably frozen)
- 2 tbsp unsweetened cocoa powder
- 1 scoop chocolate or vanilla protein powder (optional, but great for extra staying power)
- 1 tbsp almond butter or peanut butter
- 1 cup milk of choice (dairy, almond, oat—they all work!)
- A handful
- A tiny pinch of sea salt (trust me on this)
Tools: A good-quality blender is your best friend here.
The beauty of this recipe is in its simplicity. Using frozen fruit is the real trick—it gives you that wonderfully thick, milkshake-like consistency without any need for ice cream. And that pinch of salt? It’s not there to make things salty; it’s there to make the chocolate and cherry flavors pop in a way that will honestly surprise you. A little goes a long way.
Serves: 1 | Prep Time: 5 minutes | Cook Time: 0 minutes | Total Time: 5 minutes
Before You Start: Tips & Ingredient Notes
- Frozen fruit is non-negotiable for texture. If you only have fresh cherries, freeze them for at least 2-3 hours before blending. A frozen banana is key for creaminess.
- What kind of cocoa powder should you use? I always reach for unsweetened, natural cocoa powder. It provides a pure, deep chocolate flavor without any added sugar, letting you control the sweetness.
- Don’t skip the nut butter. Even if it’s just a tablespoon, it adds a subtle richness and healthy fats that help make the shake more satisfying and balanced.
- Is the protein powder really optional? Yes, absolutely. If you’re not using it, the shake will be a bit thinner but still delicious. You might want to add an extra tablespoon of oats or a few more frozen cherries to thicken it up.
- Milk choices matter, but not too much. Creamier milks like whole dairy or oat milk will yield a richer result, while almond milk keeps it lighter. Use what you love!
How to Make Chocolate Cherry Recovery Shake
Step 1: First, get your blender ready. I like to add the liquid ingredients first—it helps everything blend more smoothly. So, pour in your one cup of milk. This creates a nice base for the other ingredients to fall into.
Step 2: Next, add your soft ingredients. Plop in the almond butter, the scoop of protein powder (if using), and the cocoa powder. The trick here is to try and get the powders near the liquid to prevent them from just dusting the sides of the blender jar.
Step 3: Now for the stars of the show: the frozen fruit. Toss in the cup of frozen cherries and the frozen banana, broken into a few chunks. Don’t forget that tiny, almost imperceptible pinch of sea salt. It’s the secret weapon that makes all the other flavors sing.
Step 4: Time to blend! Start on a low speed to break up the big frozen pieces, then gradually increase to high. You’ll want to blend for about 45-60 seconds, or until the shake is completely smooth, creamy, and has a uniform, deep burgundy-brown color. If it’s struggling to blend, pause and use a tamper or stop the blender and shake it a bit to redistribute the ingredients.
Step 5: Pour the shake immediately into a large glass. You’ll notice it has that perfect, thick-but-pourable consistency—like a melt-proof milkshake. If you’re feeling fancy, a fresh cherry on the rim or a light dusting of cocoa powder on top makes it feel extra special. Drink it right away for the best texture and temperature!
Serving Suggestions
Complementary Dishes
- A couple of whole-wheat toast slices with avocado — The creamy, savory fat from the avocado provides a lovely counterpoint to the sweet, fruity shake, making it a more complete meal.
- A small handful of salted almonds on the side — The crunch and saltiness are a fantastic textural contrast and help balance the sweetness beautifully.
Drinks
- A tall glass of cold water with lemon — It might sound simple, but staying hydrated is key, and the bright, clean flavor of lemon water is incredibly refreshing alongside the rich shake.
- A hot cup of herbal tea, like peppermint or chamomile — The warmth of the tea creates a nice balance with the cold shake, especially on a chilly morning or for a relaxing evening.
Something Sweet
- A small, dark chocolate square (70% or higher) — For the true chocolate lover, letting a piece of high-quality dark chocolate slowly melt on your tongue after the last sip is pure bliss.
- A few fresh, unpitted cherries — It continues the cherry theme in a fresh, juicy way and feels like a little celebratory treat.
Top Mistakes to Avoid
- Mistake: Using only fresh, unfrozen fruit. This is the number one reason shakes turn out watery and thin. The frozen fruit is essential for that thick, spoonable, milkshake texture we’re after.
- Mistake: Blending for too short a time. If you stop as soon as the big chunks disappear, you might be left with a gritty texture from the cocoa powder. Let it run on high for a full minute to ensure supreme silkiness.
- Mistake: Forgetting the salt. I know I keep mentioning it, but it really is that important. Without it, the flavors can taste a bit flat and one-dimensional. The salt wakes everything up.
- Mistake: Adding too much liquid at once. Start with the recipe amount. You can always add another splash of milk if it’s too thick, but you can’t take it out if it’s too thin.
Expert Tips
- Tip: Prep frozen banana “coins”. When your bananas are ripe, peel them, break them into chunks, and freeze them flat on a baking sheet before transferring to a bag. This makes them easier to measure and blend.
- Tip: Boost the cherry flavor. For an even more intense cherry taste, add a drop or two of pure almond extract. It complements the cherry flavor phenomenally well—just be careful, as it’s very potent!
- Tip: Make it a smoothie bowl. Reduce the milk by about a quarter cup to make an extra-thick blend that you can eat with a spoon. Top with granola, coconut flakes, and a few extra cherries for a beautiful breakfast.
- Tip: Clean your blender instantly. The best way to clean a blender after a thick shake? Fill it halfway with warm water and a drop of soap, then blend for 30 seconds. Rinse, and it’s sparkling clean with almost no effort.
FAQs
Can I make this shake ahead of time?
You can, but the texture is best immediately after blending. If you need to prep it, store it in a sealed jar in the fridge for up to 24 hours. It will separate and thin out a bit, so just give it a really good shake or a quick re-blend before drinking. I honestly prefer it fresh, but life happens!
I don’t have a high-powered blender. Will it still work?
Absolutely! A standard blender will do the job; it just might take a little more patience. Start on low and gradually increase the speed, stopping to scrape down the sides a couple of times. Letting the frozen fruit sit in the liquid for 5-10 minutes before blending can also help soften it up for less powerful motors.
What can I use instead of banana?
If you’re not a banana fan, you can try using a quarter of an avocado for creaminess (you won’t taste it!) or increase the frozen cherries by another half-cup and add a tablespoon of rolled oats to help thicken the shake. The flavor profile will shift slightly, but it will still be delicious.
Is this shake suitable for a post-workout drink?
Many people find it ideal for that purpose! The combination of carbohydrates from the fruit and protein from the powder (if used) can be a great way to refuel. Of course, individual nutritional needs vary, but it’s a whole-foods-based option that feels much more rewarding than a standard supplement.
Can I use fresh cherries instead of frozen?
You can, but you’ll need to adjust the recipe. Use fresh, pitted cherries, but you must add a full cup of ice cubes to achieve the right thick and frosty texture. The flavor will be a bit brighter and less concentrated, but still very tasty.
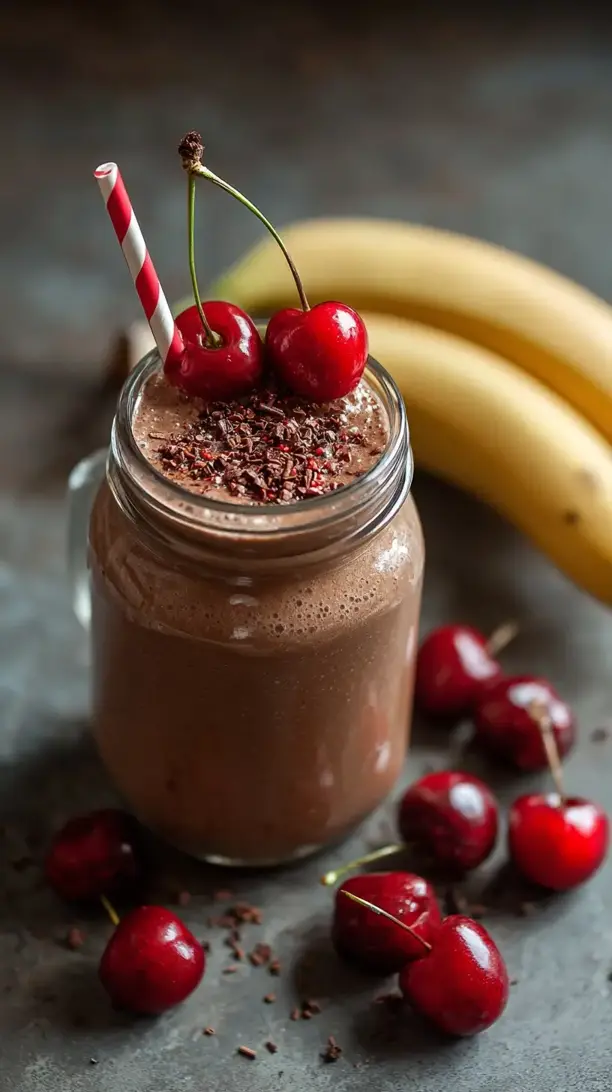
Chocolate Cherry Recovery Shake
Whip up this decadent Chocolate Cherry Recovery Shake in 5 minutes! A healthy post-workout or afternoon pick-me-up that tastes like a treat. Simple ingredients, huge flavor.
Ingredients
Ingredients
-
1 cup frozen dark sweet cherries
-
1 large ripe banana (preferably frozen)
-
2 tbsp unsweetened cocoa powder
-
1 scoop chocolate or vanilla protein powder (optional, but great for extra staying power)
-
1 tbsp almond butter or peanut butter
-
1 cup milk of choice (dairy, almond, oat—they all work!)
-
A handful ice cubes (if your banana isn't frozen)
-
A tiny pinch sea salt
Instructions
-
First, get your blender ready. I like to add the liquid ingredients first—it helps everything blend more smoothly. So, pour in your one cup of milk. This creates a nice base for the other ingredients to fall into.01
-
Next, add your soft ingredients. Plop in the almond butter, the scoop of protein powder (if using), and the cocoa powder. The trick here is to try and get the powders near the liquid to prevent them from just dusting the sides of the blender jar.02
-
Now for the stars of the show: the frozen fruit. Toss in the cup of frozen cherries and the frozen banana, broken into a few chunks. Don't forget that tiny, almost imperceptible pinch of sea salt. It's the secret weapon that makes all the other flavors sing.03
-
Time to blend! Start on a low speed to break up the big frozen pieces, then gradually increase to high. You'll want to blend for about 45-60 seconds, or until the shake is completely smooth, creamy, and has a uniform, deep burgundy-brown color. If it's struggling to blend, pause and use a tamper or stop the blender and shake it a bit to redistribute the ingredients.04
-
Pour the shake immediately into a large glass. You'll notice it has that perfect, thick-but-pourable consistency—like a melt-proof milkshake. If you're feeling fancy, a fresh cherry on the rim or a light dusting of cocoa powder on top makes it feel extra special. Drink it right away for the best texture and temperature!05