
Why You’ll Love This Cacao Nib Pancakes
- A textural dream. The fluffy, tender crumb of the pancake is the perfect backdrop for the delightful, subtle crunch of the cacao nibs. It’s a contrast that makes every single bite interesting.
- Not too sweet, perfectly balanced. Cacao nibs bring a sophisticated, slightly bitter note that means you can drizzle on that maple syrup without feeling like you’ve crossed into dessert-for-breakfast territory. It’s a more grown-up, complex flavor profile.
- Incredibly easy to whip up. You don’t need any special equipment or complicated techniques. It’s a simple, one-bowl batter that comes together in minutes, leaving you more time to sip your coffee and enjoy the morning.
- They feel special. These pancakes have a certain je ne sais quoi that makes any breakfast feel like a celebration. They’re perfect for impressing guests or for treating yourself on a lazy Sunday.
Ingredients & Tools
- 1 ½ cups all-purpose flour
- 2 tablespoons granulated sugar
- 2 teaspoons baking powder
- ½ teaspoon baking soda
- ½ teaspoon fine sea salt
- 1 ¼ cups buttermilk, well-shaken
- 1 large egg
- 3 tablespoons unsalted butter, melted and slightly cooled (plus more for the pan)
- 1 teaspoon pure vanilla extract
- ⅓ cup cacao nibs
Tools: A large mixing bowl, whisk, measuring cups/spoons, a ladle or ¼ cup measure, and a large non-stick skillet or griddle.
The real stars here are, of course, the cacao nibs. They’re simply crushed cacao beans, so they’re less processed than chocolate and pack a wonderful antioxidant punch. Using buttermilk is non-negotiable for me—its tanginess reacts with the baking soda to create the most incredible, airy lift. And don’t skip the vanilla; it bridges the gap between the sweet batter and the bitter nibs beautifully.
Serves: 3-4 (makes about 8-10 pancakes) | Prep Time: 10 minutes | Cook Time: 15 minutes | Total Time: 25 minutes
Before You Start: Tips & Ingredient Notes
- Don’t have buttermilk? No problem! Make a quick substitute by placing 1 tablespoon of white vinegar or lemon juice in a measuring cup and adding enough regular milk to reach the 1 ¼ cup line. Let it sit for 5 minutes until it curdles slightly.
- What exactly are cacao nibs? Think of them as chocolate in its most pure, unadulterated form. They’re crunchy, have a deep chocolate aroma, and a flavor that’s fruity, bitter, and nutty all at once. You can find them in the health food or baking aisle of most supermarkets.
- Why rest the batter? If you have an extra 5 minutes, let the mixed batter sit on the counter. This allows the flour to fully hydrate and the baking powder to get activated, resulting in noticeably taller, fluffier pancakes.
- Check your baking powder. It’s the key to the fluff factor! If your baking powder is old (over 6 months), it may have lost its potency. To test it, stir half a teaspoon into a cup of hot water. If it doesn’t bubble vigorously, it’s time for a new can.
How to Make Cacao Nib Pancakes
Step 1: Combine your dry ingredients. In your large mixing bowl, whisk together the flour, sugar, baking powder, baking soda, and salt. You want to do this thoroughly to ensure the leavening agents are evenly distributed—no one wants a pocket of baking soda in their pancake! This is also the time to make a well in the center of the dry ingredients; it just makes incorporating the wet stuff a little easier.
Step 2: Whisk the wet ingredients. In a separate bowl or a large liquid measuring cup, whisk together the buttermilk, egg, melted butter, and vanilla extract until they are completely homogenous. The melted butter might try to solidify when it hits the cold buttermilk, but just keep whisking—it’ll be fine. Pour this wet mixture into the well you created in the dry ingredients.
Step 3: Gently combine the batter. Now, here’s the crucial part: don’t overmix! Use your whisk or a spatula and stir until the flour is *just* incorporated. A few lumps are not just okay, they are desirable. Overmixing develops the gluten in the flour and will lead to tough, chewy pancakes. Once it’s combined, gently fold in the cacao nibs until they’re evenly scattered throughout.
Step 4: Preheat and grease your cooking surface. Place your skillet or griddle over medium heat. You want it properly hot before you add the batter. To test it, flick a few drops of water onto the surface—if they dance and evaporate quickly, you’re good to go. Add a small pat of butter and swirl it around to coat the surface.
Step 5: Cook to golden perfection. Using your ladle or ¼ cup measure, pour the batter onto the hot skillet. You’ll notice little bubbles starting to form on the surface after about 2-3 minutes. Once the edges look set and the bubbles begin to pop and leave little holes, it’s time to flip. Slide your spatula underneath and confidently flip it over. Cook for another 1-2 minutes on the second side until it’s golden brown and cooked through.
Step 6: Keep them warm and serve. As you cook the pancakes, transfer them to a wire rack placed on a baking sheet in a 200°F (95°C) oven. This keeps them warm and crisp without getting soggy. Stack them high and serve immediately with your favorite toppings.
Serving Suggestions
Complementary Dishes
- Crispy bacon or turkey sausage — The salty, savory fat is a classic and perfect counterpoint to the subtle bitterness of the cacao nibs.
- Fresh berry compote — The bright, tart acidity of berries like raspberries or strawberries cuts through the richness and complements the chocolate notes beautifully.
- Whipped coconut cream — For a dairy-free option, a dollop of lightly sweetened coconut cream adds a luxurious, creamy element that feels incredibly indulgent.
Drinks
- A strong cup of black coffee — This is the ultimate pairing. The bitterness of the coffee and the cacao nibs harmonize in a way that feels deeply satisfying and adult.
- Cold-brew iced coffee — For a warm morning, the smooth, less acidic profile of cold brew is a refreshing match that won’t overpower the pancakes.
- A glass of whole milk — Sometimes, you just can’t beat the classic. The creaminess of cold milk is a wonderful, simple companion.
Something Sweet
- Warm maple syrup — It’s a must. The deep, caramel-like sweetness is the ideal partner for the cacao nibs, creating a balanced flavor profile in every bite.
- Almond or hazelnut butter drizzle — This adds a nutty richness that echoes the natural notes in the cacao nibs, taking the whole experience to another level.
- A dusting of powdered sugar — For a simple, elegant finish that adds a touch of extra sweetness without being overwhelming.
Top Mistakes to Avoid
- Mistake: Overmixing the batter. This is the number one pancake killer. It develops gluten and makes them tough. Lumps are your friend—they promise a tender crumb.
- Mistake: Cooking at the wrong temperature. If the pan is too hot, the outside will burn before the inside cooks. Too low, and you’ll get pale, greasy pancakes. The water droplet test is your best friend here.
- Mistake: Pressing down on the pancakes with the spatula. I know it’s tempting, but you’re squeezing out all the precious air bubbles that make them fluffy! Just let them be.
- Mistake: Using expired baking powder. This is the engine of your pancake’s fluffiness. If it’s dead, your pancakes will be flat. Always do the quick water test if you’re unsure.
Expert Tips
- Tip: Let the batter rest. I mentioned it before, but it’s worth repeating. A 5-10 minute rest allows the starch molecules to relax and absorb the liquid, leading to a more cohesive and lighter batter.
- Tip: Use a cookie scoop for mini pancakes. For a fun brunch or if you’re feeding kids, a small cookie scoop (about 1 tablespoon) is perfect for creating a stack of adorable, silver-dollar-sized pancakes.
- Tip: Make a “test” pancake. Always cook one small pancake first to check your heat level and taste for seasoning. It’s your chance to adjust the batter or skillet temperature before committing to the whole batch.
- Tip: Freeze extras for a quick breakfast. These freeze beautifully. Let them cool completely, then layer them between parchment paper in a freezer bag. Reheat in a toaster or oven for a nearly-instant weekday treat.
FAQs
Can I make the batter the night before?
I wouldn’t recommend it for the best results. The baking powder will lose its oomph overnight, and the batter can become a bit gray and gummy. For a make-ahead option, mix the dry ingredients and wet ingredients in separate containers the night before. In the morning, just combine them and fold in the cacao nibs. It takes less than a minute and guarantees fluffy pancakes.
Can I use chocolate chips instead of cacao nibs?
You absolutely can, but the experience will be different. Chocolate chips will melt and make the pancakes sweeter. Cacao nibs provide a crunchy, bitter contrast. If you use chips, I’d recommend a dark chocolate (70% cacao or higher) to better mimic the sophisticated bitterness of the nibs.
My pancakes are coming out flat. What did I do wrong?
Flat pancakes are usually a sign of expired or weak baking powder. Double-check its freshness with the hot water test. Another common culprit is overmixing, which deflates the air bubbles. Finally, make sure your skillet is properly preheated—if it’s not hot enough, the pancakes will spread too much before they start to rise.
Are cacao nibs the same as cocoa powder?
Not at all! Cocoa powder is made by pressing the fat (cocoa butter) out of roasted cacao beans and grinding the remaining solids into a fine powder. Cacao nibs are simply the roasted, crushed beans themselves. They have a crunchy texture and a much more intense, less sweet flavor than cocoa powder.
Can I make these gluten-free or vegan?
For gluten-free, a 1:1 gluten-free flour blend should work well. For vegan, you can try using a flax egg (1 tbsp ground flaxseed mixed with 3 tbsp water, let sit 5 mins) and a plant-based buttermilk (non-dairy milk + vinegar). The results can vary slightly depending on the brands you use, but the method remains the same.
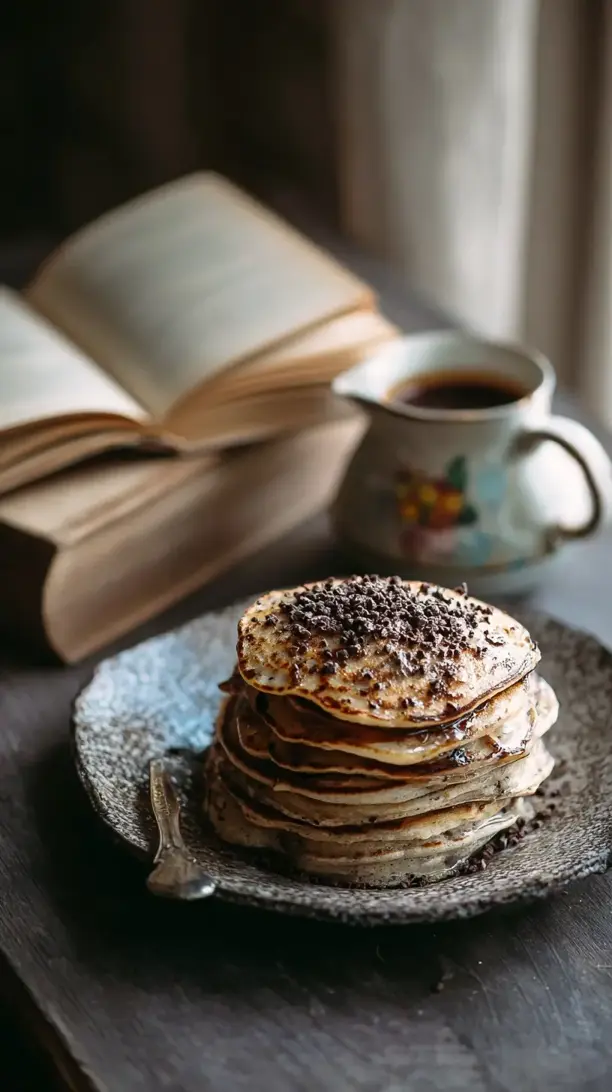
Cacao Nib Pancakes
Level up your weekend breakfast with these Cacao Nib Pancakes! Fluffy buttermilk pancakes with a sophisticated crunch from cacao nibs. Easy, gourmet, and perfectly balanced.
Ingredients
Ingredients
-
1 ½ cups all-purpose flour
-
2 tablespoons granulated sugar
-
2 teaspoons baking powder
-
½ teaspoon baking soda
-
½ teaspoon fine sea salt
-
1 ¼ cups buttermilk (well-shaken)
-
1 large egg
-
3 tablespoons unsalted butter (melted and slightly cooled (plus more for the pan))
-
1 teaspoon pure vanilla extract
-
⅓ cup cacao nibs
Instructions
-
Combine your dry ingredients. In your large mixing bowl, whisk together the flour, sugar, baking powder, baking soda, and salt. You want to do this thoroughly to ensure the leavening agents are evenly distributed—no one wants a pocket of baking soda in their pancake! This is also the time to make a well in the center of the dry ingredients; it just makes incorporating the wet stuff a little easier.01
-
Whisk the wet ingredients. In a separate bowl or a large liquid measuring cup, whisk together the buttermilk, egg, melted butter, and vanilla extract until they are completely homogenous. The melted butter might try to solidify when it hits the cold buttermilk, but just keep whisking—it'll be fine. Pour this wet mixture into the well you created in the dry ingredients.02
-
Gently combine the batter. Now, here's the crucial part: don't overmix! Use your whisk or a spatula and stir until the flour is *just* incorporated. A few lumps are not just okay, they are desirable. Overmixing develops the gluten in the flour and will lead to tough, chewy pancakes. Once it's combined, gently fold in the cacao nibs until they're evenly scattered throughout.03
-
Preheat and grease your cooking surface. Place your skillet or griddle over medium heat. You want it properly hot before you add the batter. To test it, flick a few drops of water onto the surface—if they dance and evaporate quickly, you're good to go. Add a small pat of butter and swirl it around to coat the surface.04
-
Cook to golden perfection. Using your ladle or ¼ cup measure, pour the batter onto the hot skillet. You'll notice little bubbles starting to form on the surface after about 2-3 minutes. Once the edges look set and the bubbles begin to pop and leave little holes, it's time to flip. Slide your spatula underneath and confidently flip it over. Cook for another 1-2 minutes on the second side until it's golden brown and cooked through.05
-
Keep them warm and serve. As you cook the pancakes, transfer them to a wire rack placed on a baking sheet in a 200°F (95°C) oven. This keeps them warm and crisp without getting soggy. Stack them high and serve immediately with your favorite toppings.06