
Why You’ll Love These Berry Oatmeal Crumble Bars
- They’re the ultimate texture experience. You get a firm, slightly chewy base, a soft, jammy fruit center, and a crunchy, crumbly top all in one bite. It’s a symphony of contrasts that’s just so satisfying.
- They’re incredibly versatile. Seriously, use whatever berries you have! A mix of strawberries, raspberries, and blueberries is classic, but even a bag of frozen mixed berries works beautifully. It’s a fantastic way to use up fruit that’s past its prime for eating fresh.
- They’re freezer-friendly heroes. You can make a batch, freeze them individually wrapped, and have a delicious homemade dessert on standby for weeks. It’s like a gift from your past self to your future, slightly stressed self.
- They feel homemade in the best way. There’s no fancy technique required here. It’s a straightforward, mix-and-press situation that yields a result that tastes far more complex and special than the effort would suggest.
Ingredients & Tools
- 200 g old-fashioned rolled oats
- 250 g all-purpose flour
- 150 g light brown sugar, packed
- 1 tsp baking powder
- ½ tsp fine sea salt
- 225 g cold unsalted butter, cubed
- 1 large egg
- 1 tsp vanilla extract
- 450 g mixed berries (fresh or frozen)
- 50 g granulated sugar
- 2 tbsp cornstarch
- 1 tbsp lemon juice
Tools: 8×8 inch (20×20 cm) baking pan, parchment paper, mixing bowls, pastry cutter or your fingers!
A couple of ingredient notes right off the bat—using cold butter is non-negotiable for that perfect crumbly texture. And for the oats, make sure you’re using old-fashioned rolled oats, not instant; they provide the necessary structure and chew. The cornstarch is your best friend for the filling, as it thickens the berry juices beautifully without making them gloopy.
Serves: 9 generous bars | Prep Time: 20 minutes | Cook Time: 45-50 minutes | Total Time: about 1 hour 10 minutes (plus cooling)
Before You Start: Tips & Ingredient Notes
- Why cold butter? This is the secret to a crumbly, not cakey, texture. When the cold butter melts in the oven, it creates little steam pockets, leading to that perfect, delicate crunch. If your butter starts to soften, just pop the bowl in the fridge for 10 minutes.
- Can I use frozen berries? Absolutely! In fact, you don’t even need to thaw them. Toss them frozen with the sugar and cornstarch—they’ll release just the right amount of juice as they bake. Using frozen can sometimes even prevent the bottom crust from getting soggy.
- Don’t skip the lemon juice. It might seem like a small thing, but that splash of acidity really brightens up the berry flavor and balances the sweetness. It keeps the filling from tasting one-dimensional.
- The power of patience: cooling. I know it’s tempting to dive right in, but you must let these bars cool completely in the pan. This allows the fruit layer to set properly, so when you cut them, you get clean squares, not a delicious but messy berry soup.
How to Make Berry Oatmeal Crumble Bars
Step 1: Prepare Your Pan and Oven. Start by preheating your oven to 350°F (175°C). Line your 8×8 inch baking pan with parchment paper, leaving some overhang on two opposite sides. This creates a “sling” that will make lifting the entire block of bars out of the pan later an absolute breeze. Lightly grease the exposed sides of the pan.
Step 2: Make the Oatmeal Crumble Mixture. In a large mixing bowl, whisk together the rolled oats, flour, brown sugar, baking powder, and salt. Add the cold, cubed butter. Now, using a pastry cutter, two forks, or—my personal favorite—your clean fingertips, work the butter into the dry ingredients. You’re looking for a crumbly texture with pea-sized bits of butter throughout. The mixture should hold together when you pinch it. Stir in the egg and vanilla extract until just combined. The dough will be clumpy and moist.
Step 3: Prepare the Berry Filling. In a separate bowl, gently toss your berries (no need to thaw if frozen) with the granulated sugar, cornstarch, and lemon juice. You’ll notice the sugar starting to draw out a little juice almost immediately, which is exactly what you want. The cornstarch will coat the berries and will be the magic ingredient that thickens everything up in the oven.
Step 4: Assemble the Bars. Press about two-thirds of the oatmeal crumble mixture firmly and evenly into the bottom of your prepared pan. Really press it down—this compacted layer is your foundation. Next, spread the berry filling evenly over the base, leaving a tiny border around the edges. Finally, sprinkle the remaining third of the crumble mixture over the berries. Don’t press this down; you want it loose and crumbly for the topping.
Step 5: Bake to Golden Perfection. Place the pan in the preheated oven and bake for 45-50 minutes. You’re looking for the top to be a deep golden brown, and the berry filling should be visibly bubbling around the edges. That bubbling is a good sign that the cornstarch has activated and the filling is setting.
Step 6: The Crucial Cool Down. Once baked, transfer the pan to a wire rack and let the bars cool completely. I mean it—this can take a good 2-3 hours. Rushing this step is the number one reason for messy bars. The filling needs this time to firm up. For the cleanest cuts, you can even refrigerate them for an hour after they’ve cooled to room temperature.
Step 7: Slice and Serve. Once completely cool, use the parchment paper sling to lift the entire block out of the pan. Place it on a cutting board and use a sharp knife to slice it into 9 or 12 bars. Wiping the knife clean between cuts helps achieve those picture-perfect edges.
Serving Suggestions
Complementary Dishes
- A scoop of vanilla bean ice cream — The classic pairing. The warm, tart bar against the cold, creamy sweetness is a match made in heaven. The vanilla echoes the notes in the crust beautifully.
- A dollop of lightly sweetened whipped cream — For a slightly lighter option, a cloud of whipped cream adds a lovely richness without overpowering the berry flavor.
- A side of Greek yogurt for breakfast — Honestly, these bars are wholesome enough to enjoy in the morning. A tangy yogurt alongside turns it into a fantastic brunch or breakfast treat.
Drinks
- A hot cup of English Breakfast tea — The malty, robust notes of the tea are a wonderful contrast to the sweet fruitiness of the bars, making for a very cozy afternoon.
- A glass of cold milk — Never underestimate the power of this simple combo. It’s nostalgic, comforting, and just works.
- A crisp glass of Prosecco or Moscato d’Asti — For a more celebratory feel, the bubbles and slight sweetness of these wines complement the berries and crumble topping wonderfully.
Something Sweet
- A simple dark chocolate square — Placing a small piece of high-quality dark chocolate (70% or higher) on top of a warm bar lets it melt slightly, adding a sophisticated, bitter note that cuts through the sweetness.
- A drizzle of honey or a dusting of powdered sugar — Just before serving, this adds a little extra visual appeal and a touch of extra sweetness if your berries were particularly tart.
- A few fresh mint leaves — A garnish of fresh mint not only looks pretty but adds a refreshing, aromatic note that brightens the entire dish.
Top Mistakes to Avoid
- Mistake: Using softened butter. This will lead to a greasy, dense base rather than a light, crumbly one. The cold butter is essential for creating the right texture, so keep it chilled until the very last second.
- Mistake: Pressing the top layer down. The bottom layer needs to be compact, but the top layer should be loosely sprinkled. Pressing it will prevent it from becoming that desirable, crunchy crumble topping.
- Mistake: Cutting the bars while warm. I’ve messed this up before too, and it’s a lesson you only need to learn once. The filling is essentially a hot fruit syrup and needs time to cool and set into a jam-like consistency. Cutting too soon equals a delicious but unphotogenic mess.
- Mistake: Skipping the cornstarch. If your berries are very juicy, the filling can be too runny without a thickener. The cornstarch is your insurance policy for a perfect, sliceable bar.
Expert Tips
- Tip: Toast your oats for a deeper flavor. Spread the rolled oats on a baking sheet and toast them in a 350°F (175°C) oven for 5-7 minutes before using. Let them cool completely. This adds a wonderful nutty dimension to the crust and topping.
- Tip: Add a handful of nuts for extra crunch. Stir in ½ cup of chopped pecans or almonds into the crumble mixture. They’ll toast up beautifully in the oven and add another layer of texture and flavor.
- Tip: Grate your cold butter. For super easy and even incorporation, use the large holes of a box grater to grate your cold butter directly into the flour mixture. It blends in effortlessly.
- Tip: Create a flavor variation with spices. Add ½ teaspoon of cinnamon or a pinch of nutmeg to the dry ingredients for a warm, spiced note that pairs wonderfully with the berries, especially in the fall and winter.
FAQs
Can I make these gluten-free?
Absolutely! The structure here is very forgiving. Simply use a 1-to-1 gluten-free all-purpose flour blend in place of the regular flour. Make sure your oats are certified gluten-free, as oats are often processed in facilities that also handle wheat. The method and baking time remain exactly the same.
How should I store these bars, and how long do they last?
Once completely cool, store the bars in an airtight container at room temperature for up to 2 days. After that, I recommend transferring them to the refrigerator, where they’ll keep for about 5 days. The chilled texture is actually really lovely—a bit firmer and chewier. You can also freeze them for up to 3 months; just wrap individual bars tightly in plastic wrap and place them in a freezer bag.
My berry filling is a bit runny even after cooling. What happened?
This usually means the bars needed a few more minutes in the oven. The filling must be bubbling actively at the edges for the cornstarch to fully thicken. Next time, bake until you see that vigorous bubbling. Also, ensure you’re using the correct amount of cornstarch—if your berries are exceptionally juicy, you could increase it by another teaspoon.
Can I use a different fruit?
Of course! This recipe is a fantastic template. Sliced peaches or nectarines, pitted cherries, or even a combination of apples and cinnamon would work beautifully. Just adjust the sugar in the filling depending on the natural sweetness of your chosen fruit. For very wet fruits like peaches, you might want to increase the cornstarch by a tablespoon.
Why did my bottom crust get soggy?
This can happen if the berries release a lot of juice before baking. If using fresh, very ripe berries, toss them with the sugar and cornstarch and let them sit for only a minute or two before assembling—don’t let them macerate for too long. Using frozen berries straight from the freezer can also help prevent this, as the crust sets a bit before the berries fully thaw and release their liquid.
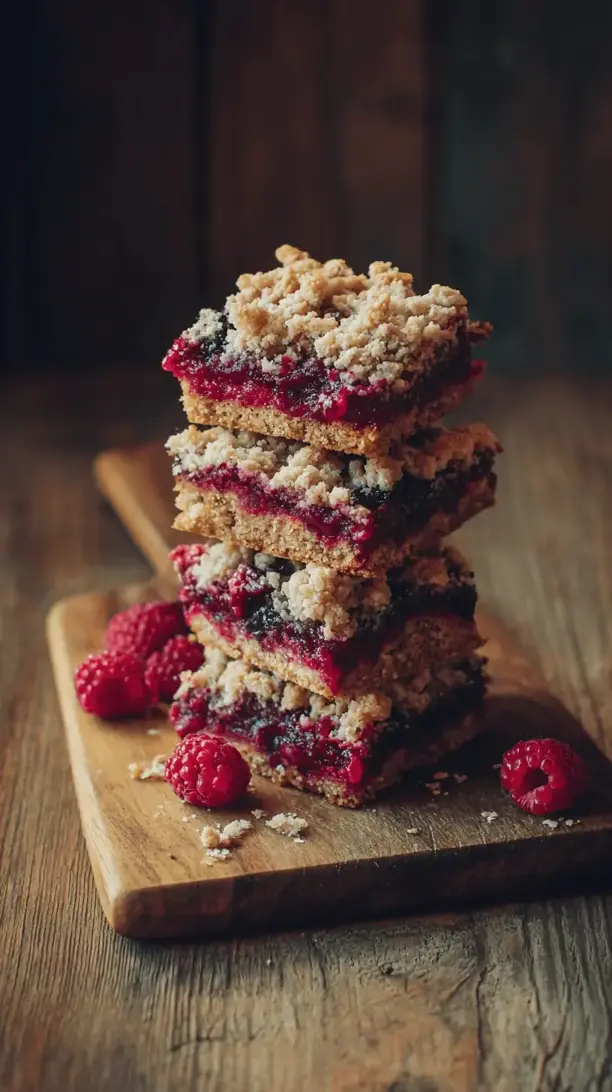
Berry Oatmeal Crumble Bars
Whip up these easy Berry Oatmeal Crumble Bars! A buttery oat crust & crumble top with a jammy berry center. Perfect for picnics, potlucks, or a simple dessert. Ready in about an hour!
Ingredients
Ingredients
-
200 g old-fashioned rolled oats
-
250 g all-purpose flour
-
150 g light brown sugar (packed)
-
1 tsp baking powder
-
½ tsp fine sea salt
-
225 g cold unsalted butter (cubed)
-
1 large egg
-
1 tsp vanilla extract
-
450 g mixed berries (fresh or frozen)
-
50 g granulated sugar
-
2 tbsp cornstarch
-
1 tbsp lemon juice
Instructions
-
Prepare Your Pan and Oven. Start by preheating your oven to 350°F (175°C). Line your 8x8 inch baking pan with parchment paper, leaving some overhang on two opposite sides. This creates a 'sling' that will make lifting the entire block of bars out of the pan later an absolute breeze. Lightly grease the exposed sides of the pan.01
-
Make the Oatmeal Crumble Mixture. In a large mixing bowl, whisk together the rolled oats, flour, brown sugar, baking powder, and salt. Add the cold, cubed butter. Now, using a pastry cutter, two forks, or—my personal favorite—your clean fingertips, work the butter into the dry ingredients. You're looking for a crumbly texture with pea-sized bits of butter throughout. The mixture should hold together when you pinch it. Stir in the egg and vanilla extract until just combined. The dough will be clumpy and moist.02
-
Prepare the Berry Filling. In a separate bowl, gently toss your berries (no need to thaw if frozen) with the granulated sugar, cornstarch, and lemon juice. You'll notice the sugar starting to draw out a little juice almost immediately, which is exactly what you want. The cornstarch will coat the berries and will be the magic ingredient that thickens everything up in the oven.03
-
Assemble the Bars. Press about two-thirds of the oatmeal crumble mixture firmly and evenly into the bottom of your prepared pan. Really press it down—this compacted layer is your foundation. Next, spread the berry filling evenly over the base, leaving a tiny border around the edges. Finally, sprinkle the remaining third of the crumble mixture over the berries. Don't press this down; you want it loose and crumbly for the topping.04
-
Bake to Golden Perfection. Place the pan in the preheated oven and bake for 45-50 minutes. You're looking for the top to be a deep golden brown, and the berry filling should be visibly bubbling around the edges. That bubbling is a good sign that the cornstarch has activated and the filling is setting.05
-
The Crucial Cool Down. Once baked, transfer the pan to a wire rack and let the bars cool completely. I mean it—this can take a good 2-3 hours. Rushing this step is the number one reason for messy bars. The filling needs this time to firm up. For the cleanest cuts, you can even refrigerate them for an hour after they've cooled to room temperature.06
-
Slice and Serve. Once completely cool, use the parchment paper sling to lift the entire block out of the pan. Place it on a cutting board and use a sharp knife to slice it into 9 or 12 bars. Wiping the knife clean between cuts helps achieve those picture-perfect edges.07


